
Use the car-ui-lib library to launch self-consistent, in-vehicle, infotainment
(IVI) systems. This codelab introduces you to car-ui-lib and how you can
use runtime resource overlays (RROs) to customize components in the library.
What you'll learn
How to:
- Include
car-ui-libcomponents in your Android app. - Use Gradle to build Android apps and RROs.
- Use RROs with
car-ui-lib.
This codelab doesn't detail how RROs work. See Change the value of an app's resources at runtime and Troubleshoot runtime resource overlays to learn more.
Before you start
Prerequisites
Before you start, make sure you have:
Computer with command line (Linux machine, Mac, or Windows machine with Windows Subsystem for Linux).
Android device or emulator connected to your machine. See Download the Android source and Build Android.
Basic knowledge of RROs.
Create a new Android app
Duration: 15 minutes
In this section, you create a new Android Studio project.
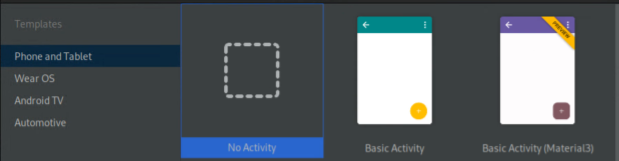
In Android Studio create an app with an
EmptyActivity.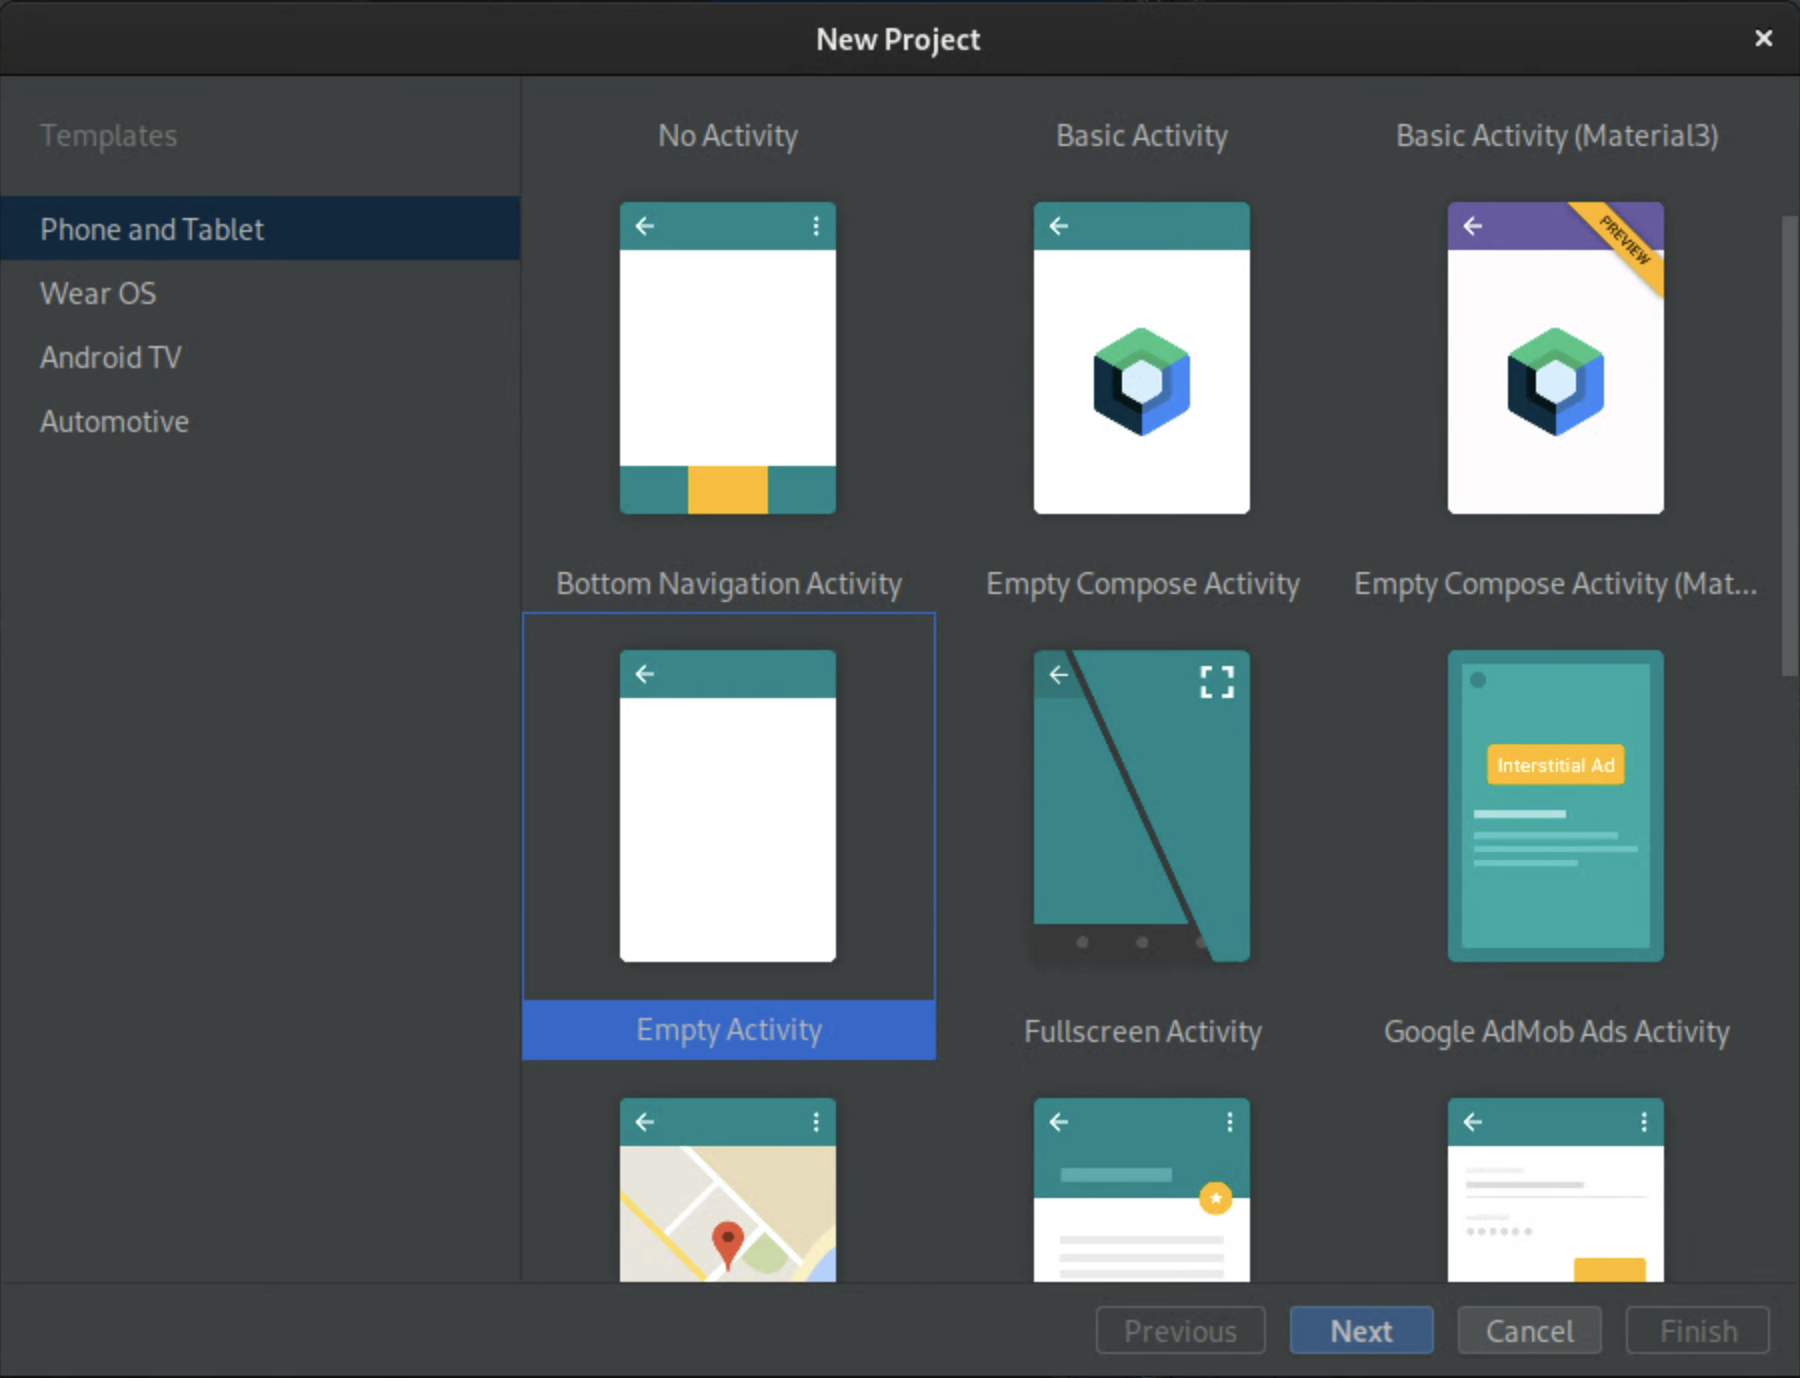
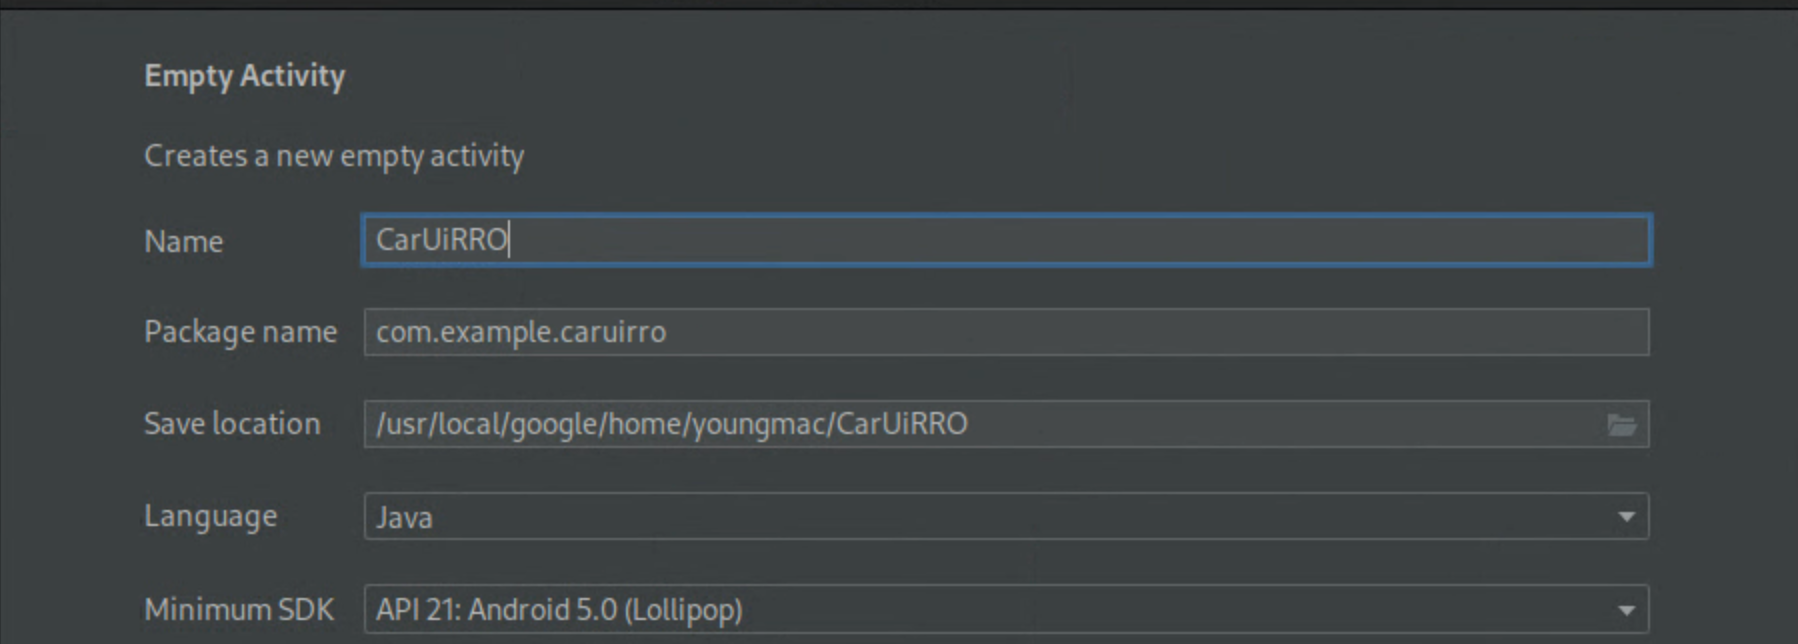
Figure 1.Create an Empty Activity Name the app
CarUiCodelaband then select the Java language. You can also select a file location if desired. Accept the default values for the remaining settings.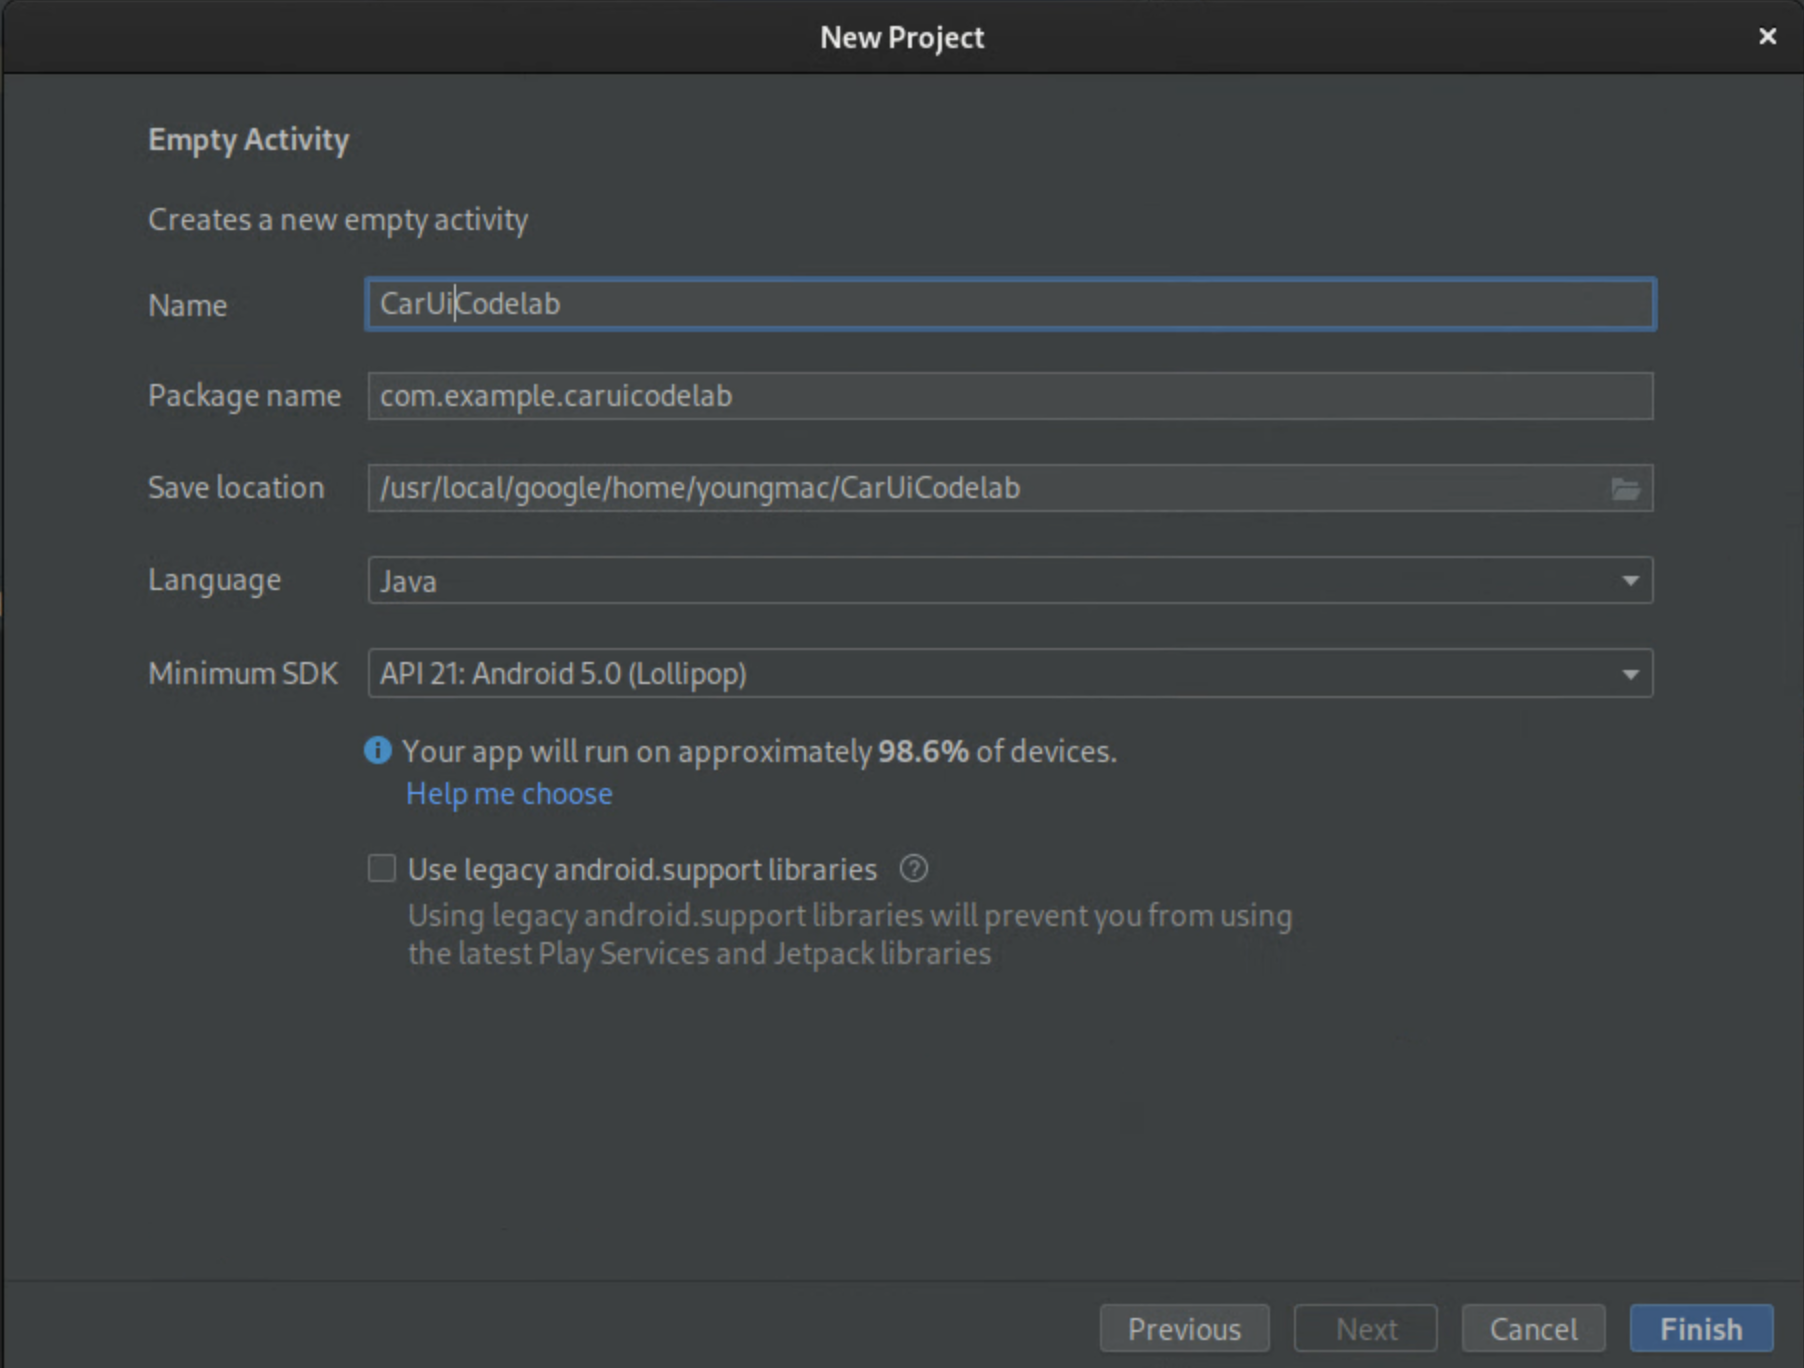
Figure 2. Name your app Replace
activity_main.xmlwith the following code block:<?xml version="1.0" encoding="utf-8"?> <androidx.constraintlayout.widget.ConstraintLayout xmlns:android="http://schemas.android.com/apk/res/android" xmlns:app="http://schemas.android.com/apk/res-auto" xmlns:tools="http://schemas.android.com/tools" android:layout_width="match_parent" android:layout_height="match_parent" tools:context=".MainActivity"> <TextView android:id="@+id/textView" android:layout_width="wrap_content" android:layout_height="wrap_content" android:text="@string/sample_text" app:layout_constraintBottom_toBottomOf="parent" app:layout_constraintEnd_toEndOf="parent" app:layout_constraintStart_toStartOf="parent" app:layout_constraintTop_toTopOf="parent" /> </androidx.constraintlayout.widget.ConstraintLayout>This code block displays the string
sample_text, which is not defined.Add the
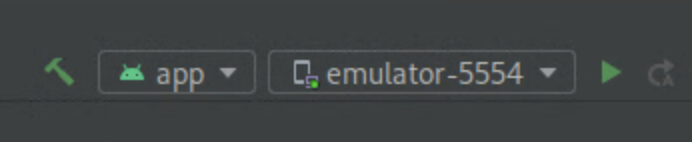
sample_textresource string and set it to "Hello World!" in yourstrings.xmlfile. To open this file, select app > src > main > res > values > strings.xml.<?xml version="1.0" encoding="utf-8"?> <resources> <string name="app_name">CarUiCodelab</string> <string name="sample_text">Hello World!</string> </resources>To build you app, click the green Play button in the top right. Doing so automatically installs the apk to your emulator or Android device through Gradle.
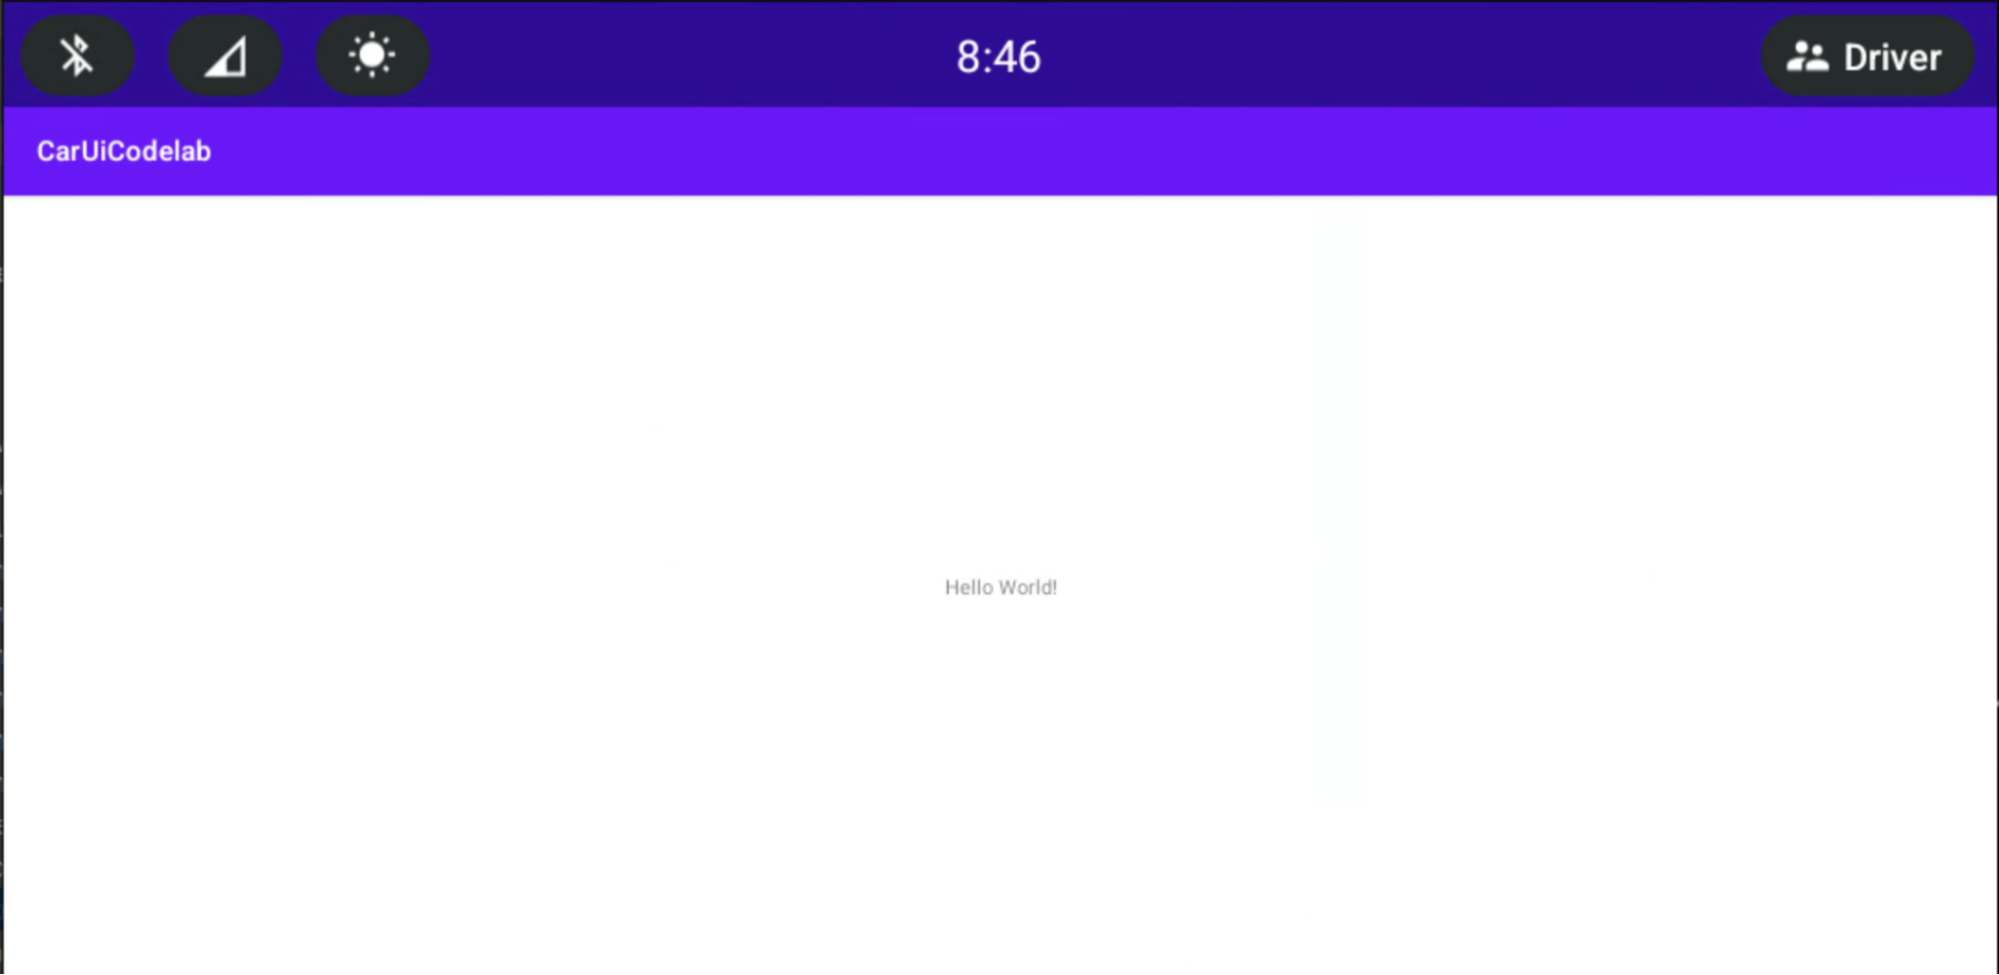
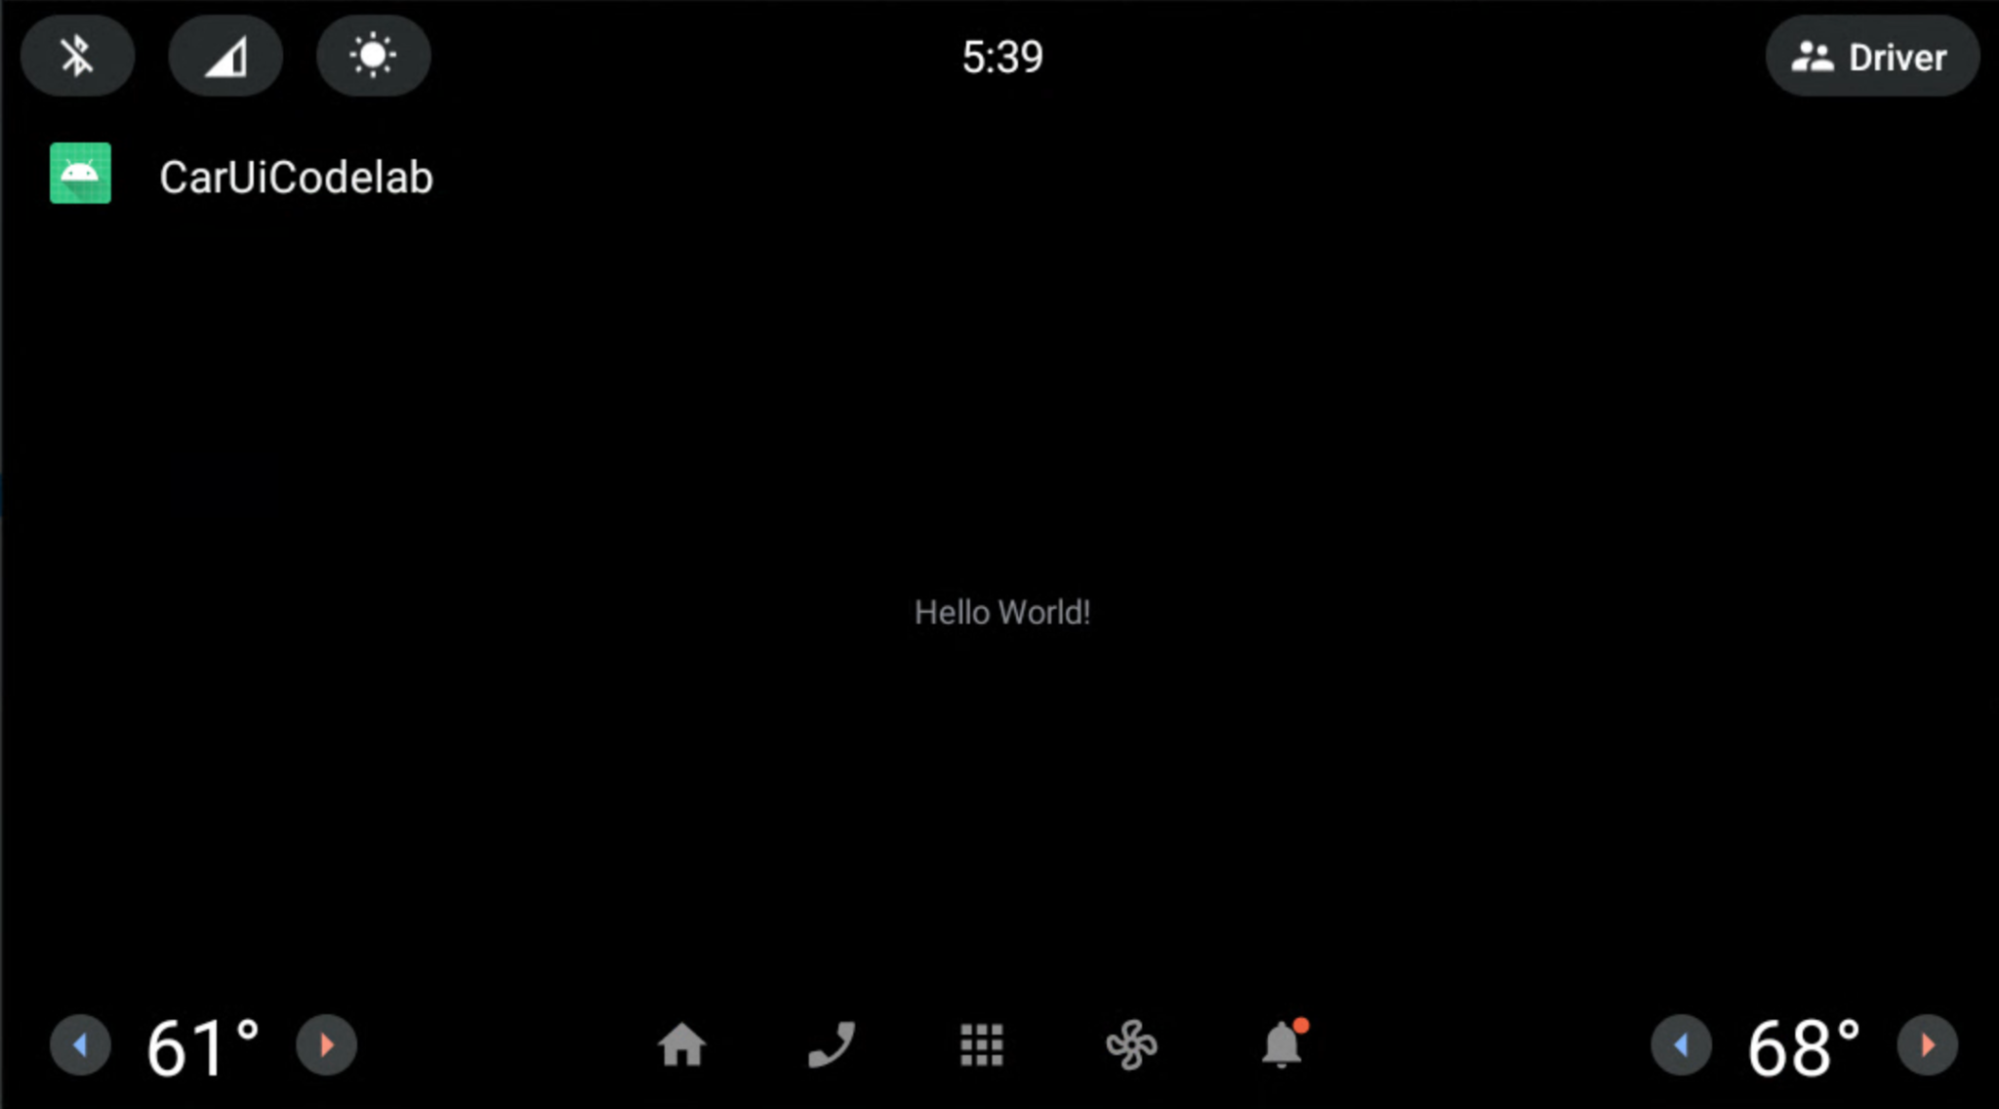
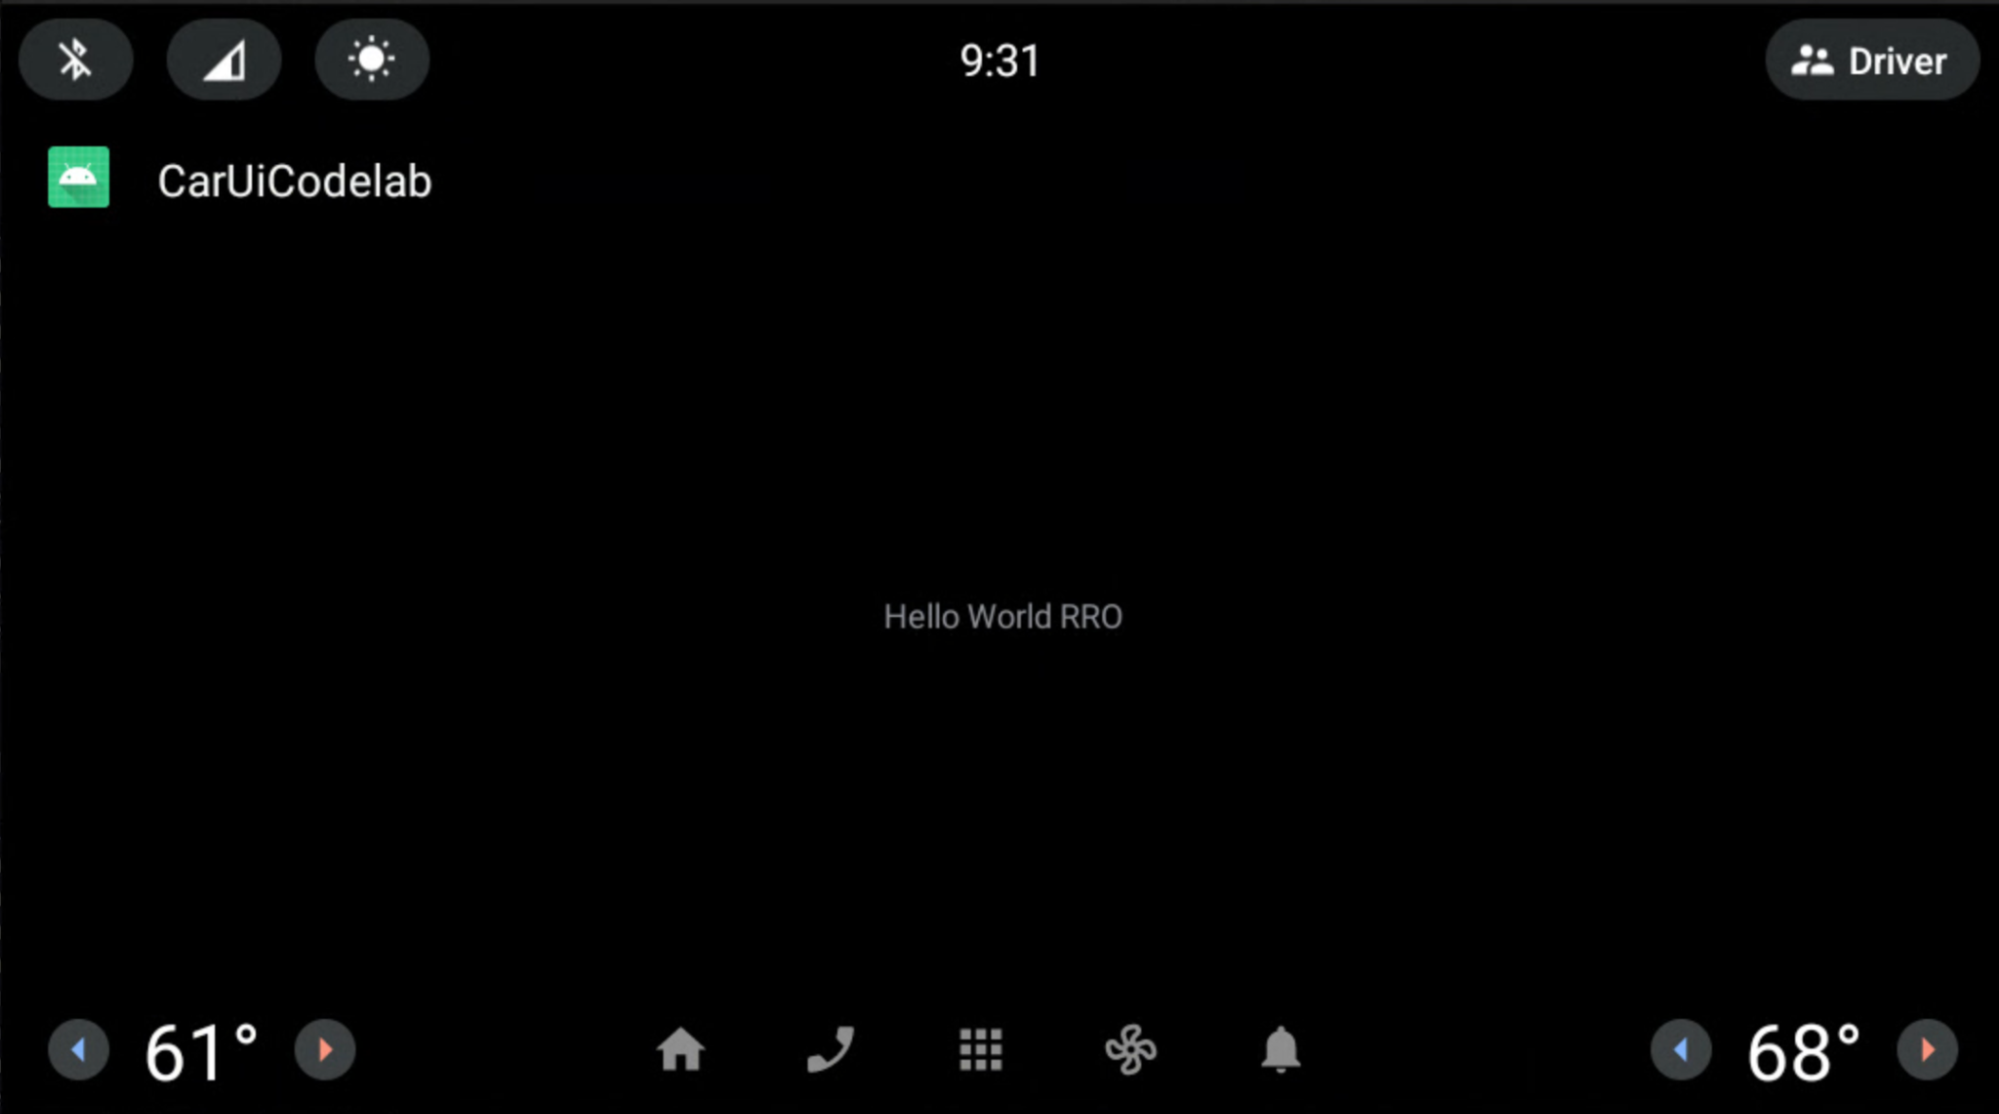
The new app should open automatically on your emulator or Android device. If
not, open the CarUiCodelab app from the app launcher, which is now installed.
It appears like this:
Add car-ui-lib to your Android app
Duration: 15 minutes
Add car-ui-lib to your app:
To add the
car-ui-libdependency to your project’sbuild.gradlefile, select app > build.gradle. Your dependencies should appear like this:dependencies { implementation 'com.android.car.ui:car-ui-lib:2.0.0' implementation 'androidx.appcompat:appcompat:1.4.1' implementation 'com.google.android.material:material:1.4.0' implementation 'androidx.constraintlayout:constraintlayout:2.1.4' }
Use car-ui-lib components in your Android app
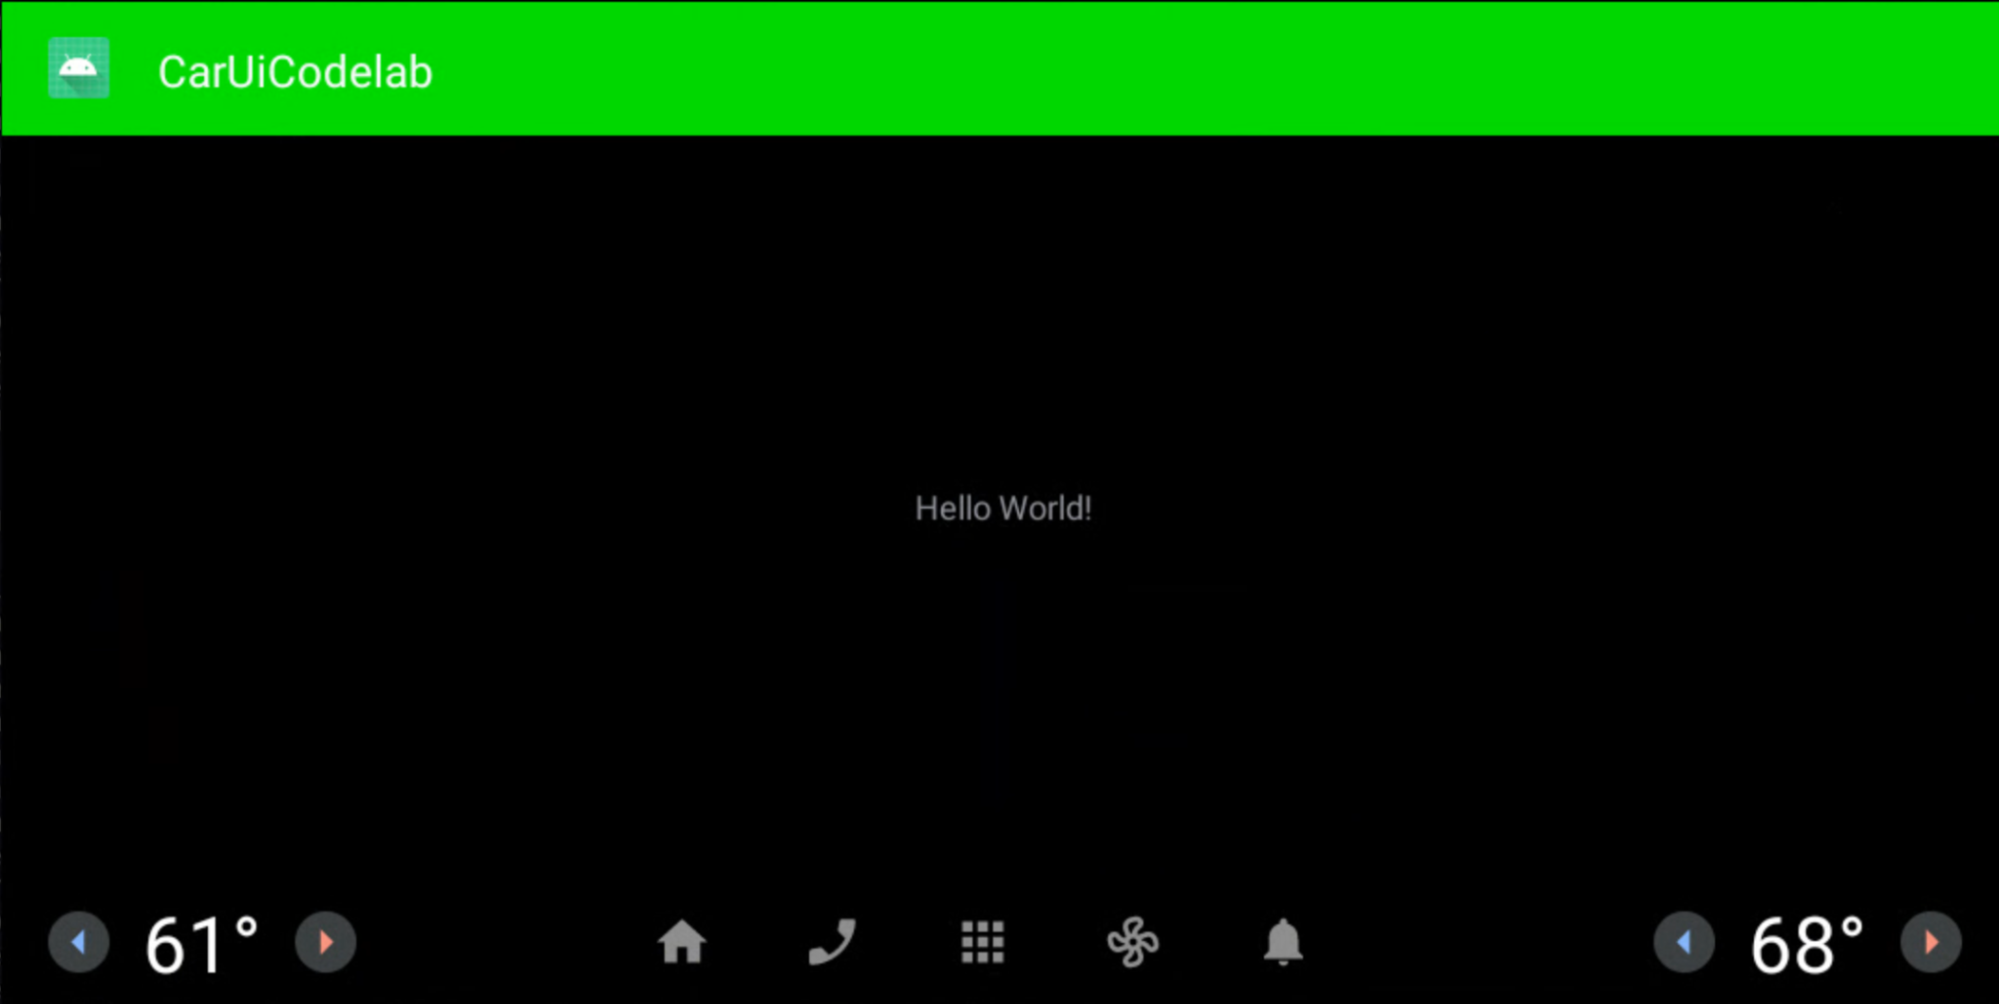
Now that you have car-ui-lib, add a toolbar to your app.
In your
MainActivity.javafile, overwrite theonCreatemethod:@Override protected void onCreate(Bundle savedInstanceState) { super.onCreate(savedInstanceState); setContentView(R.layout.activity_main); // Get the toolbar controller instance. ToolbarController toolbar = CarUi.getToolbar(this); // Set the title on toolbar. toolbar.setTitle(getTitle()); // Set the logo to be shown with the title. toolbar.setLogo(R.mipmap.ic_launcher_round); }Be sure to import
ToolbarController:import com.android.car.ui.core.CarUi; import com.android.car.ui.toolbar.ToolbarController;To use the
Theme.CarUi.WithToolbartheme, select app > src > main > AndroidManifest.xml and then updateAndroidManifest.xmlto appear as follows:<?xml version="1.0" encoding="utf-8"?> <manifest xmlns:android="http://schemas.android.com/apk/res/android" xmlns:tools="http://schemas.android.com/tools" package="com.example.caruicodelab"> <application android:allowBackup="true" android:dataExtractionRules="@xml/data_extraction_rules" android:fullBackupContent="@xml/backup_rules" android:icon="@mipmap/ic_launcher" android:label="@string/app_name" android:roundIcon="@mipmap/ic_launcher_round" android:supportsRtl="true" android:theme="@style/Theme.CarUi.WithToolbar" tools:targetApi="31"> <activity android:name=".MainActivity" android:exported="true"> <intent-filter> <action android:name="android.intent.action.MAIN" /> <category android:name="android.intent.category.LAUNCHER" /> </intent-filter> </activity> </application> </manifest>To build the app, press the green Play button like before.
Add RROs to your app
Duration: 30 minutes
If you're familiar with RROs, go to the next section, Add a permission controller to your app. Otherwise, to learn the basics of RROs, see Change the value of an app's resources at runtime.
Add a permission controller to your app
To control which resources an RRO package overlays, add a file named
overlayable.xml to your app's /res folder. This file serves as a permission
controller between your app (the target) and your RRO package (the overlay).
Add
res/values/overlayable.xmlto your app and copy the following content into your file:<?xml version="1.0" encoding="utf-8"?> <resources> <overlayable name="CarUiCodelab"> <policy type="public"> <item type="string" name="sample_text"/> </policy> </overlayable> </resources>Since the string
sample_textmust be overlayable by an RRO, include the resource name in the app's overlayable.xml.Your
overlayable.xmlfile MUST reside inres/values/. If not, theOverlayManagerServicecan't locate it.To learn more about overlayable resources and how they can can be configured, see Restrict overlayable resources.
Create an RRO package
In this section, you create an RRO package to change the string displayed above from "Hello World!" to "Hello World RRO".
To create a new project, select File > New > New Project. Be sure to select No Activity instead of Empty Activity as RRO packages contain only resources.
Your configurations appear similarly to those illustrated below. The location to which they are saved may differ:
After you create the new
CarUiRROproject, declare the project as an RRO by modifyingAndroidManifest.xml.<?xml version="1.0" encoding="utf-8"?> <manifest xmlns:android="http://schemas.android.com/apk/res/android" package="com.example.caruirro"> <application android:hasCode="false" /> <uses-sdk android:minSdkVersion="29" android:targetSdkVersion="29"/> <overlay android:targetPackage="com.example.caruicodelab" android:targetName="CarUiCodelab" android:isStatic="false" android:resourcesMap="@xml/sample_overlay" /> </manifest>Doing this creates an error with
@xml/sample_overlay. TheresourcesMapfile maps resource names from the target package to the RRO package. Setting the flaghasCodetofalseis mandatory for RRO packages. In addition, RRO packages aren't allowed to contain DEX files.Copy the following block of code into
…/res/xml/sample_overlay.xml:<?xml version="1.0" encoding="utf-8"?> <overlay> <item target="string/sample_text" value="@string/sample_text"/> </overlay>Add
sample_textto…/res/values/strings.xml:<?xml version="1.0" encoding="utf-8"?> <resources> <string name="app_name">CarUiRRO</string> <string name="sample_text">Hello World RRO</string> </resources>
To build your RRO target, press the green Play button to create a Gradle build of your RRO on your emulator or Android device.
To verify your RRO is properly installed, run:
shell:~$ adb shell cmd overlay list --user current | grep -i com.example
com.example.caruicodelab
[ ] com.example.caruirro
This command displays useful information about the state of RRO packages on the system.
[ ]designates that the RRO is installed and ready to be activated.---indicates that the RRO is installed but contains errors.[X]means that the RRO is installed and activated.
If your RRO contains errors, see Troubleshoot runtime resource overlays before you continue.
To enable the RRO and verify that it's enabled:
shell:~$ adb shell cmd overlay enable --user current com.example.caruirro
shell:~$ adb shell cmd overlay list --user current | grep -i com.example
com.example.caruicodelab
[x] com.example.caruirro
Your app displays the string "Hello World RRO”.
Congratulations! You've created your first RRO.
When using RROs, you may want to use the Android Asset Packaging Tool (AAPT2)
flags --no-resource-deduping and --no-resource-removal described in
Link options.
It's not necessary to add the flags in this codelab, but we suggest you use them
in your RROs to avoid the removal of resources (and debugging headaches). You
can add them to your RRO’s build.gradle file like this:
android {
    …
    aaptOptions {
        additionalParameters "--no-resource-deduping", "--no-resource-removal"
    }
}
To learn more about these flags, see Build the package and AAPT2.
Modify car-ui-lib components using RROs in your Android app
This page describes how you can use a runtime resource overlay (RRO) to
modify components from the car-ui-lib library in your Android app.
Set the toolbar background color
Duration: 15 minutes
To change the background color of the toolbar:
Add the following value to your RRO app, and set the resource to bright green (
#0F0):<?xml version="1.0" encoding="utf-8"?> <resources> <drawable name="car_ui_toolbar_background">#0F0</drawable> </resources>The
car-ui-liblibrary contains a resource namedcar_ui_toolbar_background. When this resource is contained in the configuration of an RRO, the toolbar doesn't change because the wrong value is targeted.In the
AndroidManifest.xmlfor your RRO, updatetargetNameto point tocar-ui-lib:… android:targetName="car-ui-lib" …You MUST create a new RRO package for each target package you want to RRO. For example, when creating overlays for two different targets, you must create two overlay apks.
Build, verify, install, and enable the RRO in the same way as before.
Your app appears like this:
RRO layouts and styles
Duration: 15 minutes
In this exercise, you build a new app similar to the app you built earlier. This app allows the layout to be overlaid. Follow the same steps as before, or modify your existing app.
Be sure you add the following lines to
overlayable.xml:<?xml version="1.0" encoding="utf-8"?> <resources> <overlayable name="CarUiCodelab"> <policy type="public"> <item type="string" name="sample_text"/> <item type="layout" name="activity_main"/> <item type="id" name="textView"/> </policy> </overlayable> </resources>Ensure
activity_main.xmlappears as follows:<?xml version="1.0" encoding="utf-8"?> <androidx.constraintlayout.widget.ConstraintLayout xmlns:android="http://schemas.android.com/apk/res/android" xmlns:app="http://schemas.android.com/apk/res-auto" xmlns:tools="http://schemas.android.com/tools" android:layout_width="match_parent" android:layout_height="match_parent" tools:context=".MainActivity"> <TextView android:id="@+id/textView" android:layout_width="wrap_content" android:layout_height="wrap_content" android:text="@string/sample_text" app:layout_constraintBottom_toBottomOf="parent" app:layout_constraintEnd_toEndOf="parent" app:layout_constraintStart_toStartOf="parent" app:layout_constraintTop_toTopOf="parent" /> </androidx.constraintlayout.widget.ConstraintLayout>In your RRO app, create a
res/layout/activity_main.xmland add the following:<?xml version="1.0" encoding="utf-8"?> <FrameLayout xmlns:android="http://schemas.android.com/apk/res/android" android:layout_width="match_parent" android:layout_height="match_parent"> <TextView android:id="@+id/textView" android:layout_width="wrap_content" android:layout_height="wrap_content" android:text="@string/sample_text" android:textAppearance="@style/TextAppearance.CarUi" android:layout_gravity="center_vertical|center_horizontal"/> </FrameLayout>Update
res/values/styles.xmlto add our style to the RRO:<?xml version="1.0" encoding="utf-8"?> <resources> <style name="TextAppearance.CarUi" parent="android:TextAppearance.DeviceDefault"> <item name="android:textColor">#0f0</item> <item name="android:textSize">100sp</item> </style> </resources>Change the
targetNameinAndroidManifest.xmlto point to the name of your new app:… android:targetName="CarUiCodelab" …Add the resources to the
sample_overlay.xmlfile in your RRO:<?xml version="1.0" encoding="utf-8"?> <overlay> <item target="string/sample_text" value="@string/sample_text"/> <item target="id/textView" value="@id/textView"/> <item target="layout/activity_main" value="@layout/activity_main"/> </overlay>Build and install the app and RRO the same way as before (green Play button). Be sure to enable your RRO.
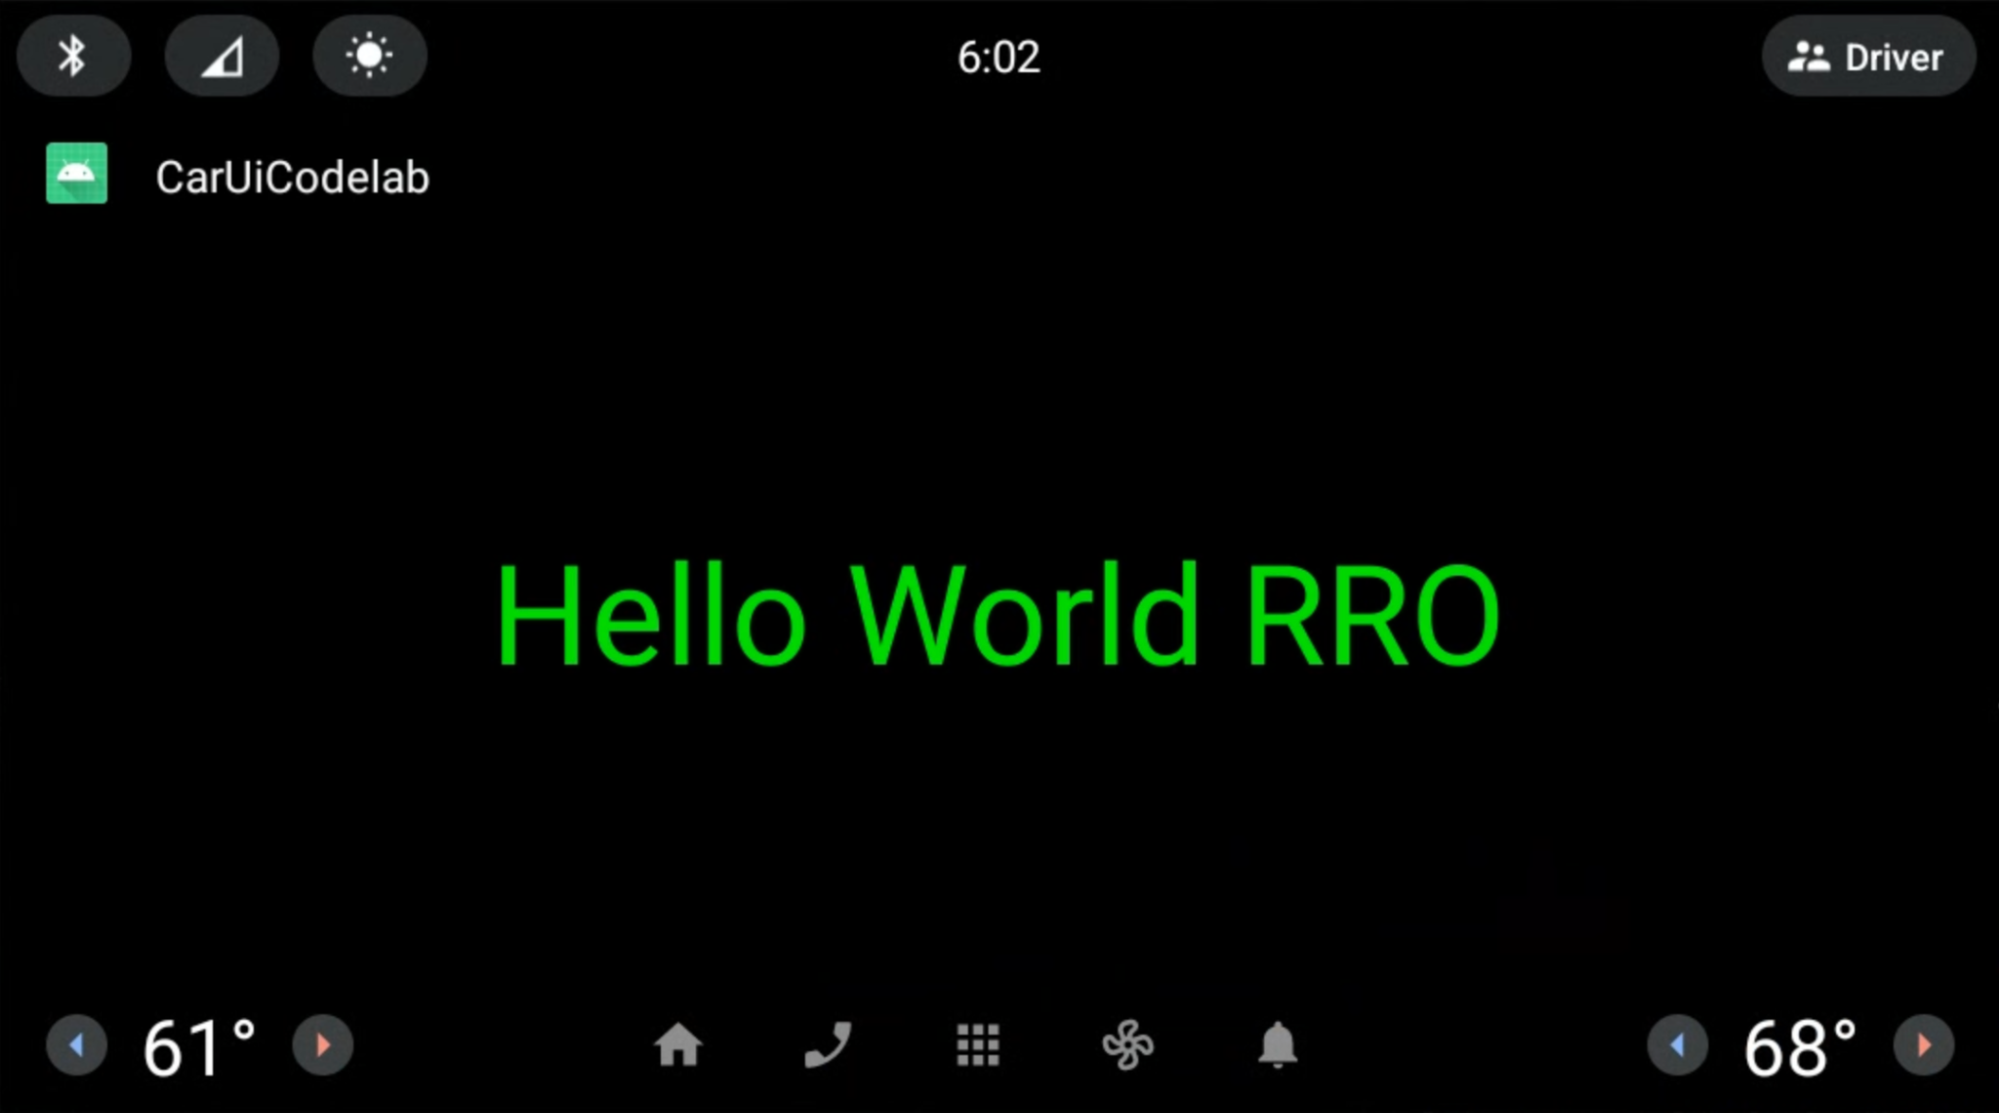
The app and RRO render as follows. The Hello World RRO text is green and is centered as specified in the layout RRO.
Add CarUiRecyclerView to your app
Duration: 15 minutes
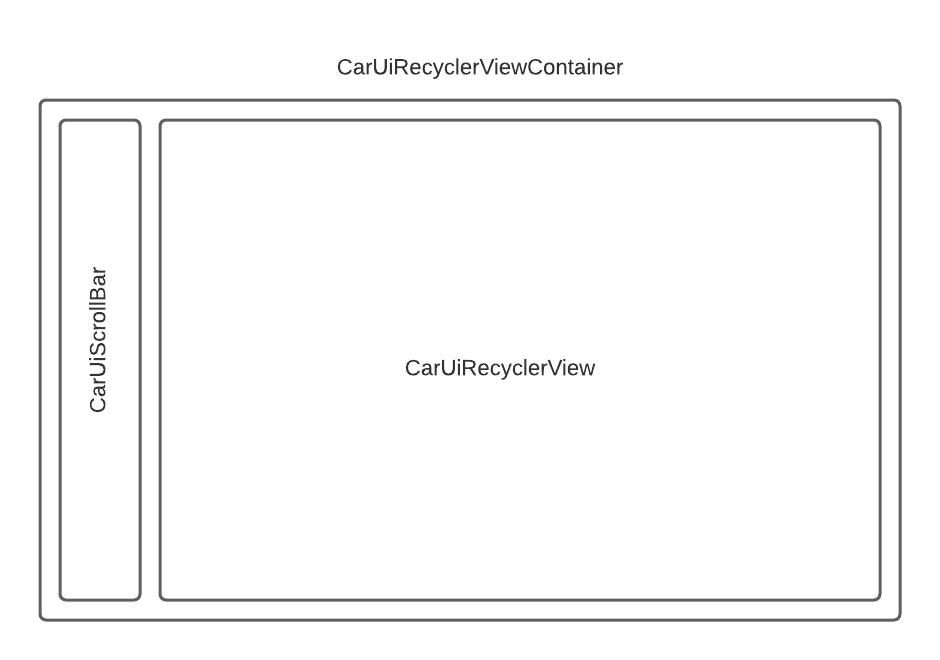
The CarUiRecyclerView interface provides APIs to access a RecyclerView
that’s customized via car-ui-lib resources. For example, CarUiRecyclerView
checks a flag at runtime to determine if the scrollbar should be enabled or not
and selects the corresponding layout.
To add a
CarUiRecyclerView, add it to youractivity_main.xmlandMainActivity.javafiles. You can either create a new app from scratch or modify the existing app. If you modify the existing app, be sure to remove undeclared resources fromoverlayable.xml.activity_main.xml<?xml version="1.0" encoding="utf-8"?> <com.android.car.ui.recyclerview.CarUiRecyclerView android:id="@+id/list" android:layout_width="match_parent" android:layout_height="match_parent"/>The following error may appear, which you can ignore:
Cannot resolve class com.android.car.ui.recyclerview.CarUiRecyclerViewAs long as your class is spelled correctly and you've added
car-ui-libas a dependency, you can build and compile your apk. To remove the error, select File > Invalidate Caches then click Invalidate and Restart.Add the following to
MainActivity.javapackage com.example.caruicodelab; import android.app.Activity; import android.os.Bundle; import com.android.car.ui.core.CarUi; import com.android.car.ui.recyclerview.CarUiContentListItem; import com.android.car.ui.recyclerview.CarUiListItem; import com.android.car.ui.recyclerview.CarUiListItemAdapter; import com.android.car.ui.recyclerview.CarUiRecyclerView; import com.android.car.ui.toolbar.ToolbarController; import java.util.ArrayList; /** Activity with a simple car-ui layout. */ public class MainActivity extends Activity { private final ArrayList<CarUiListItem> mData = new ArrayList<>(); private CarUiListItemAdapter mAdapter; @Override protected void onCreate(Bundle savedInstanceState) { super.onCreate(savedInstanceState); setContentView(R.layout.activity_main); ToolbarController toolbar = CarUi.getToolbar(this); toolbar.setTitle(getTitle()); toolbar.setLogo(R.mipmap.ic_launcher_round); CarUiRecyclerView recyclerView = findViewById(R.id.list); mAdapter = new CarUiListItemAdapter(generateSampleData()); recyclerView.setAdapter(mAdapter); } private ArrayList<CarUiListItem> generateSampleData() { for (int i = 0; i < 20; i++) { CarUiContentListItem item = new CarUiContentListItem(CarUiContentListItem.Action.ICON); item.setTitle("Title " + i); item.setPrimaryIconType(CarUiContentListItem.IconType.CONTENT); item.setIcon(getDrawable(R.drawable.ic_launcher_foreground)); item.setBody("body " + i); mData.add(item); } return mData; }Build and install your app as before.
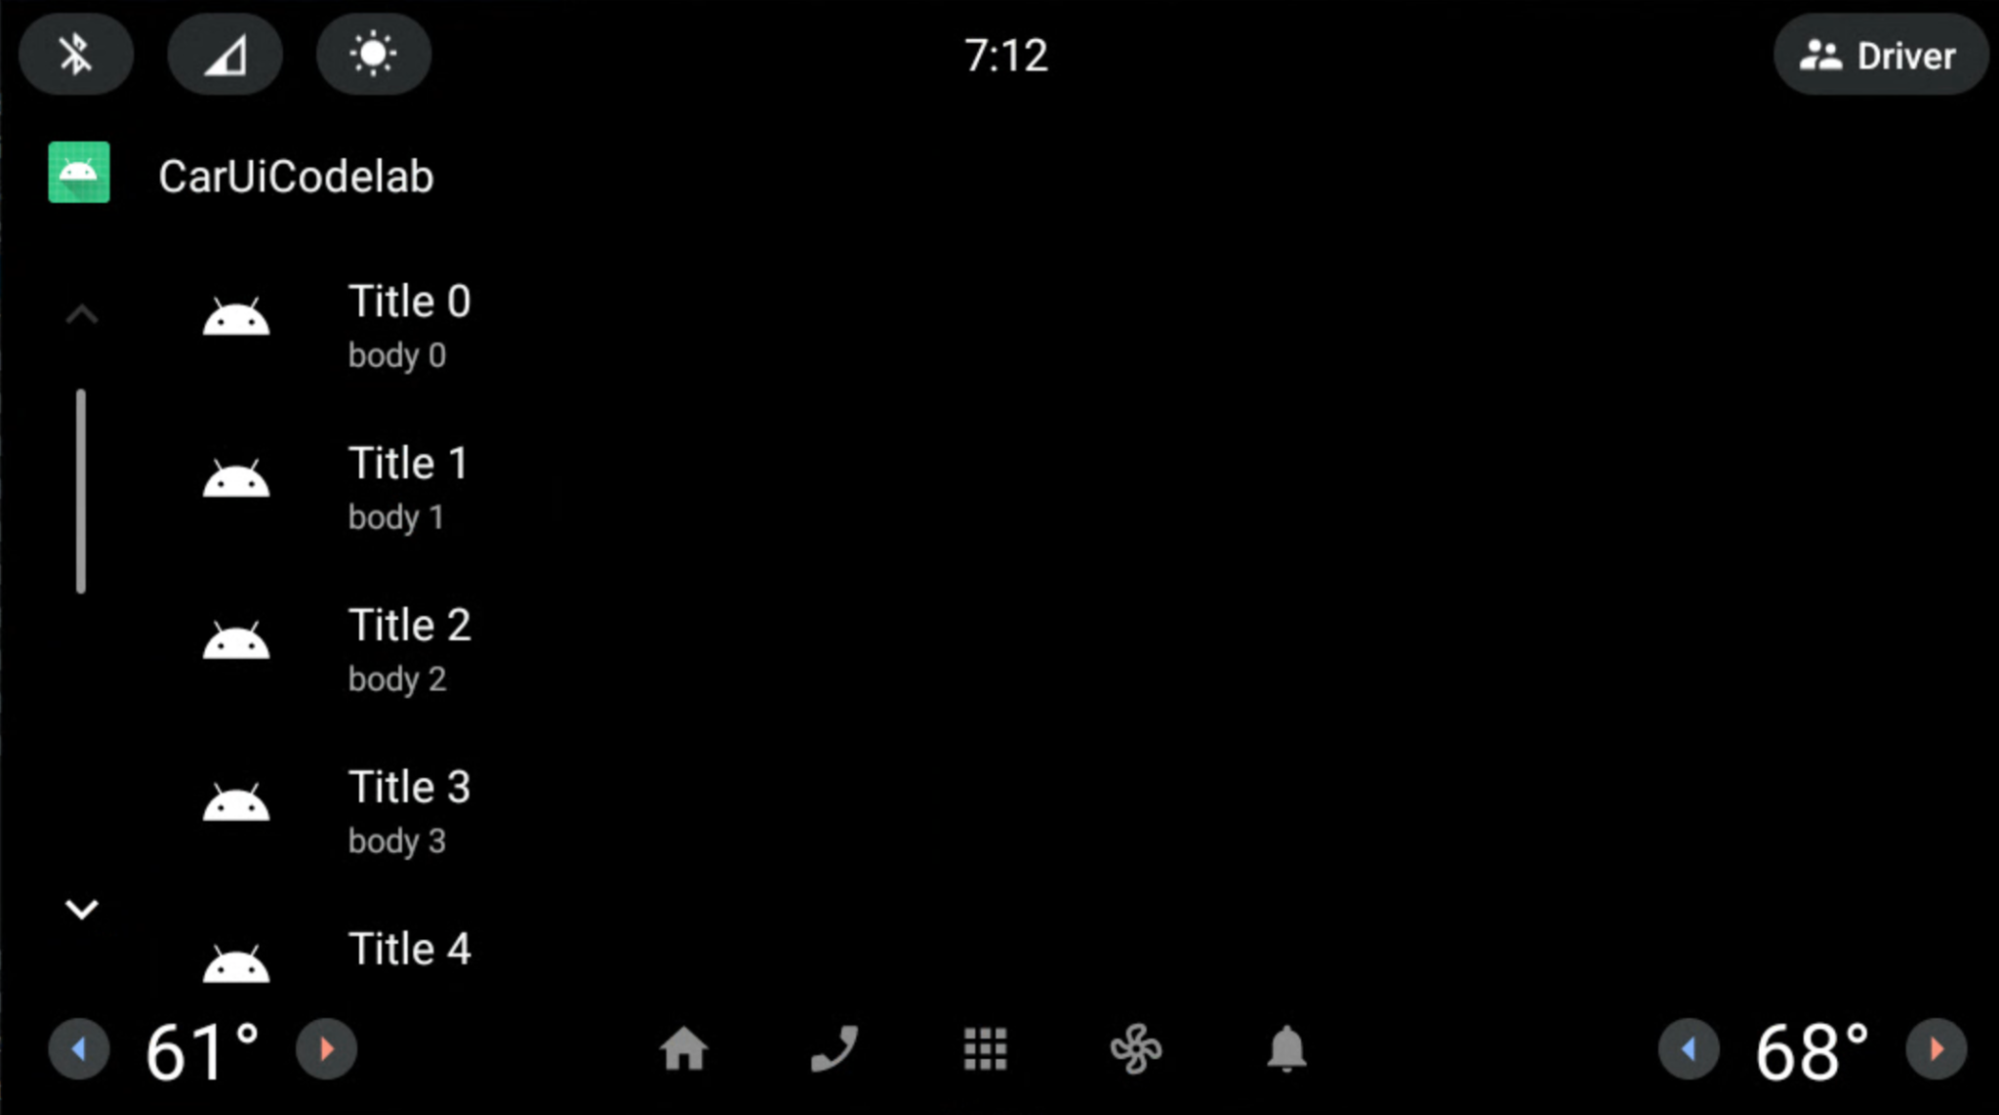
You now see a CarUiRecyclerView:
Use an RRO to remove the scrollbar
Duration: 10 minutes
This exercise shows you how to use an RRO to remove the scrollbar from
CarUiRecyclerView.
In your RRO, add and modify the following files:
AndroidManifest.xml<?xml version="1.0" encoding="utf-8"?> <manifest xmlns:android="http://schemas.android.com/apk/res/android" package="com.example.caruirro"> <application android:hasCode="false" /> <uses-sdk android:minSdkVersion="29" android:targetSdkVersion="29"/> <overlay android:targetPackage="com.example.caruicodelab" android:targetName="car-ui-lib" android:isStatic="false" android:resourcesMap="@xml/sample_overlay" /> </manifest>res/values/bools.xml<?xml version="1.0" encoding="utf-8"?> <resources> <bool name="car_ui_scrollbar_enable">false</bool> </resources>The resource
car_ui_scrollbar_enableis acar-ui-libboolean resource, which controls whether the car optimized scrollbar with Up and Down buttons inCarUiRecyclerViewis present or not. When set tofalse,CarUiRecyclerViewacts like an AndroidXRecyclerView.res/xml/sample_overlay.xml<?xml version="1.0" encoding="utf-8"?> <overlay> <item target="bool/car_ui_scrollbar_enable" value="@bool/car_ui_scrollbar_enable"/> </overlay>
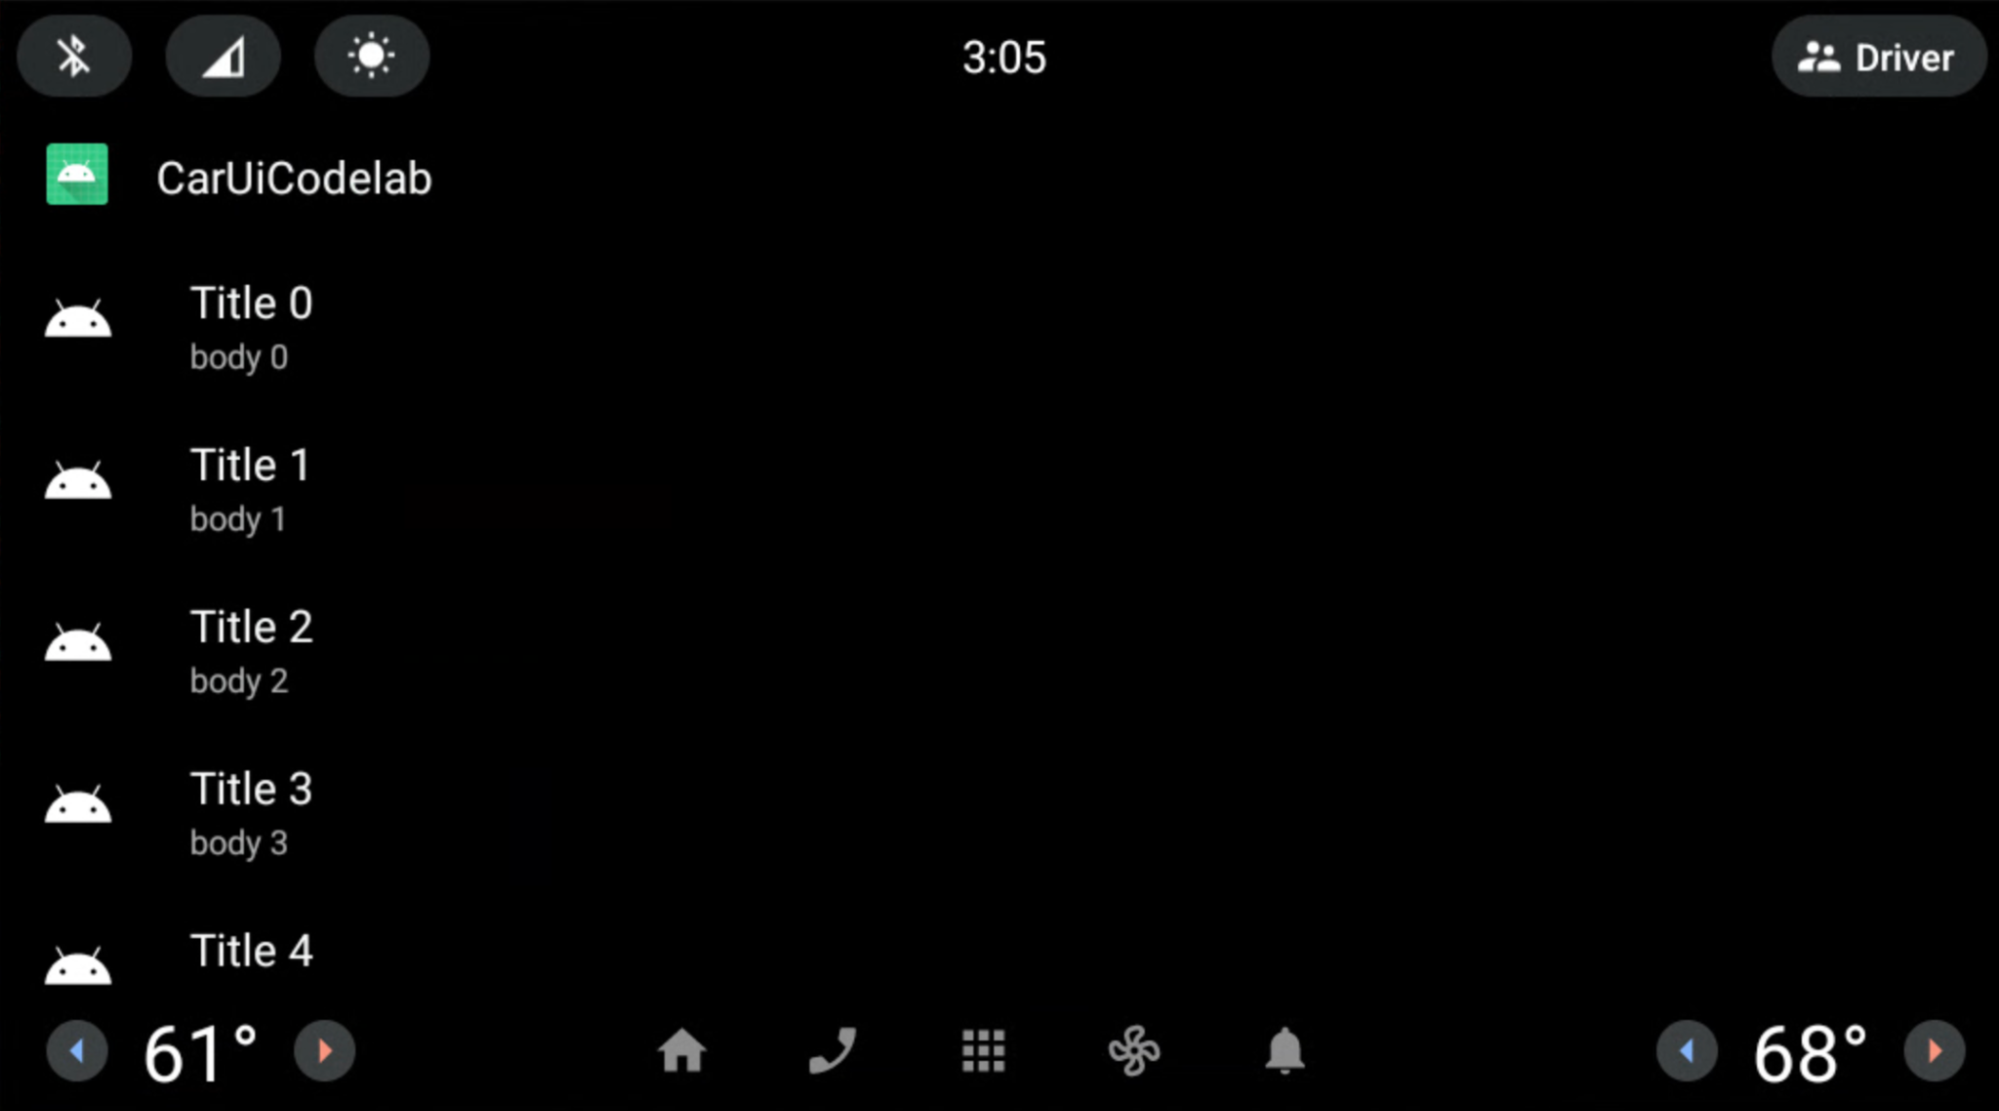
Build and install your app as before. The scrollbar is now removed from
CarUiRecyclerView:
Use a layout to overlay the CarUiRecyclerView scrollbar
Duration: 15 minutes
In this exercise, you modify the CarUiRecyclerView scrollbar layout.
Add and modify the following files in your RRO app.
res/layout/car_ui_recycler_view_scrollbar.xml<?xml version="1.0" encoding="utf-8"?> <RelativeLayout xmlns:android="http://schemas.android.com/apk/res/android" android:layout_width="112dp" android:layout_height="match_parent" android:id="@+id/car_ui_scroll_bar"> <!-- View height is dynamically calculated during layout. --> <View android:id="@+id/car_ui_scrollbar_thumb" android:layout_width="6dp" android:layout_height="20dp" android:layout_alignParentTop="true" android:layout_centerHorizontal="true" android:background="@drawable/car_ui_recyclerview_scrollbar_thumb"/> <View android:id="@+id/car_ui_scrollbar_track" android:layout_width="10dp" android:layout_height="match_parent" android:layout_marginTop="10dp" android:layout_centerHorizontal="true" android:layout_above="@+id/car_ui_scrollbar_page_up"/> <View android:layout_width="2dp" android:layout_height="match_parent" android:layout_marginTop="10dp" android:background="#323232" android:layout_toLeftOf="@+id/car_ui_scrollbar_thumb" android:layout_above="@+id/car_ui_scrollbar_page_up" android:layout_marginRight="5dp"/> <View android:layout_width="2dp" android:layout_height="match_parent" android:layout_marginTop="10dp" android:background="#323232" android:layout_toRightOf="@+id/car_ui_scrollbar_thumb" android:layout_above="@+id/car_ui_scrollbar_page_up" android:layout_marginLeft="5dp"/> <ImageView android:id="@+id/car_ui_scrollbar_page_up" android:layout_width="75dp" android:layout_height="75dp" android:focusable="false" android:hapticFeedbackEnabled="false" android:src="@drawable/car_ui_recyclerview_ic_up" android:scaleType="centerInside" android:background="?android:attr/selectableItemBackgroundBorderless" android:layout_centerHorizontal="true" android:layout_above="@+id/car_ui_scrollbar_page_down"/> <ImageView android:id="@+id/car_ui_scrollbar_page_down" android:layout_width="75dp" android:layout_height="75dp" android:focusable="false" android:hapticFeedbackEnabled="false" android:src="@drawable/car_ui_recyclerview_ic_down" android:scaleType="centerInside" android:background="?android:attr/selectableItemBackgroundBorderless" android:layout_centerHorizontal="true" android:layout_alignParentBottom="true"/> </RelativeLayout>To overlay a layout file, you must add all the IDs and namespace attributes to the
overlay.xmlof your RRO. See the files below.res/xml/sample_overlay.xml<?xml version="1.0" encoding="utf-8"?> <overlay> <item target="drawable/car_ui_recyclerview_ic_down" value="@drawable/car_ui_recyclerview_ic_down"/> <item target="drawable/car_ui_recyclerview_ic_up" value="@drawable/car_ui_recyclerview_ic_up"/> <item target="drawable/car_ui_recyclerview_scrollbar_thumb" value="@drawable/car_ui_recyclerview_scrollbar_thumb"/> <item target="id/car_ui_scroll_bar" value="@id/car_ui_scroll_bar"/> <item target="id/car_ui_scrollbar_thumb" value="@id/car_ui_scrollbar_thumb"/> <item target="id/car_ui_scrollbar_track" value="@id/car_ui_scrollbar_track"/> <item target="id/car_ui_scrollbar_page_up" value="@id/car_ui_scrollbar_page_up"/> <item target="id/car_ui_scrollbar_page_down" value="@id/car_ui_scrollbar_page_down"/> <item target="layout/car_ui_recyclerview_scrollbar" value="@layout/car_ui_recyclerview_scrollbar"/> </overlay>res/drawable/car_ui_recyclerview_ic_up.xml<?xml version="1.0" encoding="utf-8"?> <vector xmlns:android="http://schemas.android.com/apk/res/android" android:width="48dp" android:height="48dp" android:viewportWidth="48.0" android:viewportHeight="48.0"> <path android:pathData="M14.83,30.83L24,21.66l9.17,9.17L36,28 24,16 12,28z" android:fillColor="#0000FF"/> </vector>res/drawable/car_ui_recyclerview_ic_down.xml<?xml version="1.0" encoding="utf-8"?> <vector xmlns:android="http://schemas.android.com/apk/res/android" android:width="48dp" android:height="48dp" android:viewportWidth="48.0" android:viewportHeight="48.0"> <path android:pathData="M14.83,16.42L24,25.59l9.17,-9.17L36,19.25l-12,12 -12,-12z" android:fillColor="#0000FF"/> </vector>res/drawable/car_ui_recyclerview_scrollbar_thumb.xml<?xml version="1.0" encoding="utf-8"?> <shape xmlns:android="http://schemas.android.com/apk/res/android" android:shape="rectangle"> <solid android:color="#0000FF" /> <corners android:radius="100dp"/> </shape>It is suggested to examine how these files interact.
For simplicity, dimensions and colors are hardcoded. However, a best practice is to declare these values in
dimens.xmlandcolors.xmlor even designated as color files in theres/color/folder. To learn more, see AOSP Java code style for contributors.Build and install your app as before. You've built
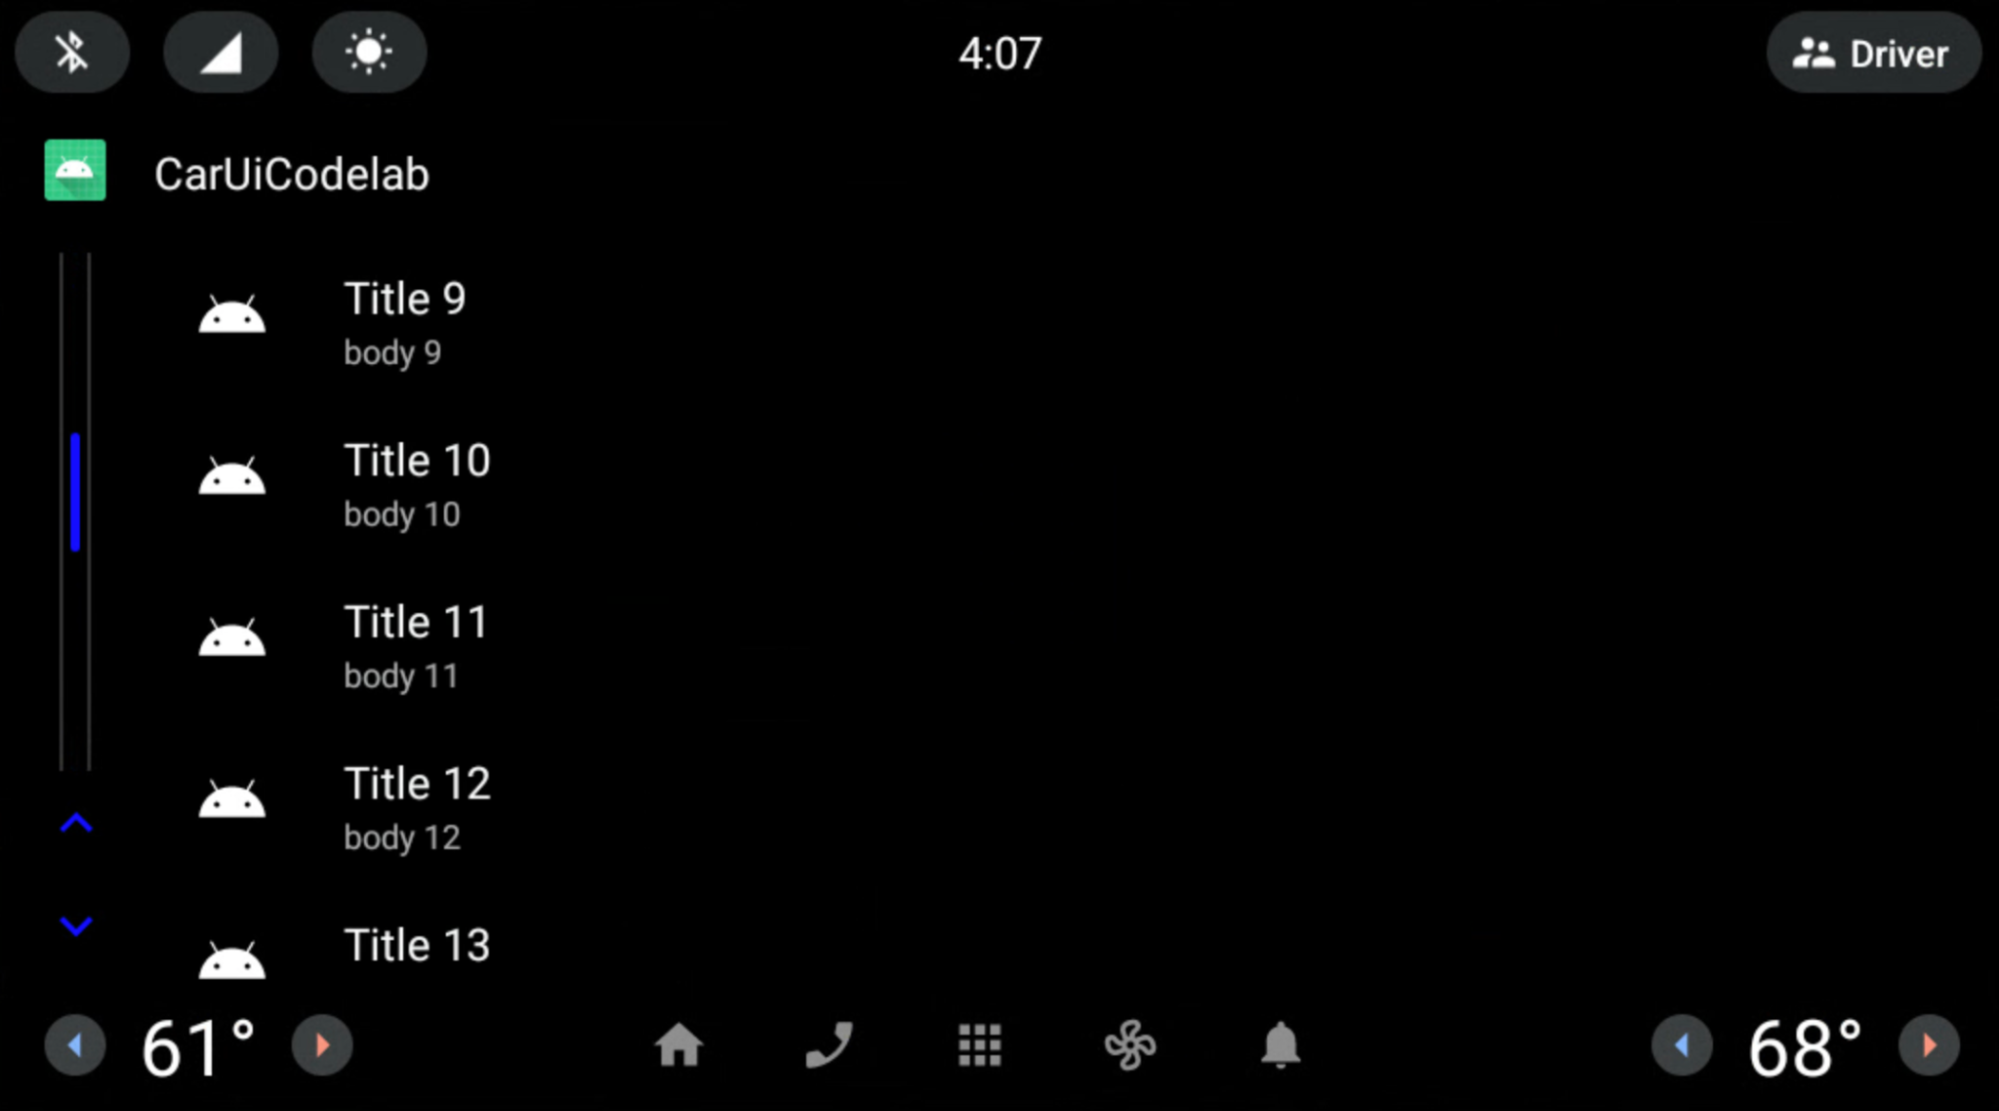
CarUiRecyclerViewwith a blue scrollbar and gray rails.
Congratulations! Both arrows appear along the bottom of the scrollbar, You've
successfully applied an RRO to a car-ui-lib layout resource file using the Gradle build
system through Android Studio.
RRO List items
Duration: 15 minutes
To this point, you've applied an RRO to car-ui-lib components using framework
components (not AndroidX). To use AndroidX components in an RRO, you must add
that component's dependencies to both the app and to the RRO build.gradle. You
must also add that component's attrs to overlayable.xml in your app, as well
as the sample_overlay.xml in your RRO.
Our library (car-ui-lib) uses ConstraintLayout as well as other AndroidX
components, so its overlayable.xml might look like this:
<?xml version='1.0' encoding='UTF-8'?>
<resources>
    <overlayable name="car-ui-lib">
        …
        <item type="attr" name="layout_constraintBottom_toBottomOf"/>
        <item type="attr" name="layout_constraintBottom_toTopOf"/>
        <item type="attr" name="layout_constraintCircle"/>
        <item type="attr" name="layout_constraintCircleAngle"/>
        <item type="attr" name="layout_constraintCircleRadius"/>
        <item type="attr" name="layout_constraintDimensionRatio"/>
        <item type="attr" name="layout_constraintEnd_toEndOf"/>
        <item type="attr" name="layout_constraintEnd_toStartOf"/>
        <item type="attr" name="layout_constraintGuide_begin"/>
        <item type="attr" name="layout_constraintGuide_end"/>
        <item type="attr" name="layout_constraintGuide_percent"/>
        <item type="attr" name="layout_constraintHeight_default"/>
        <item type="attr" name="layout_constraintHeight_max"/>
        <item type="attr" name="layout_constraintHeight_min"/>
        <item type="attr" name="layout_constraintHeight_percent"/>
        <item type="attr" name="layout_constraintHorizontal_bias"/>
        <item type="attr" name="layout_constraintHorizontal_chainStyle"/>
        <item type="attr" name="layout_constraintHorizontal_weight"/>
        <item type="attr" name="layout_constraintLeft_creator"/>
        <item type="attr" name="layout_constraintLeft_toLeftOf"/>
        <item type="attr" name="layout_constraintLeft_toRightOf"/>
        <item type="attr" name="layout_constraintRight_creator"/>
        <item type="attr" name="layout_constraintRight_toLeftOf"/>
        <item type="attr" name="layout_constraintRight_toRightOf"/>
        <item type="attr" name="layout_constraintStart_toEndOf"/>
        <item type="attr" name="layout_constraintStart_toStartOf"/>
        <item type="attr" name="layout_constraintTag"/>
        <item type="attr" name="layout_constraintTop_creator"/>
        <item type="attr" name="layout_constraintTop_toBottomOf"/>
        <item type="attr" name="layout_constraintTop_toTopOf"/>
        <item type="attr" name="layout_constraintVertical_bias"/>
        <item type="attr" name="layout_constraintVertical_chainStyle"/>
        …
    </overlayable>
</resources>
Change the layout of the list items in the
CarUiRecyclerViewusingConstraintLayout. Add or modify the following files in your RRO:res/xml/sample_overlay.xml<?xml version="1.0" encoding="utf-8"?> <overlay> <item target="id/car_ui_list_item_touch_interceptor" value="@id/car_ui_list_item_touch_interceptor"/> <item target="id/car_ui_list_item_reduced_touch_interceptor" value="@id/car_ui_list_item_reduced_touch_interceptor"/> <item target="id/car_ui_list_item_start_guideline" value="@id/car_ui_list_item_start_guideline"/> <item target="id/car_ui_list_item_icon_container" value="@id/car_ui_list_item_icon_container"/> <item target="id/car_ui_list_item_icon" value="@id/car_ui_list_item_icon"/> <item target="id/car_ui_list_item_content_icon" value="@id/car_ui_list_item_content_icon"/> <item target="id/car_ui_list_item_avatar_icon" value="@id/car_ui_list_item_avatar_icon"/> <item target="id/car_ui_list_item_title" value="@id/car_ui_list_item_title"/> <item target="id/car_ui_list_item_body" value="@id/car_ui_list_item_body"/> <item target="id/car_ui_list_item_action_container_touch_interceptor" value="@id/car_ui_list_item_action_container_touch_interceptor"/> <item target="id/car_ui_list_item_action_container" value="@id/car_ui_list_item_action_container"/> <item target="id/car_ui_list_item_action_divider" value="@id/car_ui_list_item_action_divider"/> <item target="id/car_ui_list_item_switch_widget" value="@id/car_ui_list_item_switch_widget"/> <item target="id/car_ui_list_item_checkbox_widget" value="@id/car_ui_list_item_checkbox_widget"/> <item target="id/car_ui_list_item_radio_button_widget" value="@id/car_ui_list_item_radio_button_widget"/> <item target="id/car_ui_list_item_supplemental_icon" value="@id/car_ui_list_item_supplemental_icon"/> <item target="id/car_ui_list_item_end_guideline" value="@id/car_ui_list_item_end_guideline"/> <item target="attr/layout_constraintBottom_toBottomOf" value="@attr/layout_constraintBottom_toBottomOf"/> <item target="attr/layout_constraintBottom_toTopOf" value="@attr/layout_constraintBottom_toTopOf"/> <item target="attr/layout_constraintEnd_toEndOf" value="@attr/layout_constraintEnd_toEndOf"/> <item target="attr/layout_constraintEnd_toStartOf" value="@attr/layout_constraintEnd_toStartOf"/> <item target="attr/layout_constraintGuide_begin" value="@attr/layout_constraintGuide_begin"/> <item target="attr/layout_constraintGuide_end" value="@attr/layout_constraintGuide_end"/> <item target="attr/layout_constraintHorizontal_bias" value="@attr/layout_constraintHorizontal_bias"/> <item target="attr/layout_constraintLeft_toLeftOf" value="@attr/layout_constraintLeft_toLeftOf"/> <item target="attr/layout_constraintLeft_toRightOf" value="@attr/layout_constraintLeft_toRightOf"/> <item target="attr/layout_constraintRight_toLeftOf" value="@attr/layout_constraintRight_toLeftOf"/> <item target="attr/layout_constraintRight_toRightOf" value="@attr/layout_constraintRight_toRightOf"/> <item target="attr/layout_constraintStart_toEndOf" value="@attr/layout_constraintStart_toEndOf"/> <item target="attr/layout_constraintStart_toStartOf" value="@attr/layout_constraintStart_toStartOf"/> <item target="attr/layout_constraintTop_toBottomOf" value="@attr/layout_constraintTop_toBottomOf"/> <item target="attr/layout_constraintTop_toTopOf" value="@attr/layout_constraintTop_toTopOf"/> <item target="attr/layout_goneMarginBottom" value="@attr/layout_goneMarginBottom"/> <item target="attr/layout_goneMarginEnd" value="@attr/layout_goneMarginEnd"/> <item target="attr/layout_goneMarginLeft" value="@attr/layout_goneMarginLeft"/> <item target="attr/layout_goneMarginRight" value="@attr/layout_goneMarginRight"/> <item target="attr/layout_goneMarginStart" value="@attr/layout_goneMarginStart"/> <item target="attr/layout_goneMarginTop" value="@attr/layout_goneMarginTop"/> <item target="attr/layout_constraintVertical_chainStyle" value="@attr/layout_constraintVertical_chainStyle"/> <item target="layout/car_ui_list_item" value="@layout/car_ui_list_item"/> </overlay>res/layout/car_ui_list_item.xml<?xml version="1.0" encoding="utf-8"?> <androidx.constraintlayout.widget.ConstraintLayout xmlns:android="http://schemas.android.com/apk/res/android" xmlns:app="http://schemas.android.com/apk/res-auto" android:layout_width="match_parent" android:layout_height="wrap_content" android:tag="carUiListItem" android:minHeight="@dimen/car_ui_list_item_height"> <!-- The following touch interceptor views are sized to encompass the specific sub-sections of the list item view to easily control the bounds of a background ripple effects. --> <com.android.car.ui.SecureView android:id="@+id/car_ui_list_item_touch_interceptor" android:layout_width="0dp" android:layout_height="0dp" android:background="@drawable/car_ui_list_item_background" app:layout_constraintBottom_toBottomOf="parent" app:layout_constraintEnd_toEndOf="parent" app:layout_constraintStart_toStartOf="parent" app:layout_constraintTop_toTopOf="parent" /> <!-- This touch interceptor does not include the action container --> <com.android.car.ui.SecureView android:id="@+id/car_ui_list_item_reduced_touch_interceptor" android:layout_width="0dp" android:layout_height="0dp" android:background="@drawable/car_ui_list_item_background" android:visibility="gone" app:layout_constraintBottom_toBottomOf="parent" app:layout_constraintEnd_toStartOf="@id/car_ui_list_item_action_container" app:layout_constraintStart_toStartOf="parent" app:layout_constraintTop_toTopOf="parent" /> <androidx.constraintlayout.widget.Guideline android:id="@+id/car_ui_list_item_start_guideline" android:layout_width="wrap_content" android:layout_height="wrap_content" android:orientation="vertical" app:layout_constraintGuide_begin="@dimen/car_ui_list_item_start_inset" /> <FrameLayout android:id="@+id/car_ui_list_item_icon_container" android:layout_width="@dimen/car_ui_list_item_icon_container_width" android:layout_height="0dp" app:layout_constraintBottom_toBottomOf="parent" app:layout_constraintStart_toStartOf="@+id/car_ui_list_item_start_guideline" app:layout_constraintTop_toTopOf="parent"> <ImageView android:id="@+id/car_ui_list_item_icon" android:layout_width="@dimen/car_ui_list_item_icon_size" android:layout_height="@dimen/car_ui_list_item_icon_size" android:layout_gravity="center" android:visibility="gone" android:scaleType="fitCenter" /> <ImageView android:id="@+id/car_ui_list_item_content_icon" android:layout_width="@dimen/car_ui_list_item_content_icon_width" android:layout_height="@dimen/car_ui_list_item_content_icon_height" android:layout_gravity="center" android:visibility="gone" android:scaleType="fitCenter" /> <ImageView android:id="@+id/car_ui_list_item_avatar_icon" android:background="@drawable/car_ui_list_item_avatar_icon_outline" android:layout_width="@dimen/car_ui_list_item_avatar_icon_width" android:layout_height="@dimen/car_ui_list_item_avatar_icon_height" android:layout_gravity="center" android:visibility="gone" android:scaleType="fitCenter" /> </FrameLayout> <CarUiTextView android:id="@+id/car_ui_list_item_title" android:layout_width="0dp" android:layout_height="wrap_content" android:layout_marginStart="@dimen/car_ui_list_item_text_start_margin" android:singleLine="@bool/car_ui_list_item_single_line_title" android:textAppearance="@style/TextAppearance.CarUi.ListItem" android:layout_gravity="right" android:gravity="right" android:textAlignment="viewEnd" app:layout_constraintBottom_toTopOf="@+id/car_ui_list_item_body" app:layout_constraintEnd_toStartOf="@+id/car_ui_list_item_action_container" app:layout_constraintStart_toEndOf="@+id/car_ui_list_item_icon_container" app:layout_constraintTop_toTopOf="parent" app:layout_constraintVertical_chainStyle="packed" app:layout_goneMarginStart="@dimen/car_ui_list_item_text_no_icon_start_margin" /> <CarUiTextView android:id="@+id/car_ui_list_item_body" android:layout_width="0dp" android:layout_height="wrap_content" android:layout_marginStart="@dimen/car_ui_list_item_text_start_margin" android:textAppearance="@style/TextAppearance.CarUi.ListItem.Body" android:layout_gravity="right" android:gravity="right" android:textAlignment="viewEnd" app:layout_constraintBottom_toBottomOf="parent" app:layout_constraintEnd_toStartOf="@+id/car_ui_list_item_action_container" app:layout_constraintStart_toEndOf="@+id/car_ui_list_item_icon_container" app:layout_constraintTop_toBottomOf="@+id/car_ui_list_item_title" app:layout_goneMarginStart="@dimen/car_ui_list_item_text_no_icon_start_margin" /> <!-- This touch interceptor is sized and positioned to encompass the action container --> <com.android.car.ui.SecureView android:id="@+id/car_ui_list_item_action_container_touch_interceptor" android:layout_width="0dp" android:layout_height="0dp" android:background="@drawable/car_ui_list_item_background" android:visibility="gone" app:layout_constraintBottom_toBottomOf="@id/car_ui_list_item_action_container" app:layout_constraintEnd_toEndOf="@id/car_ui_list_item_action_container" app:layout_constraintStart_toStartOf="@id/car_ui_list_item_action_container" app:layout_constraintTop_toTopOf="@id/car_ui_list_item_action_container" /> <FrameLayout android:id="@+id/car_ui_list_item_action_container" android:layout_width="wrap_content" android:minWidth="@dimen/car_ui_list_item_icon_container_width" android:layout_height="0dp" app:layout_constraintBottom_toBottomOf="parent" app:layout_constraintEnd_toEndOf="@+id/car_ui_list_item_end_guideline" app:layout_constraintTop_toTopOf="parent"> <View android:id="@+id/car_ui_list_item_action_divider" android:layout_width="@dimen/car_ui_list_item_action_divider_width" android:layout_height="@dimen/car_ui_list_item_action_divider_height" android:layout_gravity="start|center_vertical" android:background="@drawable/car_ui_list_item_divider" /> <Switch android:id="@+id/car_ui_list_item_switch_widget" android:layout_width="wrap_content" android:layout_height="wrap_content" android:layout_gravity="center" android:clickable="false" android:focusable="false" /> <CheckBox android:id="@+id/car_ui_list_item_checkbox_widget" android:layout_width="wrap_content" android:layout_height="wrap_content" android:layout_gravity="center" android:clickable="false" android:focusable="false" /> <RadioButton android:id="@+id/car_ui_list_item_radio_button_widget" android:layout_width="wrap_content" android:layout_height="wrap_content" android:layout_gravity="center" android:clickable="false" android:focusable="false" /> <ImageView android:id="@+id/car_ui_list_item_supplemental_icon" android:layout_width="@dimen/car_ui_list_item_supplemental_icon_size" android:layout_height="@dimen/car_ui_list_item_supplemental_icon_size" android:layout_gravity="center" android:scaleType="fitCenter" /> </FrameLayout> <androidx.constraintlayout.widget.Guideline android:id="@+id/car_ui_list_item_end_guideline" android:layout_width="wrap_content" android:layout_height="wrap_content" android:orientation="vertical" app:layout_constraintGuide_end="@dimen/car_ui_list_item_end_inset" /> </androidx.constraintlayout.widget.ConstraintLayout>car_ui_list_item.xmlreferences several references several components/ resources that are not included as dependencies of the app. These arecar-ui-libresources. You can fix this by addingcar-ui-libas a dependency to your RRO app inapp/build.gradle:dependencies { implementation 'com.android.car.ui:car-ui-lib:2.0.0' implementation 'androidx.appcompat:appcompat:1.4.1' implementation 'com.google.android.material:material:1.4.0' }
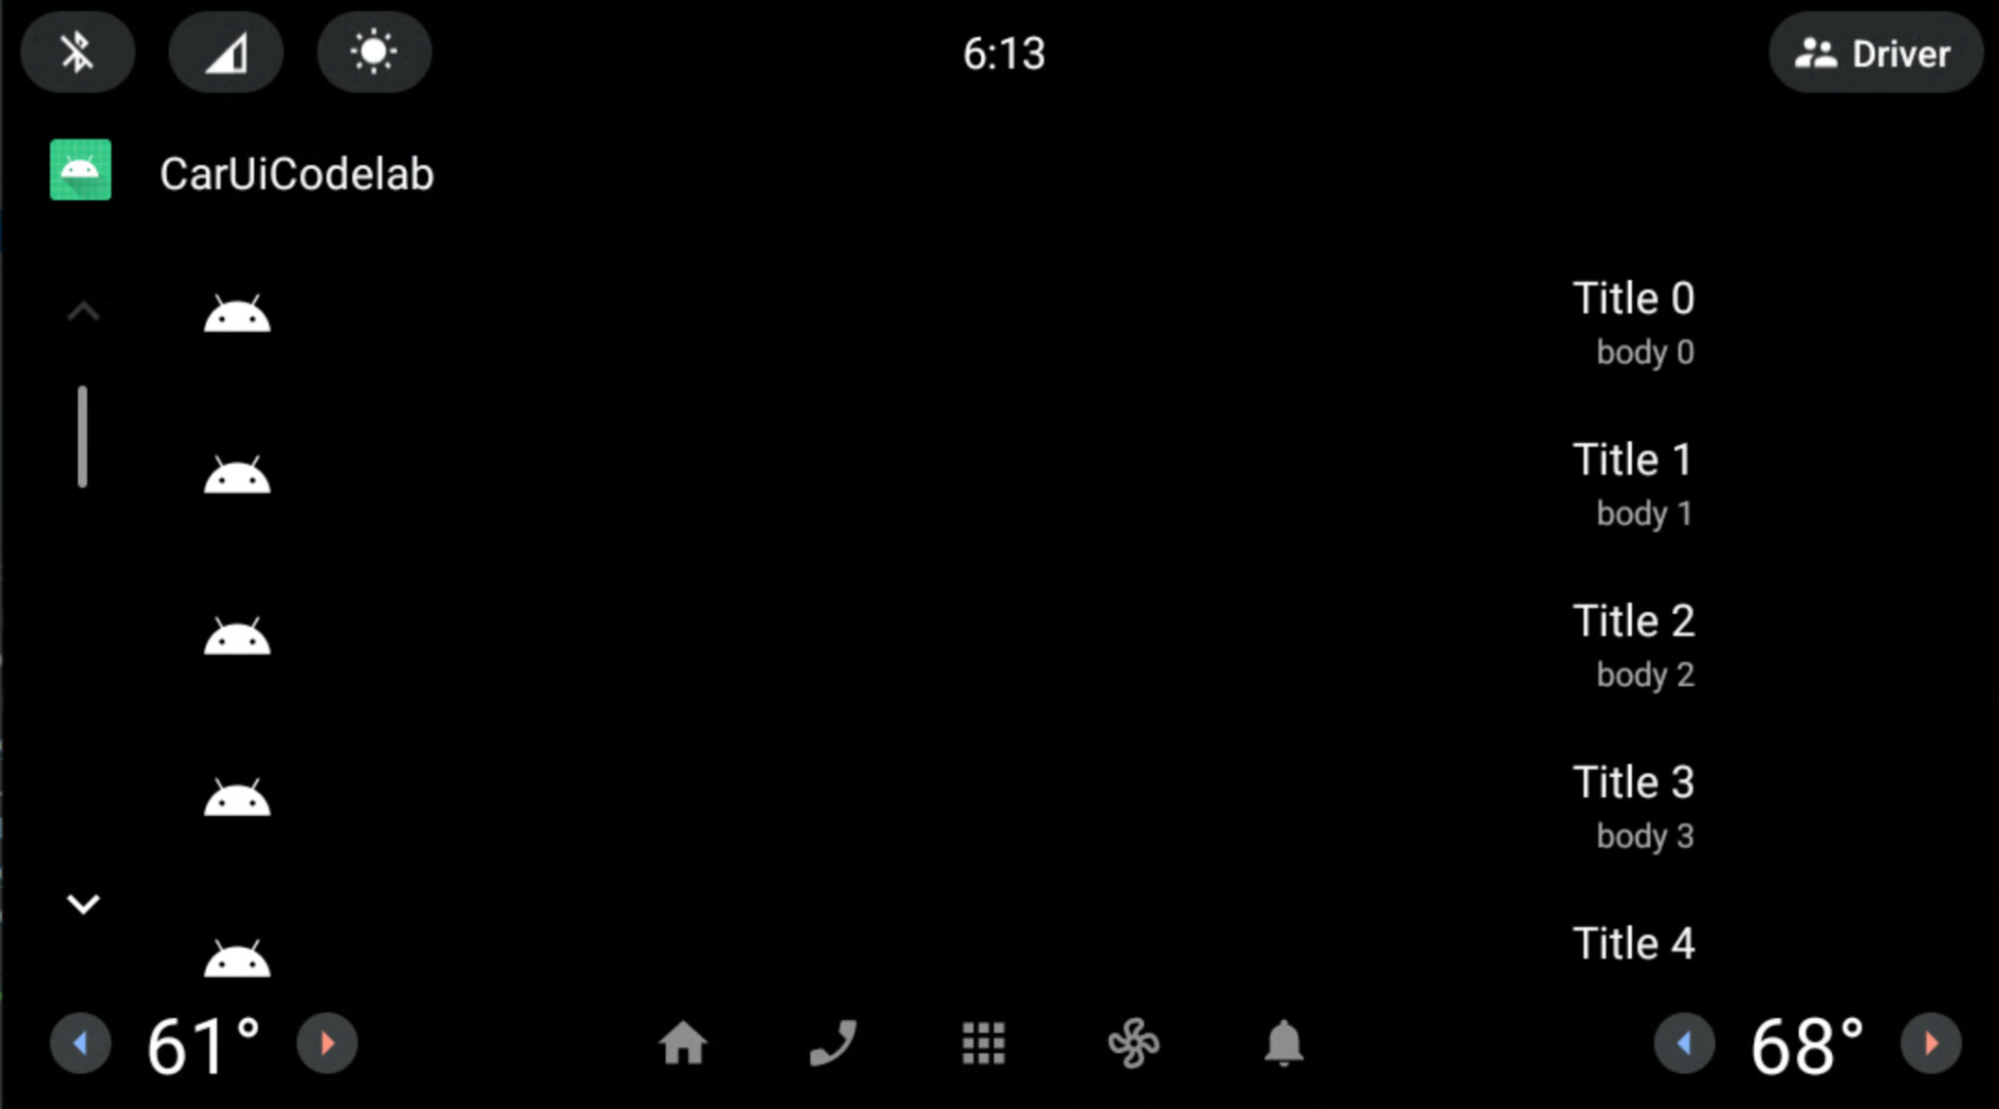
The Title and Body are now right-aligned instead of left-aligned.
We only applied an RRO to car-ui-lib using AndroidX components
(ConstraintLayout) when its attributes were present in the car-ui-lib
file named overlayable.xml as well as the RRO sample_overlay.xml. It's
possible to do something similar in your own app. Just add all the corresponding
attrs to your app’s overlayable.xml, similar to car-ui-lib.
However, it is not possible to RRO an app using AndroidX components when
the app has car-ui-lib as a dependency in its build.gradle (when app uses
car-ui-lib components). Since the attribute mappings were already defined in
the car-ui-lib library's overlayable.xml, adding them to your
app’s overlayable.xml with car-ui-lib as a dependency would cause a
mergeDebugResources error like that below. This is because these attributes
are present in multiple overlayable.xml files:
org.gradle.api.tasks.TaskExecutionException: Execution failed for task ':app:mergeDebugResources'