
Overview
Git source editor (ci.android.com/edit) is a browser-based tool for editing files in the Android Open Source Project (AOSP) and uploading changes to Gerrit. It’s intended for making minor changes to a small number of files, and provides a faster workflow than downloading the Android source tree. You should be familiar with the full process of submitting changes to AOSP using Git, Repo, and Gerrit before using Git source editor.
When you edit a file using Git source editor, all of the work happens on your local machine, until you upload changes to create a Gerrit changelist.
Log in
- Load Git Source Editor in a browser.
Click Log in to log in to your account.
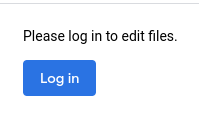
Figure 1. Login button
Edit files and changes
Git Source Editor has these main workflows:
- Edit one or more files of your choice, in the branch that you choose.
- Edit a change. When you edit a change, the result depends on who created the
change:
- If you created the change, your Git Source Editor edits get patched into the change as a new patchset.
- If someone else created the change, your Git Source Editor edits create a new change that you own, based on the change you loaded.
Load what you want to edit
Start an editing session by loading either a file or a change.
Load files
Enter the URL of the file you want to edit in the file/change path box at the top of the page.
Sample file path: https://android.googlesource.com/platform/build/+show/refs/heads/android16-qpr2-release/Changes.md
Click Load file or change.
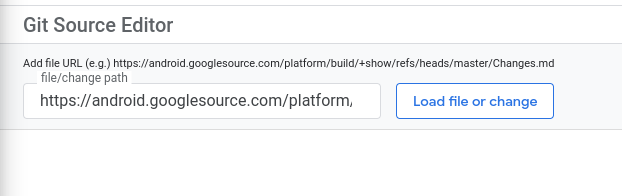
Figure 2. Loading a file or change
The file loads in the editor pane. The navigation pane to the left of the editor pane is a file browser, which opens the repo, with your file preloaded.
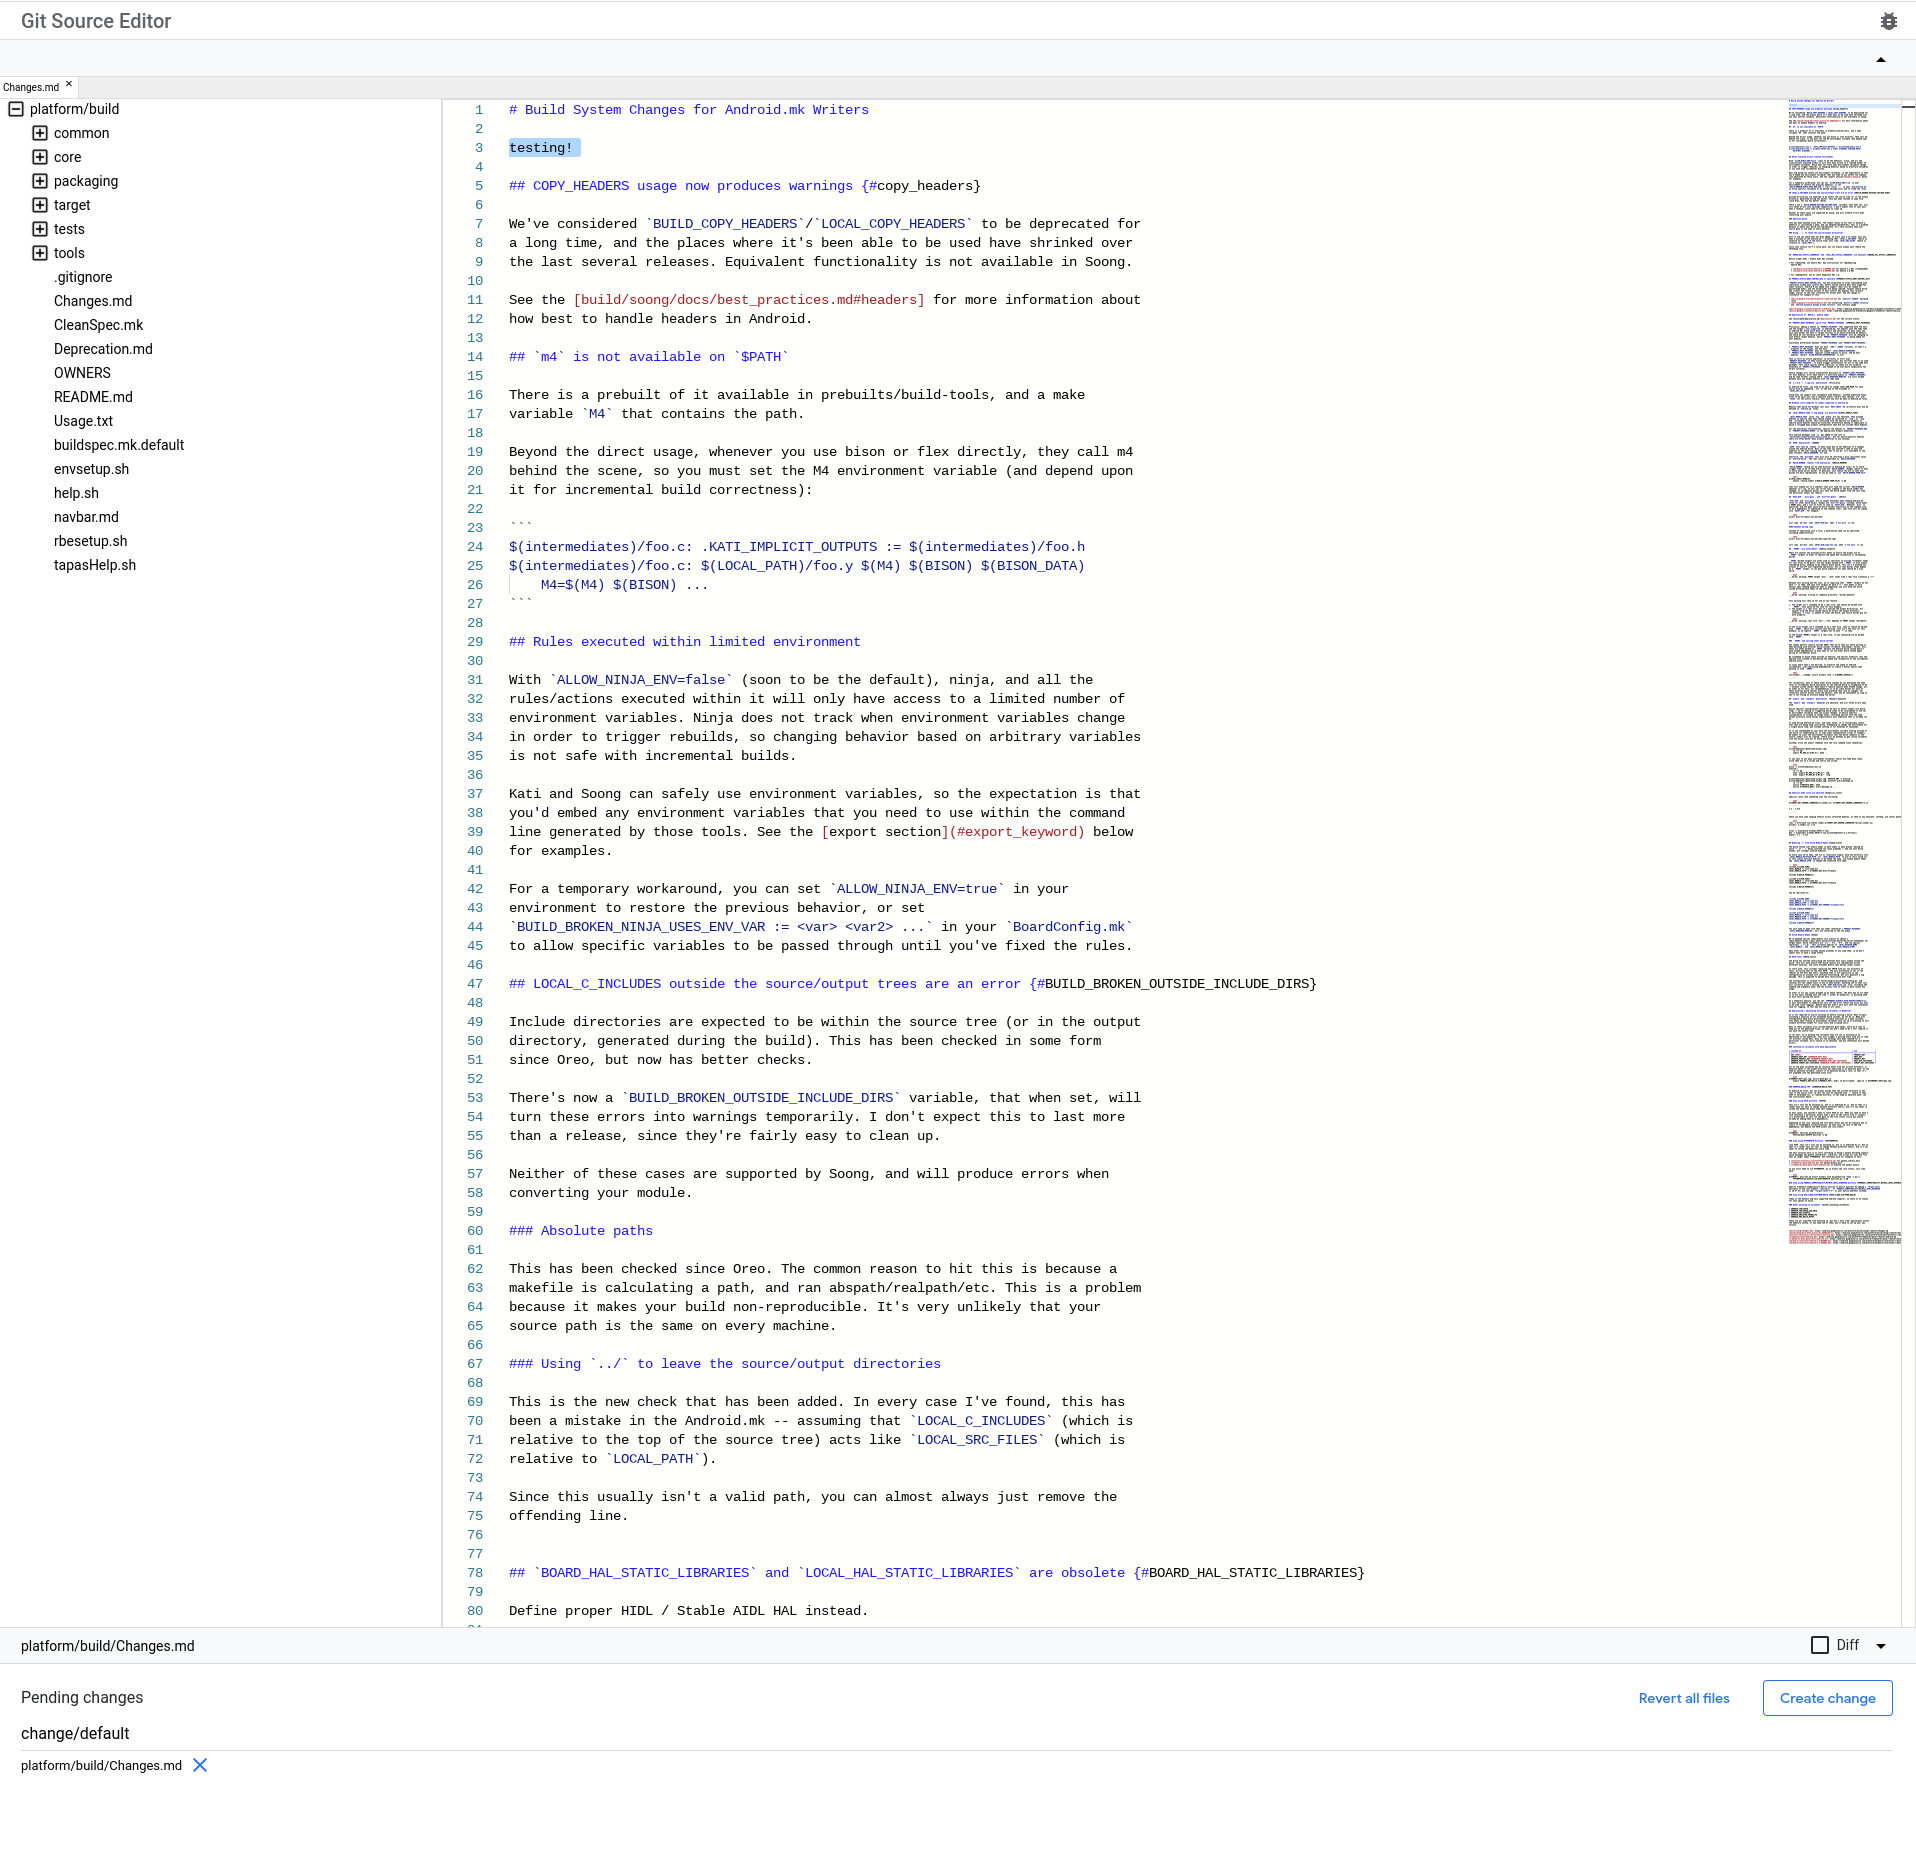
Figure 3. A file loaded into the editing pane
You can use the navigation pane to open more files within the same repo. If you open multiple files, each file appears as a tab in the row above the editing pane. Click a tab to open that file in the editing pane.

Figure 4. Tabs for loaded files
Load a change
Navigate to the change you want to edit by entering the URL of a Gerrit changelist into the file/change path box at the top of the page (see Figure 2).
Sample change link: https://android-review.googlesource.com/c/platform/build/soong/+/1284176
The files in the change open in the editing pane (see Figure 3).
If the change includes multiple files, each file appears as a tab in the row above the editing pane (see Figure 4). Click a tab to open that file in the editing pane.
Make your edits
Edit files using the text editing pane. Files you edit appear in the Pending changes list below the editing pane. If you accidentally close the tab of a file with edits, you can reopen the file with the edits intact by clicking its name in the Pending changes list.
Submit changes
You create and publish your change to Gerrit in Git Source Editor. Then you track the change's approval in Gerrit.
Create and publish the changes
Follow this procedure to create and publish the changes you’ve made.
Click the appropriate button:
- Click Create change if you're creating a new change.
- Click Update change if you are updating an existing change.
A dialog box opens.

Figure 5. Create Change dialog box
Enter a change description, which will become the change description in Gerrit. This description is required. If you are editing an existing change, you can edit its description if you want.
Optionally, clear or select the Publish on create checkbox.
This box is selected by default.
If this box is selected when you create the change, the change is immediately published to Gerrit. If the box isn't selected, the change is uploaded to Gerrit but not published.
Click Create.
The change is uploaded to Gerrit. If you selected the Publish on create checkbox, the change is also published in Gerrit. The change is linked in a notification at the top of the screen.

Figure 6. Change created notification
Track change approval in Gerrit
Track change submission status directly in Gerrit, as you would any other change.
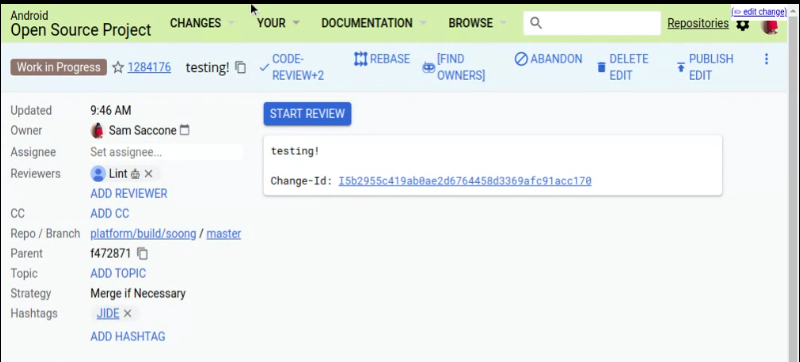
Figure 7. Tracking change submission status in Gerrit
View file diffs
Select the Diff checkbox below the editing pane to view the diffs of edits you’ve made to the file that’s active in the editing pane. This is useful when changing a file and when editing an existing change.
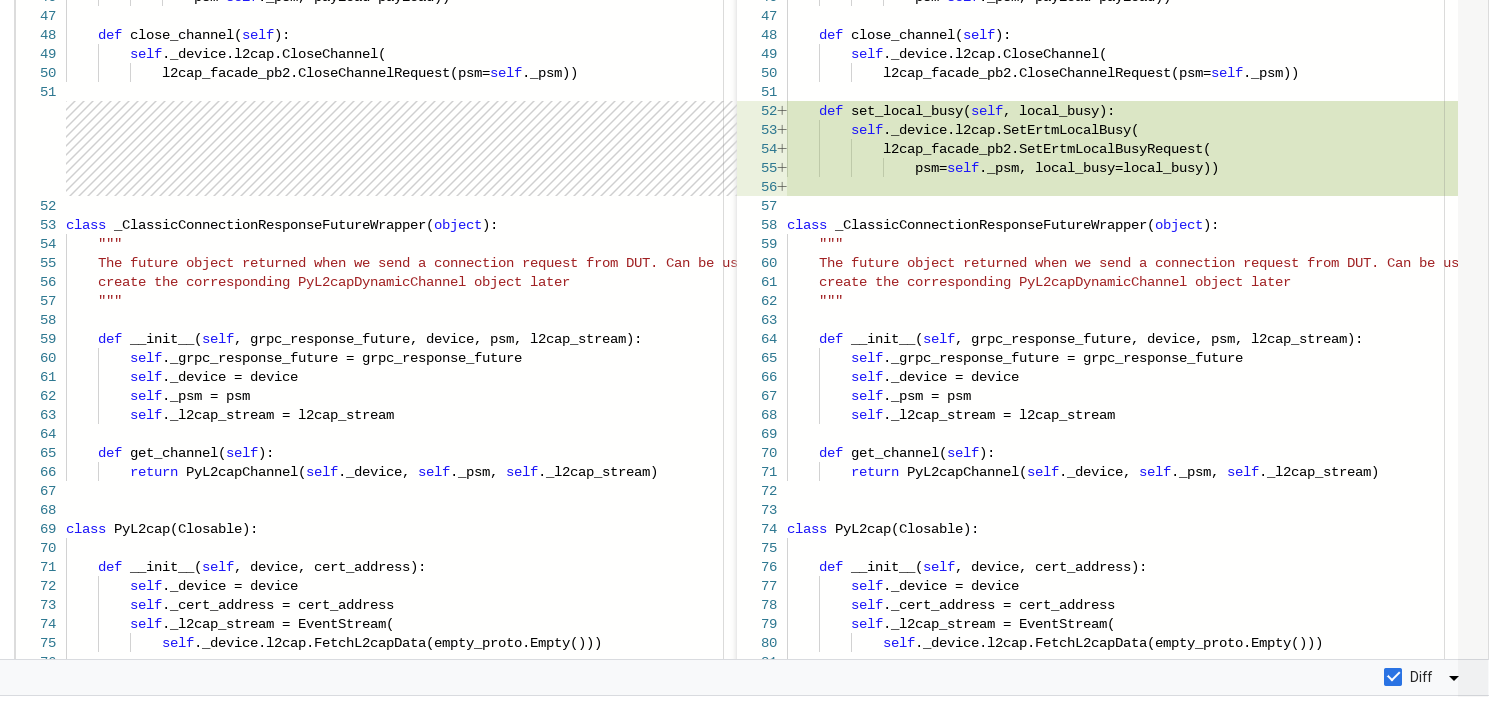
Figure 8. Viewing file diffs
Revert files
You can revert changes from a single file or from all the files in the pending changelist. Both revert options revert changes only in Git Source Editor. They will NOT update the change in Gerrit.
Revert a single file
To revert a single file, click the X next to the filename in the Pending changes list.
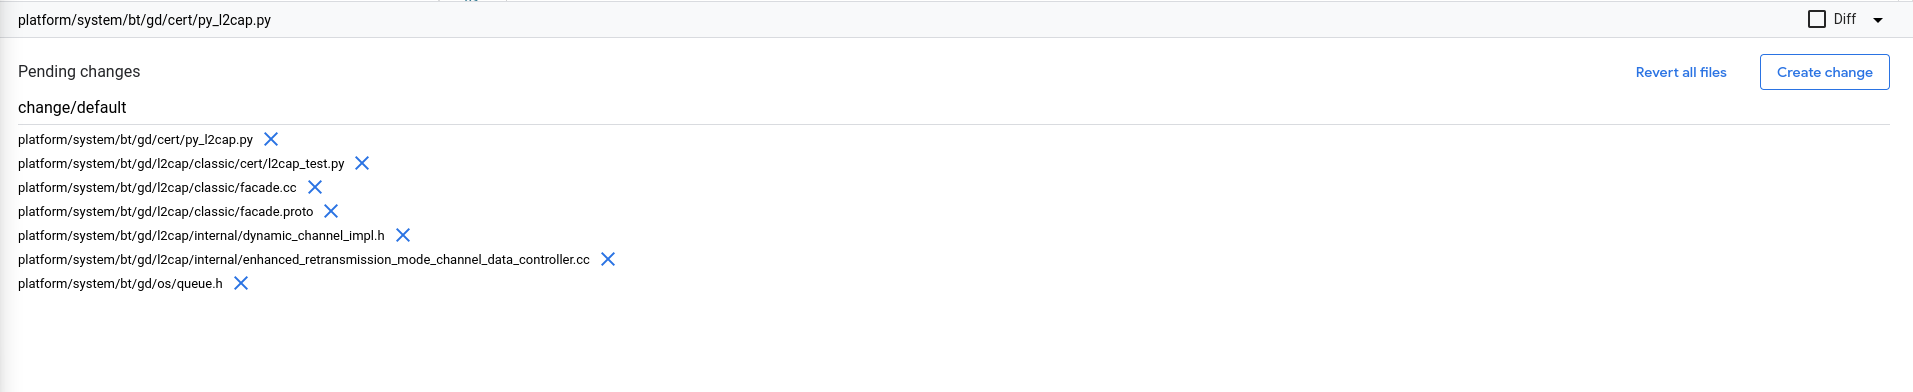
Figure 9. Pending changes section
Revert all files
To revert all files at once, click Revert all files below the editing pane.
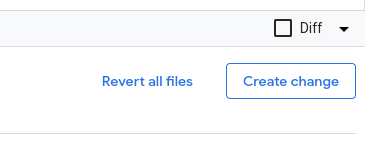
Figure 10. Revert all files button
A popup dialog box opens. Click Revert all to revert changes in all pending files, or click Cancel to retain the changes and continue editing.
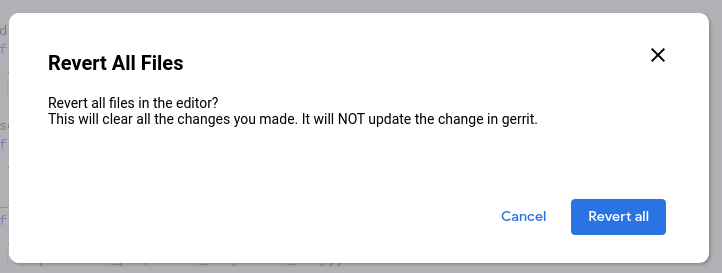
Figure 11. Revert all files confirmation dialog box
Edit a page directly from Android code search
You can open a file in Git Source Editor directly from Android code search. This is helpful if you need to locate the file before editing it.
Follow this procedure to edit a file directly from Android code search.
In Android Code Search (cs.android.com), navigate to the file you are interested in editing.
Click Edit code.
Figure 12. Android Code Search Edit code button
Git Source Editor opens with the file preselected for editing.
Select the Git branch in which you want to edit the file from the Select a git branch dropdown list, then click Pick branch.
Figure 13. Selecting a Git branch to edit
The file opens in the editing pane.
Continue editing as described in the Making Your Edits section.
You can open additional files to edit as described in the Loading files section
Resolve conflicts
To resolve conflicts:
In the Source Editor, navigate to the change. After the change is loaded, the conflicting files are listed in the bottom portion of the screen. For example, Figure 14 shows that the
Android.pbfile has a conflict.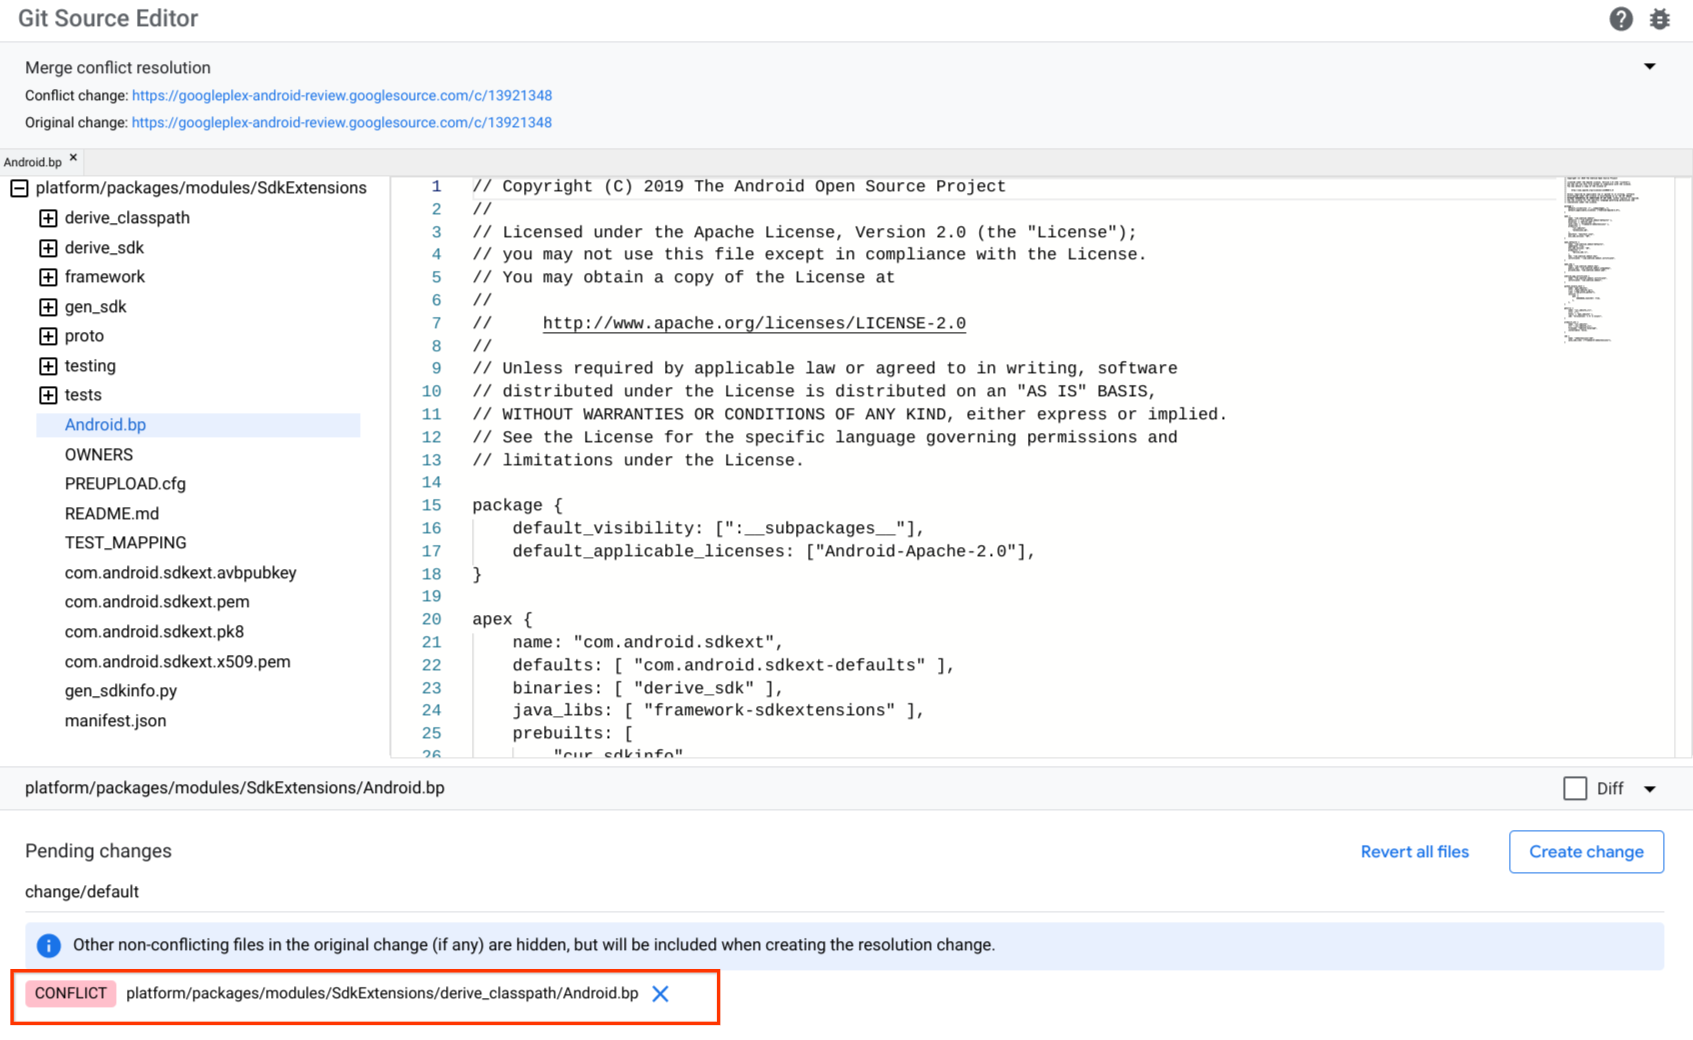
Figure 14. Source editor conflict
Click a conflicting file. The file loads and shows conflicting blocks of content in succession and within Git markers (
<<<<<<<and>>>>>>>).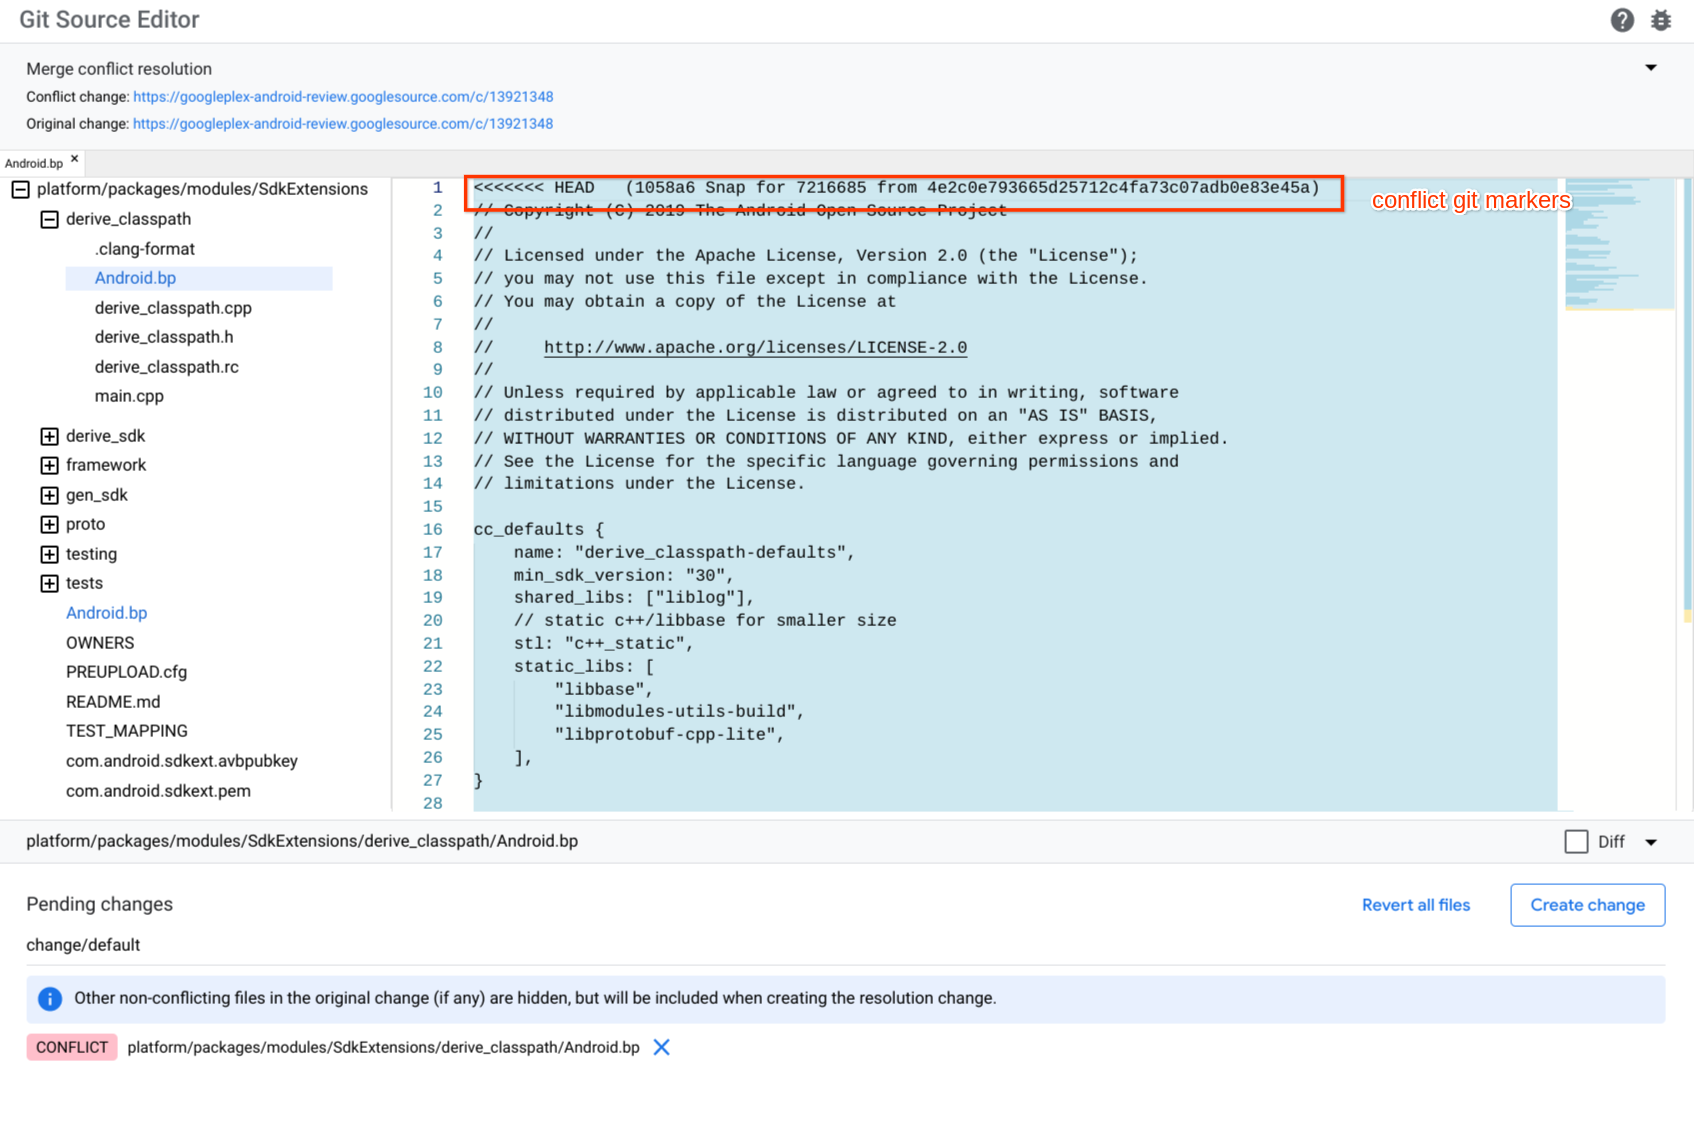
Figure 15. Source editor conflict markers
Fix the conflict by editing the file and manually removing the conflict markers around the content you want to keep. Also, remove the content and conflict markers for content you don't want to keep.
Click Create Change to create a new change. The Create Change dialog appears.
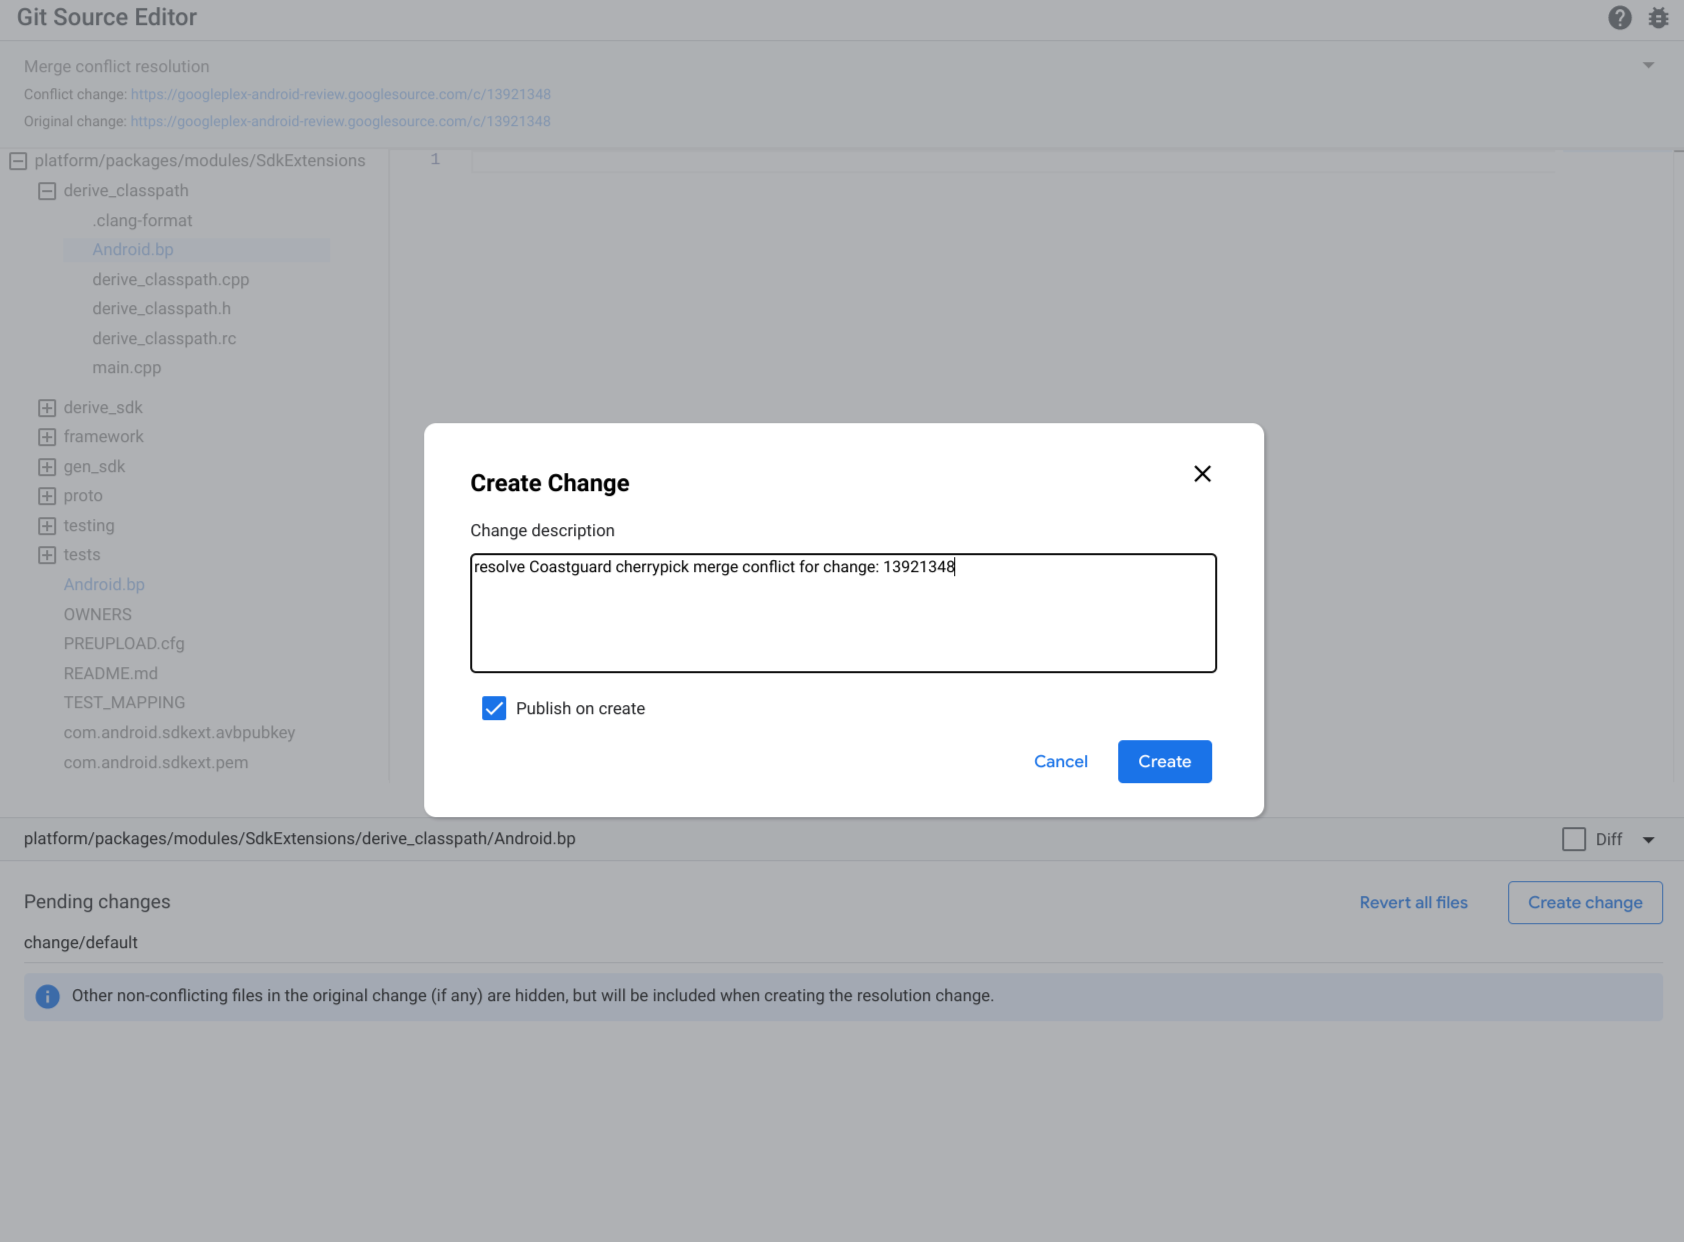
Figure 16. Create change
Type a change description and click Create.
Send feedback
Use the bug button
 in the top right corner to provide feedback about Git Source Editor.