
A number of CTS Verifier tests require an audio loopback system so that generated signals can be measured, that is, the audio signal loops back from the output to the input. For this to work, the generated signal must be loud enough to be reliably captured. To make this calibration easier, the Audio Loopback Calibration Panel is accessible from any loopback CTS test to set an appropriate signal amplitude before starting the test.
Use the Audio Loopback Calibration panel
The Audio Loopback Calibration panel is invoked using Calibrate Audio in any of the CTS Verifier tests that use audio loopback, as shown in the following figure.
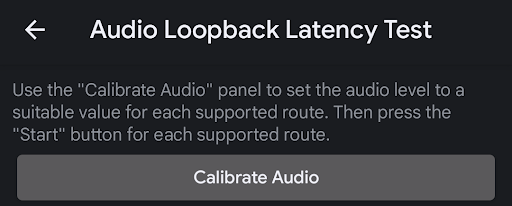
Figure 1. Audio loopback latency test.
The following figure shows the calibration panel.
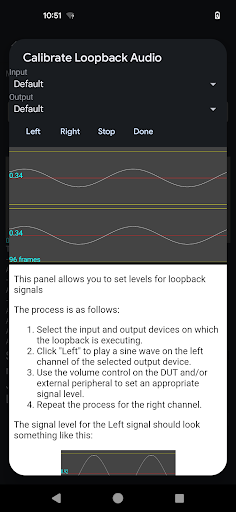
Figure 2. Calibrate loopback audio panel.
Select the loopback peripheral to calibrate
The easiest way to select the loopback peripheral to calibrate is to connect the audio peripheral to be calibrated, or to not connect any device if the loopback is between the internal speaker and microphone, and to leave the Input and Output selection set to Default.
Calibrate the left channel
Press the Left button to play a signal on the left channel of the peripheral. Adjust the volume by using the volume keys on the DUT. If the peripheral is an external USB interface with its own input level controls, adjust them as appropriate until you see an appropriate signal on the display.
Signal too low
The following figure shows a signal on the left channel with insufficient amplitude to be used for testing. Adjust the signal to a higher level.
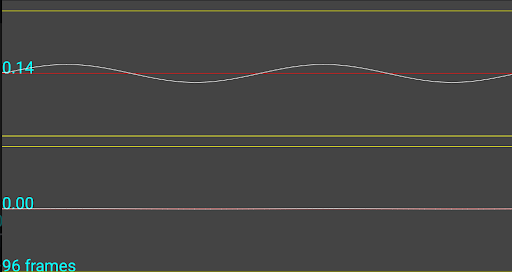
Figure 3. Signal too low.
Signal too high
The following figure shows a signal on the left channel with too much amplitude such that it is clipping at the capture device and is not an appropriate signal for testing. Adjust the signal to a lower level.
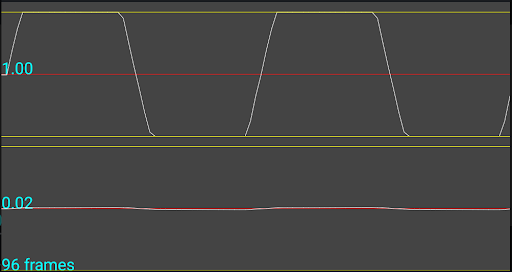
Figure 4. Signal too high.
Signal just right
The following figure example shows a signal on the left channel which is optimal for testing.
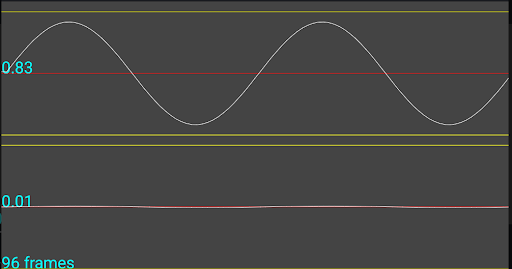
Figure 5. Signal just right.
Calibrate the right channel
Press the Right button to play a signal on the right channel of the peripheral. Follow the process described in Calibrate the left channel to set the optimal level for testing.
Calibrate a 1-channel capture device
In the case of a capture peripheral with only 1 channel (that is, the internal mic or a loopback plug connected to the analog headset jack), the display shows the same signal on both channels irrespective of which channel is playing. This behavior is as expected and the signal level must be set as described in Calibrate the left channel.
Explicit Input and Output peripheral selection
As stated in Select the loopback peripheral to calibrate, the simplest way to calibrate a given loopback peripheral is to connect it (or leave none connected for the Speaker or Microphone route) and select Default in the Input and Output menus. However, to help with debugging, you can choose any available devices from the menus. These lists are populated with a list of all the currently available peripheral input and output routes.