
This page covers the instructions for running the audio tests in CTS Verifier (CTS-V).
General instructions
The following procedures apply to all tests:
- Test setup: For each test, you need a device under test (DUT), which is the Android device you're testing, and an installed version of CTS-V associated with the Android OS version running on the DUT. For more general information on CTS-V requirements and setup, see Using CTS Verifier.
Test information: To run an audio CTS-V test, launch the CTS-V app, then select the preferred test from the CTS Verifier test list. Opening a test for the first time displays the info panel for that test, which contains the following information:
- Test purpose
- Test protocol
- Required peripherals
- Reference to the relevant CDD section
To close the info panel, tap OK. To view the info panel at any time during testing, tap the ? button.
Test runs: Use the test-specific instructions on this page to run each audio test.
- When the test passes, the green checkmark Pass button is enabled. Record a passed test by tapping this button. Some tests also display the message "PASS" above the bottom row of buttons.
- Record failed tests by tapping the red X button.
Some tests on this page require no additional peripherals. Others require a wired analog or USB headset. For tests that require specialized USB peripherals such as a USB audio interface, see USB Audio CTS Verifier tests. For tests of Musical Instrument Digital Interface (MIDI) functionality that require an audio loopback dongle, see CTS Verifier MIDI tests. For other tests that require an audio loopback dongle or external speakers, see Audio framework CTS Verifier. For Pro Audio testing procedures, see CTS Verifier Pro Audio test. For spatial audio head tracking latency testing procedures, see CTS Verifier Head Tracking Latency test.
Latency compliance tests
The following tests determine compliance with CDD audio latency requirements.
Cold Start Input Latency test
The Audio Cold Start Input Latency test measures the time required to record audio from a suspended (cold) audio system.
To run the Audio Cold Start Input Latency test, follow these steps:
- Select the API to test. The latency requirement must pass for only one API.
Tap Start to begin the test run. The test measures the time required to start recording audio from a cold audio system. Results are displayed above the test buttons with a PASS or FAIL indication.
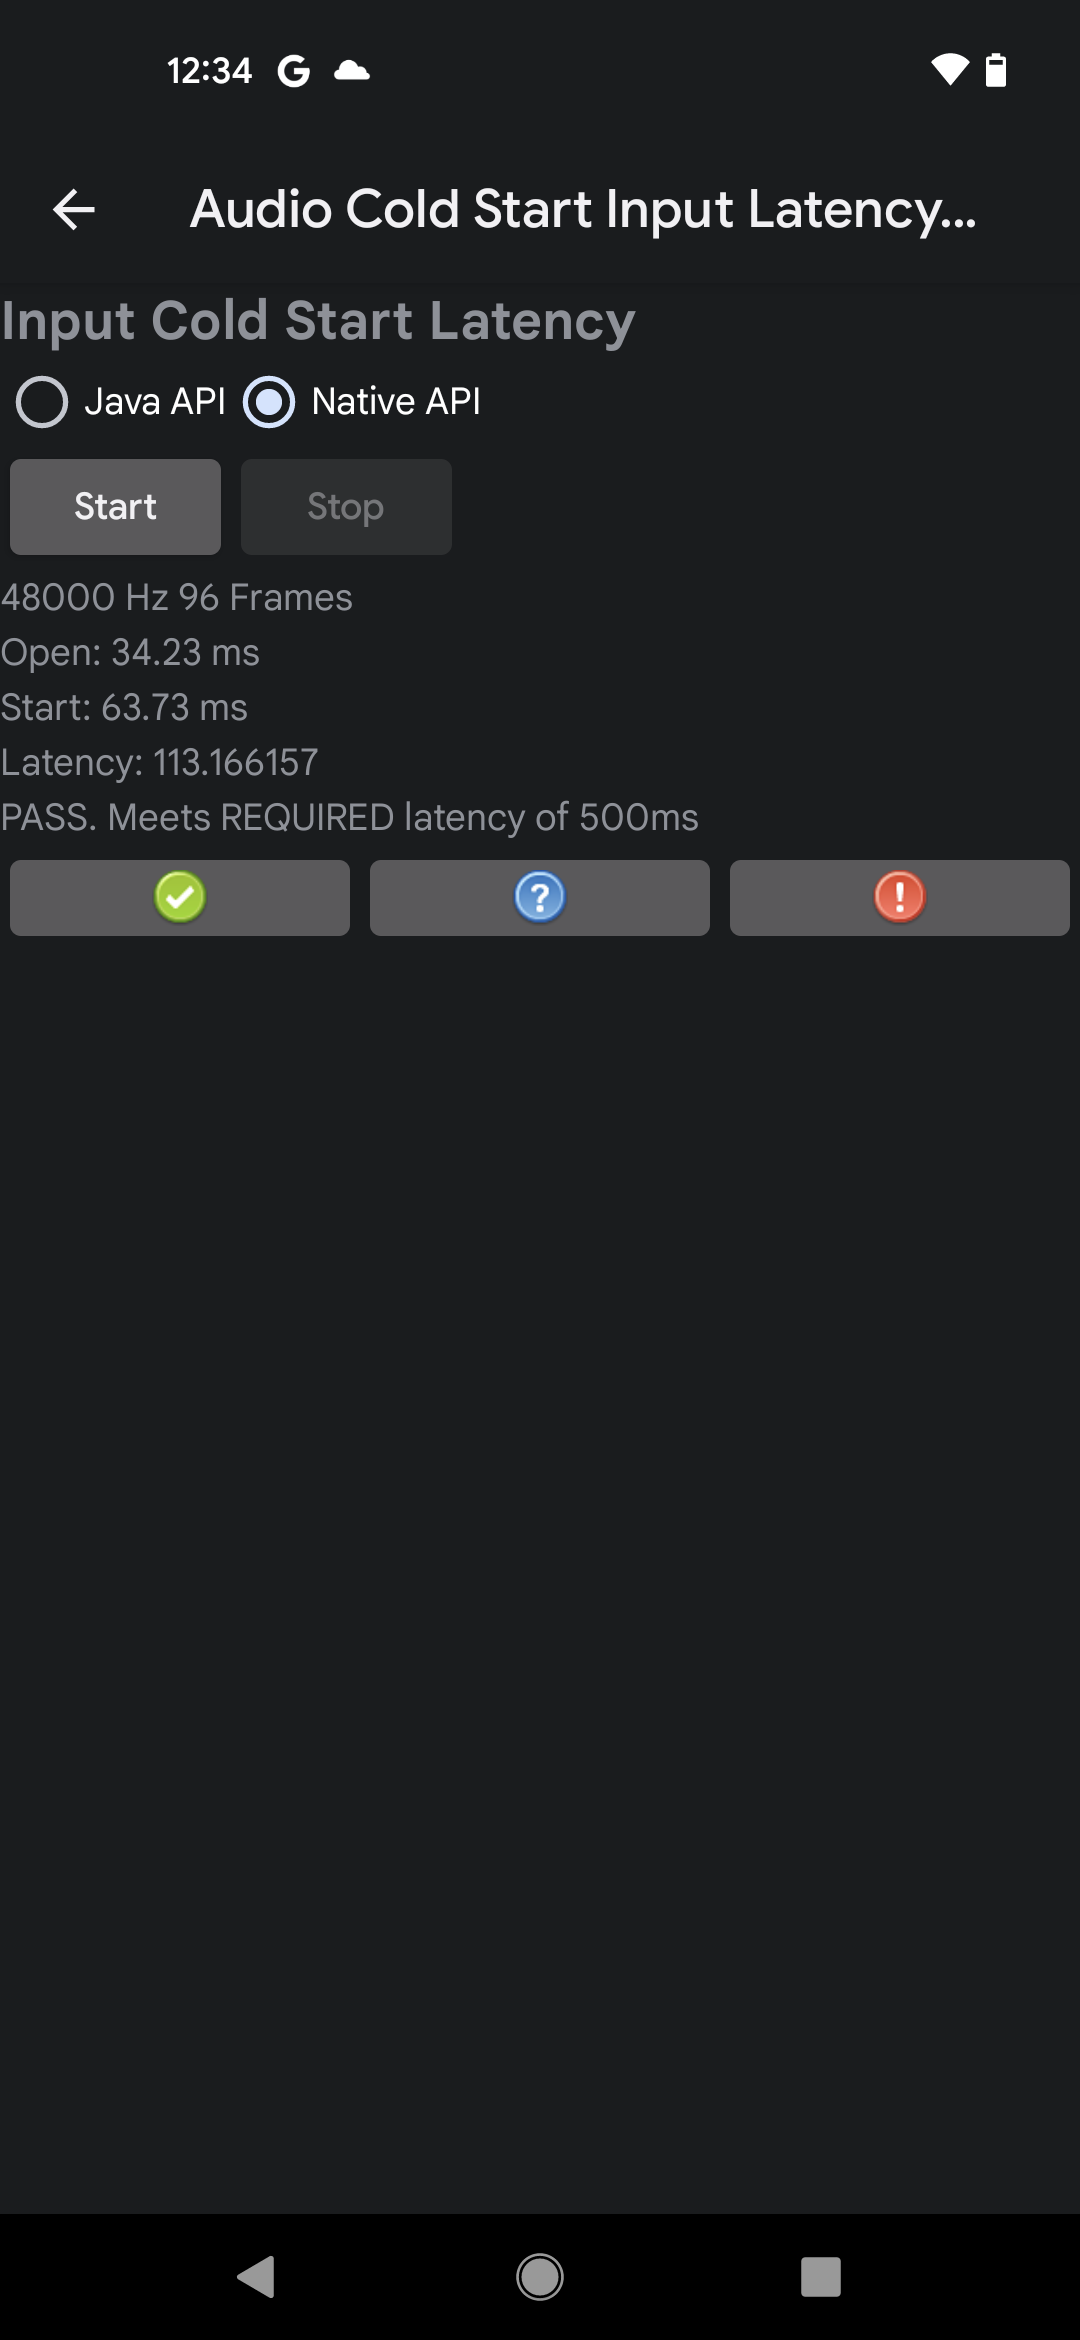
Figure 1. Example results for a passed test on the Native API
If the measured latency meets the CDD requirements, the test passes.
Cold Start Output Latency test
The Audio Cold Start Output Latency test measures the time required to play audio from a suspended (cold) audio system. This test has the following requirements:
- Device requirements. Go to Settings > Sound & vibration and deactivate Touch Sounds.
To run the Audio Cold Start Output Latency test, follow these steps:
- Select the API to test. The latency requirement must pass for only one API.
Tap Start to begin the test run. The test plays a silent audio track and measures the time from the start of playback to the time the track appears in the output.Results are displayed above the test buttons with a PASS or FAIL indication.
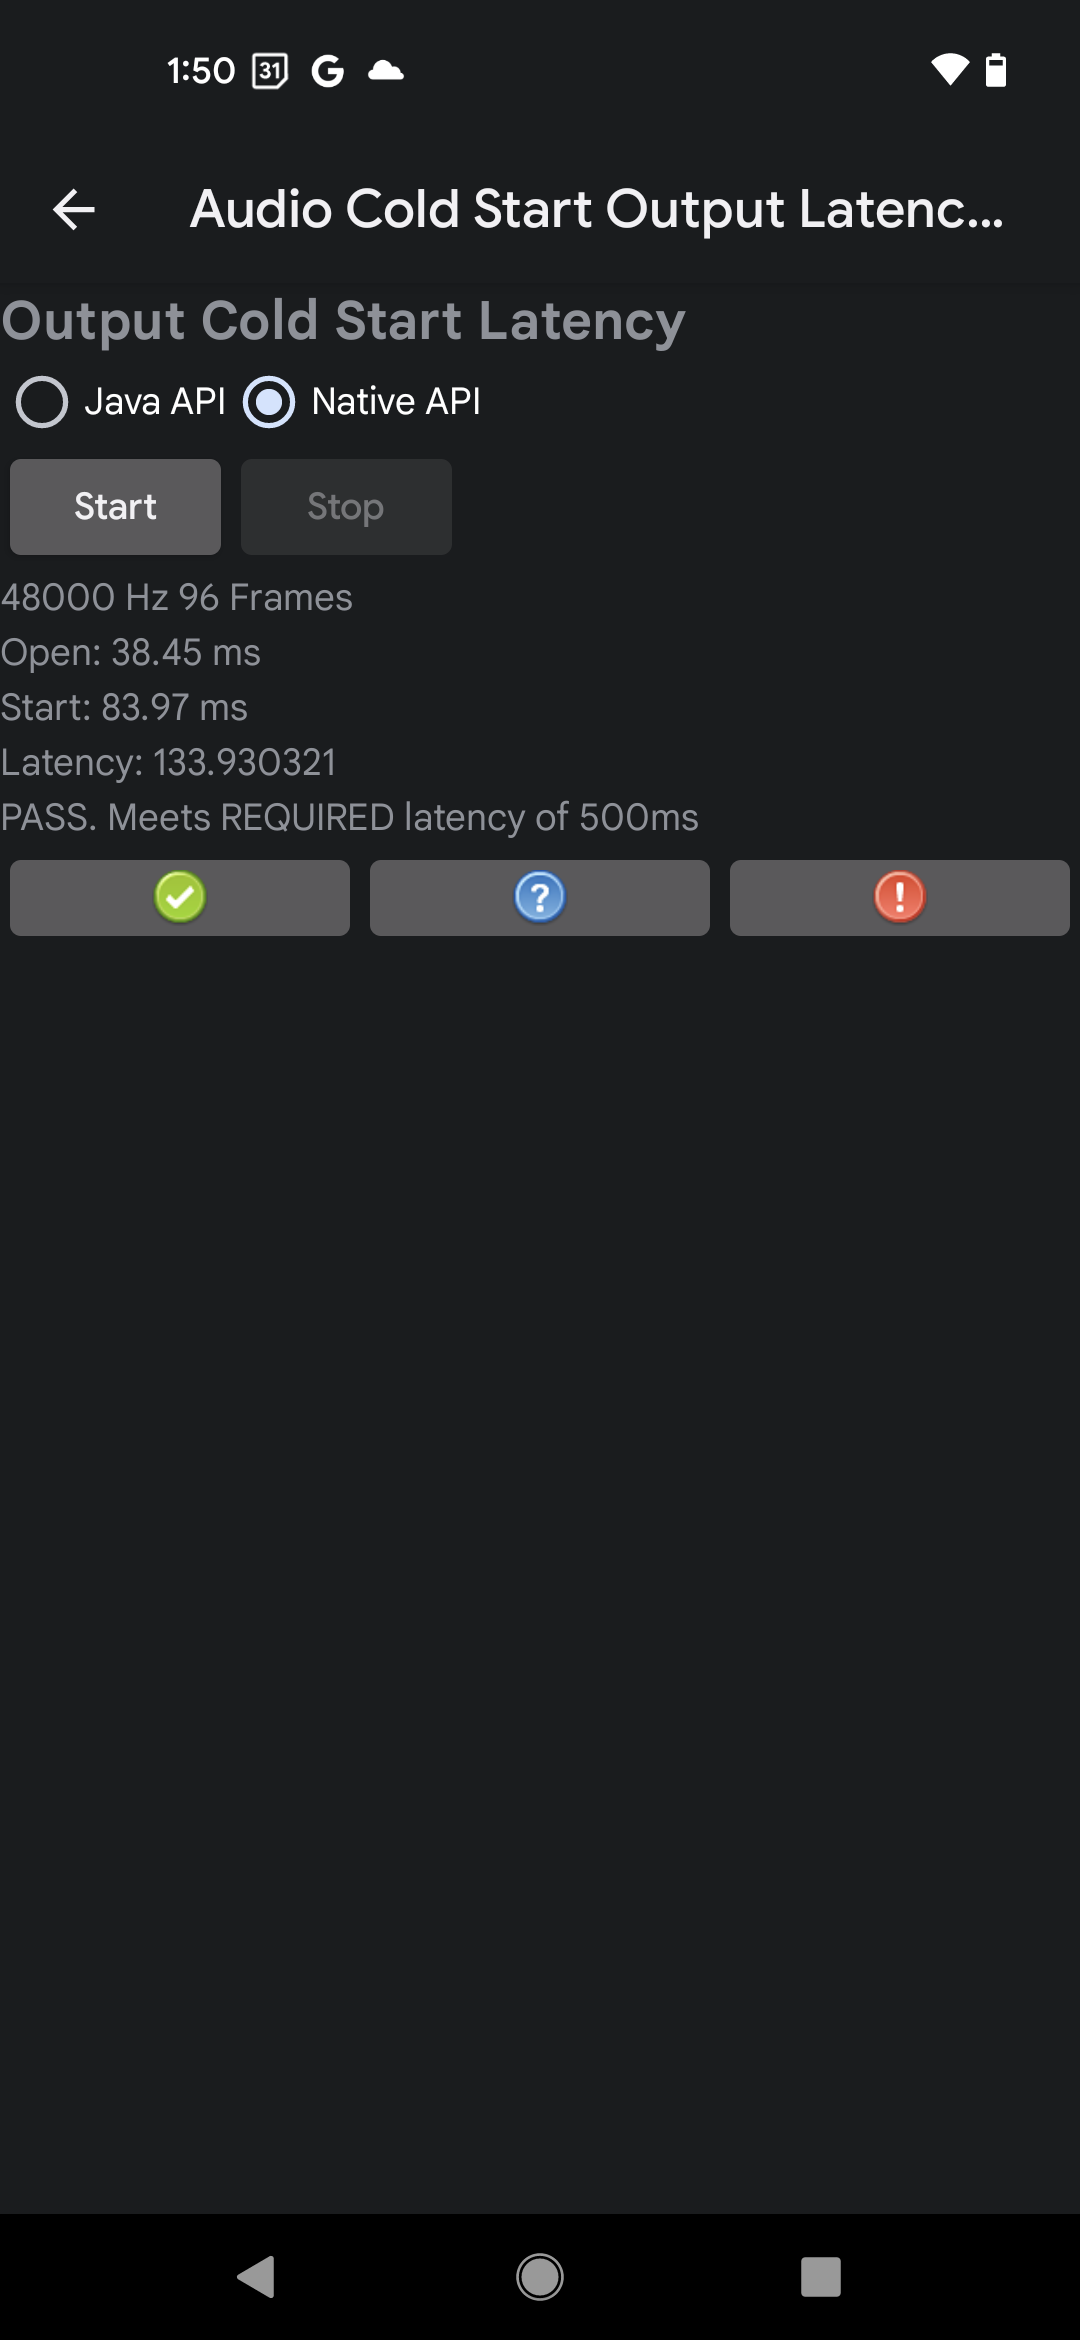
Figure 2. Example results for a passed test on the Native API
If the measured latency meets the CDD requirements, the test passes.
Audio Tap To Tone test
The Audio Tap To Tone test determines the time required for audio triggered by a user action on the screen to appear at the output of the audio system. The test uses the internal microphone to measure the time between a screen interaction and a tone played on the internal speaker. The overall result is calculated as the average of five successful measurements.
Guidelines for a successful tap trigger
This test listens for the physical TICK sound made by the tester's fingernail striking the screen in the activation field to indicate screen interaction. The sound also activates tone playback. Because the TICK can be difficult to detect, it's important to set up the test environment and execute the tap trigger precisely.
Use the following guidelines to achieve a good tap trigger during the test:
- In a quiet room, place the device on a table, screen side up.
- Strike the screen with an index finger, making sure that the fingernail and
fingertip both contact the screen so that the fingernail strike creates an
audible TICK sound.
- Striking with only the soft part of the fingertip won't create the trigger sound.
- Strike the screen ONLY ONCE and quickly withdraw the finger. Multiple strikes confuse the measurement.
For a measurement to succeed, the test must be able to detect both the activation TICK and the generated tone. You might need to adjust both how hard you strike the screen or the volume of the playback to obtain a successful measurement.
Test procedure
To run the Audio Tap To Tone test, follow these steps:
- Disconnect all wired or Bluetooth audio peripherals from the DUT.
- Select the API to test. The latency requirement must pass for only one API.
- Tap Start to begin the test.
Tap the screen once with your fingernail as described in Guidelines for a successful tap trigger. A strong TICK sound from the fingernail striking the display is necessary to register the start of the measurement.
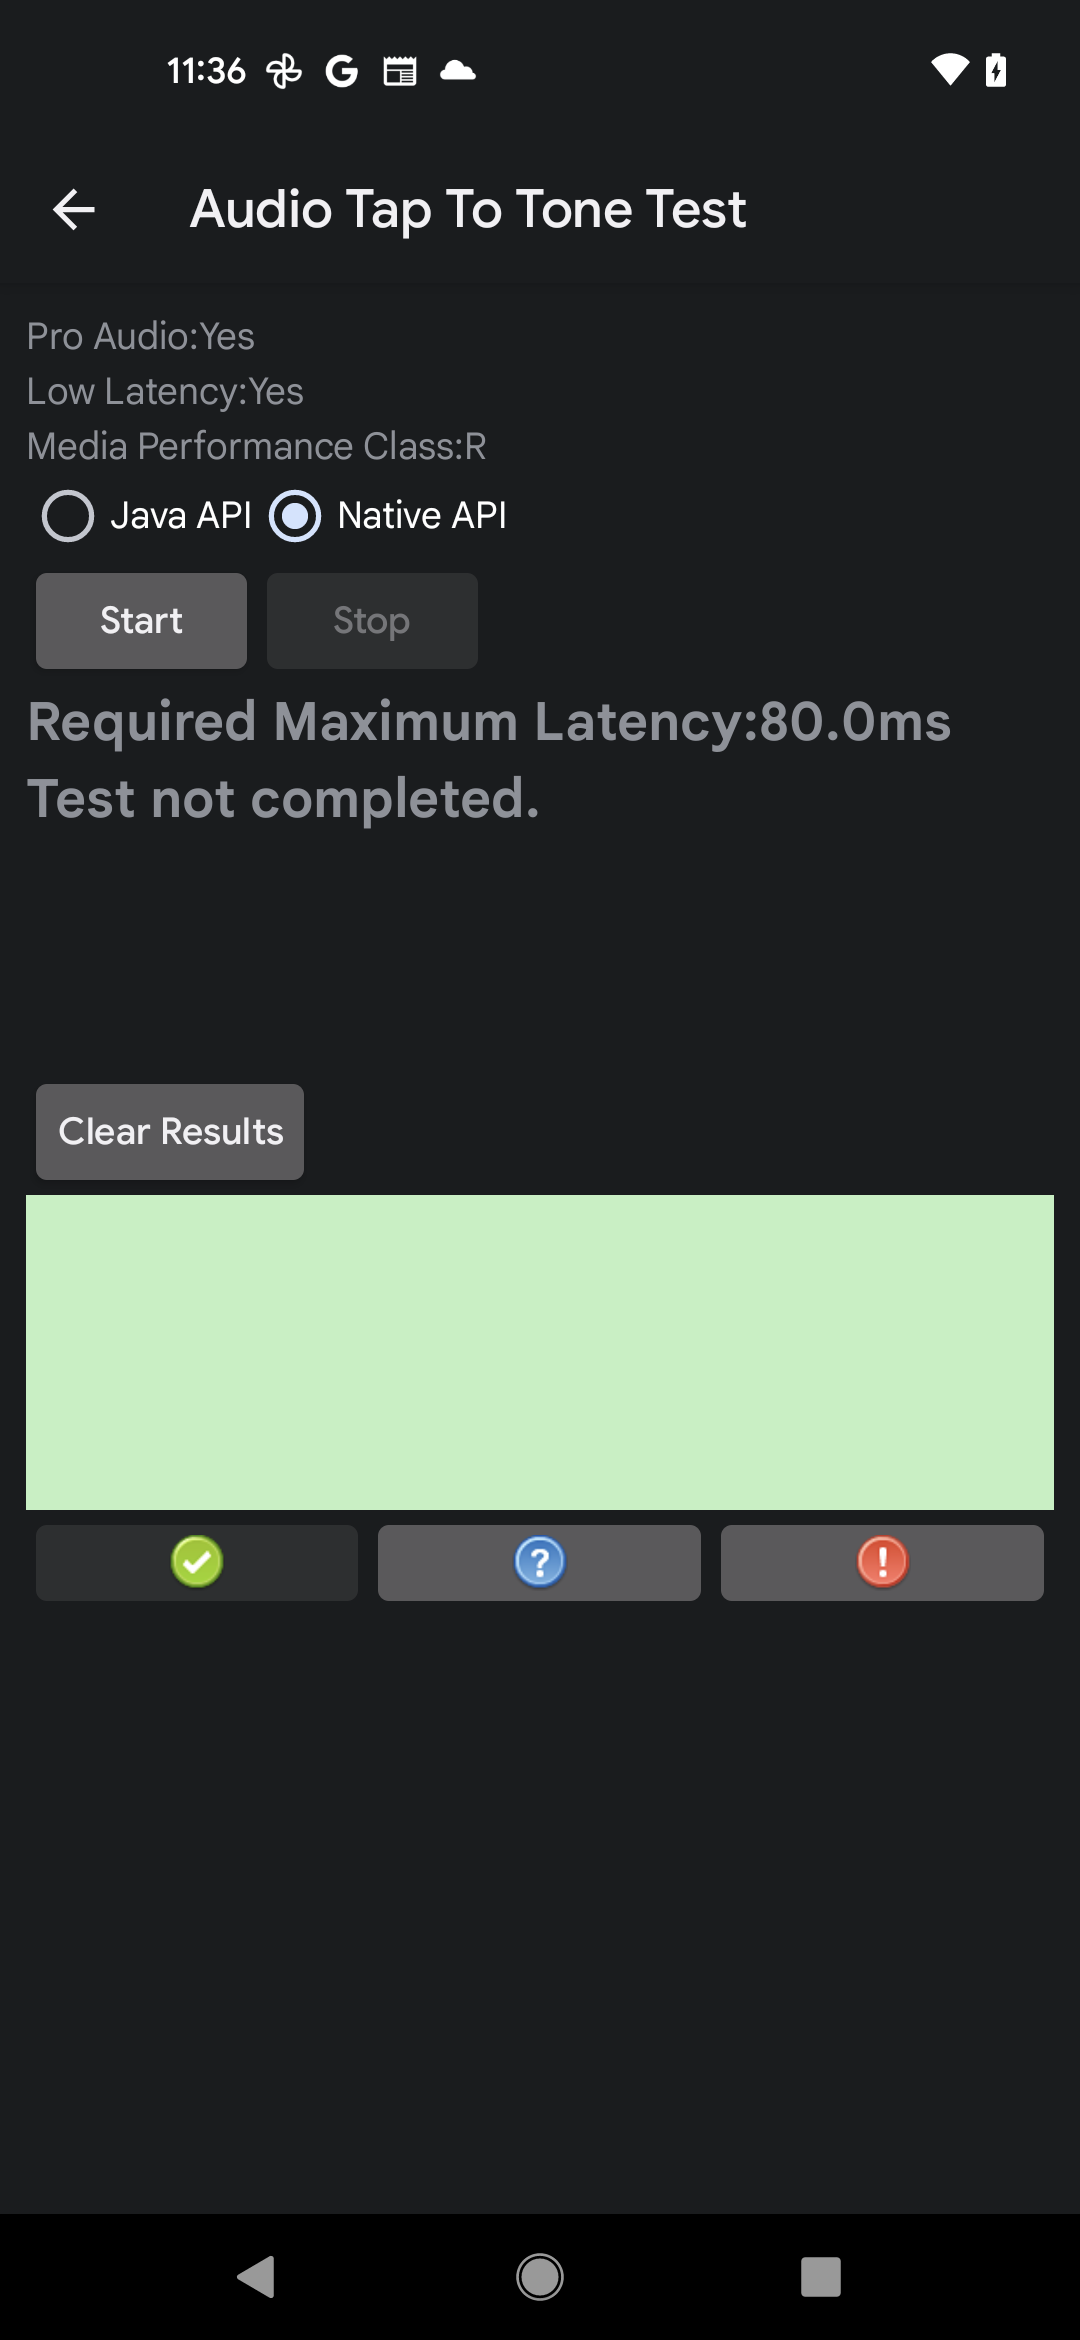
Figure 3. Audio Tap To Tone test, incomplete
Wait for measurement results to display, then repeat steps 3 and 4 until the device has made five successful measurements.
Tap Stop to end the test.
Evaluate the test results.
- Within the green rectangle, the red lines indicate the trigger TICK and the resulting tone.
- If the test average reports a PASS, report the test as passed.
- If the test average reports a FAIL, report the test as failed.
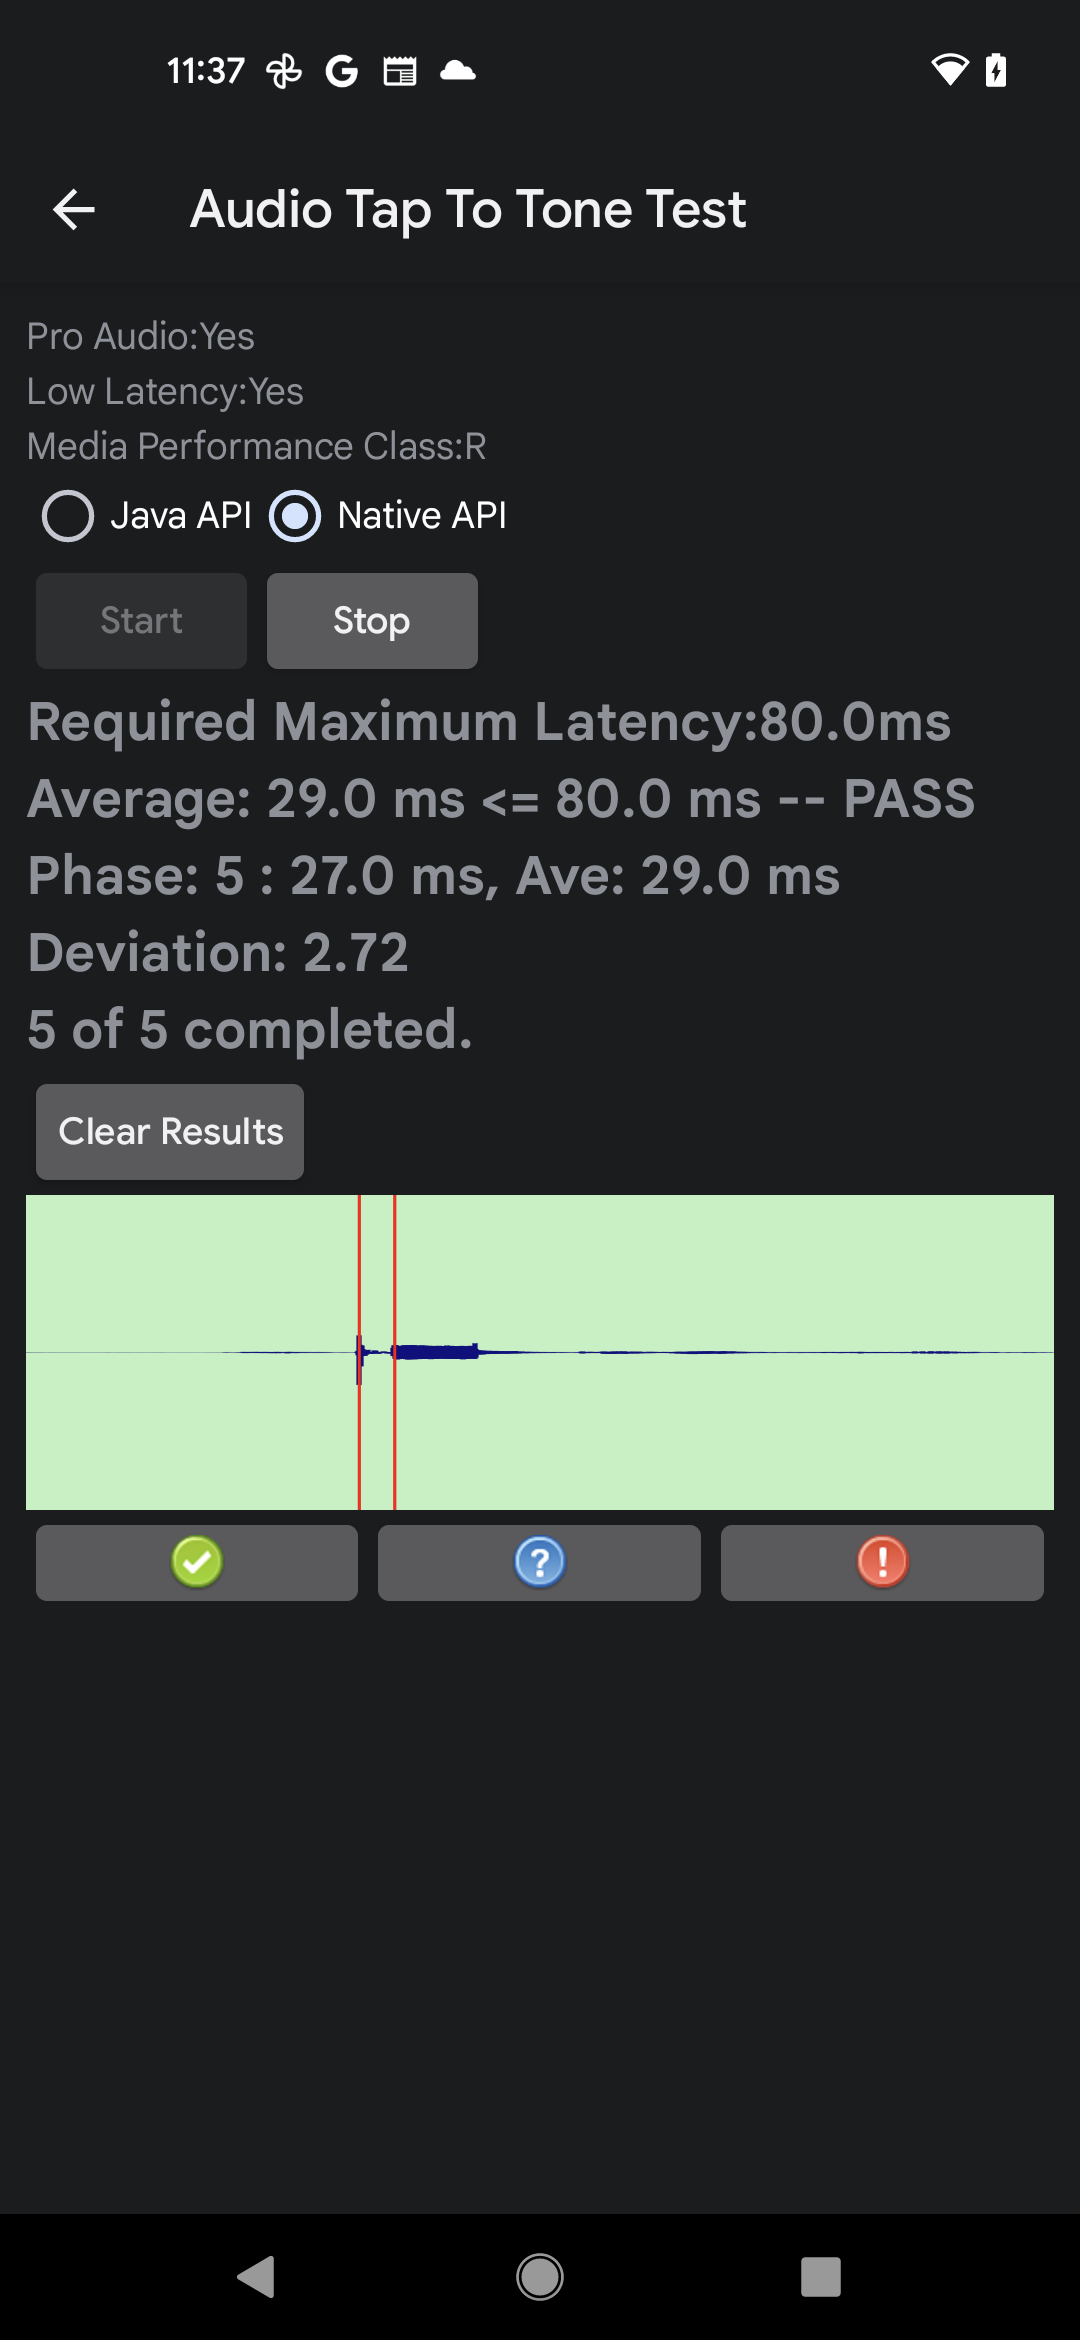
Figure 4. Audio Tap To Tone test, complete
Tests of basic audio system functionality
The following tests determine whether the audio system on the DUT functions correctly.
Analog Headset Audio test
The Analog Headset Audio test verifies the basic functionality (audio signal playback, plug intents, media transport buttons) of an analog headset connected to a DUT. This test has the following requirements:
- Required peripherals: An Android-compatible analog headset with a 4-conductor, 3.5 mm phone plug is required.
An example headset and plug are shown in the following figures:
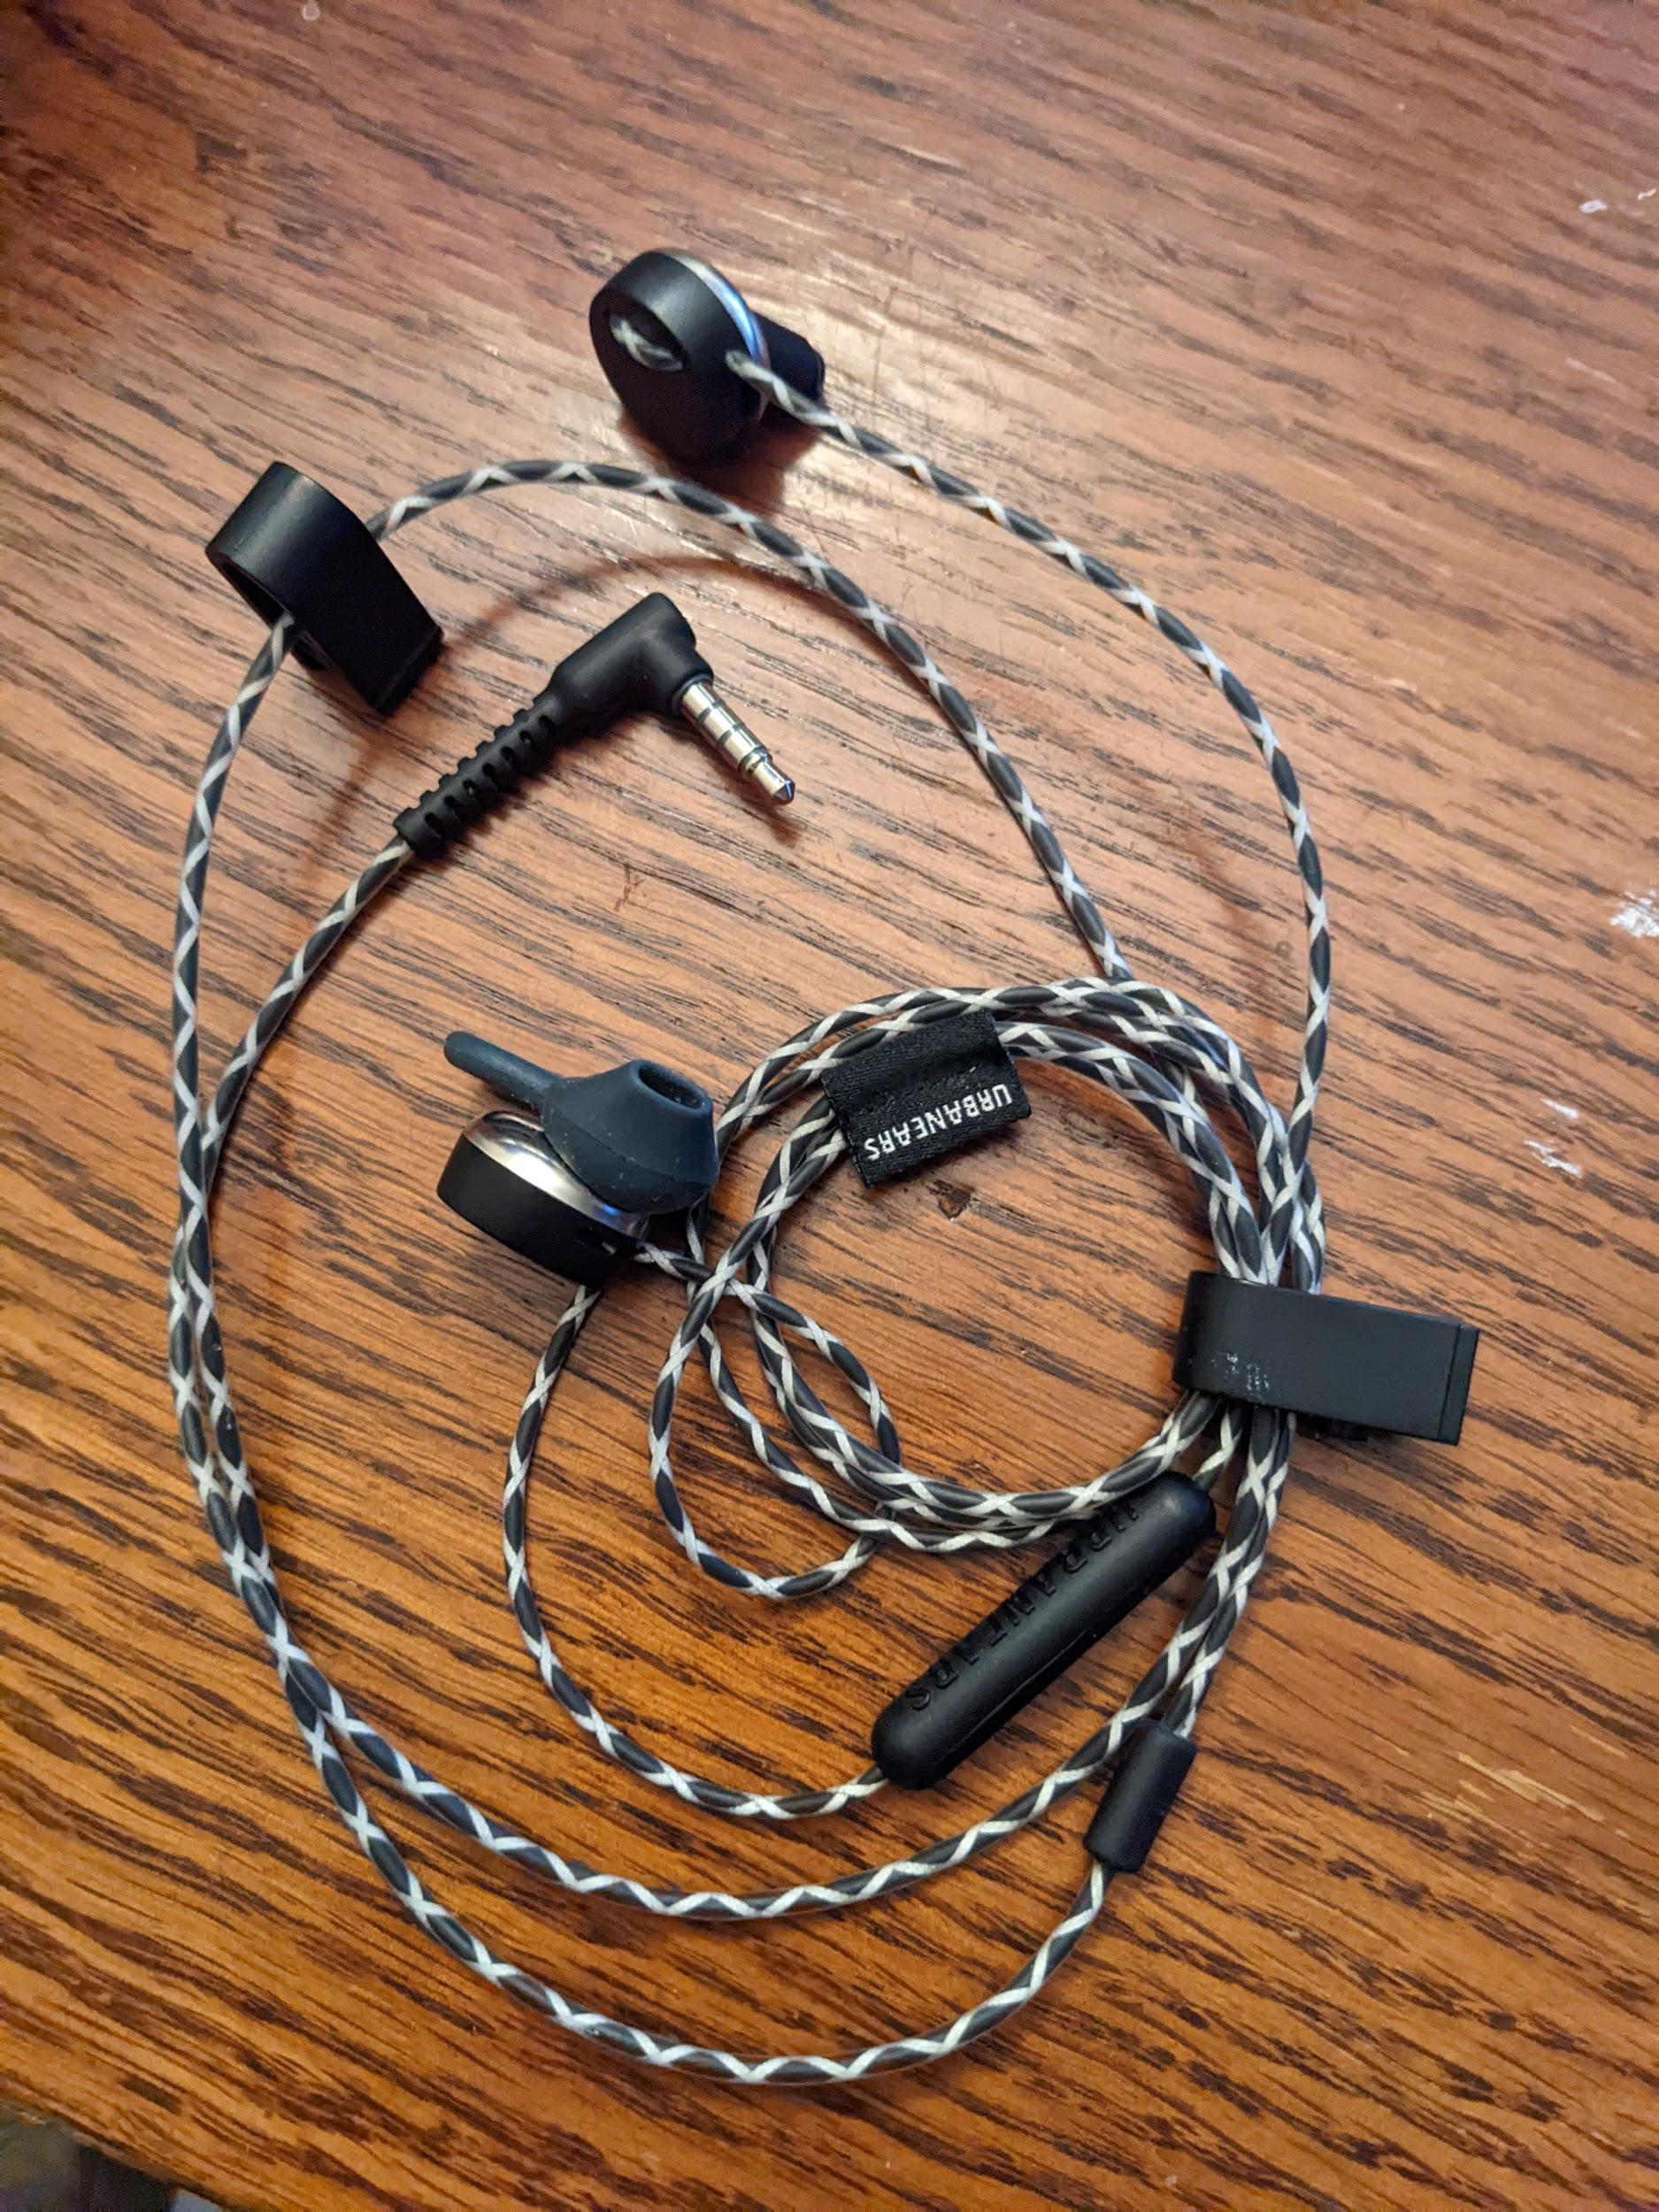
Figure 5. Example Android-compatible analog headset
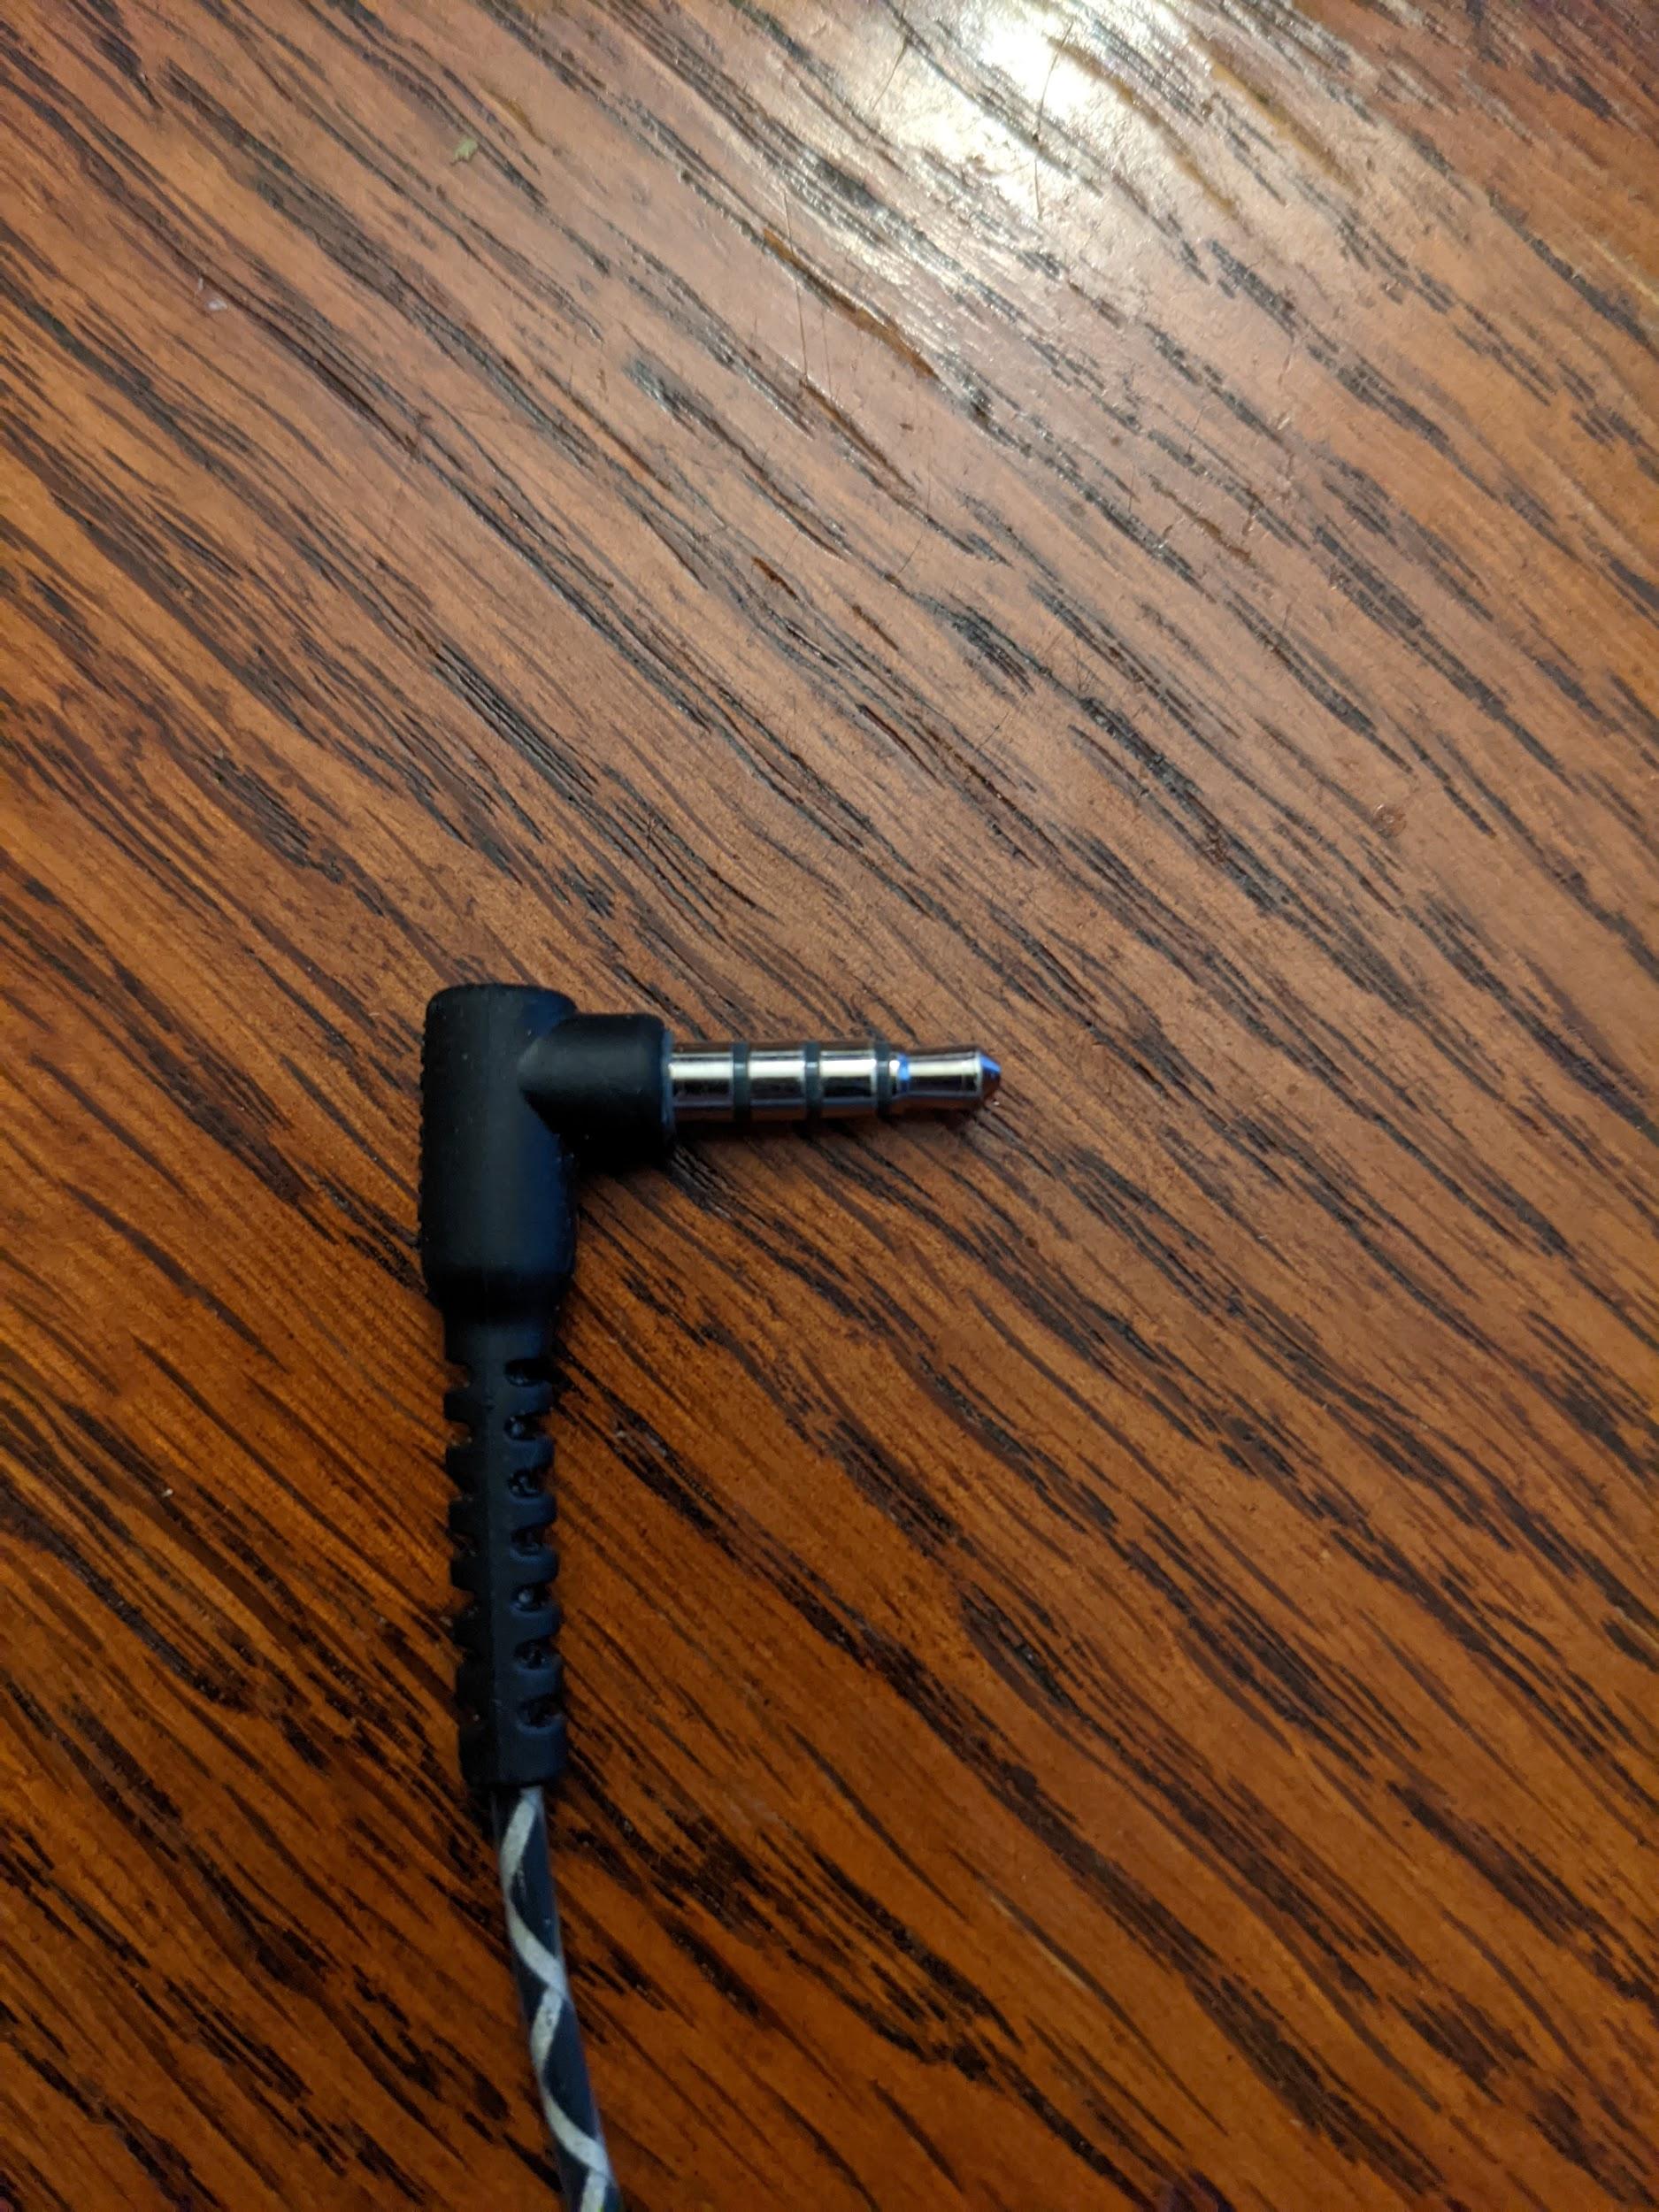
Figure 6. Example 4-conductor, 3.5mm analog phone plug
These are widely available and often identified with the term Built For Android, though many analog headsets are compatible for purposes of this test.
- Device requirements: The DUT must implement a 3.5mm headset port. If the DUT doesn't have a 3.5mm headset port, indicate that during the test.
To run the Analog Headset Audio test, follow these steps:
Verify whether the DUT has an analog headset port:
- If the DUT has an analog headset port, tap Yes.
- If the DUT doesn't have an analog headset port, tap No. The test is marked as PASS. No headset port available and you can move on to the next test.
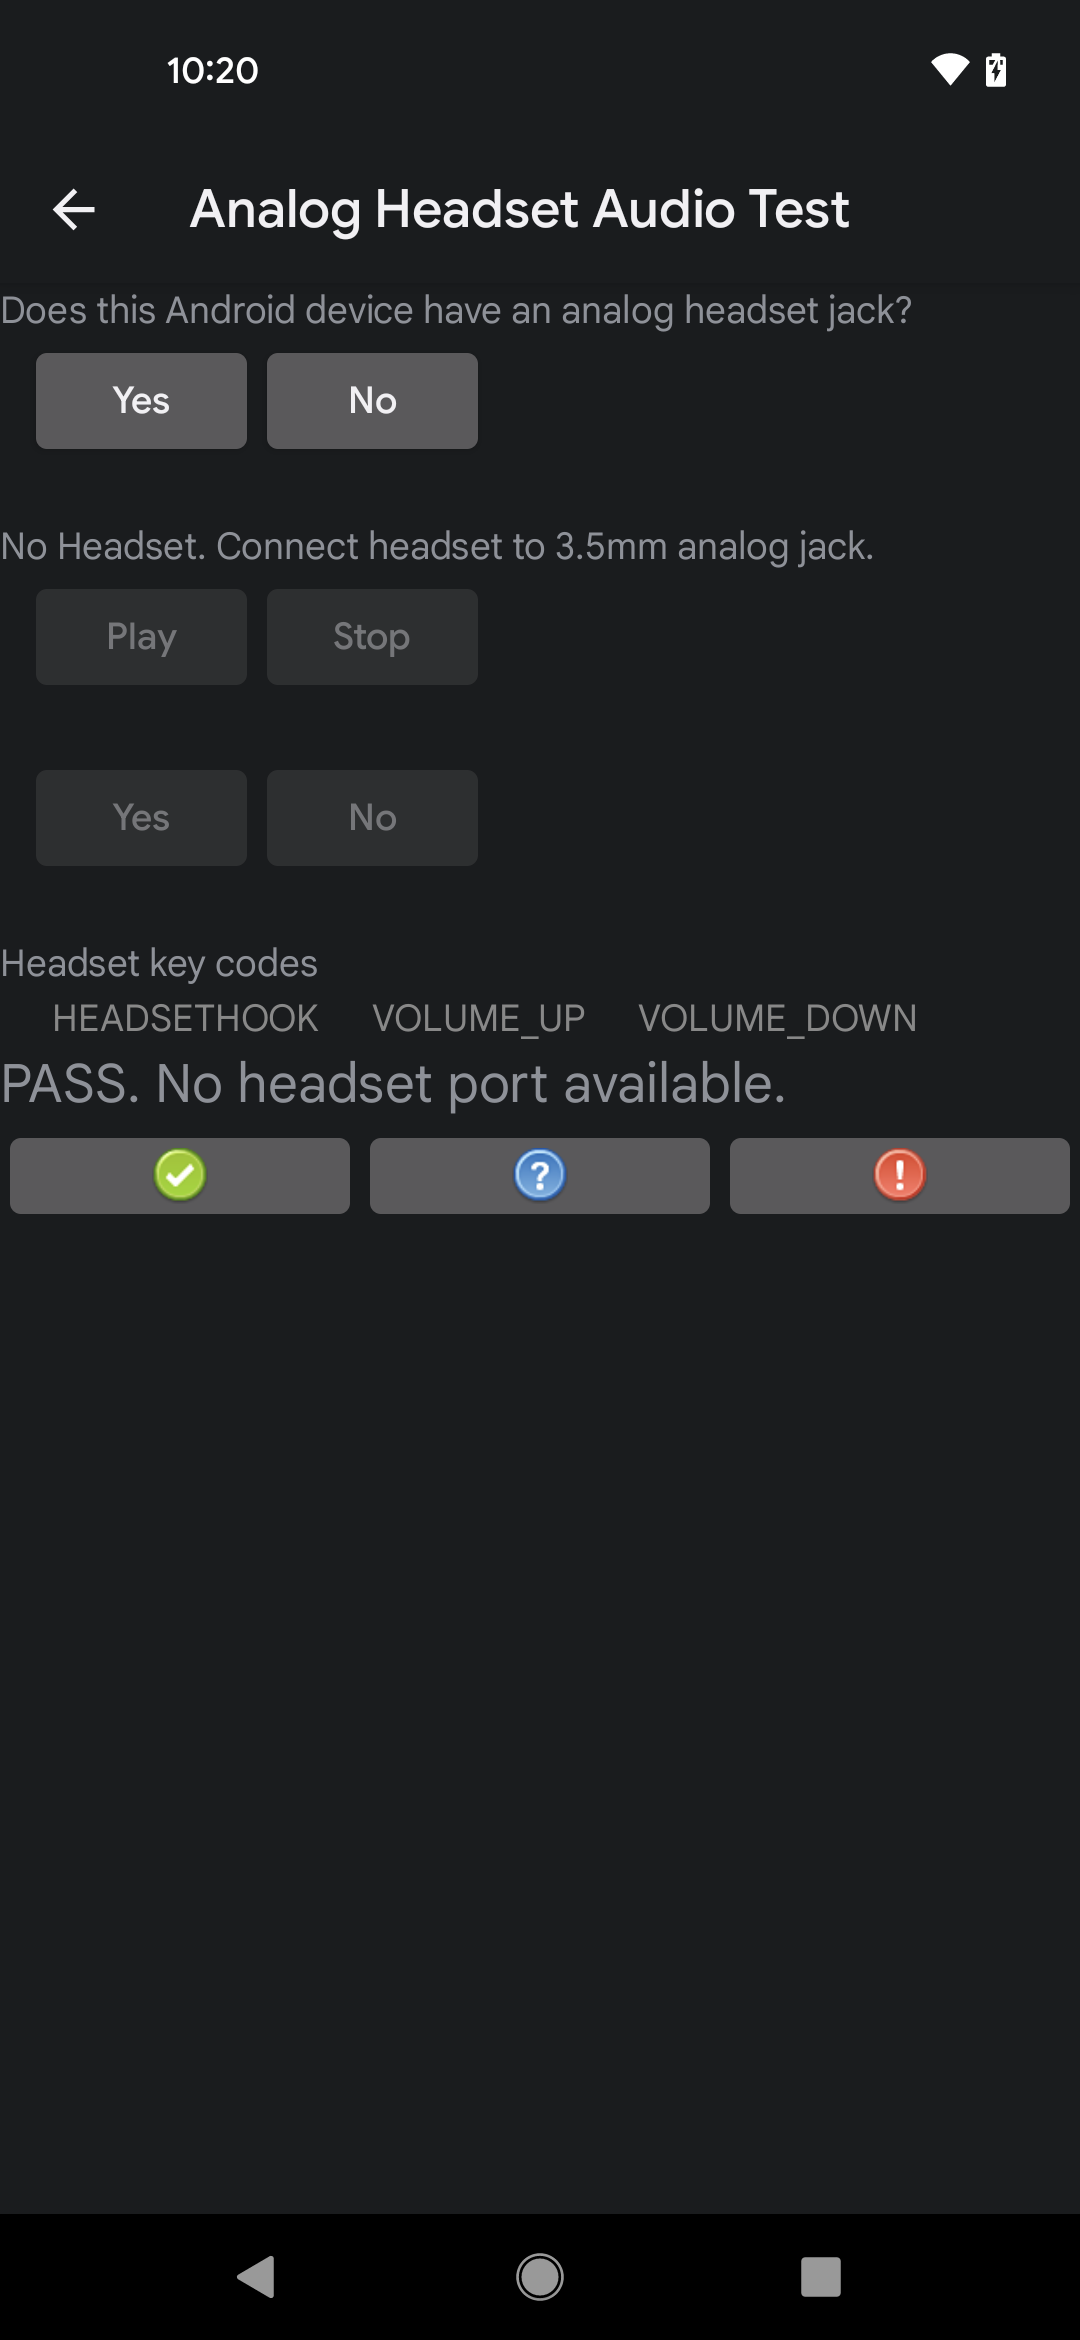
Figure 7. Test result for a DUT with no analog headset port
Insert the analog headset peripheral into the analog headset port on the DUT and verify that a message displays confirming that the plugin notification intent has been received. This message verifies that the DUT has an analog headset port. If no message displays, there's a problem with the plugin intents on the DUT, and the test fails.
Tap Play and verify that a tone is played in the headset (you might need to adjust the volume to hear the tone). Tap Stop to stop playback.
- If a tone plays in the headset, tap Yes.
- If no tone plays in the headset, there's a problem with the audio playback system, and the test fails.
One at a time, press the Volume Up, Volume Down, and Headset HookMedia Transport buttons on the analog headset and verify that the corresponding label in the analog headset audio test lights up when each button is pressed. This confirms that the DUT recognizes the button presses.
- When all three labels have lit up, the test passes.
- If any label doesn't light up, not all buttons are recognized and the test fails.
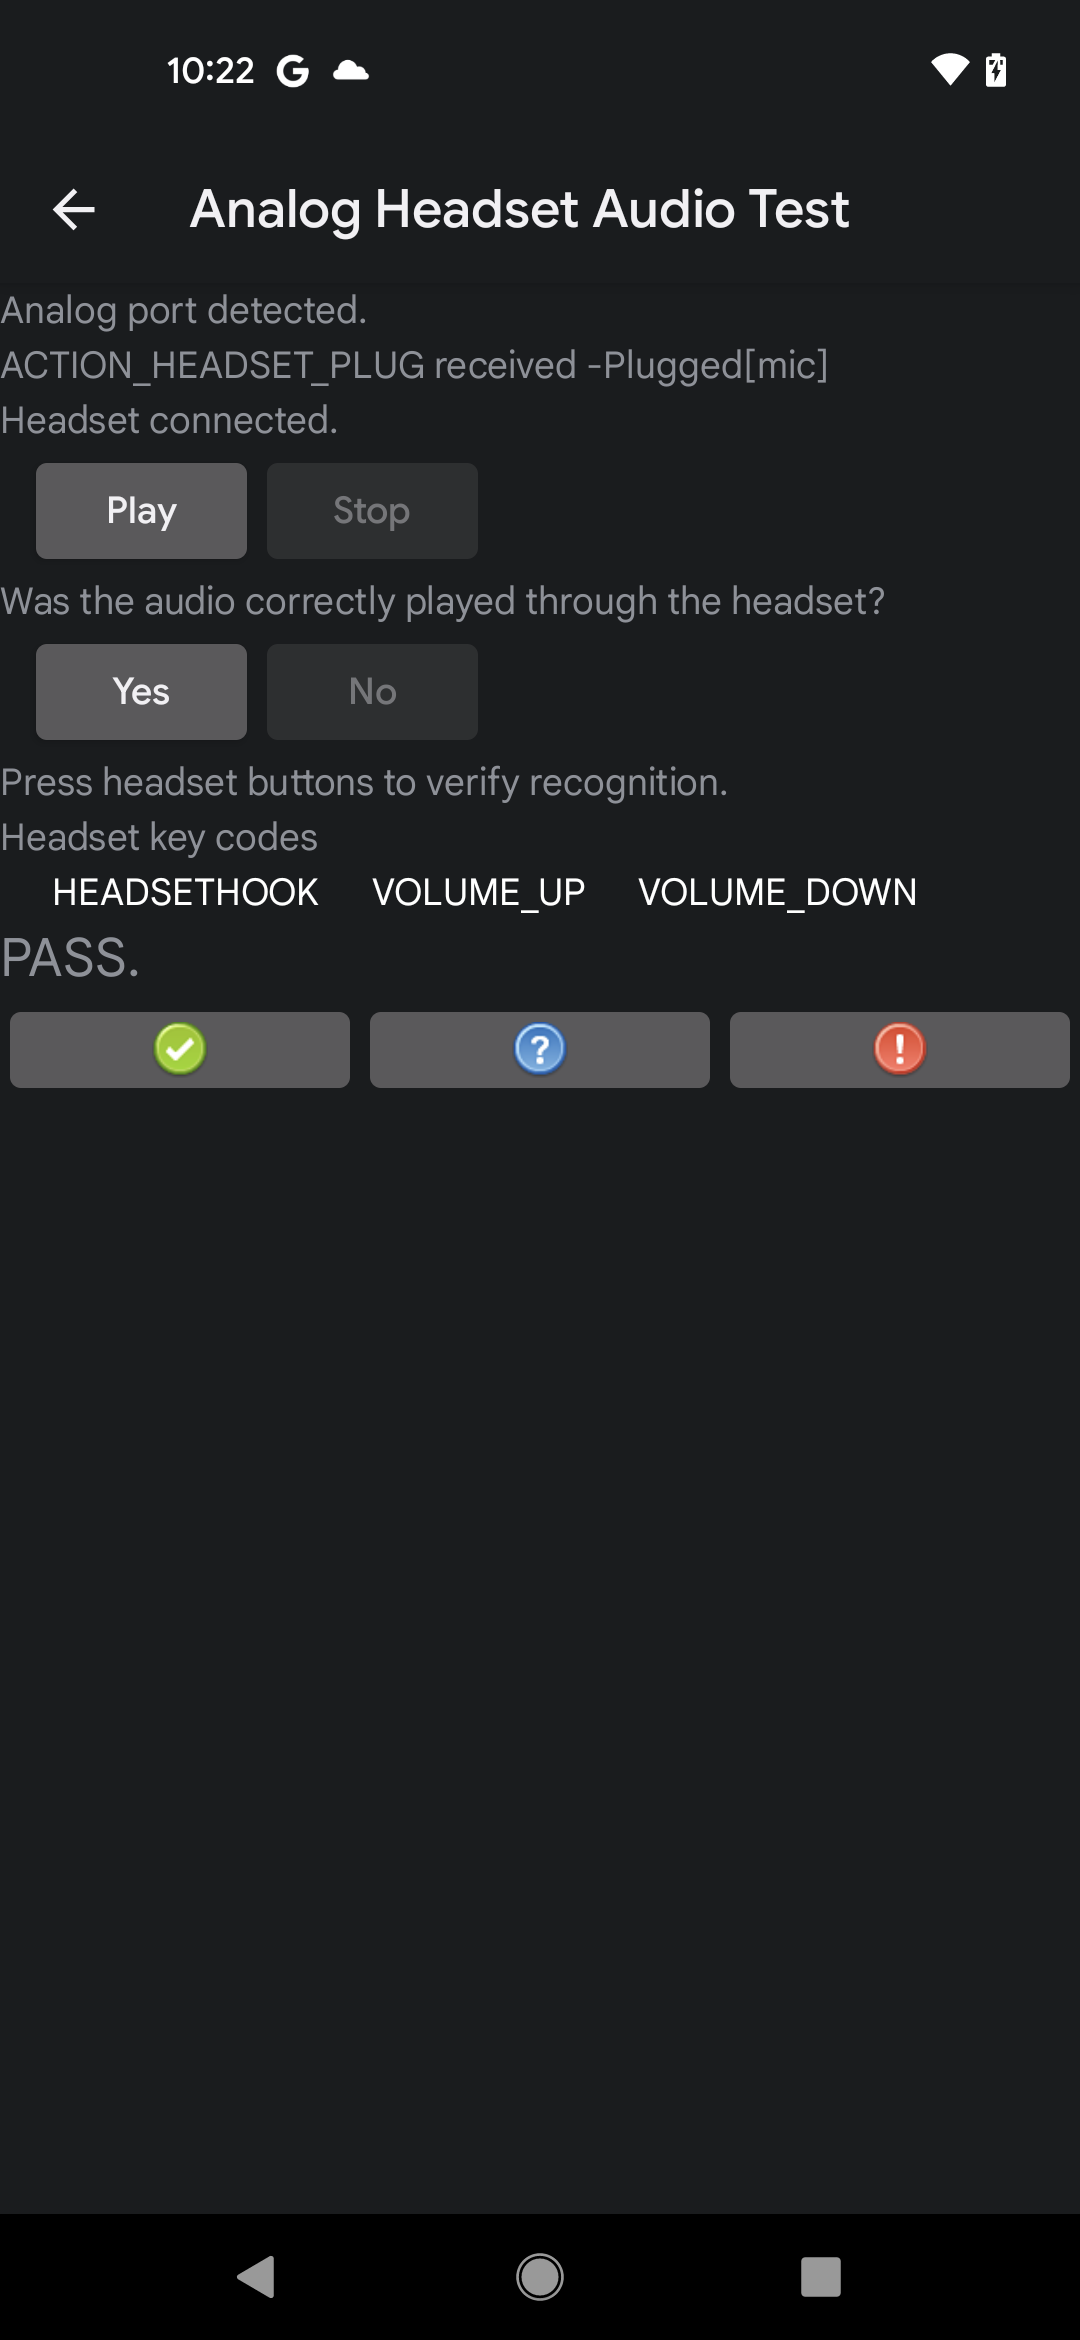
Figure 8. UI result for a passed test
Input Devices Notifications test
The Audio Input Devices Notifications test verifies that wired input peripheral connect and disconnect notifications are correctly sent when input peripherals are connected or disconnected. This test has the following requirements:
- Required peripherals: A wired audio I/O peripheral, which can be a wired headset or microphone connected to an analog headset jack on the DUT, or a USB audio headset or a microphone connected to the USB port on the DUT.
- Device requirements: The DUT must support wired audio peripherals, either through a 3.5 mm headset jack or a USB port that supports host mode (or both). If the DUT doesn't support either of these, indicate that in the test.
To run the Audio Input Devices Notifications test, follow these steps:
- Verify and indicate DUT support for wired audio peripherals:
- If the DUT has at least one port for wired audio peripherals, tap Yes.
- If the DUT doesn't have a port for wired audio peripherals, tap No. The test is marked as passed, and you can move on to the next test.
- Tap Clear Messages to clear the display of existing notifications (for example, notifications that might have been sent when the test started).
Test the connection and disconnection:
- Connect a wired audio input peripheral and verify that a connection notification displays in the test panel.
- Disconnect the wired audio input peripheral and verify that a disconnection notification displays in the test panel.
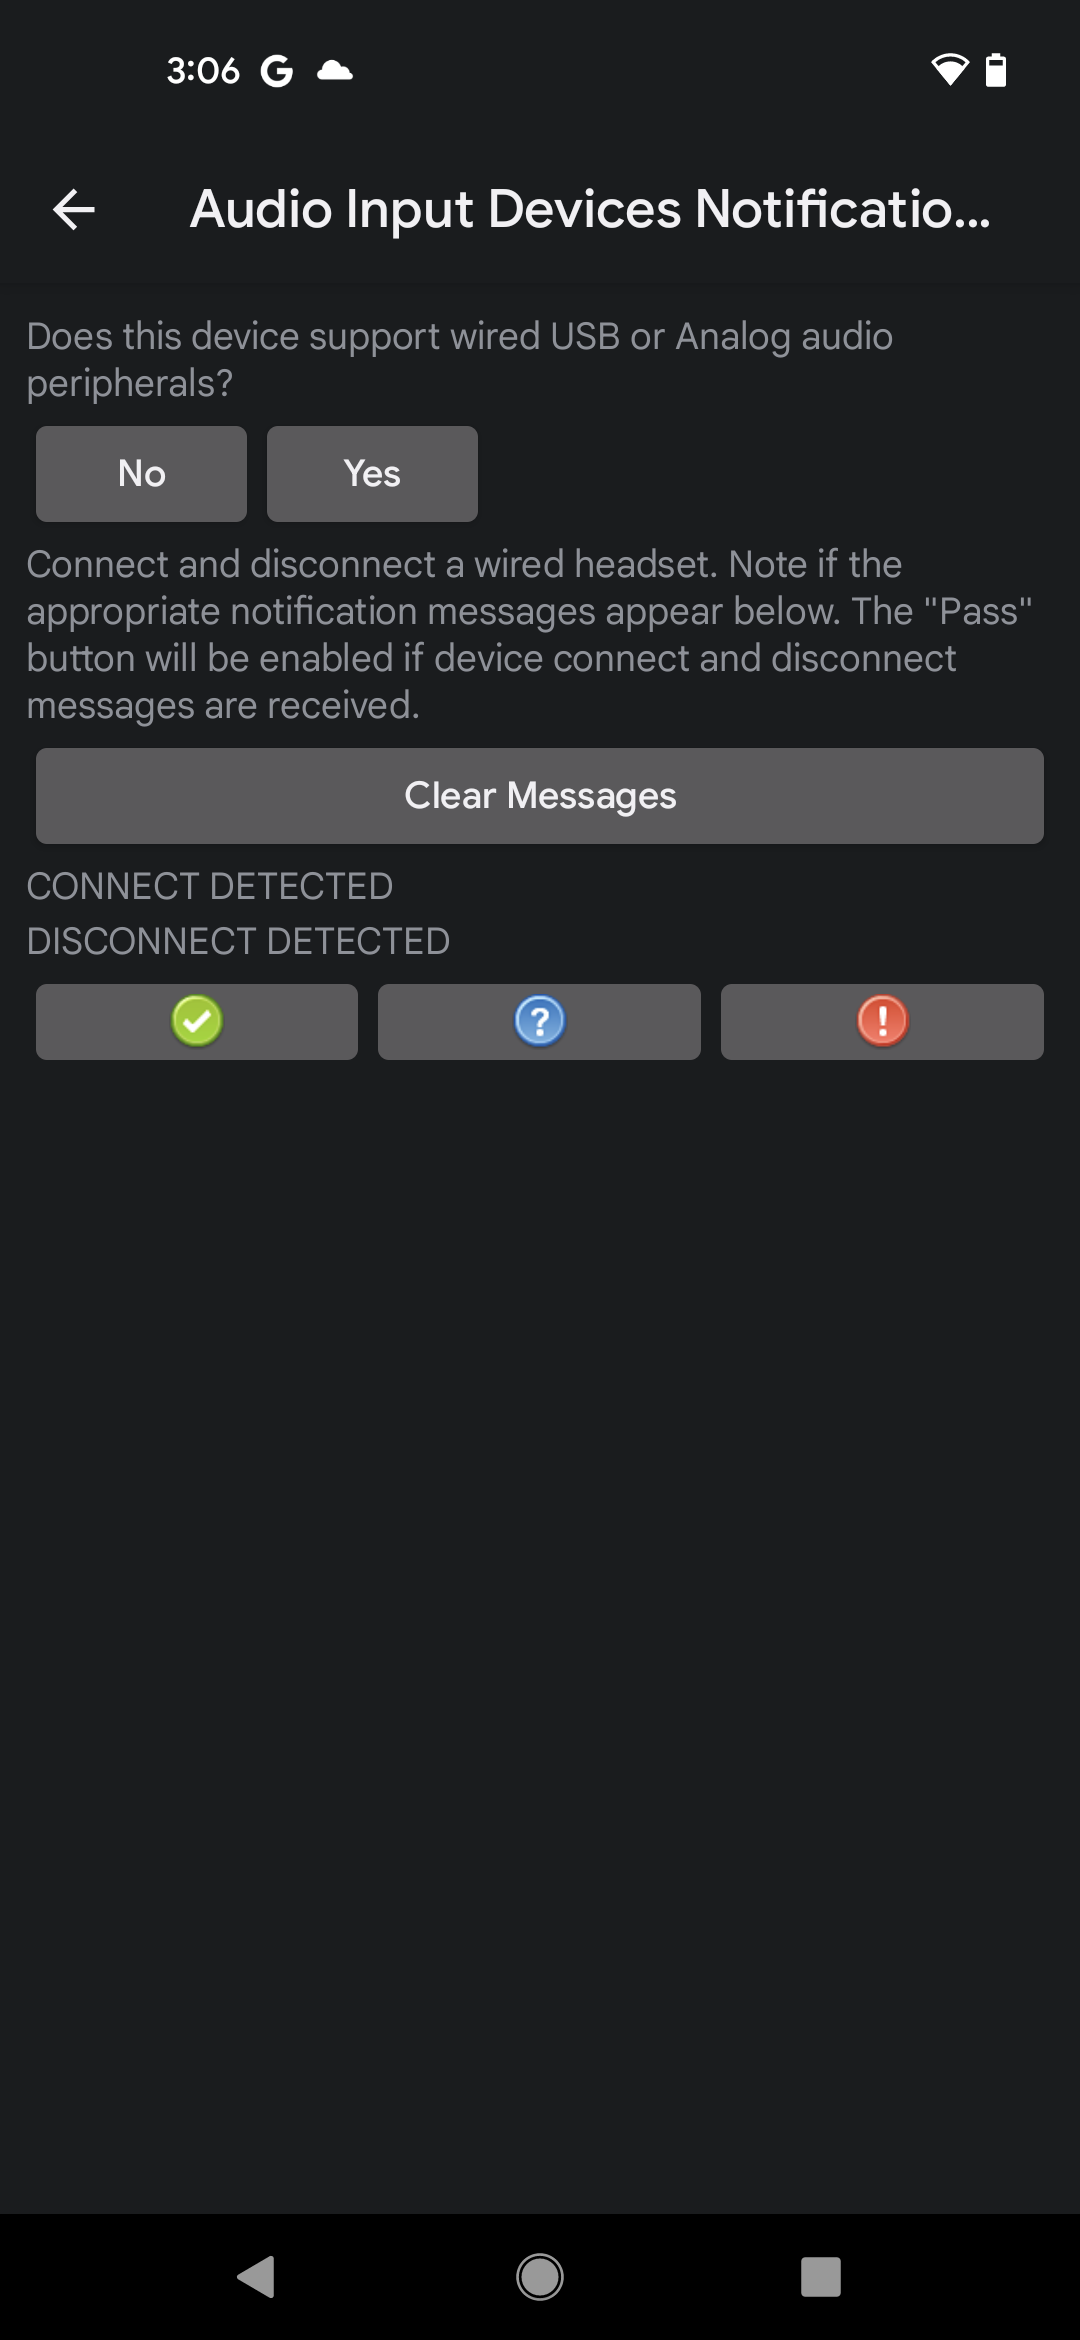
Figure 9. Audio Input Devices Notifications test UI
If both notifications display, the test passes.
Output Device Notifications test
The Audio Output Devices Notifications test verifies that wired output peripheral connect and disconnect notifications are correctly sent when input peripherals are connected or disconnected. This test has the following requirements:
- Required peripherals: A wired audio output peripheral, which can be a wired headset (or headphones) connected to an analog headset jack on the DUT, or a USB audio headset (or headphones) connected to the USB port on the DUT.
- Device requirements: The DUT must support wired audio peripherals, either through a 3.5 mm headset jack or a USB port that supports host mode (or both). If the DUT doesn't support either of these, indicate that in the test.
To run the Audio Output Devices Notifications test, follow these steps:
- Verify and indicate DUT support for wired audio peripherals:
- If the DUT has at least one port for wired audio peripherals, tap Yes.
- If the DUT doesn't have a port for wired audio peripherals, tap No. The test will be marked as passed, and you can move on to the next test.
- Tap Clear Messages to clear the display of existing notifications (for example, notifications that might have been sent when the test started).
Test the connection and disconnection:
- Connect a wired audio output peripheral and verify that a connection notification displays in the test panel.
- Disconnect the wired audio output peripheral and verify that a disconnection notification displays in the test panel.
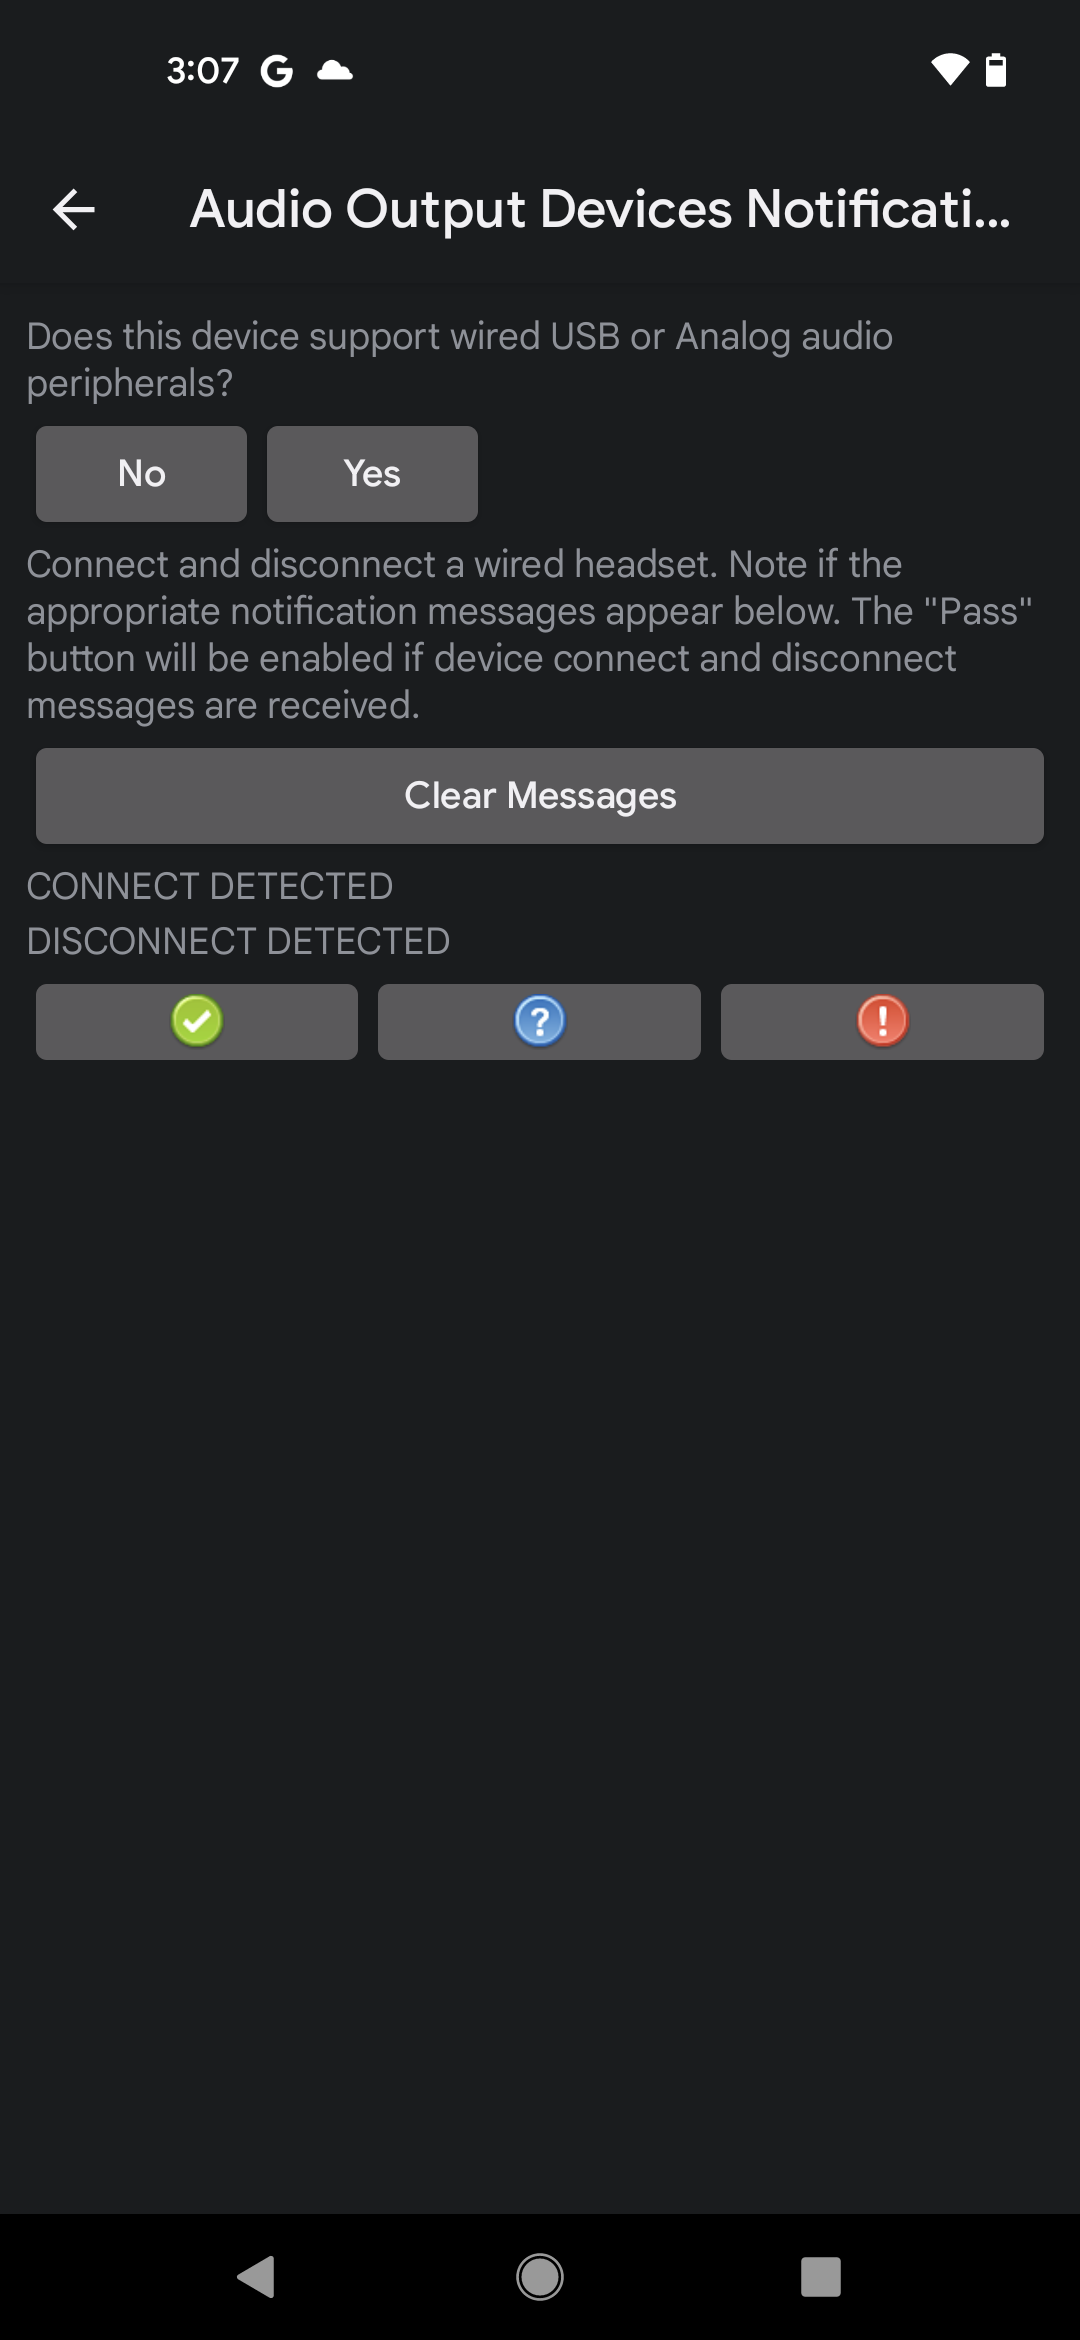
Figure 10. Audio Output Devices Notifications test UI
If both notifications display, the test passes.
Input Routing Notifications test
The Audio Input Routing Notifications test verifies that routing notifications are sent when audio input peripherals are connected to the DUT. This test has the following requirements:
- Required peripherals: A wired audio I/O peripheral, which can be a wired headset or microphone connected to an analog headset jack on the DUT, or a USB audio headset or a microphone connected to the USB port on the DUT.
- Device requirements: The DUT must support wired audio peripherals, either through a 3.5mm headset jack or a USB port that supports host mode (or both). If the DUT doesn't support either of these, indicate that in the test.
To run the Audio Input Routing Notifications test, follow these steps:
- Verify and indicate DUT support for wired audio peripherals:
- If the DUT has at least one port for wired audio peripherals, tap Yes.
- If the DUT doesn't have a port for wired audio peripherals, tap No. The test will be marked as passed and you can move on to the next test.
- Tap Record to start the test. The device won't play sounds for this test.
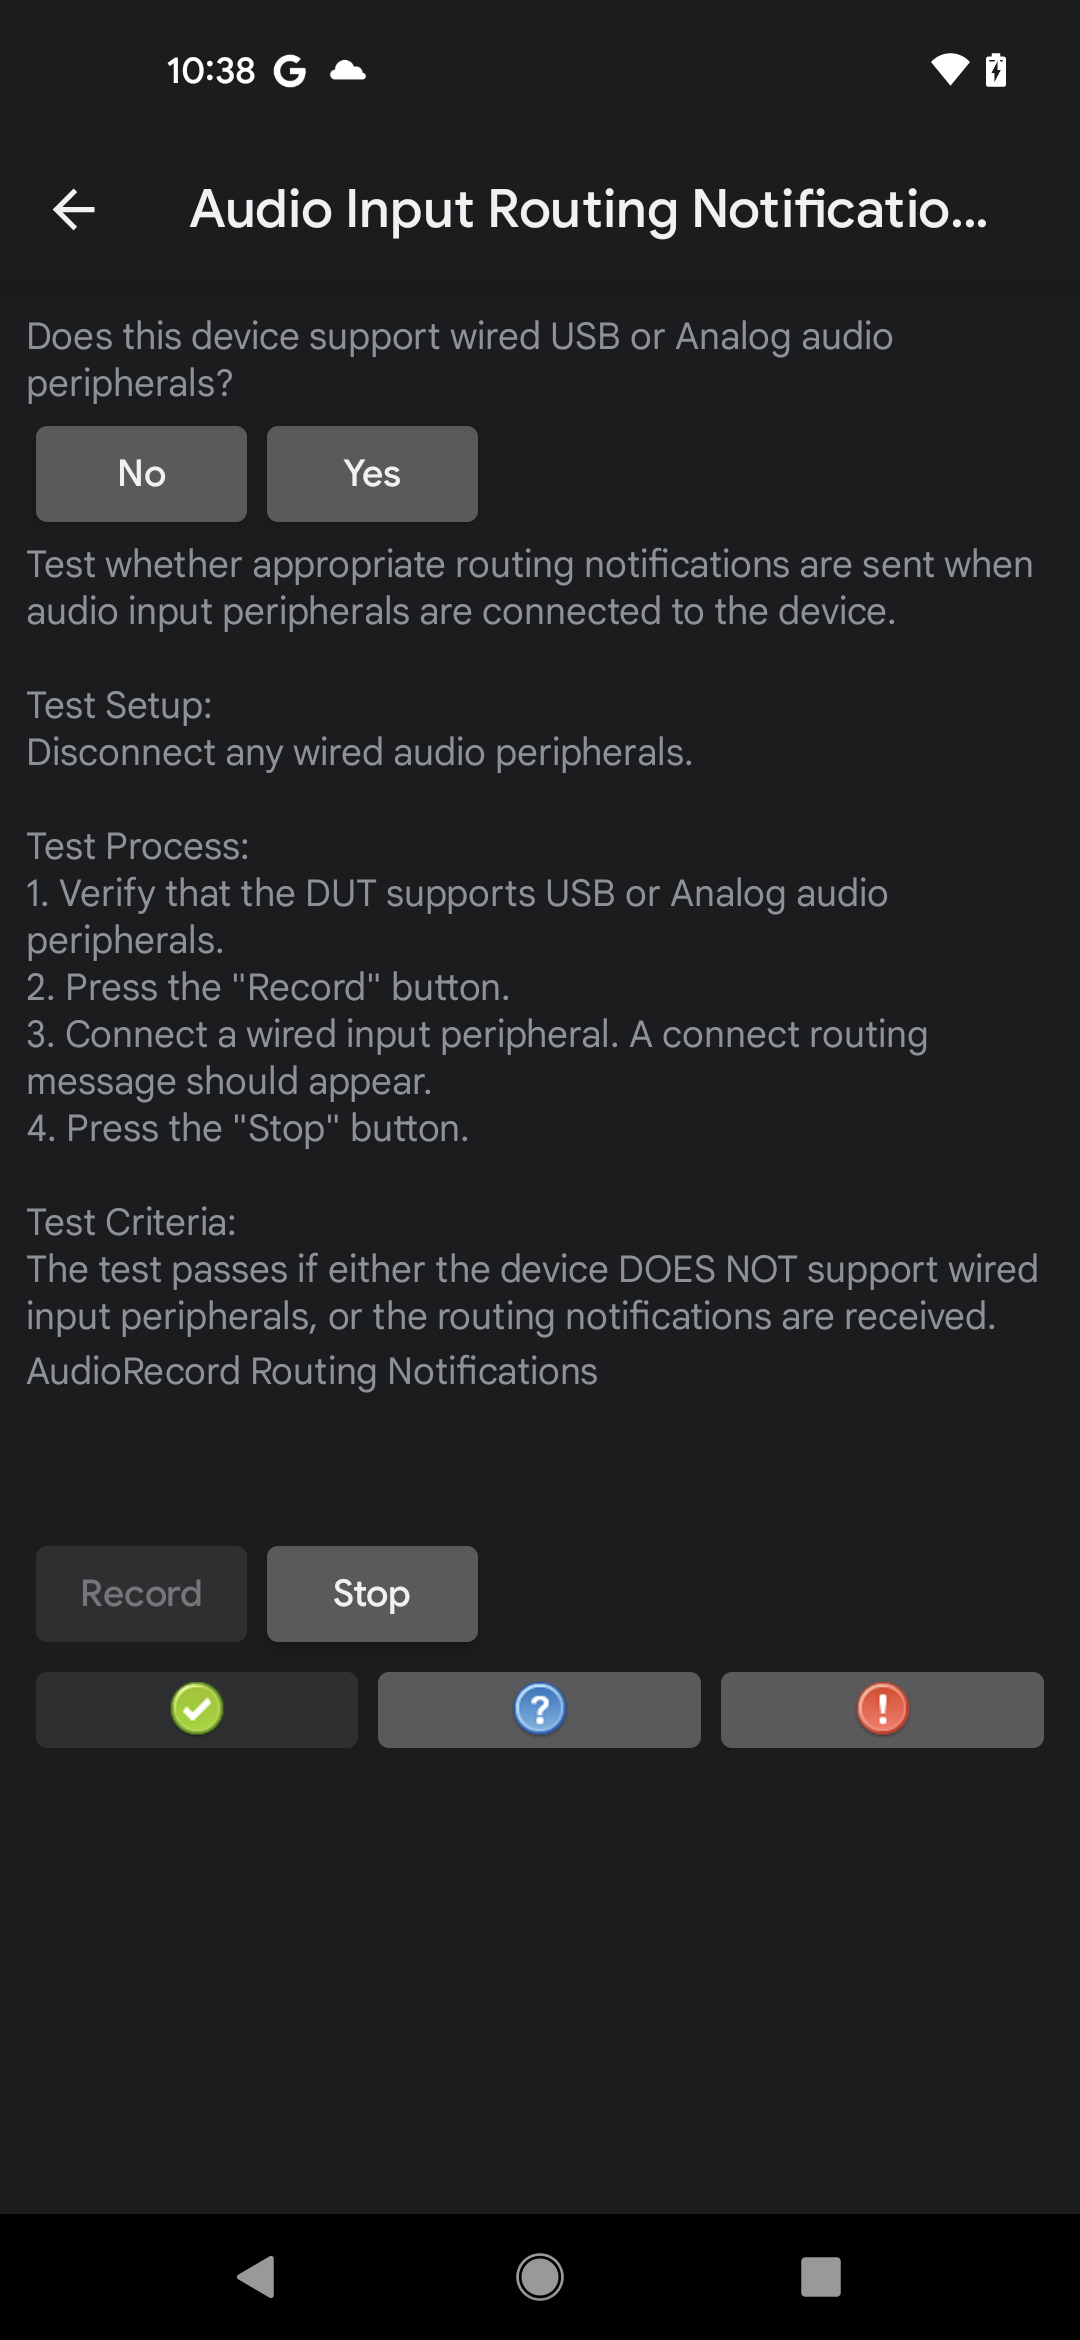
Figure 11. Audio Input Routing Notifications test, recording in progress
- Connect a wired audio input peripheral, wait 5-10 seconds, then verify that a routing notification message displays.
- If the notification appears, the test passes.
- If the notification doesn't appear, the test fails.
- Tap Stop to end the recording.
Output Routing Notifications test
The Audio Output Routing Notifications test verifies that routing notifications are sent when audio output peripherals are connected to the DUT. This test has the following requirements:
- Required peripherals. Wired audio output peripheral, which can be a wired headset (or headphones) connected to an analog headset jack on the DUT, or a USB audio headset (or headphones) connected to the USB port on the DUT.
- Device requirements. The DUT must support wired audio peripherals, either through a 3.5 mm headset jack or a USB port that supports host mode (or both). If the DUT doesn't support either of these, indicate that in the test.
To run the Audio Output Routing Notifications test, follow these steps:
- Verify and indicate DUT support for wired audio peripherals:
- If the DUT has at least one port for wired audio peripherals, tap Yes.
- If the DUT doesn't have a port for wired audio peripherals, tap No. The test is marked as passed, and you can move on to the next test.
Tap Play to start the test. The system plays an audible tone.
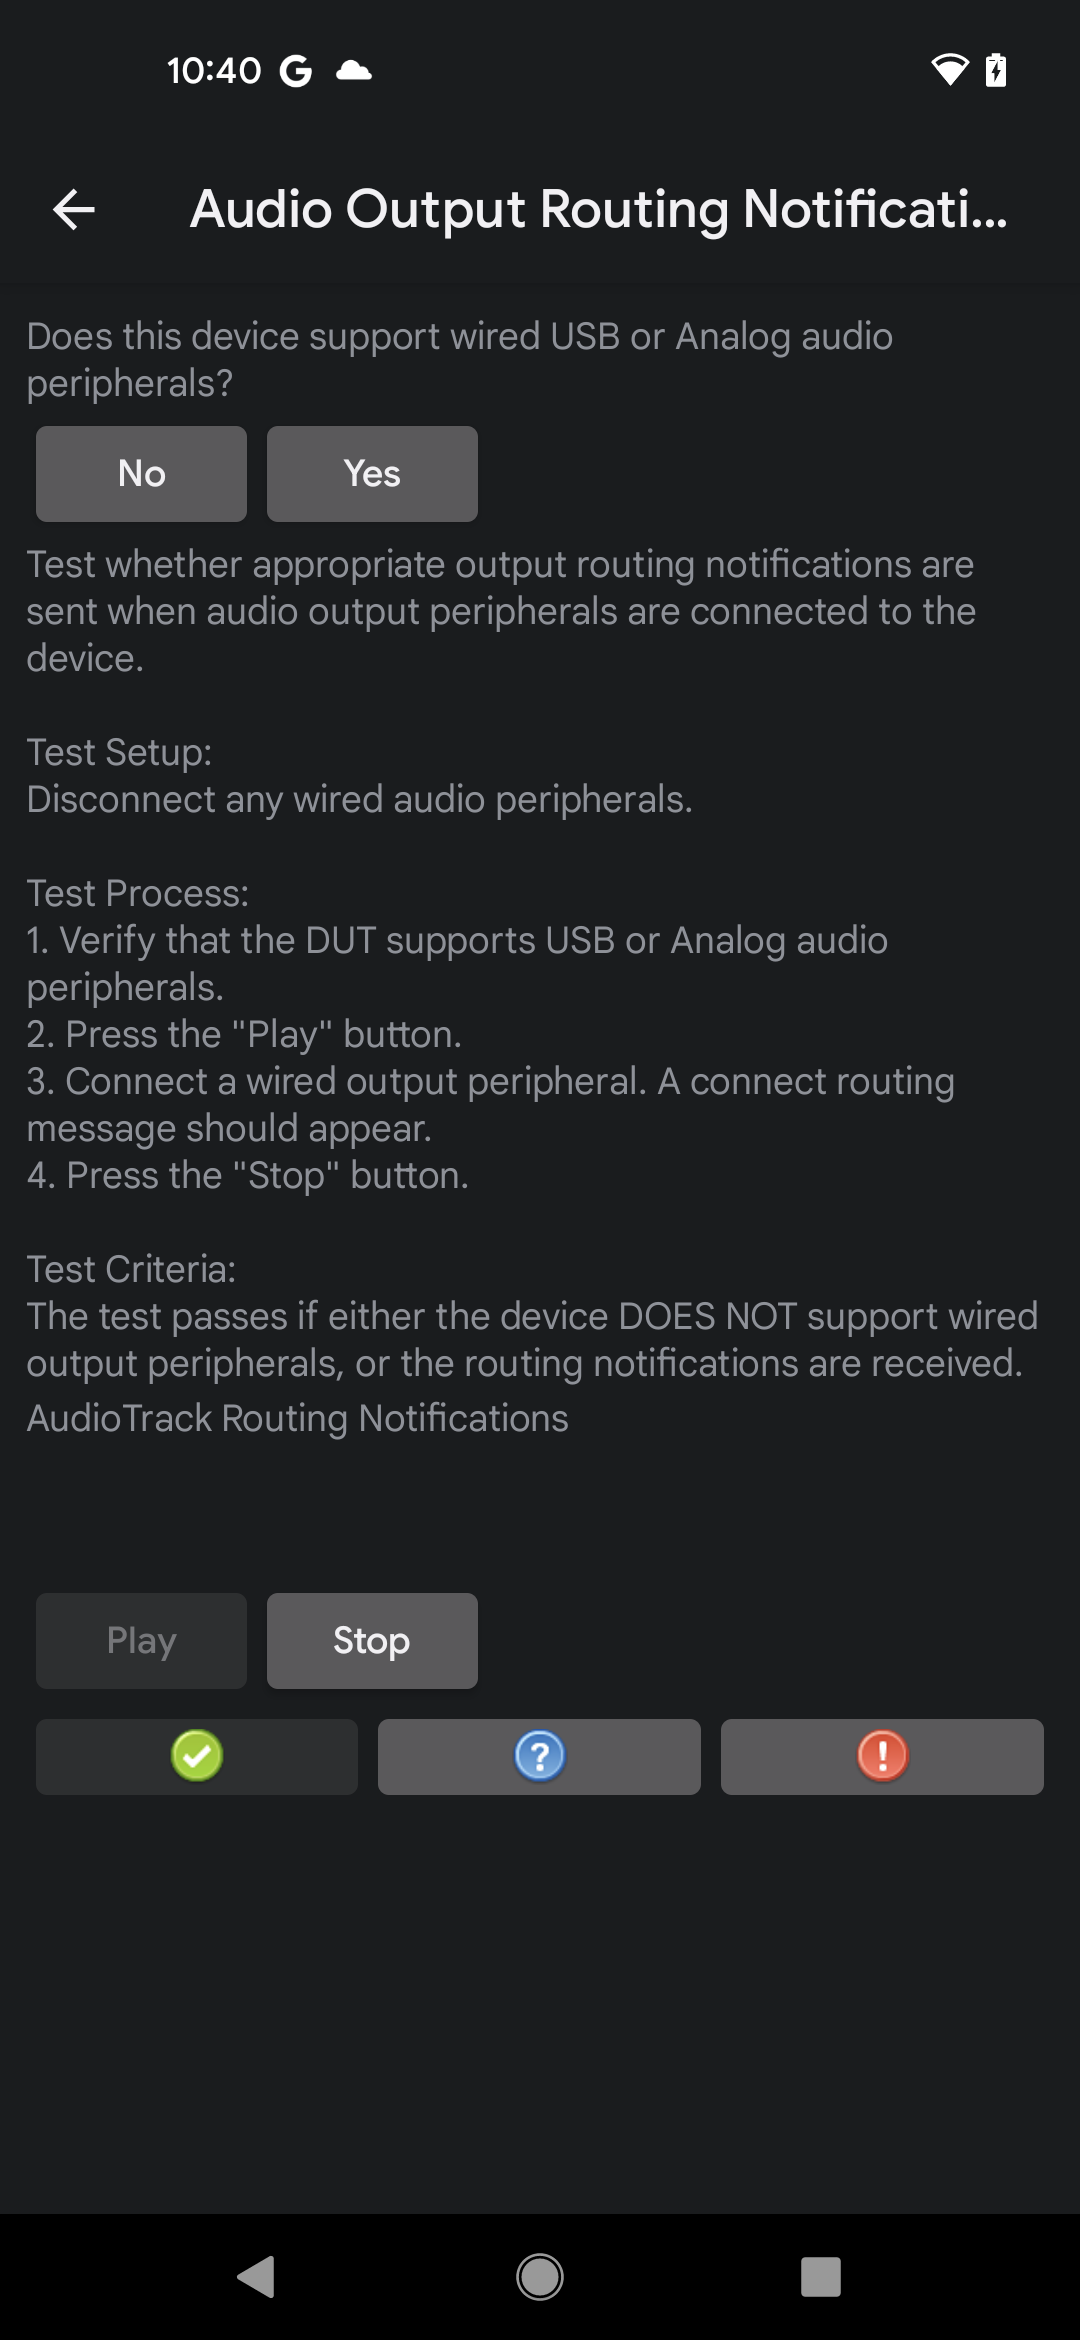
Figure 12. Audio Output Routing Notifications test, playback in progress
Connect a wired audio output peripheral, wait 5 to 10 seconds, then verify that a routing notification message displays.
- If the notification appears, the test passes.
- If the notification doesn't appear, the test fails.
Tap Stop to end the recording.
Audio Stream Disconnect test
The Audio Stream Disconnect test verifies correct behavior of the AAudio stream disconnect mechanism when a stream is disconnected from one device and rerouted to another. The test confirms proper behavior of disconnects for multiple stream attributes.
- DUT requirements: The Audio Stream Disconnect test requires a device that contains either an analog headset jack or a USB host-mode audio port (or both).
- Required peripherals: The Audio Stream Disconnect test requires either an analog headset or a USB audio I/O device. The analog "loopback" connector (used in the Audio Loopback Latency test) can be used in place of an analog headset.
To run the Audio Stream Disconnect test, follow these steps:
- Invoke the test from the CTS Verifier main display by selecting Audio Stream Disconnect Test.
- Verify support for an an analog headset or a USB audio I/O device by answering the Does this device support an analog or USB audio peripheral? prompt. If the prompt doesn't appear, the system has already verified the existence of the required hardware.
- Press Start. When prompted, insert and remove the audio I/O peripheral a number of times as different configurations of playback or record streams are tested.
The status of each configuration test displays below the prompt. If all the configurations test successfully, the test passes.