
Device administration
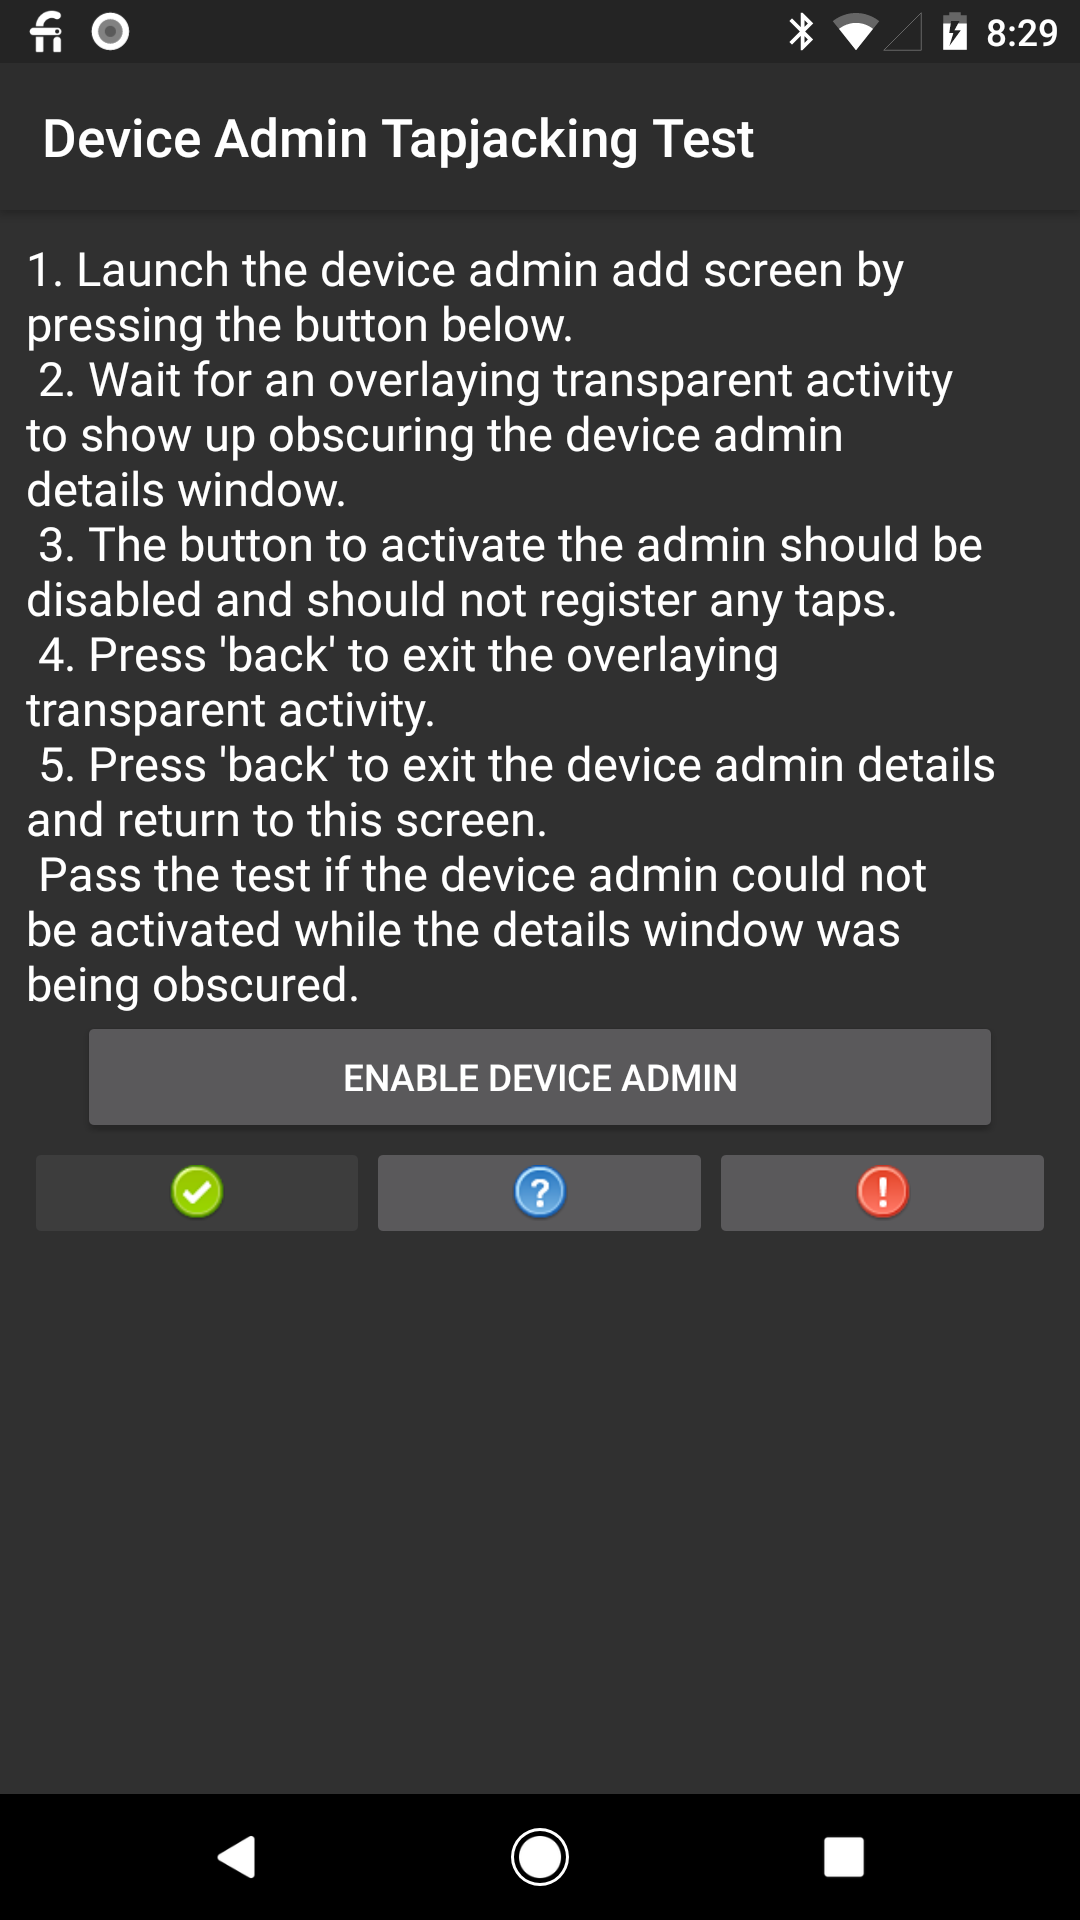
Test: Cts Verifier > Device Administration > Device Admin Tapjacking Test
com.android.cts.verifier.admin.tapjacking.DeviceAdminTapjackingTestActivity
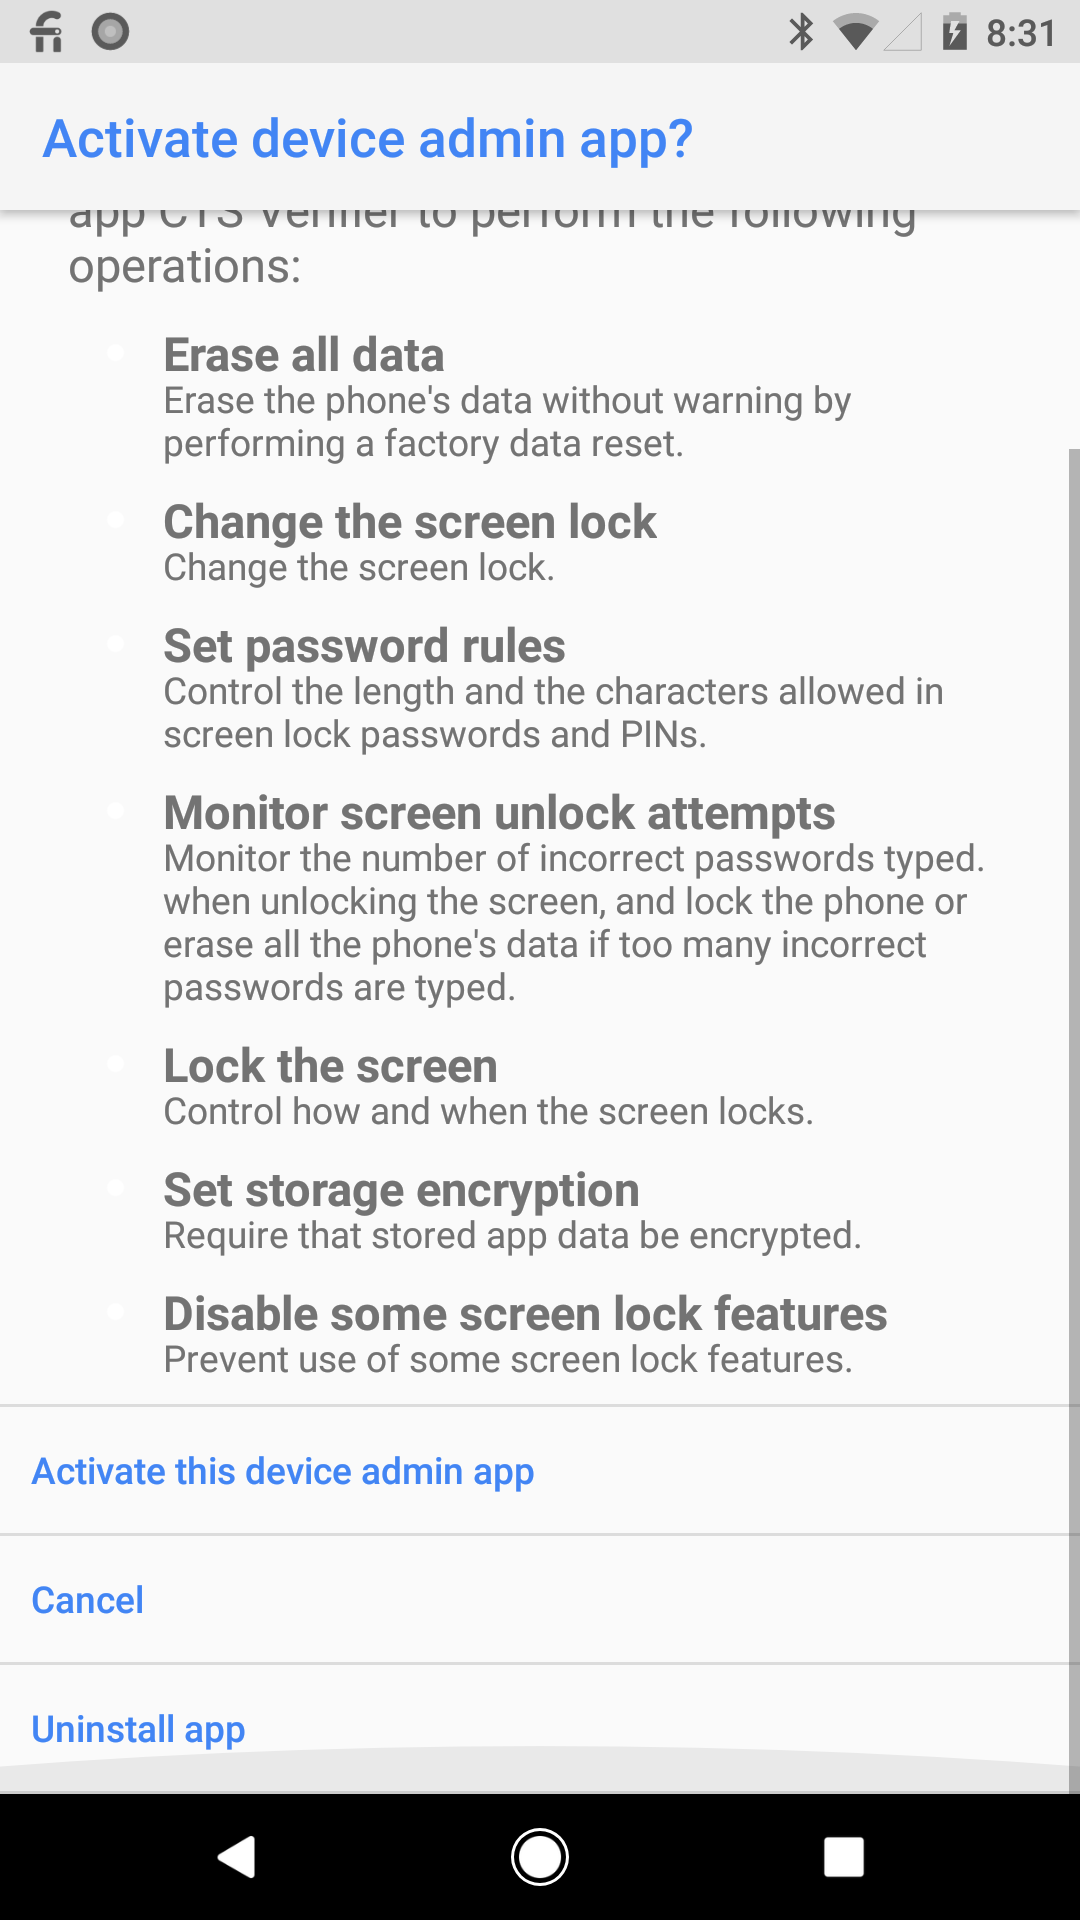
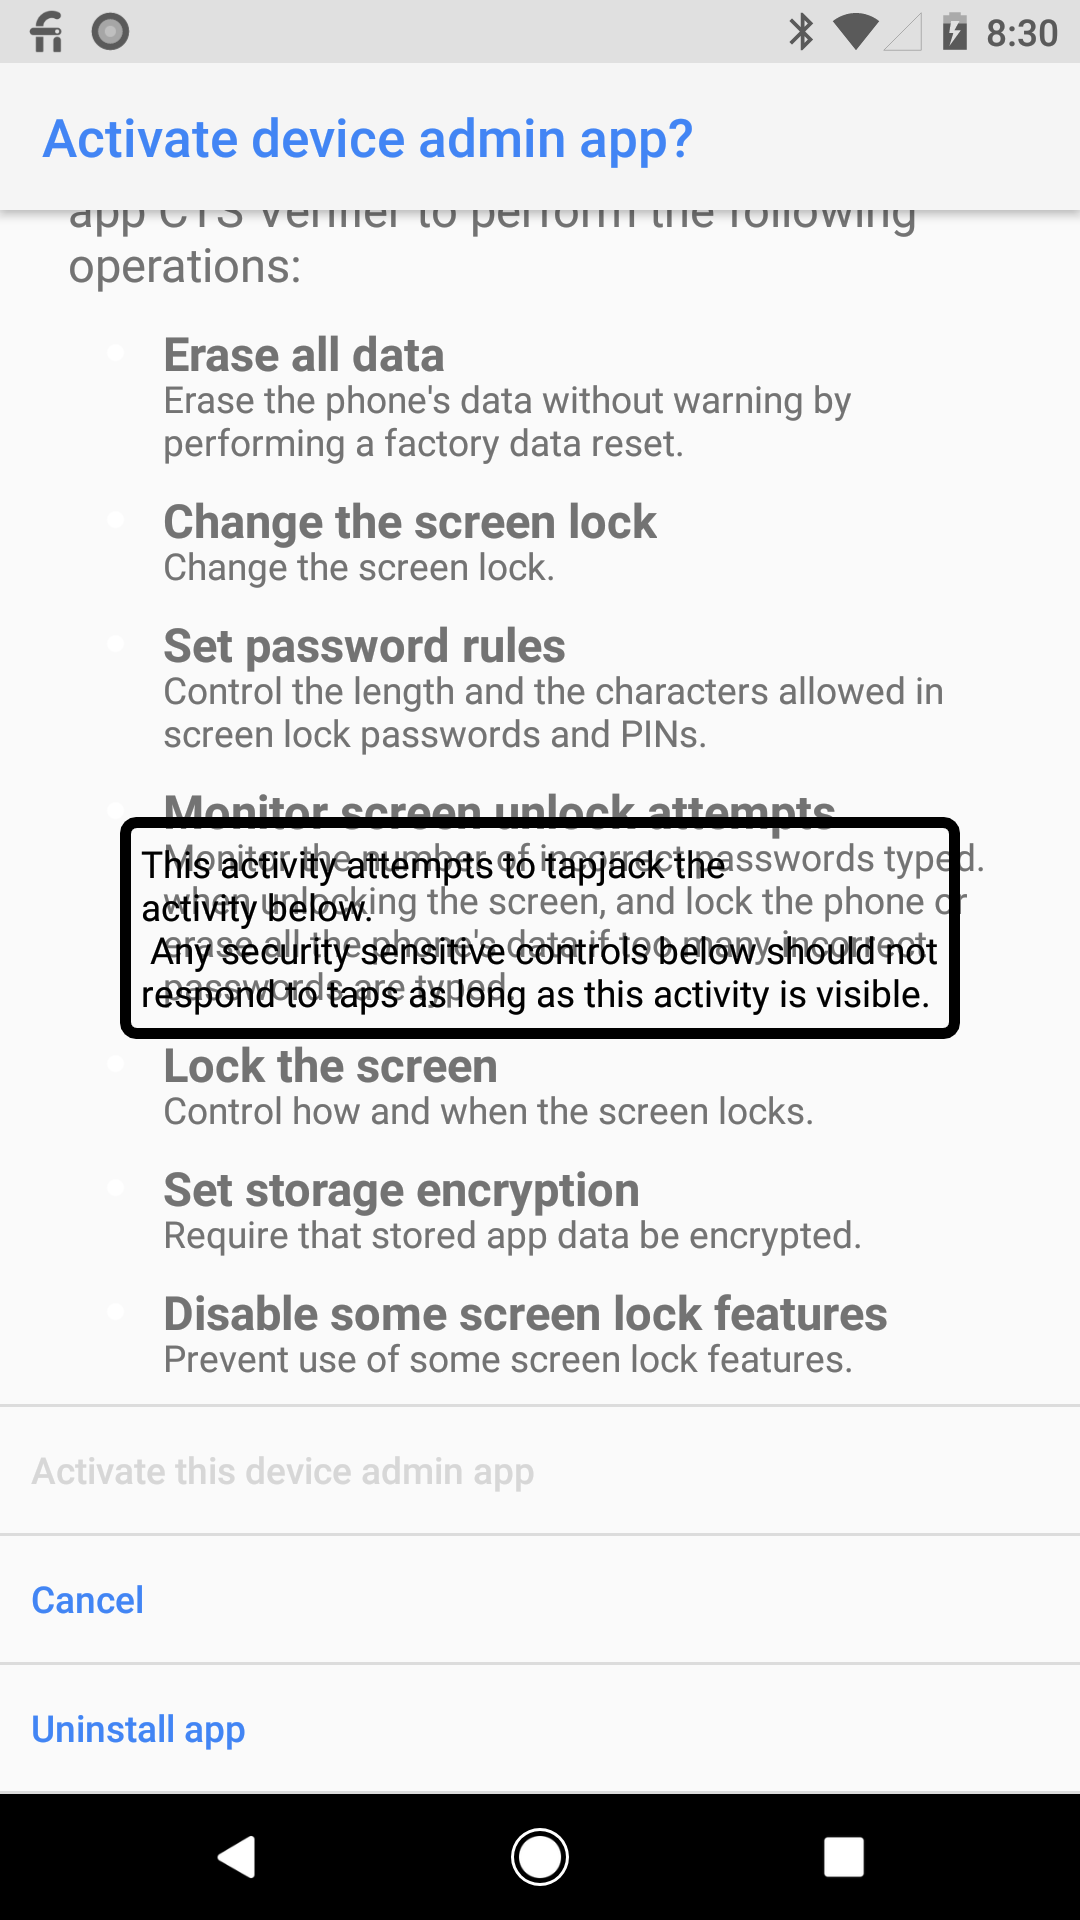
The test is open to interpretation if it behaves as expected or not. Buttons can be tapped through the overlay but maybe produce an unclear description.
The button to activate the admin should be disabled and should not register any taps.
It isn't possible to activate the device admin app but a toast is shown Because another app is displaying on top of these options, Settings can't respond to your action. Hence, the tap is registered and it is still possible to tap cancel and press Uninstall app.
Below are the expected results for Step 3.
|
|
|
| 3. Tap [ENABLE DEVICE ADMIN] | 3.1. [Active this device admin app] is enabled. | 3.2. [Active this device admin app] is disabled. |
Figure 1. Expected results for the device administration test.
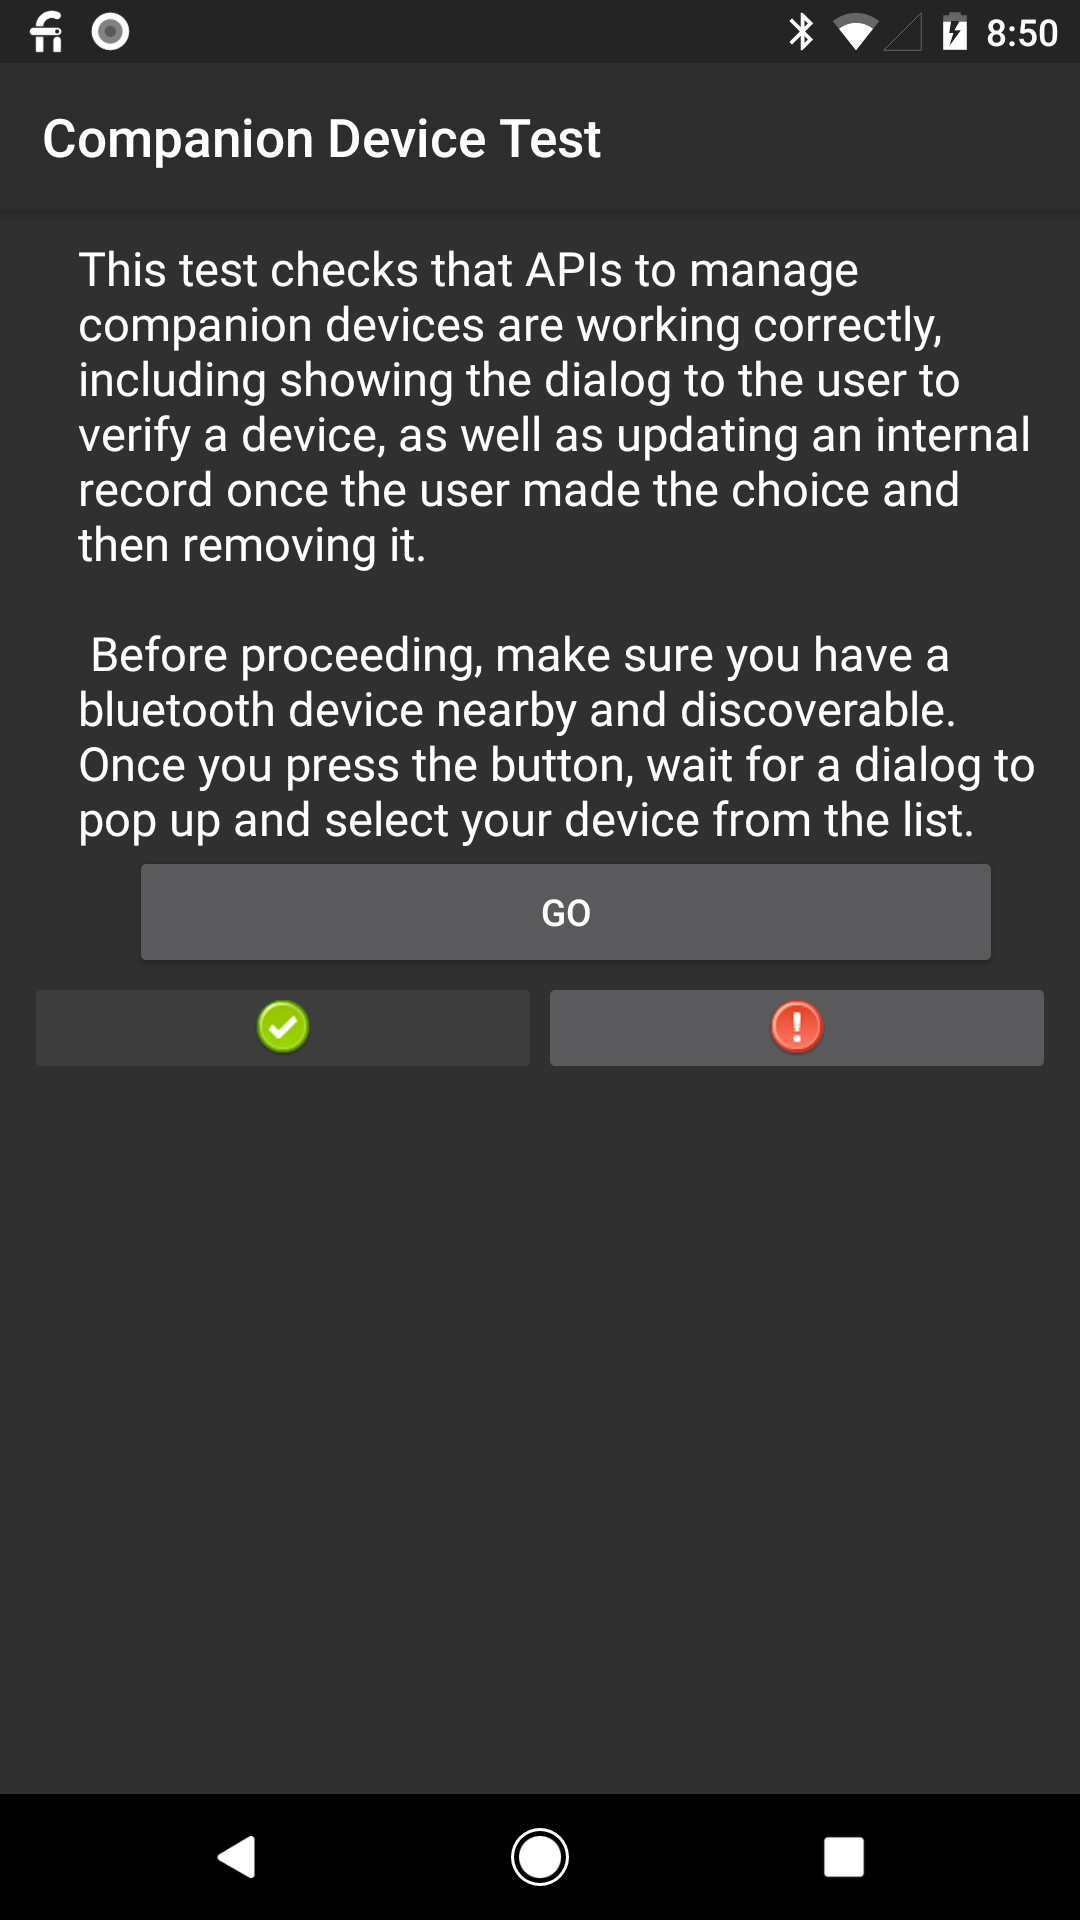
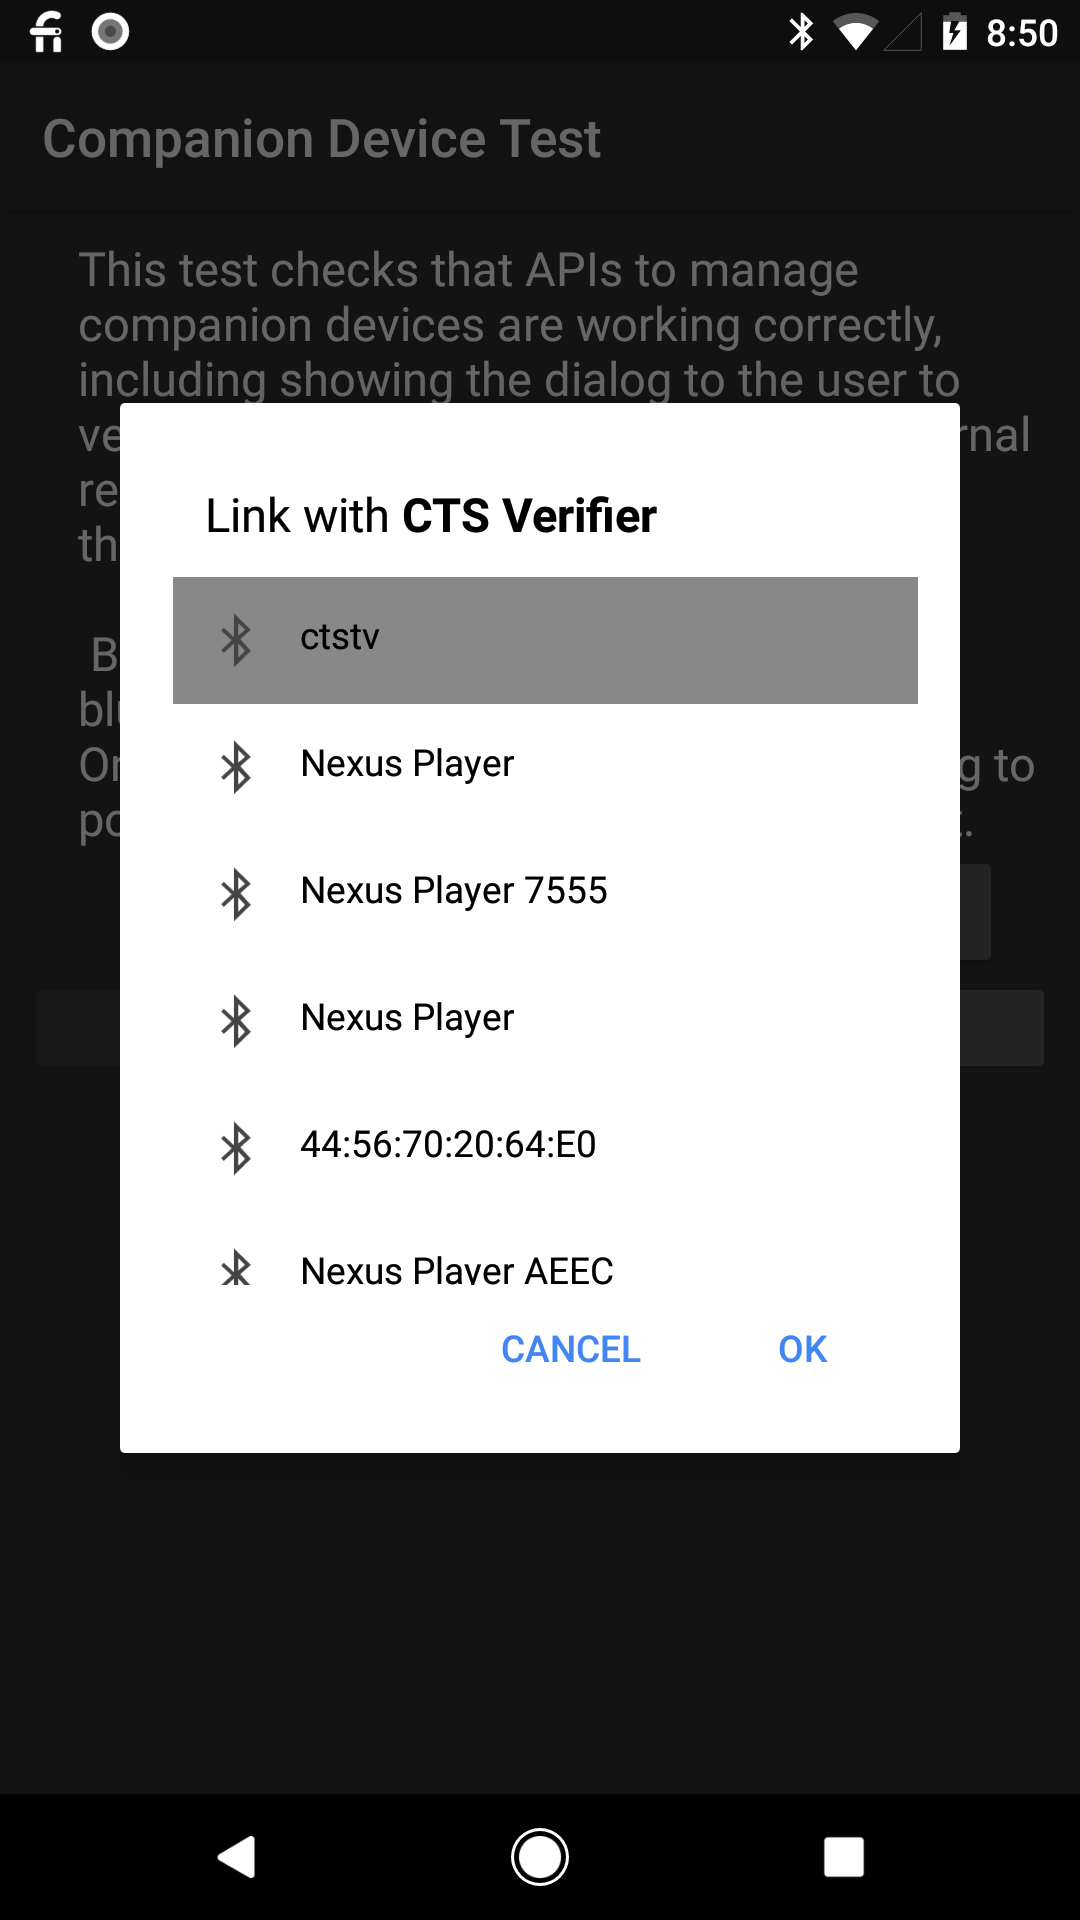
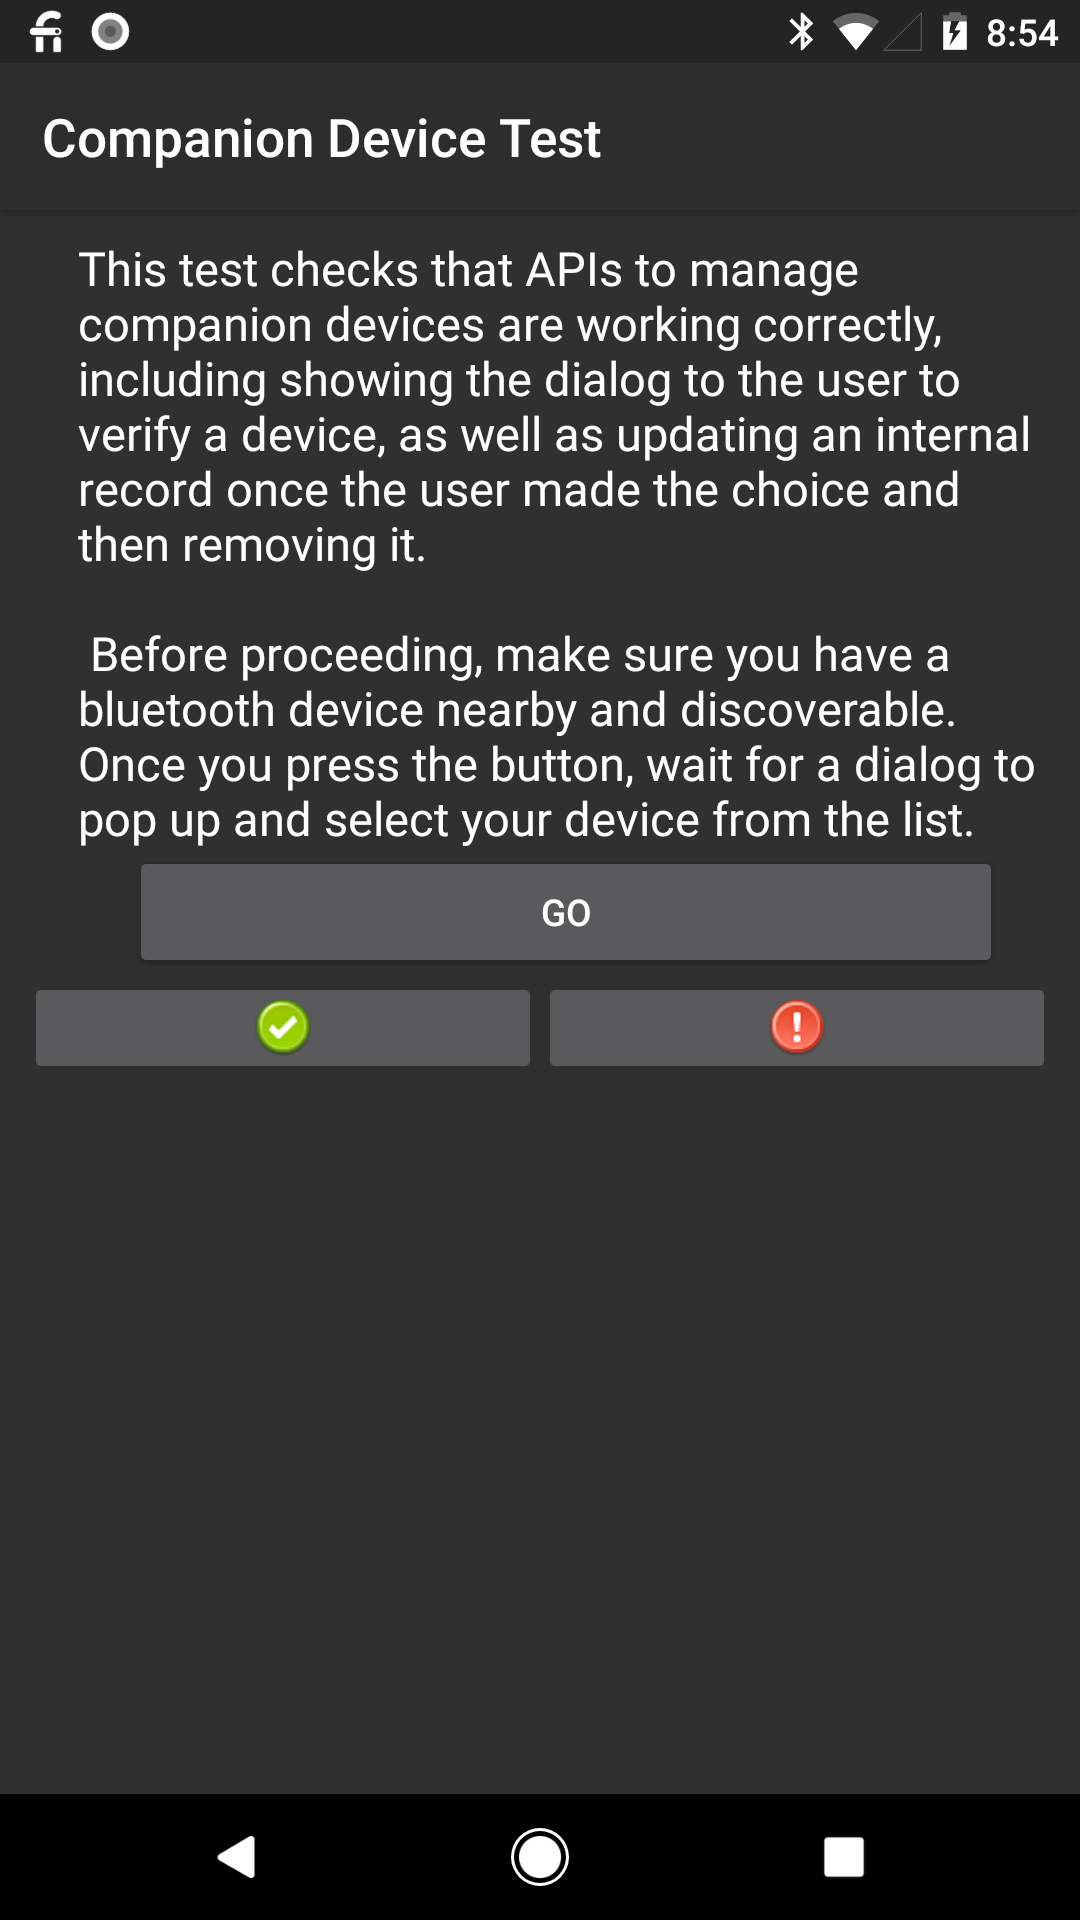
Companion device test
The companion device test is com.android.cts.verifier.companion.CompanionDeviceTestActivity.
It may be unclear if the test has finished correctly after selecting the device in the list and pressing OK.
See below for the expected results.
|
|
|
| 1. Tap [GO] | 2. Tap a BT device | 3. Tap [Pass] |
Figure 2. Expected results for the companion device test.
Voicemail broadcast test
The voicemail broadcast test is com.android.cts.verifier.voicemail.VoicemailBroadcastActivity.
To send a voicemail to the phone, call the device, decline the call on the device, and leave a voicemail.
A visual voicemail is a way to send the device audio data and detailed information for incoming voicemails, instead of just sending the Message Waiting Indicator** (MWI) SMS.
The test is testing behavior regarding receiving the MWI, and if visual voicemail is being used, the carrier might not send the MWI and interfere with the test, thus it must be disabled.
USB accessory/device test
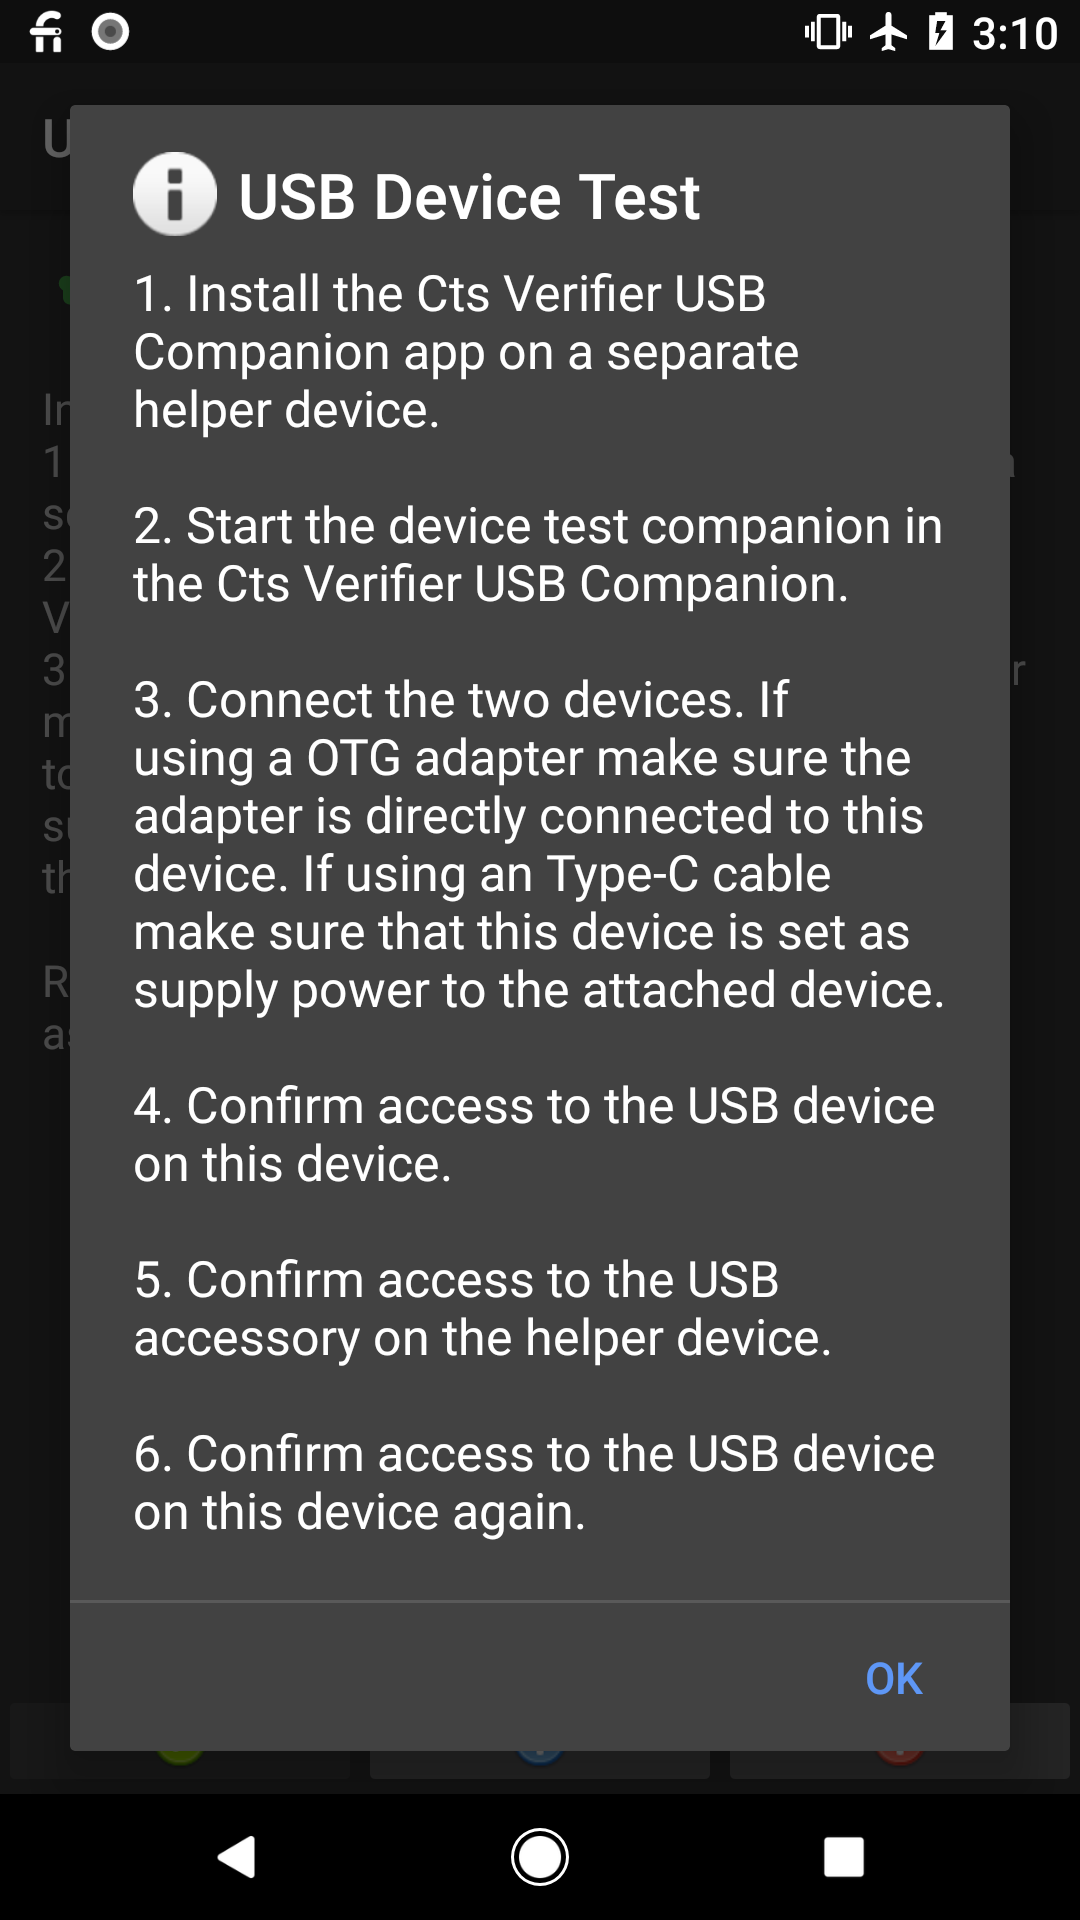
Figure 3. Instructions for the voicemail broadcast test.
Specific instructions to avoid flaky behavior:
- Install the CtsVerifier.apk on the DUT
- Install the CtsVerifierUSBCompanion.apk on the Pixel
- Make sure all USB cables are disconnected
- Start the CtsVerifierUSBCompanion on the Pixel and select the accessory test companion
- Start the CtsVerifier on the DUT and select the USB Accessory test
- Connect the OTG-Adapter to the Pixel and then connect the DUT via a USB-A(male)-C cable
- Approve the connection dialogs in the following order:
- Pixel
- DUT
- Pixel
- Wait until test completes
Dynamic sensor discovery test
Each device maker can decide whether or not to support the API
(isDynamicSensorDiscoverySupported).
If a device supports the API, the device maker needs to source an external sensor that can be used to pass the test. The device maker will need to locate a device to connect to their device to test dynamic sensors.
If the device maker isn't able to locate a device, the following setup can be used.
- Purchase TI EK-TM4C123GXL development board.
Option 1
Option 2 Download and install lm4tools.
For linux/mac execute:
cd /tmp
git clone https://github.com/utzig/lm4tools.git
cd lm4tools
make
sudo PREFIX=/usr make install
For windows, you can use LMFlash directly from TI which allows you to flash from a GUI.
Retrieve a Google provided binary called
usb_sensor_dummy_accel.bin.Flip the switch present on the board to the DEBUG mode and plug a USB micro cable into the port labeled DBG.
Run the following command:
lm4flash -v -E usb_accel_dummy.binNOTE: If there's a permission issue, please run with
sudoAfter flashing completes, unplug the USB micro cable from the DBG port, flip the switch used earlier back to DEVICE, and then plug one end of the USB micro cable into the USB slot labeled DEVICE. The other end of the cable should be plugged directly into your device.
Now you can execute this CTS-V test which should be able to discover and use the device you just plugged in as a fake accelerometer.
Device admin uninstall test
This test may require manual install of CtsEmptyDeviceAdmin.apk on the device
first from a host via adb.
For example, adb install CtsEmptyDeviceAdmin.apk.
Use CTS Verifier > Device Administration > Device Admin Uninstall Test.
It should detect that the app is installed and go through other steps.
Capture Content for Notes Tests
Starting with Android 14, if an OEM chooses to enable
the NOTES role, the OEM device must pass the new Capture Content for Notes
CTS-V test.
The Capture Content for Notes test is located in CaptureContentForNotesVerifierActivity.java
and found under the FEATURES category as shown in the following figure:

Figure 4. Capture Content for Notes test in CTS-V suite.
The Capture Content for Notes test tests the following APIs:
Intent#ACTION_LAUNCH_CAPTURE_CONTENT_ACTIVITY_FOR_NOTEIntent#EXTRA_CAPTURE_CONTENT_FOR_NOTE_STATUS_CODEandroid.permission.LAUNCH_CAPTURE_CONTENT_ACTIVITY_FOR_NOTEStatusBarManager#canLaunchCaptureContentActivityForNote
Before executing the Capture Content for Notes test, do the following:
Ensure that the device has the
NOTESrole enabled. If you see a Notes option under Default apps in the Apps Settings window, theNOTESrole is enabled.If the device supports the
NOTESrole, start the default note-taking app in a floating multitasking window. You can do this through a widget shortcut entry point on the home screen or a peripheral device action such as a button on a stylus.Install
CtsDefaultNotesAppas described inREADME.
While running the test, use the following guidelines:
- If the
NOTESrole is disabled, the test list is empty and the test lets users skip the test. Tap the green pass button to skip the test. If the
NOTESrole is enabled, the green pass button is disabled and tests are present in the test list as shown in the following figure:
Figure 5. Capture Content for Notes test when the
NOTESrole is enabled.Execute the Capture Content for Notes test suite as follows:
Go through each test and follow the instructions.
Tap the appropriate button:
- Tap the green pass button to record a success. The green pass button is enabled when all the tests pass.
- Tap the red fail button to record a failure.The red fail button is enabled if there is a failed test.