
The Android Compatibility Test Suite Verifier (CTS Verifier) supplements the Compatibility Test Suite (CTS). While CTS checks APIs and functions that can be automated, CTS Verifier provides tests for APIs and functions that can't be tested on a stationary device without manual input or positioning, such as audio quality, touchscreen, accelerometer, and camera.
Requirements
Before running CTS Verifier, make sure that you have the following equipment:
- Android-powered device that has verified Android API compatibility by passing the CTS. This is the device under test (DUT).
- Linux computer with USB 2.0 compatible port. All connections to the DUT go through this port.
- Second Android-powered device with a known compatible Bluetooth, Wi-Fi Direct, Wi-Fi Aware, UWB (if the DUT supports UWB), and NFC host card emulation (HCE) implementation.
- A Wi-Fi router configured with access point name and password. The router should have the ability to disconnect from the internet without being powered off.
Make sure you also prepare the tripods, device holders, and pre-measured distances required for the distance (proximity) measuring tests for UWB, Wi-Fi NAN, and Bluetooth RSSI. For details, see Presence calibration.
UICC requirements for NFC tests
CTS Verifier has the following NFC test cases:
- Field-off (uses transaction data from 0x54)
- De-select (uses transaction data from 0x52)
- HCI command (0025000000) (uses transaction data from 0x02)
Transaction event tests require two devices, one of which must have SecureElement UICC with the following access rules:
- CtsVerifier APK hash: 61:ED:37:7E:85:D3:86:A8:DF:EE:6B:86:4B:D8:5B:0B:FA:A5:AF:81
- Authorized Application Identifier (AID) for NFC event access: 0xA000000476416E64726F696443545341
On the emulator side, we expect the transaction event to push the corresponding activity into the foreground.
Setup
Android 17 requires an additional CTS-V setup step to grant the default browser role.
Change the system navigation mode of the test device to three-button mode as follows:
- Open Settings.
- Navigate to System > Interaction > Navigation mode.
- Select any button-based navigation mode; three-button mode preferred, if available.
To set up the CTS Verifier testing environment:
On the Linux computer:
- Before installing CTS Verifier, run the following command to allow access to non-SDK interfaces:
adb shell settings put global hidden_api_policy 1Install Android Studio.
Download the CTS Verifier APK for the version of Android to test.
Connect the DUT to the Linux computer.
From a terminal on the Linux computer, install
CtsVerifier.apkon the DUT:adb install -r -g CtsVerifier.apkFor Android 10 and higher, run the following command to give permission to the app to create the report:
adb shell appops set com.android.cts.verifier android:read_device_identifiers allowFor Android 11 and higher, run the following command to allow reports to be saved in a self-defined directory under the device's external top-level directory:
adb shell appops set com.android.cts.verifier MANAGE_EXTERNAL_STORAGE 0For Android 13 and higher, run the following command to allow test API access for CTS Verifier:
adb shell am compat enable ALLOW_TEST_API_ACCESS com.android.cts.verifierFor Android 14 and higher, run the following command to give permission to the app to turn on the screen:
adb shell appops set com.android.cts.verifier TURN_SCREEN_ON 0For Android 17 and higher, run the following command to grant the default browser role to CTS Verifier:
adb shell 'cmd role add-role-holder --user $(am get-current-user) android.app.role.BROWSER com.android.cts.verifier'Verify that the DUT has the system date and time set correctly.
Run CTS Verifier
Launch the CTS Verifier app by tapping the CTS Verifier icon on the DUT.
![]()
Figure 1. CTS Verifier icon.
The app displays several test sets available for manual verification.

Figure 2. CTS Verifier menu of tests.
Each test contains a set of common elements at the bottom of the screen.
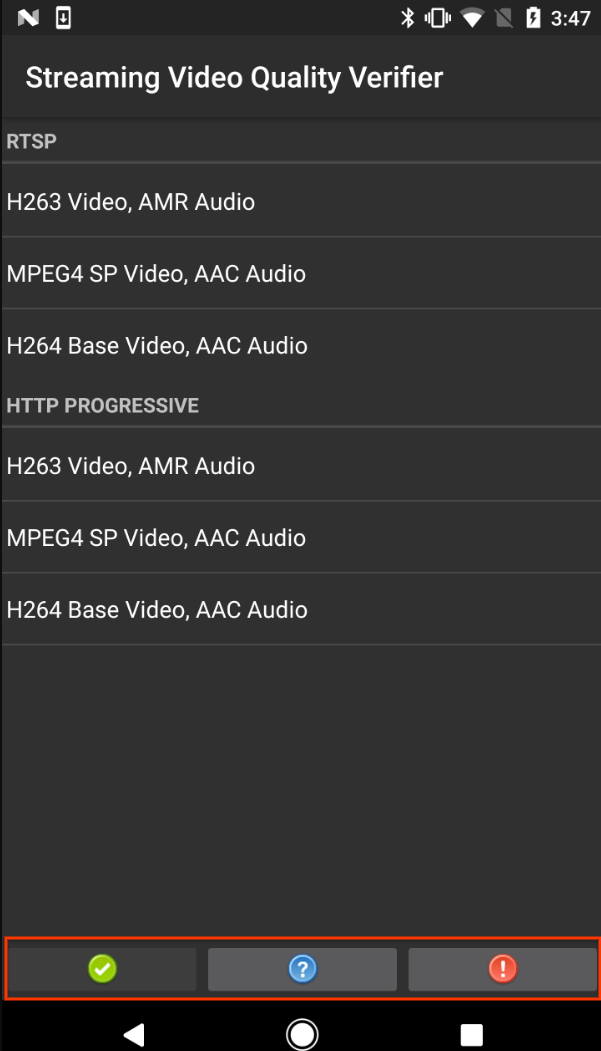
Figure 3. Test screen with common test elements highlighted.
- Pass (✓). Tap if the DUT meets the test requirements per the Info instructions.
- Info (?). Tap to display test instructions. Also appears automatically the first time a test is opened.
- Fail (!). Tap if the DUT doesn't meet the test requirements per the Info instructions.
Some tests, such as the USB accessory mode and camera calibration test, require additional test setup and instructions as detailed in the following sections.
Test USB accessory mode for 8.0 and higher
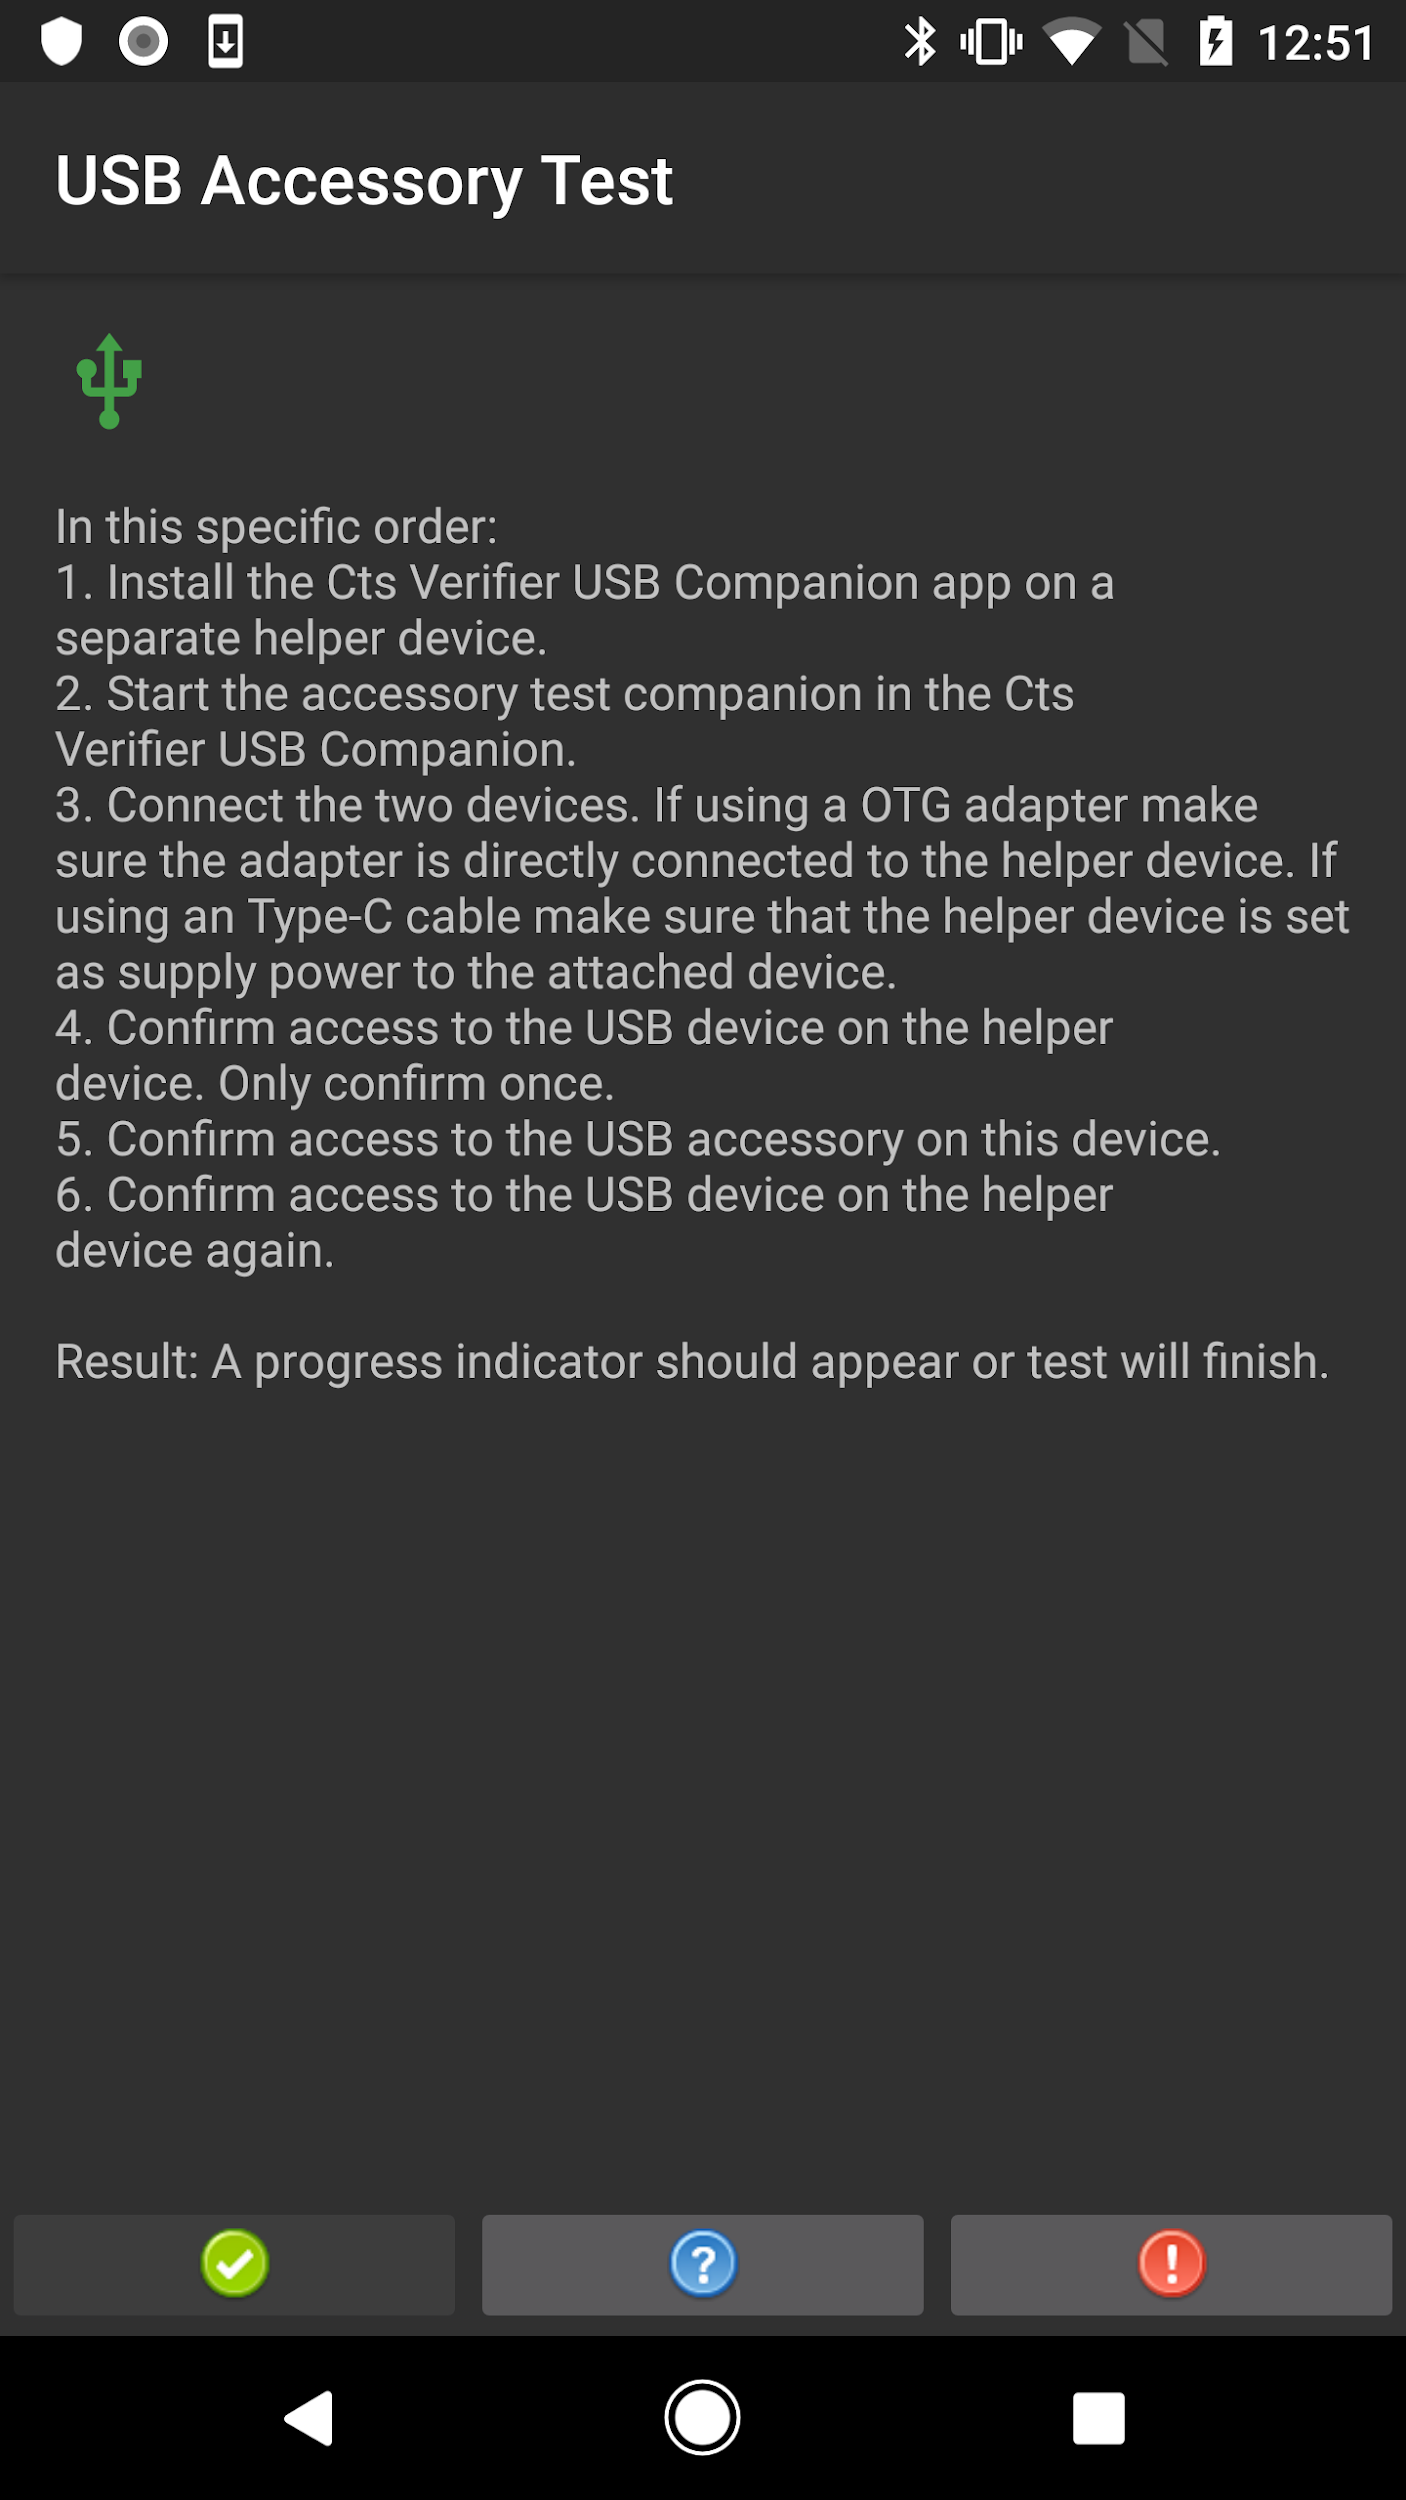
Figure 4. USB accessory test procedure for 8.0 and higher.
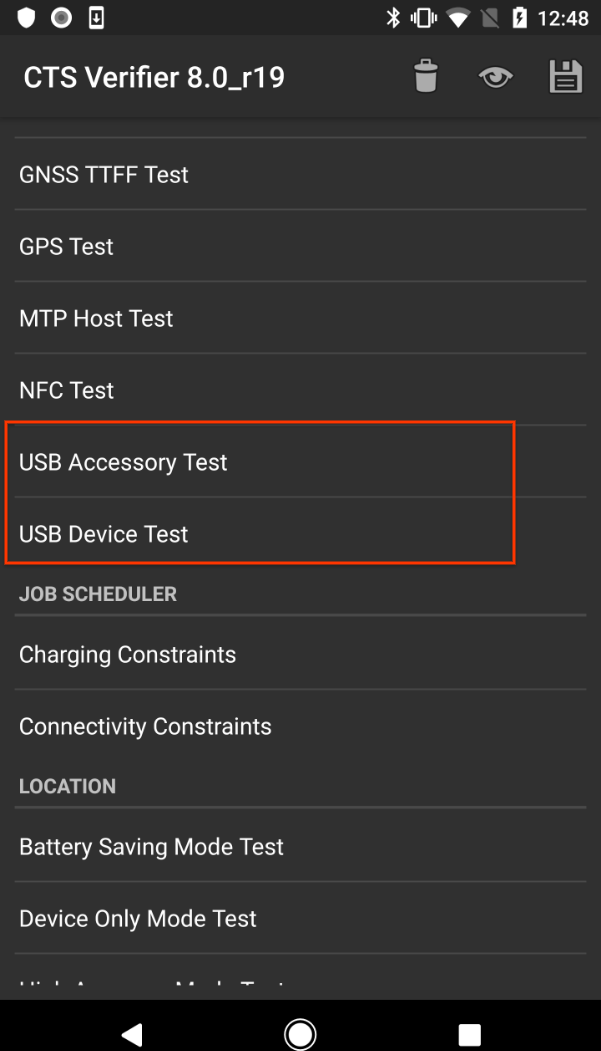
Figure 5. Testing USB accessory mode for 8.0 and higher.
Test USB accessory mode for 7.x and lower
The USB Accessory test requires a Linux computer to run the USB desktop machine (host) program.
- Connect the DUT to the Linux computer.
On the computer, execute the
cts-usb-accessoryprogram from the CTS Verifier package:./cts-usb-accessoryWait for a dialog to appear on the DUT, then tap OK.
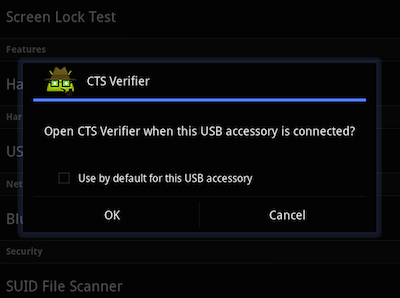
Figure 6. USB accessory test
Go to the USB Accessory Test in the CTS Verifier application on DUT.
On the computer, review the output from the console. Example output:
CTS USB Accessory Tester
Found possible Android device (413c:2106) - attempting to switch to accessory
mode...
Failed to read protocol versionfigure3
Found Android device in accessory mode (18d1:2d01)...
[RECV] Message from Android device #0
[SENT] Message from Android accessory #0
[RECV] Message from Android device #1
[SENT] Message from Android accessory #1
[RECV] Message from Android device #2
[SENT] Message from Android accessory #2
[RECV] Message from Android device #3
[SENT] Message from Android accessory #3
[RECV] Message from Android device #4
[SENT] Message from Android accessory #4
[RECV] Message from Android device #5
[SENT] Message from Android accessory #5
[RECV] Message from Android device #6
[SENT] Message from Android accessory #6
[RECV] Message from Android device #7
[SENT] Message from Android accessory #7
[RECV] Message from Android device #8
[SENT] Message from Android accessory #8
[RECV] Message from Android device #9
[SENT] Message from Android accessory #9
[RECV] Message from Android device #10
[SENT] Message from Android accessory #10
Calibrate camera field of view
Use the field of view calibration procedure to quickly determine the device field of view with moderate accuracy.
Set up the test environment:
- Print the calibration pattern PDF target file on 11" x 17" or A3 size paper.
- Mount the printed pattern on a rigid backing.
Orient the camera device and the printed target as shown in the following diagram:
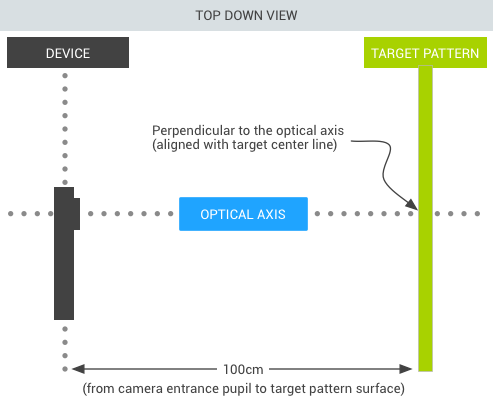
Figure 7. Camera printed target.
Set the target width:
- Measure the distance (in centimeters) between the solid lines on the target pattern to account for printing inaccuracies (~38 cm).
- Start the calibration application.
- Press the setup button and select Marker distance.
- Measure and enter the distance to the target pattern (~100 cm).
- Press the back button to return to the calibration preview.
Verify that the device and target are placed as shown in the figure and the correct distances have been entered into the setup dialog. The preview displays the image with a vertical line overlaid onto it; this line should align with the centerline of the target pattern. The transparent grid can be used with the other vertical lines to verify that the optical axis is orthogonal to the target.
Run the calibration test:
- Select an image resolution (using selector at the bottom left), then tap the screen to take a photo. The test enters calibration mode and displays the photo with two vertical lines overlaid onto the image.
- Determine accuracy:
- If the lines align with the vertical lines on the target pattern within a few centimeters, the reported field of view for the selected resolution is accurate.
- If the lines don't align, the reported field of view is inaccurate. To correct this, adjust the slider at the bottom of the screen until the overlay aligns with the target pattern as closely as possible. When the overlay and the target pattern image are aligned, the displayed field of view is a close approximation to the correct value. The reported field of view should be within 3 degrees of the calibration value.
- Press back button and repeat the calibration test for all image resolutions supported by the DUT.
Run CTS Verifier for alternate modes
Starting CTS 10 R6 and CTS 11 R2 releases, CTS Verifier supports the tests required for devices with alternate modes, or for devices with more than one screen mode.
At the top of the main list view in CTS Verifier a button is shown to enable users to toggle between unfolded and folded display mode. CTS Verifier will show the necessary tests for the selected display mode. To execute the alternate modes in CTS Verifier, one should switch the button to the appropriate display mode and run the list of tests shown.
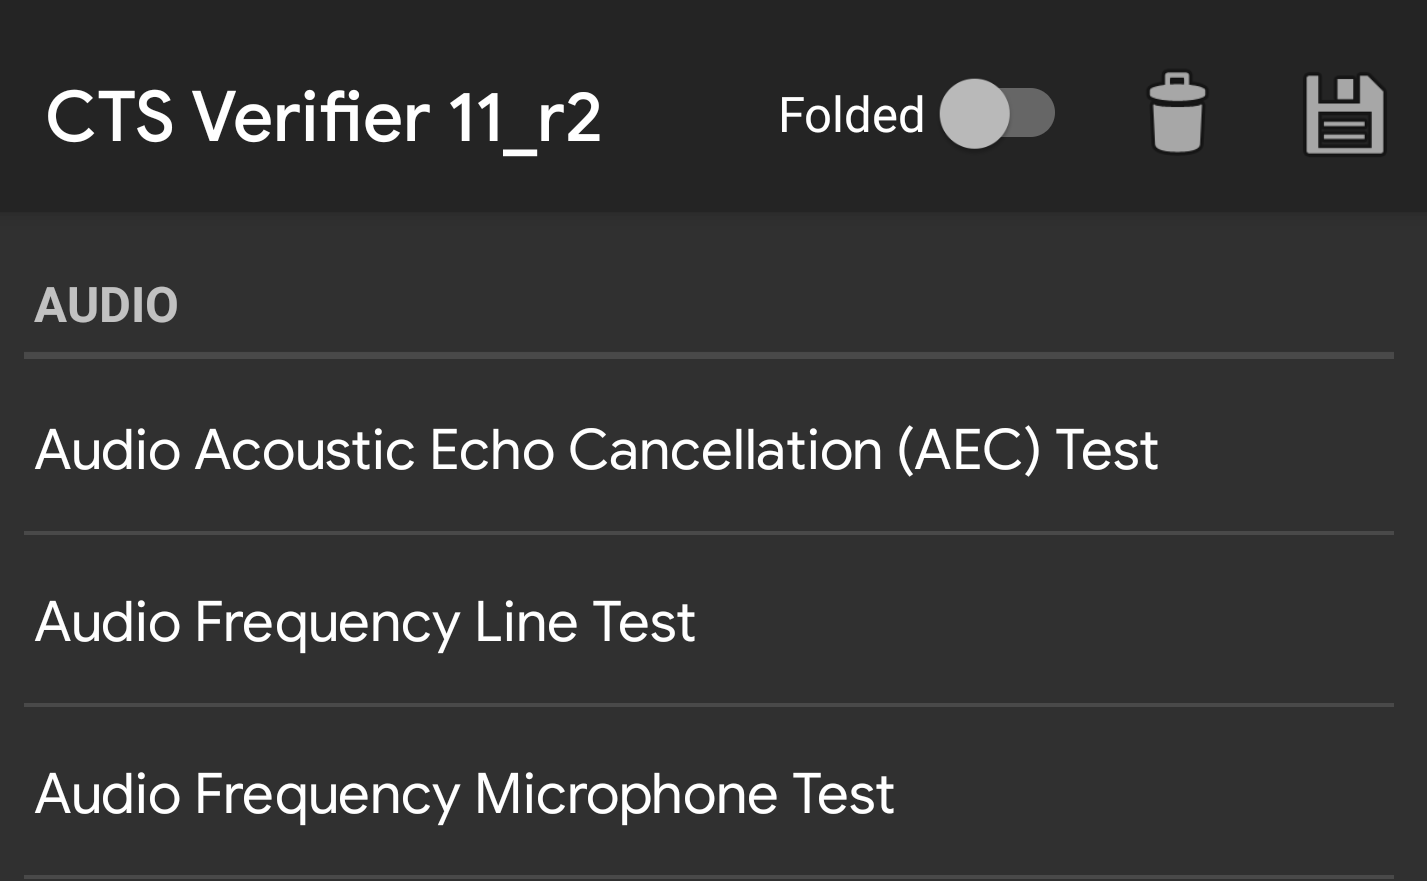
Figure 8. CTS Verifier toggle switch.
The results of folded tests will be recorded in the same report with the unfolded tests. To identify each test result from which the test set is from, a suffix is added to each test name under the folded mode.
<Test result="fail" name="com.android.cts.verifier.deskclock.DeskClockTestsActivity[folded]">
  <RunHistory subtest="CREATE_ALARM[folded]">
    <Run start="1594176663973" end="1594176665841" isAutomated="false" />
  </RunHistory>
</Test>
Export results
After all tests complete, you can save the results as a report and download them to a computer. Report names are automatically time-stamped based on the DUT system time.
To save your test results, tap the save (disk) icon at the top of the list of test categories.
Wait for a dialog that displays the path to the saved report (for example,
/sdcard/verifierReports/ctsVerifierReport-date-time.zip), then record the path.Connect the DUT to the Linux computer.
From the Android SDK installation on the Linux computer, download reports from the connected device using
adb shell content readoradb pull CTSVerifierReportPath.For Android 7.x and higher, download all reports using the following command:
adb pull /sdcard/verifierReportsFor Android 6.0 and lower, download all reports using the following command:
adb pull /mnt/sdcard/ctsVerifierReports/For Android 10 and higher, implementing Automotive and devices running as a secondary user, download the latest report using the following command:
adb shell content read --user <var>CURRENT_USER</var> --uri content://com.android.cts.verifier.testresultsprovider/reports/latest > report.zipTo list all reports available in the connected device:
  adb shell content query --user CURRENT_USER --uri content://com.android.cts.verifier.testresultsprovider/reports
  ```

To download a report from the list, you can specify the Row ID or
filename. For example:

```shell
  adb shell content read --user CURRENT_USER --uri content://com.android.cts.verifier.testresultsprovider/reports/0 > report.zip
  ```

```shell
  adb shell content read --user CURRENT_USER --uri content://com.android.cts.verifier.testresultsprovider/reports ctsVerifierReport-date-time.zip > report.zip
  ```
To clear pass or fail results, select the results in the CTS Verifier app and select Menu > Clear.