
CTS Verifier audio tests require the following audio peripherals to be connected:
Audio loopback plug
The audio loopback plug contains electronics that route the signal coming from the 3.5 mm analog headphone jack back to the input in the headphone jack. This imitates an analog headset, so that's how it appears to the DUT, albeit with a perfect loopback route from the output to the input.
For a circuit diagram and a link to a manufacturer, see the Audio loopback plug.
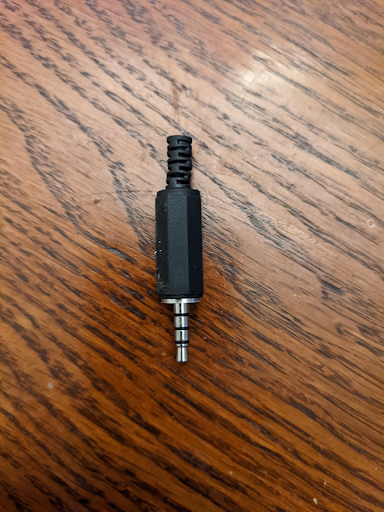
Figure 1. Audio loopback plug.
Calibrate for an analog loopback
The volume level of the output on the 3.5 mm headset jack is controlled by volume buttons, typically located on the side of the DUT. To set an appropriate level for the 3.5 mm headset jack and the audio loopback plug, do the following:
- Start the CTS Verifier test in question.
- Insert the analog loopback plug in the 3.5 mm analog headset jack.
- Start the Audio Loopback Calibration panel and start the playback process.
- Use the volume buttons on the DUT to adjust the level as specified in Audio Loopback Calibration panel.
USB-to-analog headset adapter
A USB to analog headset adapter converts the USB digital audio signal to a signal that is compatible with a standard analog headset jack. The adapter is typically connected to analog headphones or an analog headset. In this sense it's equivalent to the 3.5 mm analog headset jack found on some DUTs. However its data route in the system is different and must be tested separately.
As with the 3.5 mm analog headset jack, an Audio loopback plug must be connected to the analog jack on the adapter for any tests requiring loopback. Further, the USB-to-analog headset adapter won't cause a USB connection to the DUT until an analog device (or the audio loopback adapter) is connected.
Some USB adapters won't work with CTS Verifier. For a list of tested adapters, see the USB audio adapter recommendation.
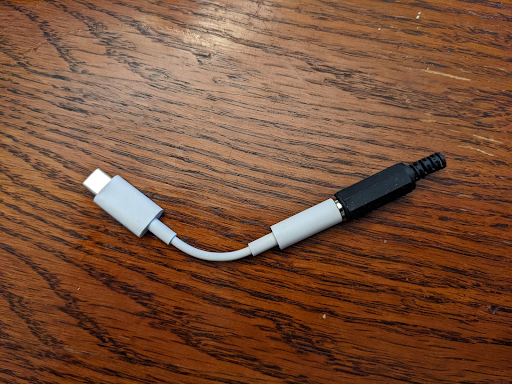
Figure 2. Audio loopback plug connected to USB-to-analog headset adapter.
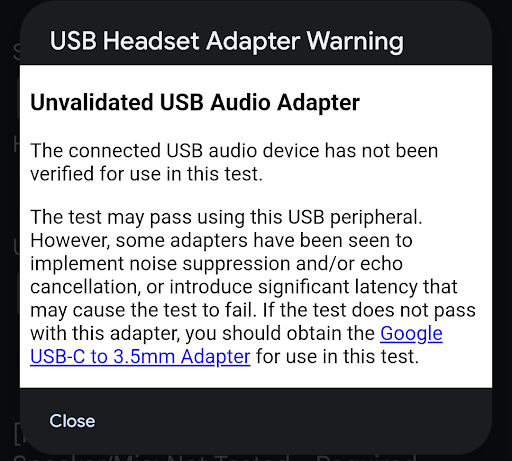
Figure 3. USB headset adapter warning.
It might be the case that the connected peripheral is sufficient to pass a test. However, some adapters implement noise suppression or echo cancellation, or introduce additional latency (30 to 40 ms) that can cause the test to fail. If the test doesn't pass with that adapter, use the Google USB-C Digital to 3.5 mm adapter.
Calibrate for a USB-to-analog headset loopback
The volume level of the output on the USB audio port is controlled by volume buttons, typically located on the side of the DUT. To set an appropriate level for the 3.5 mm headset jack + audio loopback plug:
- Start the CTS Verifier test.
- Insert the USB-to-analog headset adapter and audio loopback plug into the DUT's USB port.
- Start the Audio calibration panel and start the playback process.
- Use the volume buttons on the DUT to adjust the level as specified in Audio calibration panel.
USB audio interface
A USB audio interface refers to an external device with a variety of inputs and outputs. These peripherals are generally intended for musical uses.
Due to the wide variety of commercially available interface devices, and their constantly changing availability, the CTS Verifier doesn't specify a specific make and model of the interface device. The tester must determine if a given USB interface works for the test.
Required additional hardware
This section lists the additional hardware required to with the USB audio interface peripheral.
Patch cables
Use 1/4 inch to 1/4 inch male patch cables to connect the outputs to the inputs of the USB.
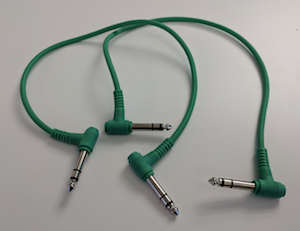
Figure 4. Patch cables.
USB peripheral cable
The USB peripheral cable (which typically comes with the peripheral) connects the USB audio peripheral to the host device.
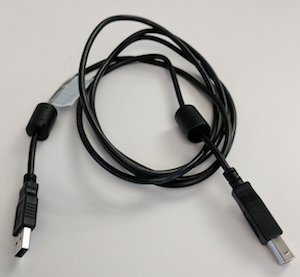
Figure 5. USB peripheral cable.
USB "On the Go" (OTG) adapter
A USB "On The Go" (OTG) adapter is required to physically connect the peripheral to the Android device and indicate to the Android device to assume the role of host.
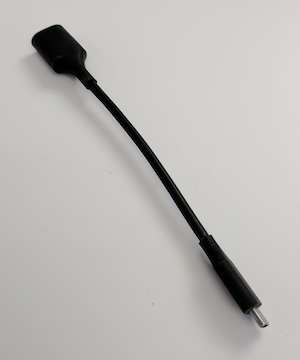
Figure 6. USB OTG adapter.
Configure for audio loopback
The following figures show the USB audio interface configurations:

Figure 7. USB audio interface with loopback connected to an Android device.
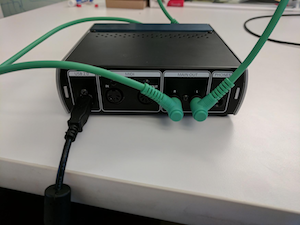
Figure 8. Connections on the back of the USB audio interface.
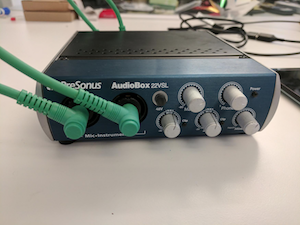
Figure 9. Connections on the front of the USB audio interface.
Calibrate for an USB audio interface
The volume level of the output on the USB audio port is controlled by the volume buttons (located on the side of the DUT) and controls on the USB audio interface itself. These controls generally include a level control for each input and a mix control that specifies the relative level of the signal from the input jacks and any signal coming from the USB audio input.
To set an appropriate level for the USB audio interface, do the following:
- Using the audio patch cables, connect the first input jack to the first output jack. One or both of these might be labeled either 1 or Left.
- Repeat for the second channel inputs or output, which might be labeled 2 or Right.
- DON'T cross-connect the inputs and outputs by connecting the first input to the second output and the second output to the first input.
- Set both input levels on the USB audio interface to their lowest value.
- If present on the USB interface, set the mix control ONLY to Playback, to prevent feedback.
- If the USB audio interface has a Monitor knob, set it to full volume to control the output volume.
- Start the CTS Verifier test.
- Start the Audio calibration panel and start the playback process.
- Use the volume buttons on the DUT to set the level to maximum level.
- Use the input level controls on the USB audio interface to adjust the level, as specified in Audio calibration panel to ensure the best signal-to-noise ratio.