The modular rig system supports ITS test automation and consists of a plastic box that is Computerized Numerical Control (CNC) cut from computer-aided design (CAD) drawings, a chart tablet, and a device under test (DUT). The modular rig system consists of a base rig and an optional tele extension rig. The modular base rig has a chart distance of 22 cm and can test mobile device cameras with a FoV of 60 degrees to 120 degrees. The base rig can perform testing rotated 90 degrees with the DUT on top (shown in Figure 2).
The tele extension rig supports testing cameras that have a long minimum focus distance (telephoto cameras). The tele extension rig is bolted onto the base rig and the length can be customized based on your camera testing requirements when purchasing through the qualified vendors. Camera ITS supports chart distances of up to 100cm.
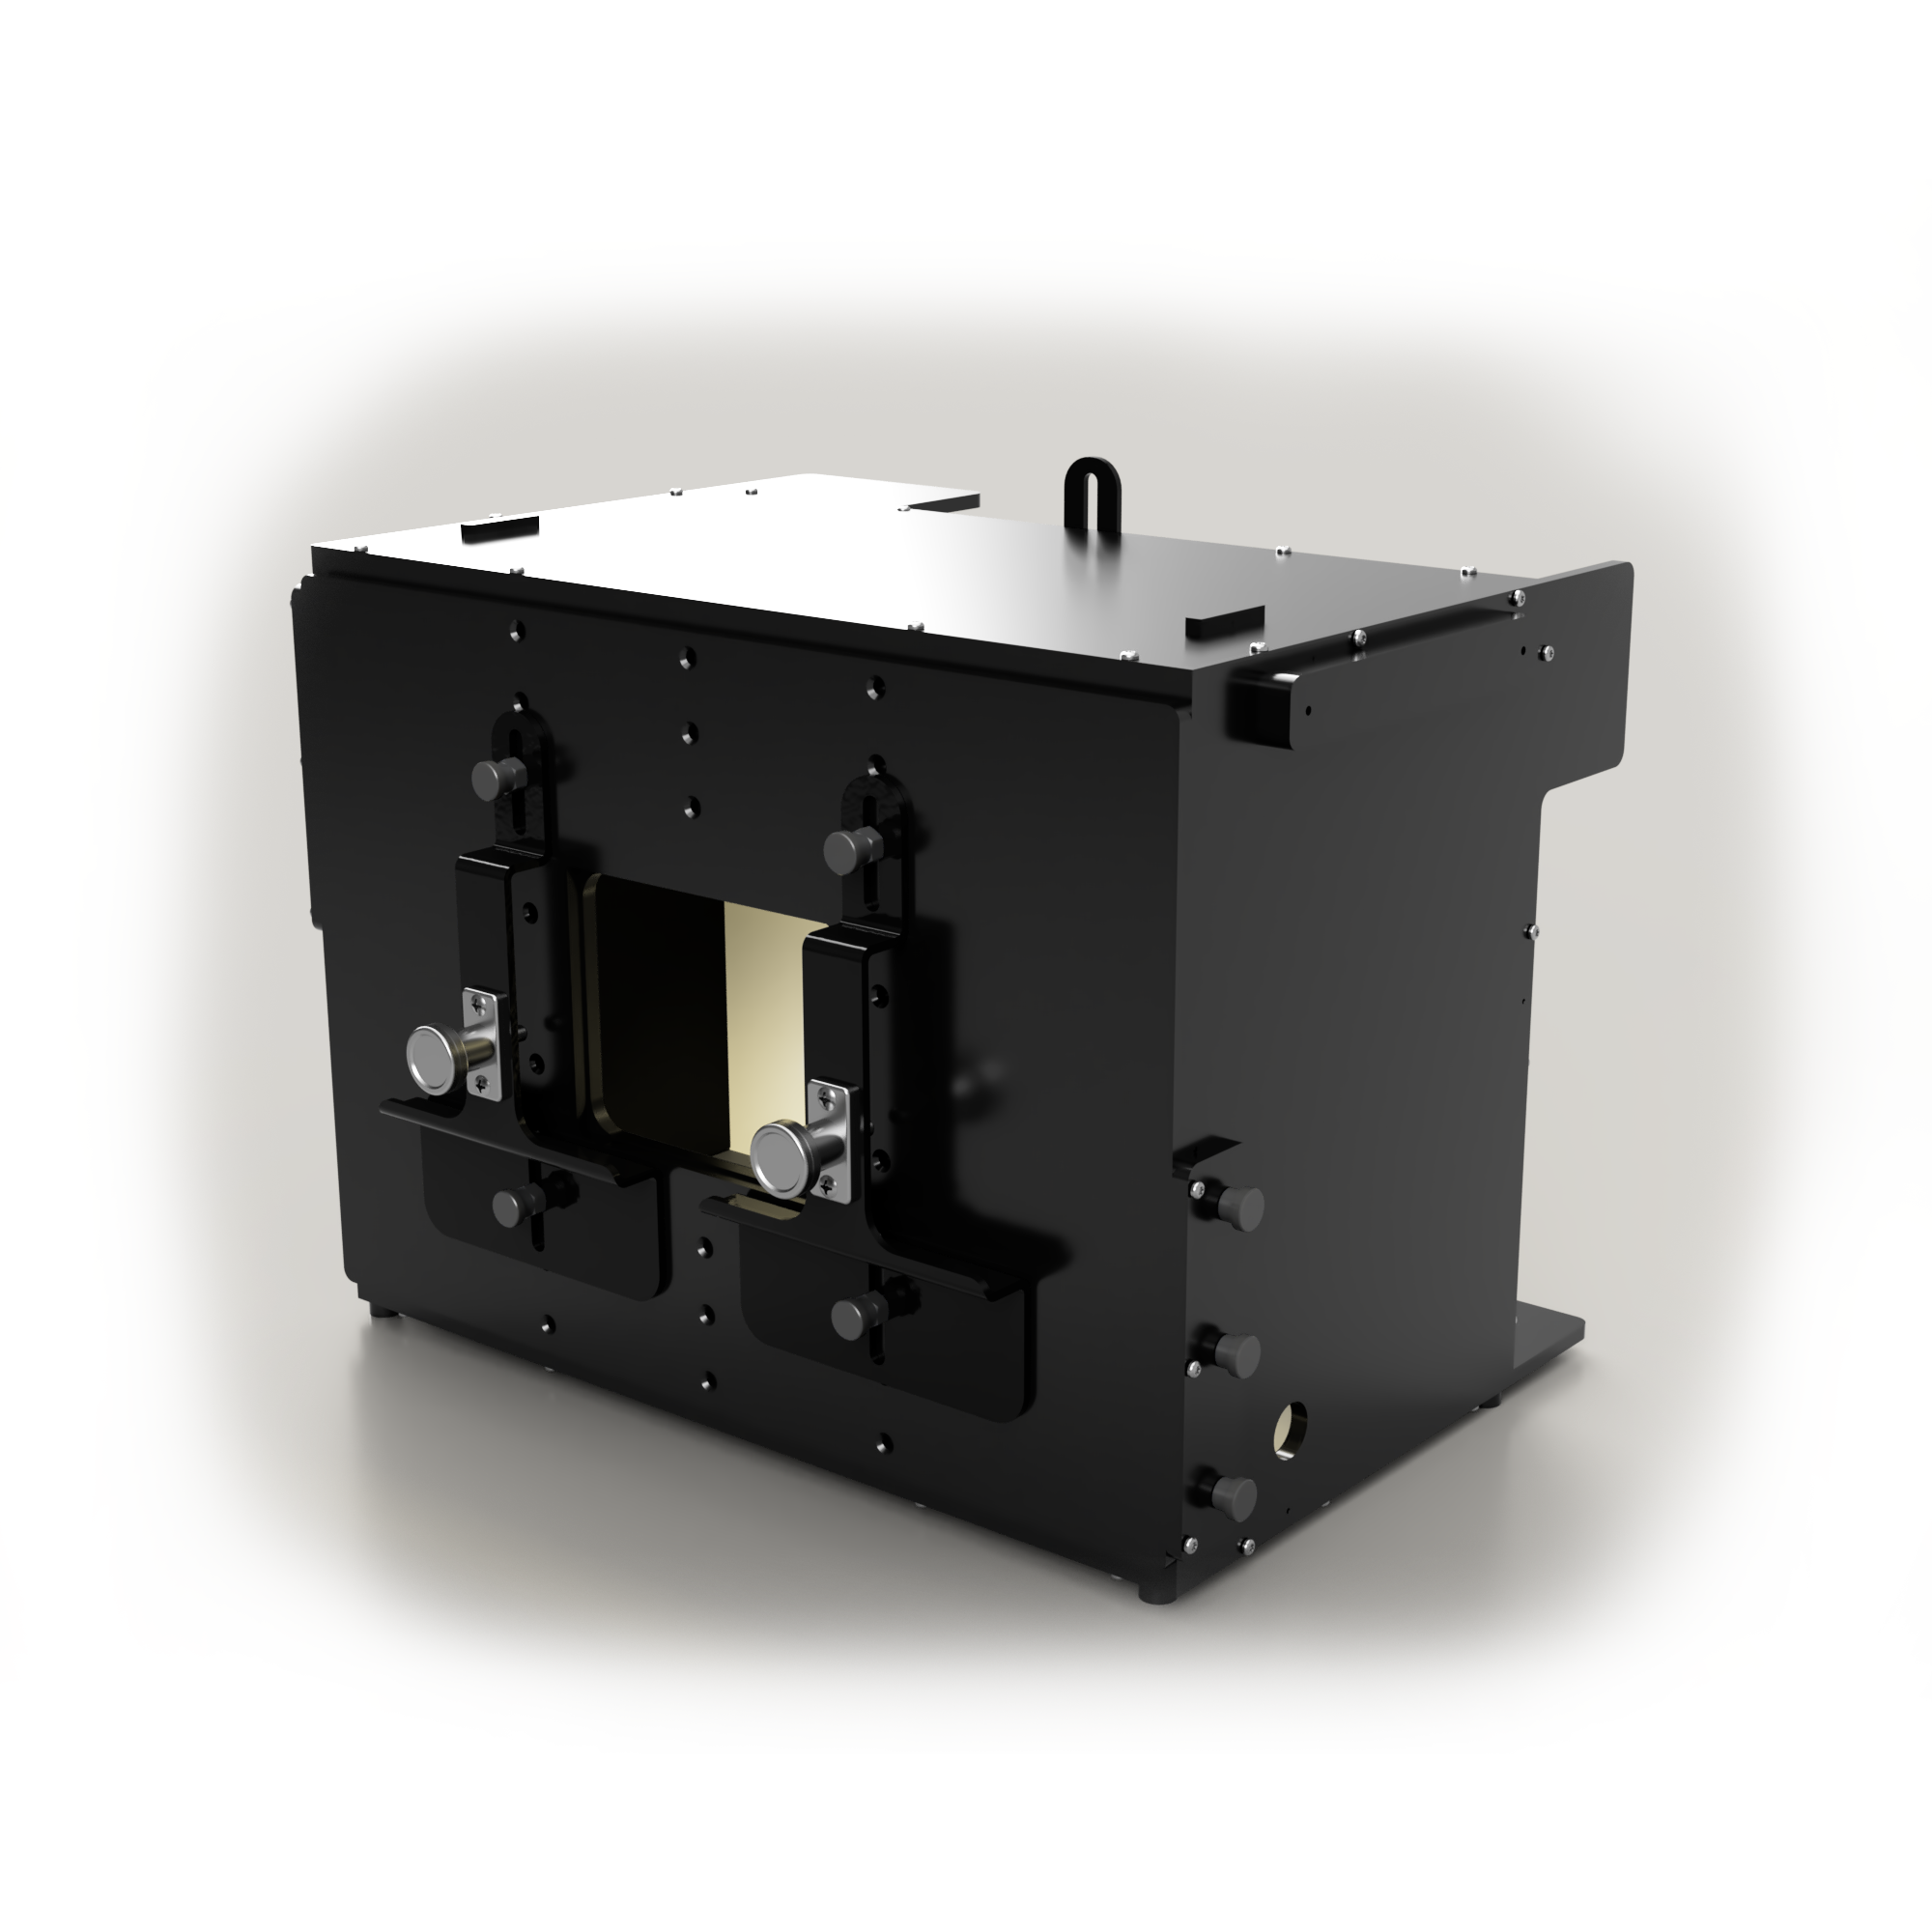
Figure 1. Modular base rig.
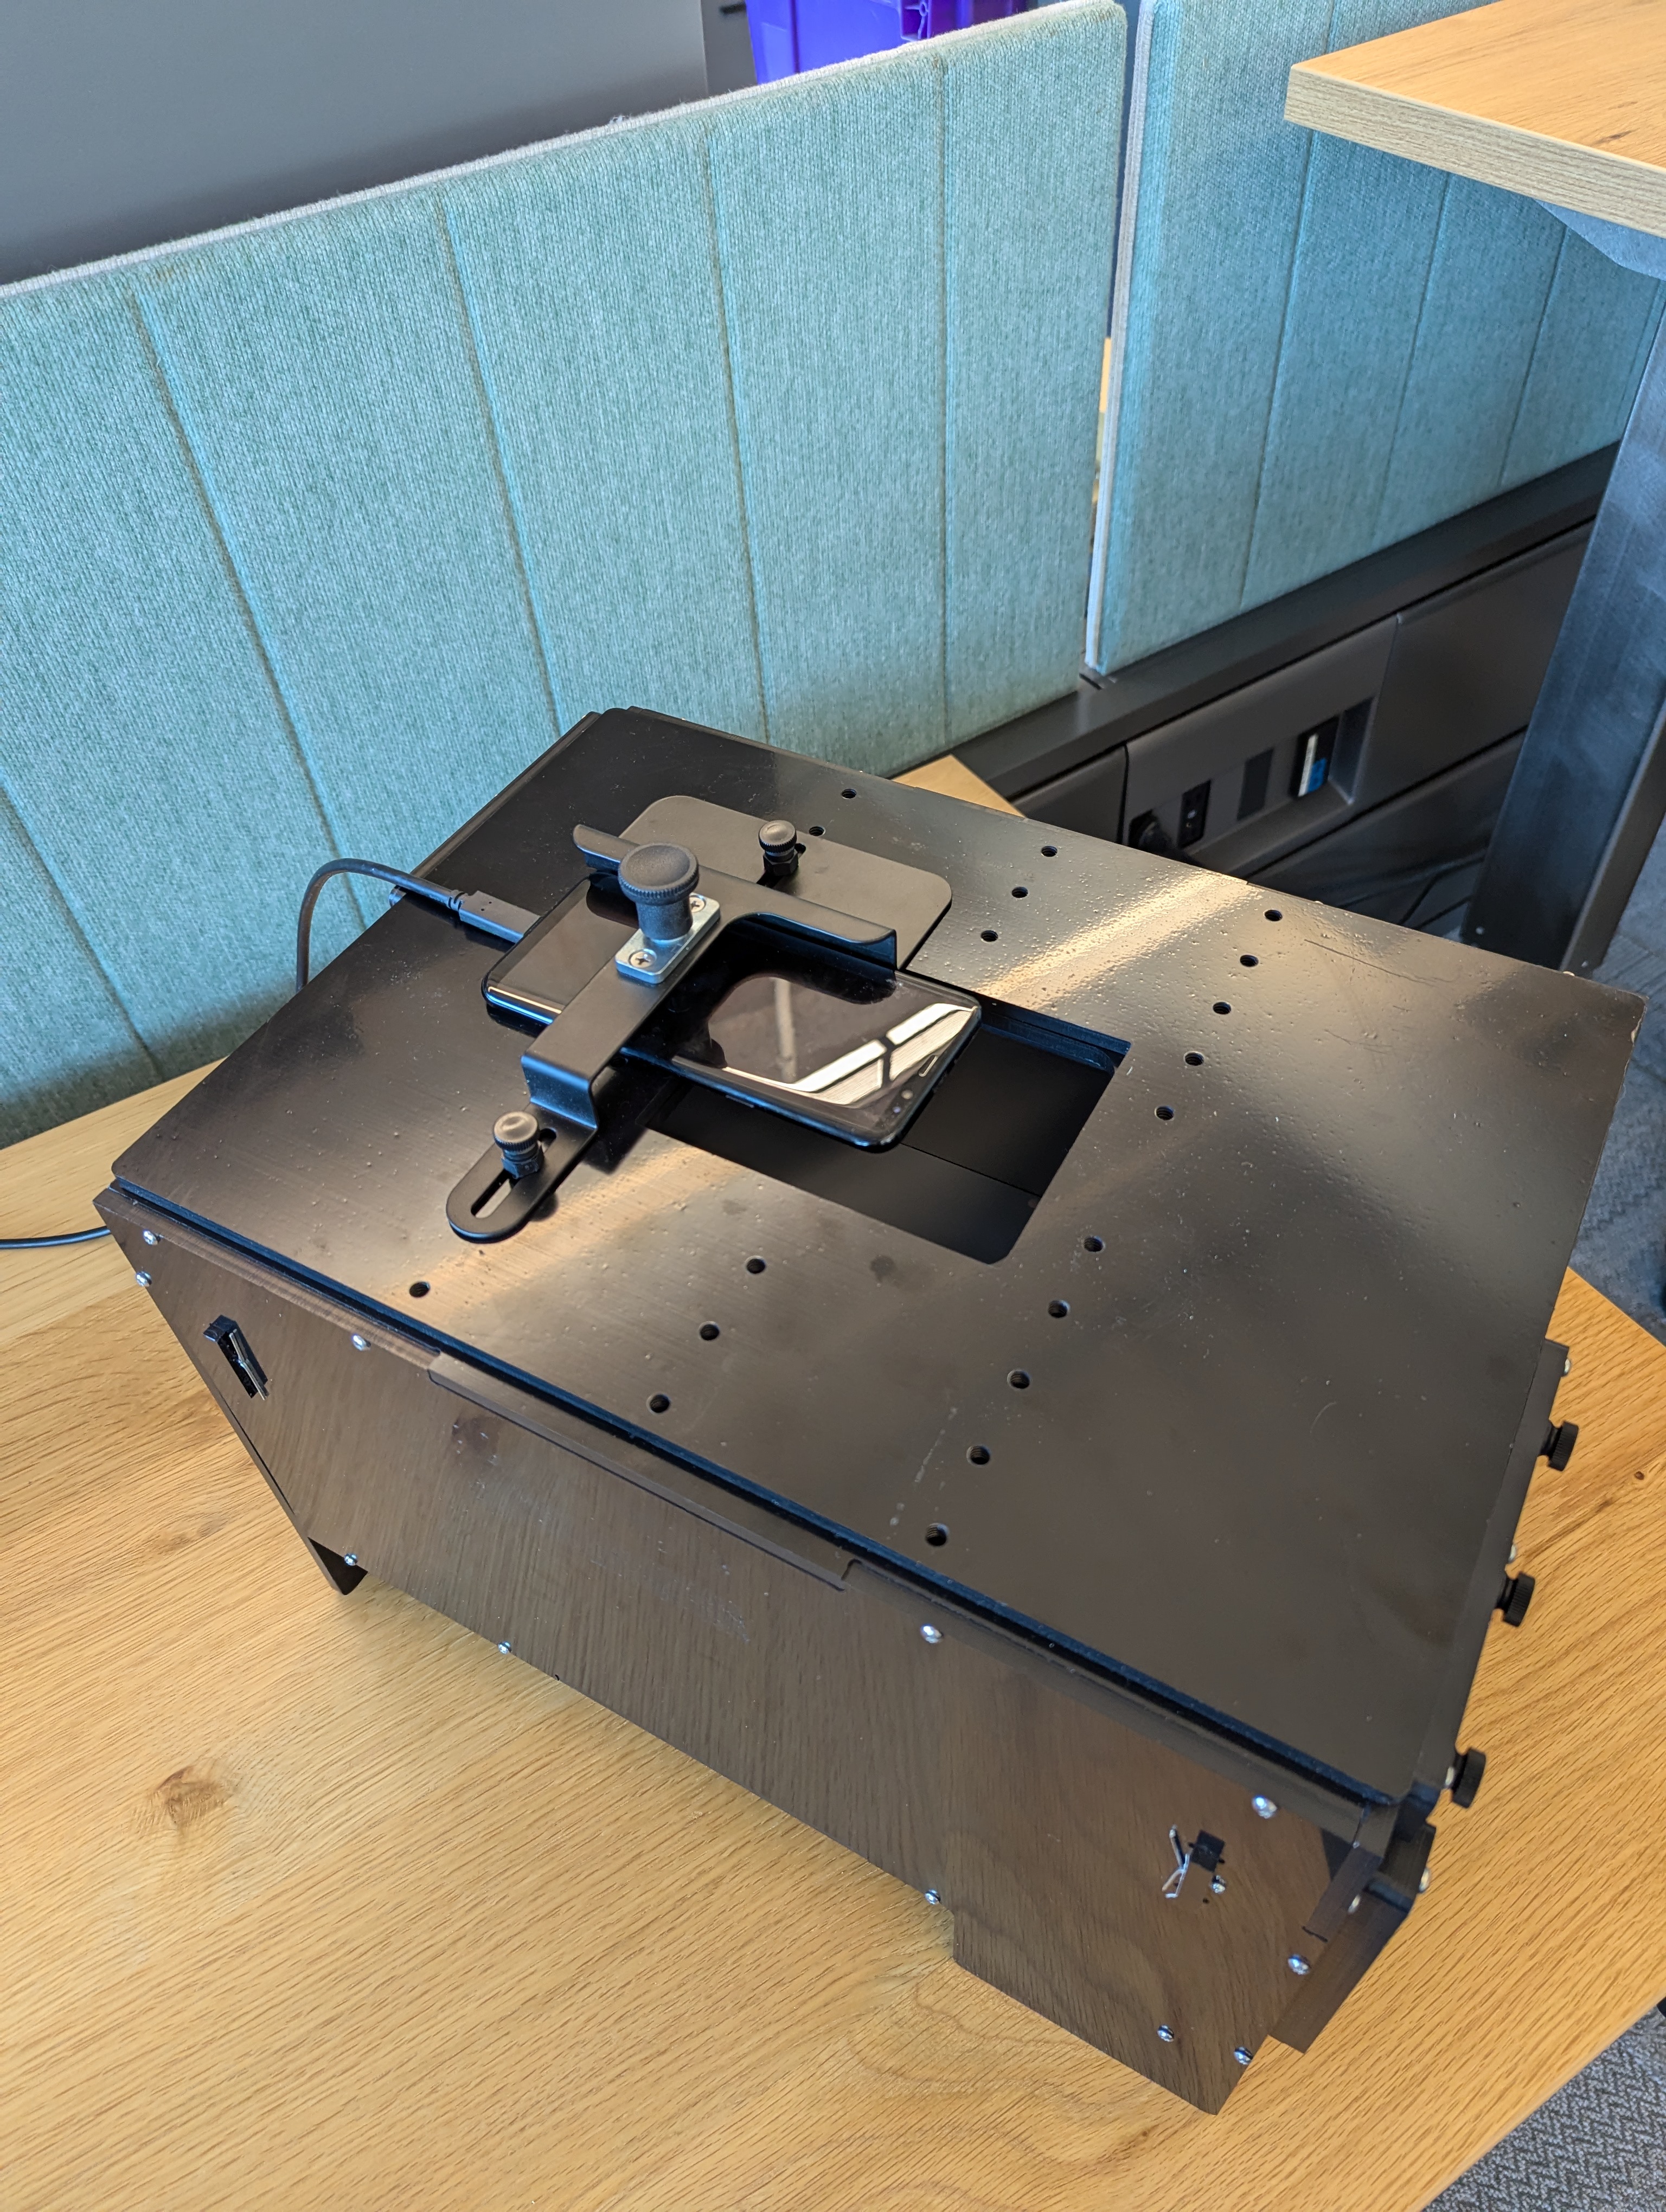
Figure 2. Modular base rig rotated 90 degrees.
Revision history
The following table describes the revision history of the modular rig system and includes download links to each version of the production files.
| Date | Revision | Production file download | Change log |
|---|---|---|---|
| September 2024 | 1.2 | Modular base rig rev1.2 |
|
Purchase a modular rig system
We recommend purchasing the modular rig system, optional tele extension rig, and accessories from one of the following qualified vendors.
Byte Bridge Inc.
USA: 1502 Crocker Ave, Hayward, CA 94544-7037
China: 22F #06-08, Hongwell International Plaza Tower A, 1600 West Zhongshan Road, Xuhui, Shanghai, 200235
www.bytebt.com
androidpartner@bytebt.com
USA: +1-510-373-8899
China: +86-400-8866-490JFT CO LTD 捷富通科技有限公司 (previously known as MYWAY DESIGN)
China: No. 40, Lane 22, Heai Road, Wujing Town, Minhang District, Shanghai, China
Taiwan: 4F., No. 163, Fu-Ying Road, XinZhuang District, New Taipei City 242, Taiwan
www.jftcoltd.com
service@jfttec.com or its.sales@jfttec.com
China:+86-021-64909136
Taiwan: 886-2-29089060
Mechanical drawings
The following is a mechanical drawing of the modular base rig.
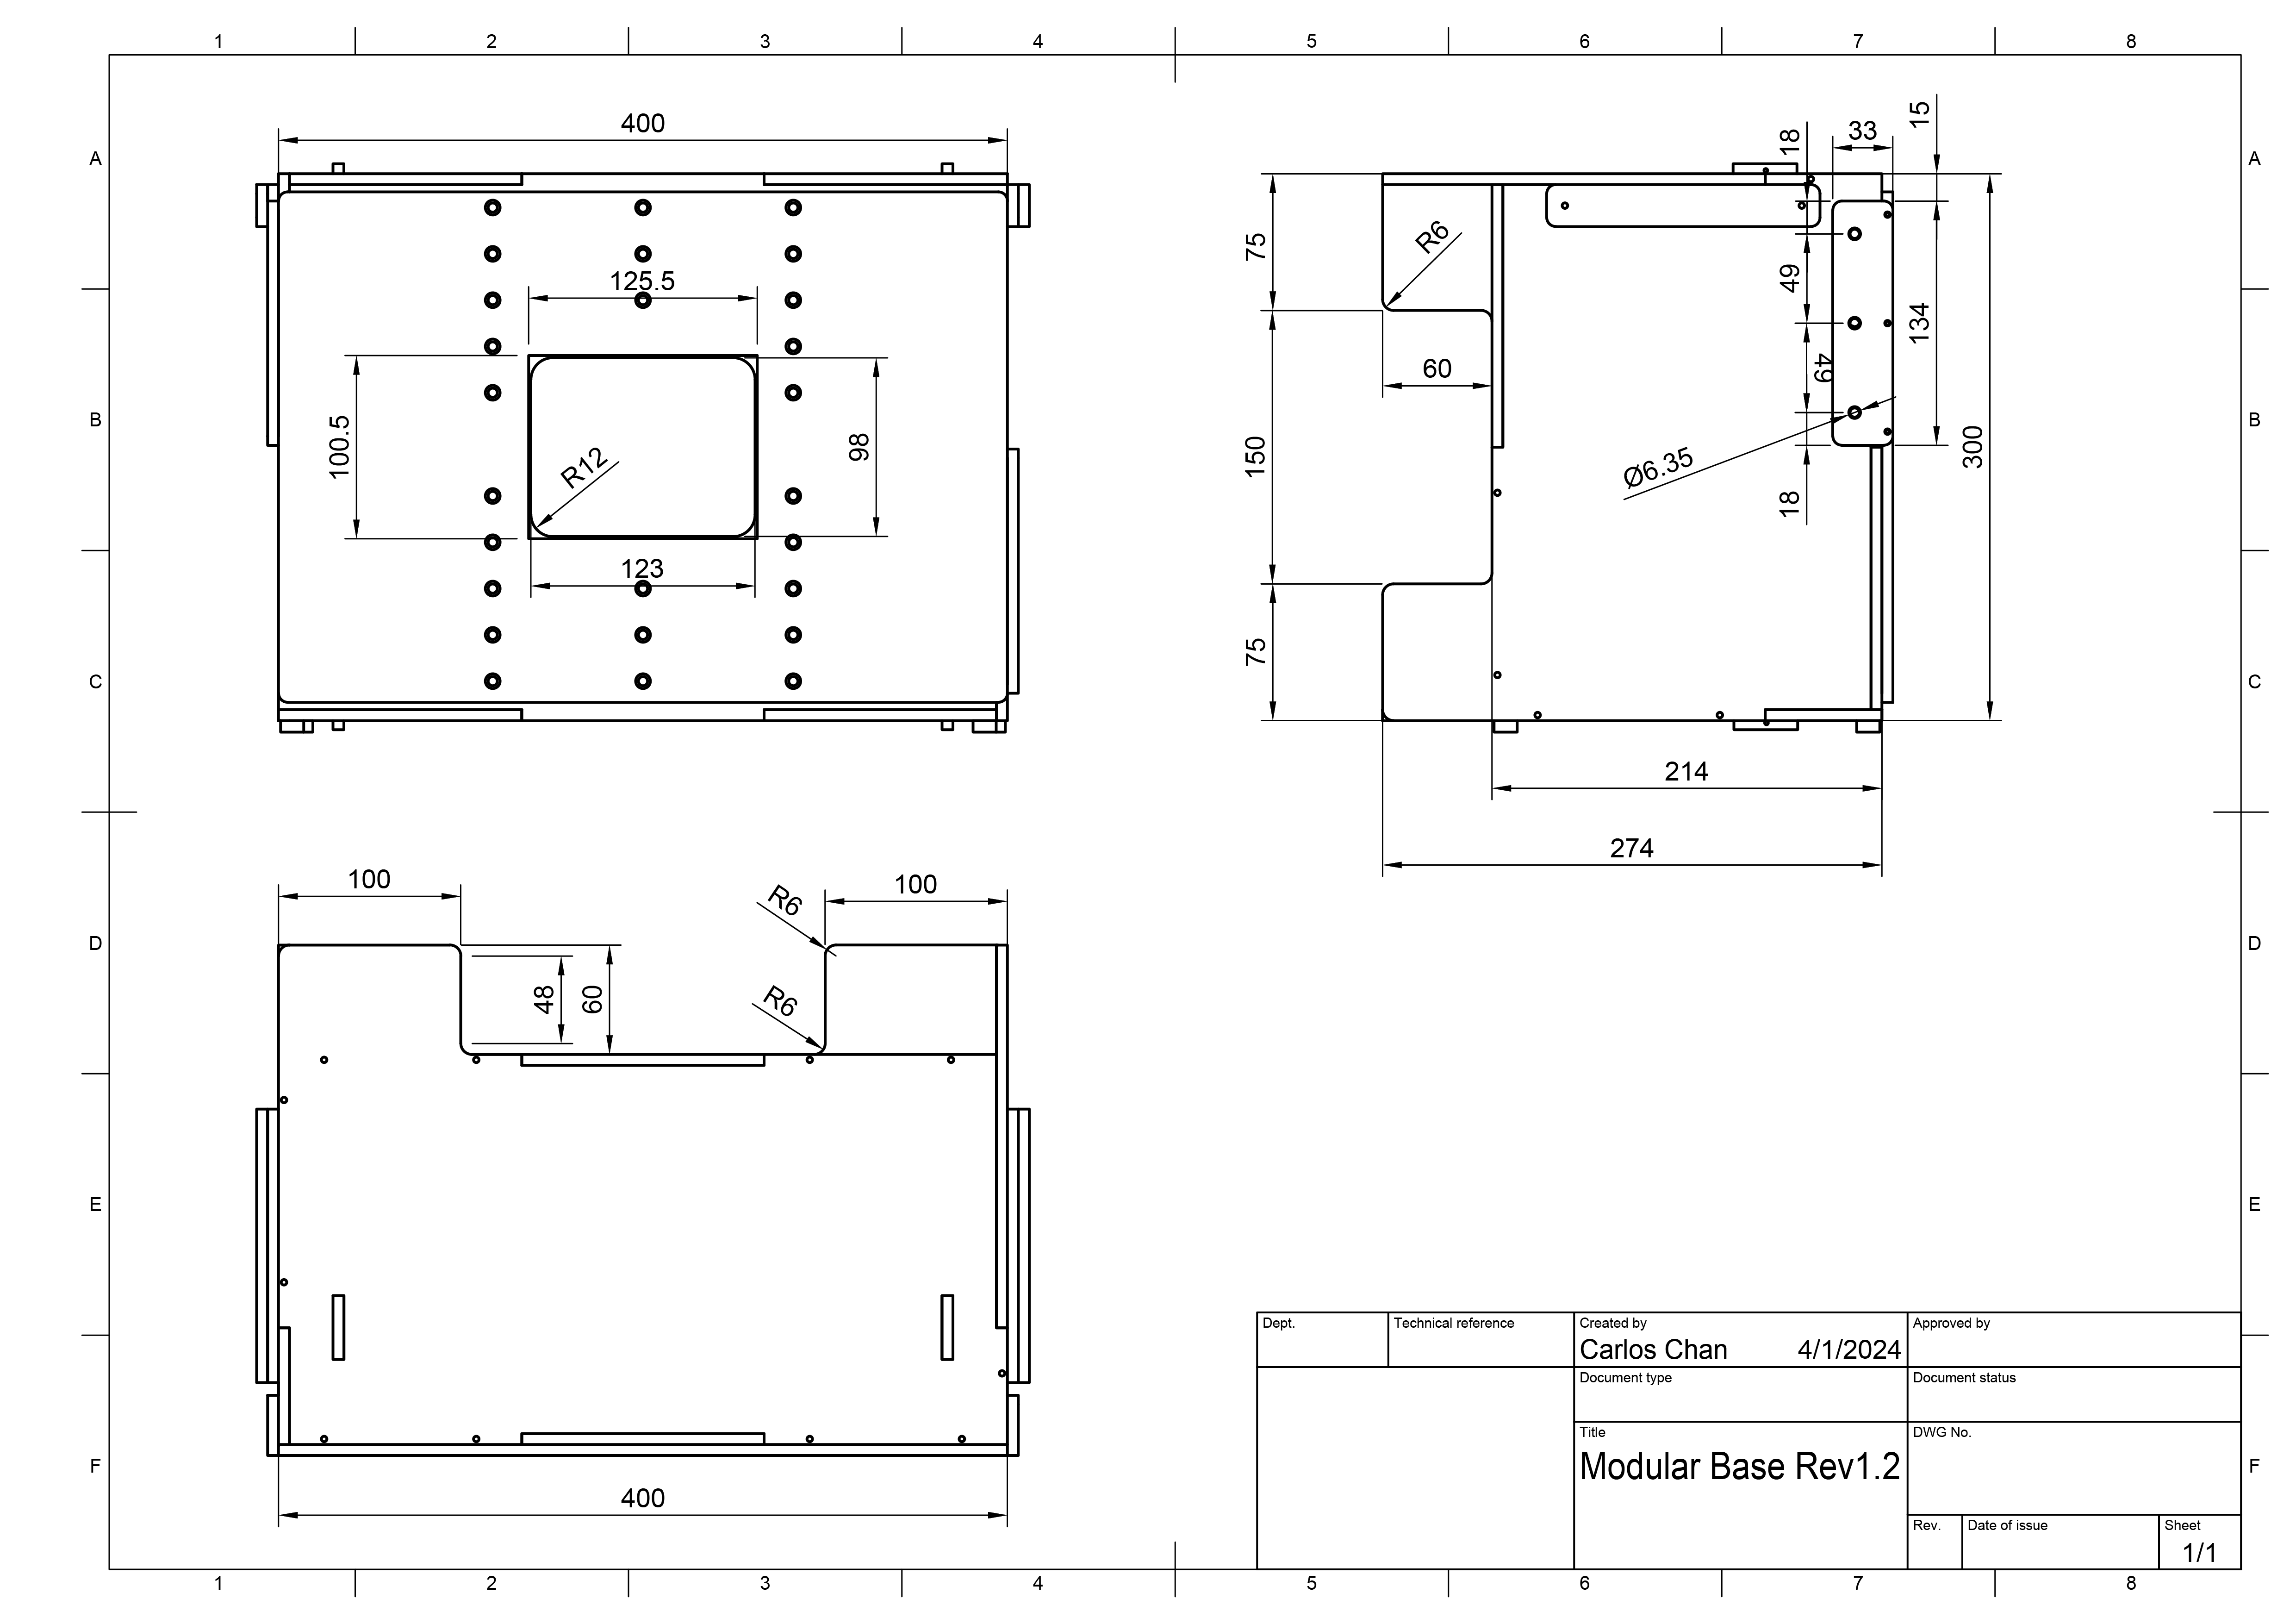
Figure 3. Mechanical drawing of modular base rig
Base rig setup
Follow these steps to set up a modular base rig.
Purchase a modular rig system from a qualified vendor.
Make sure you have all the components in the following table (items shown in Figure 4).
Component Quantity Modular base rig 1 Phone mount bracket 2 Tablet mount bracket 1 12V power supply (UL listed, 1A minimum) 1 Aperture 1 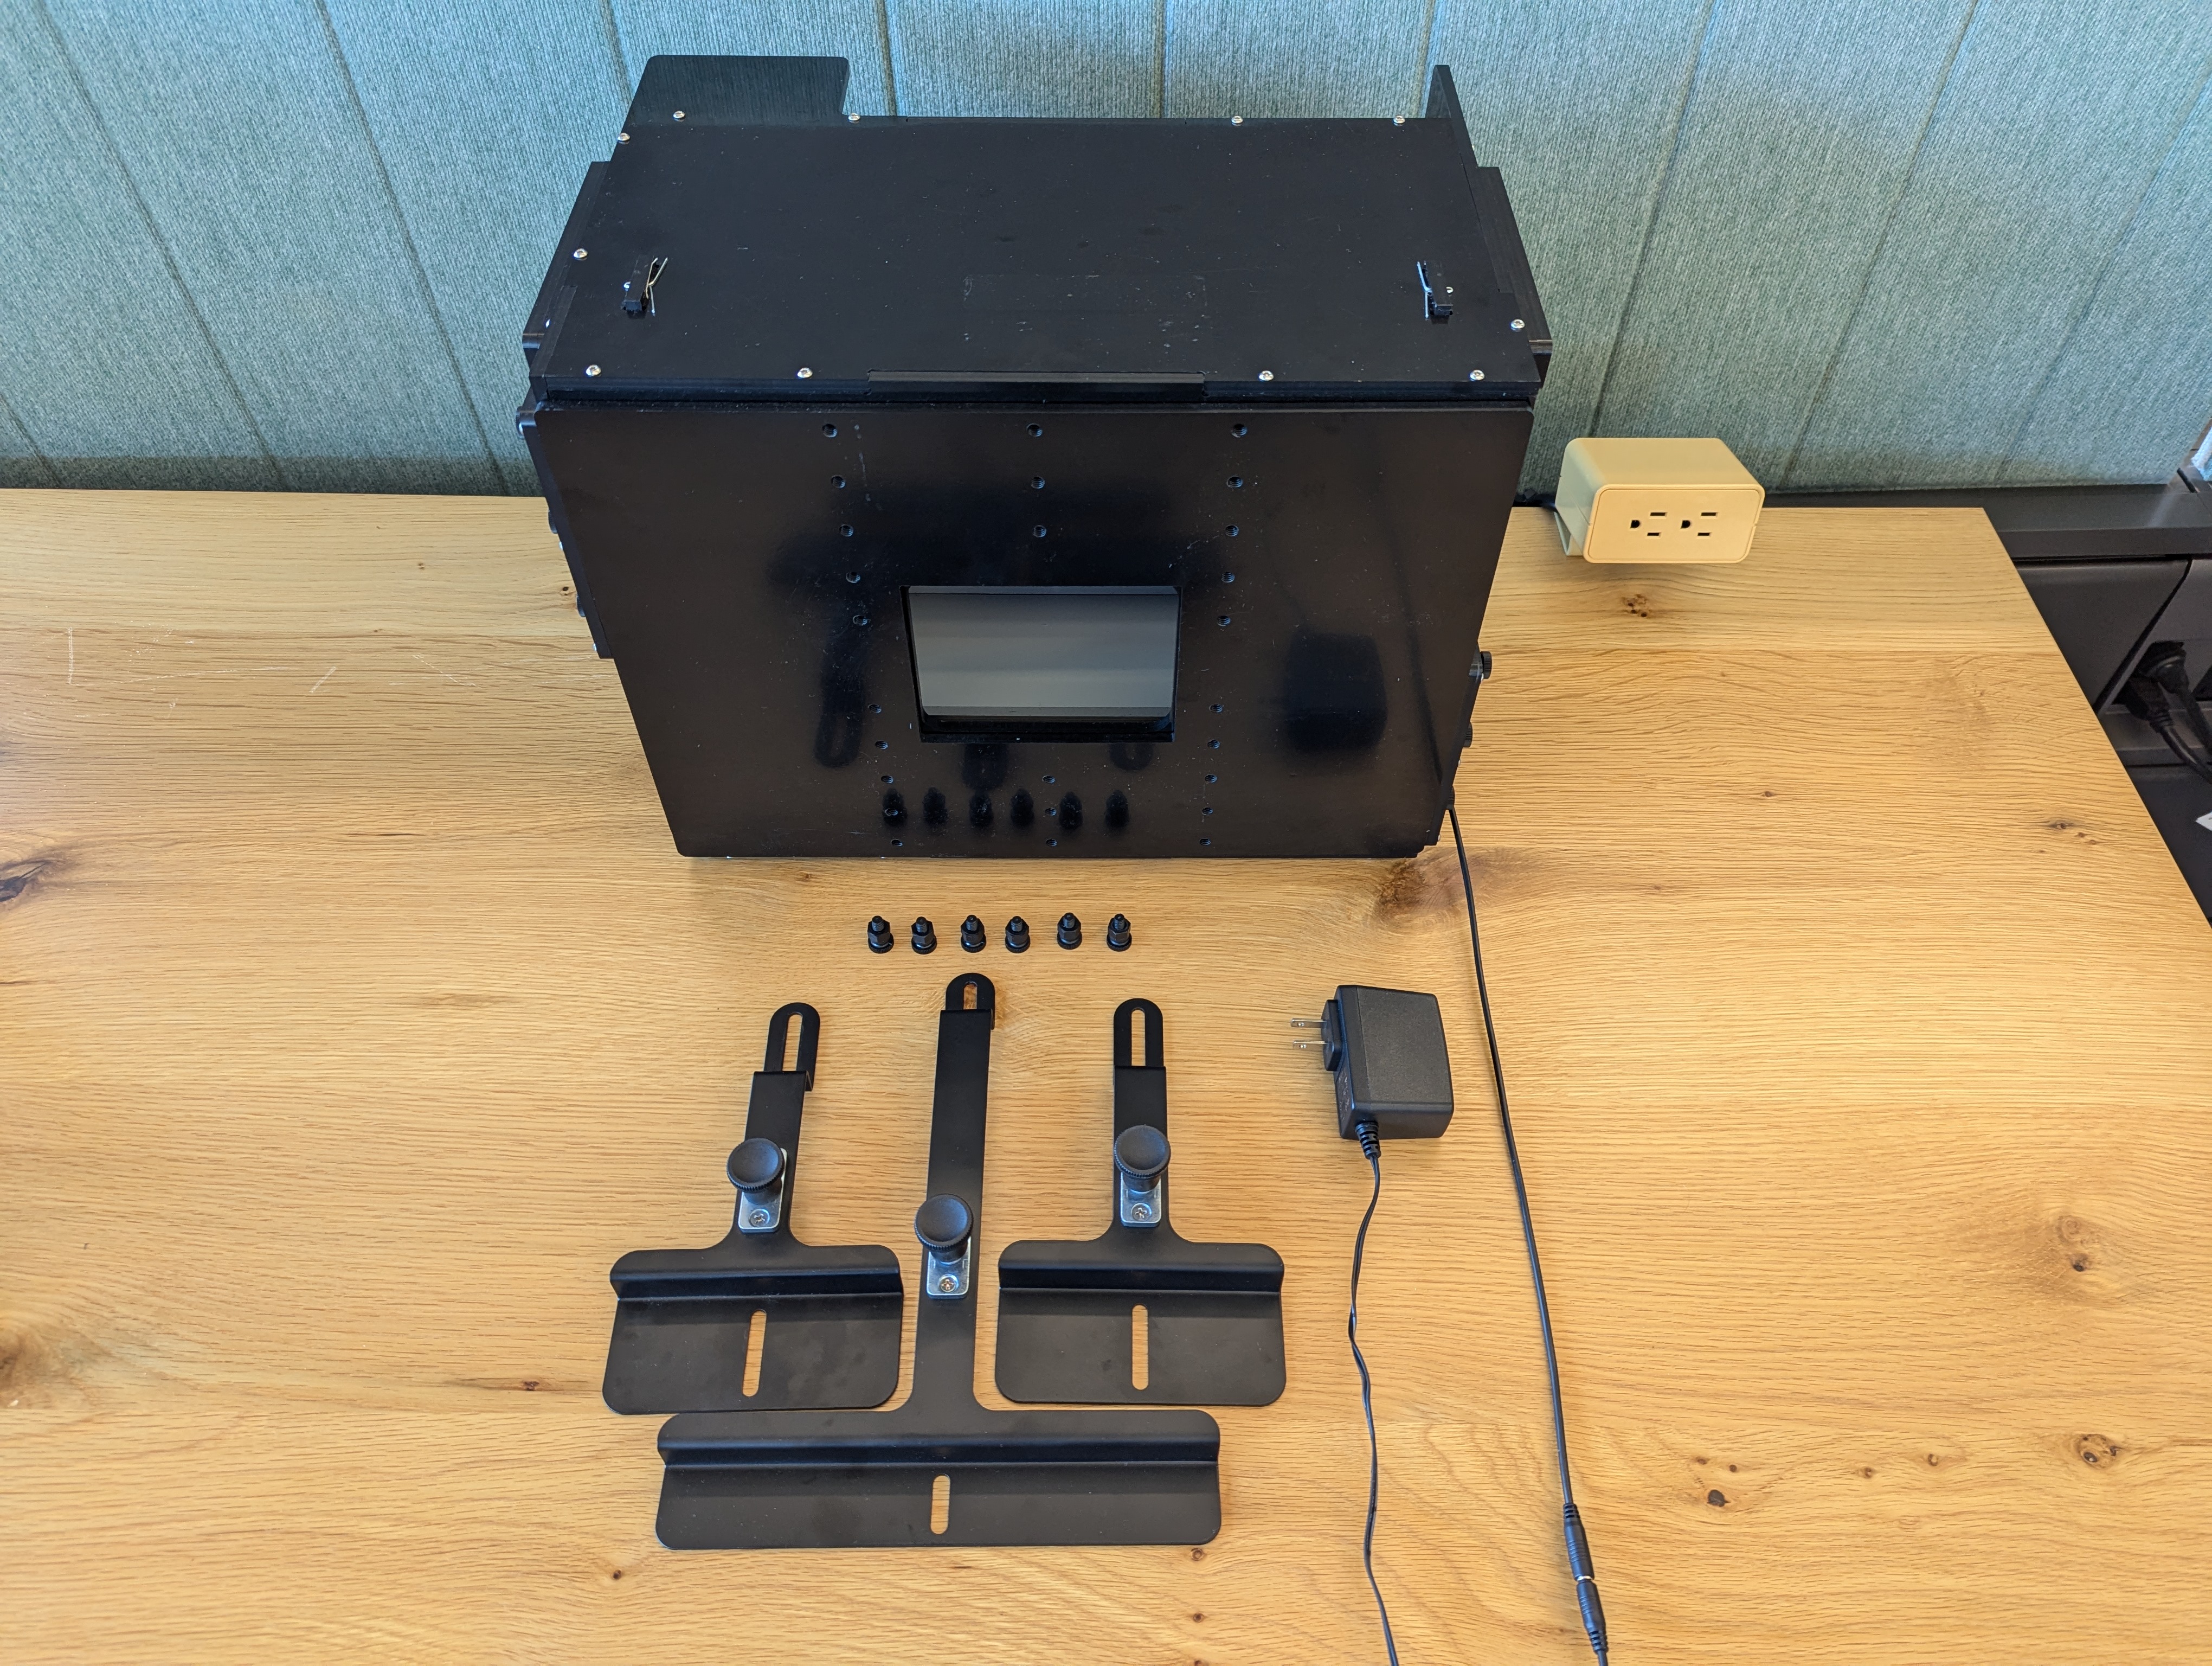
Figure 4. Modular base rig components.
Depending on your setup, make sure you have the necessary accessories in the following table (shown in Figure 5). These accessories can be purchased from a qualified vendor.
Item Quantity Lighting controller (can control up to 3 rigs) 1 5v power supply for lighting controller 1 DC barrel cable connecting lighting to modular base rig 1 DC barrel cable adaptor (5.5mm x 2.1mm to 3.5mm x 1.35mm) 1 USB A cable to USB cable 1 Foldable kit (if DUT is a foldable device) 1 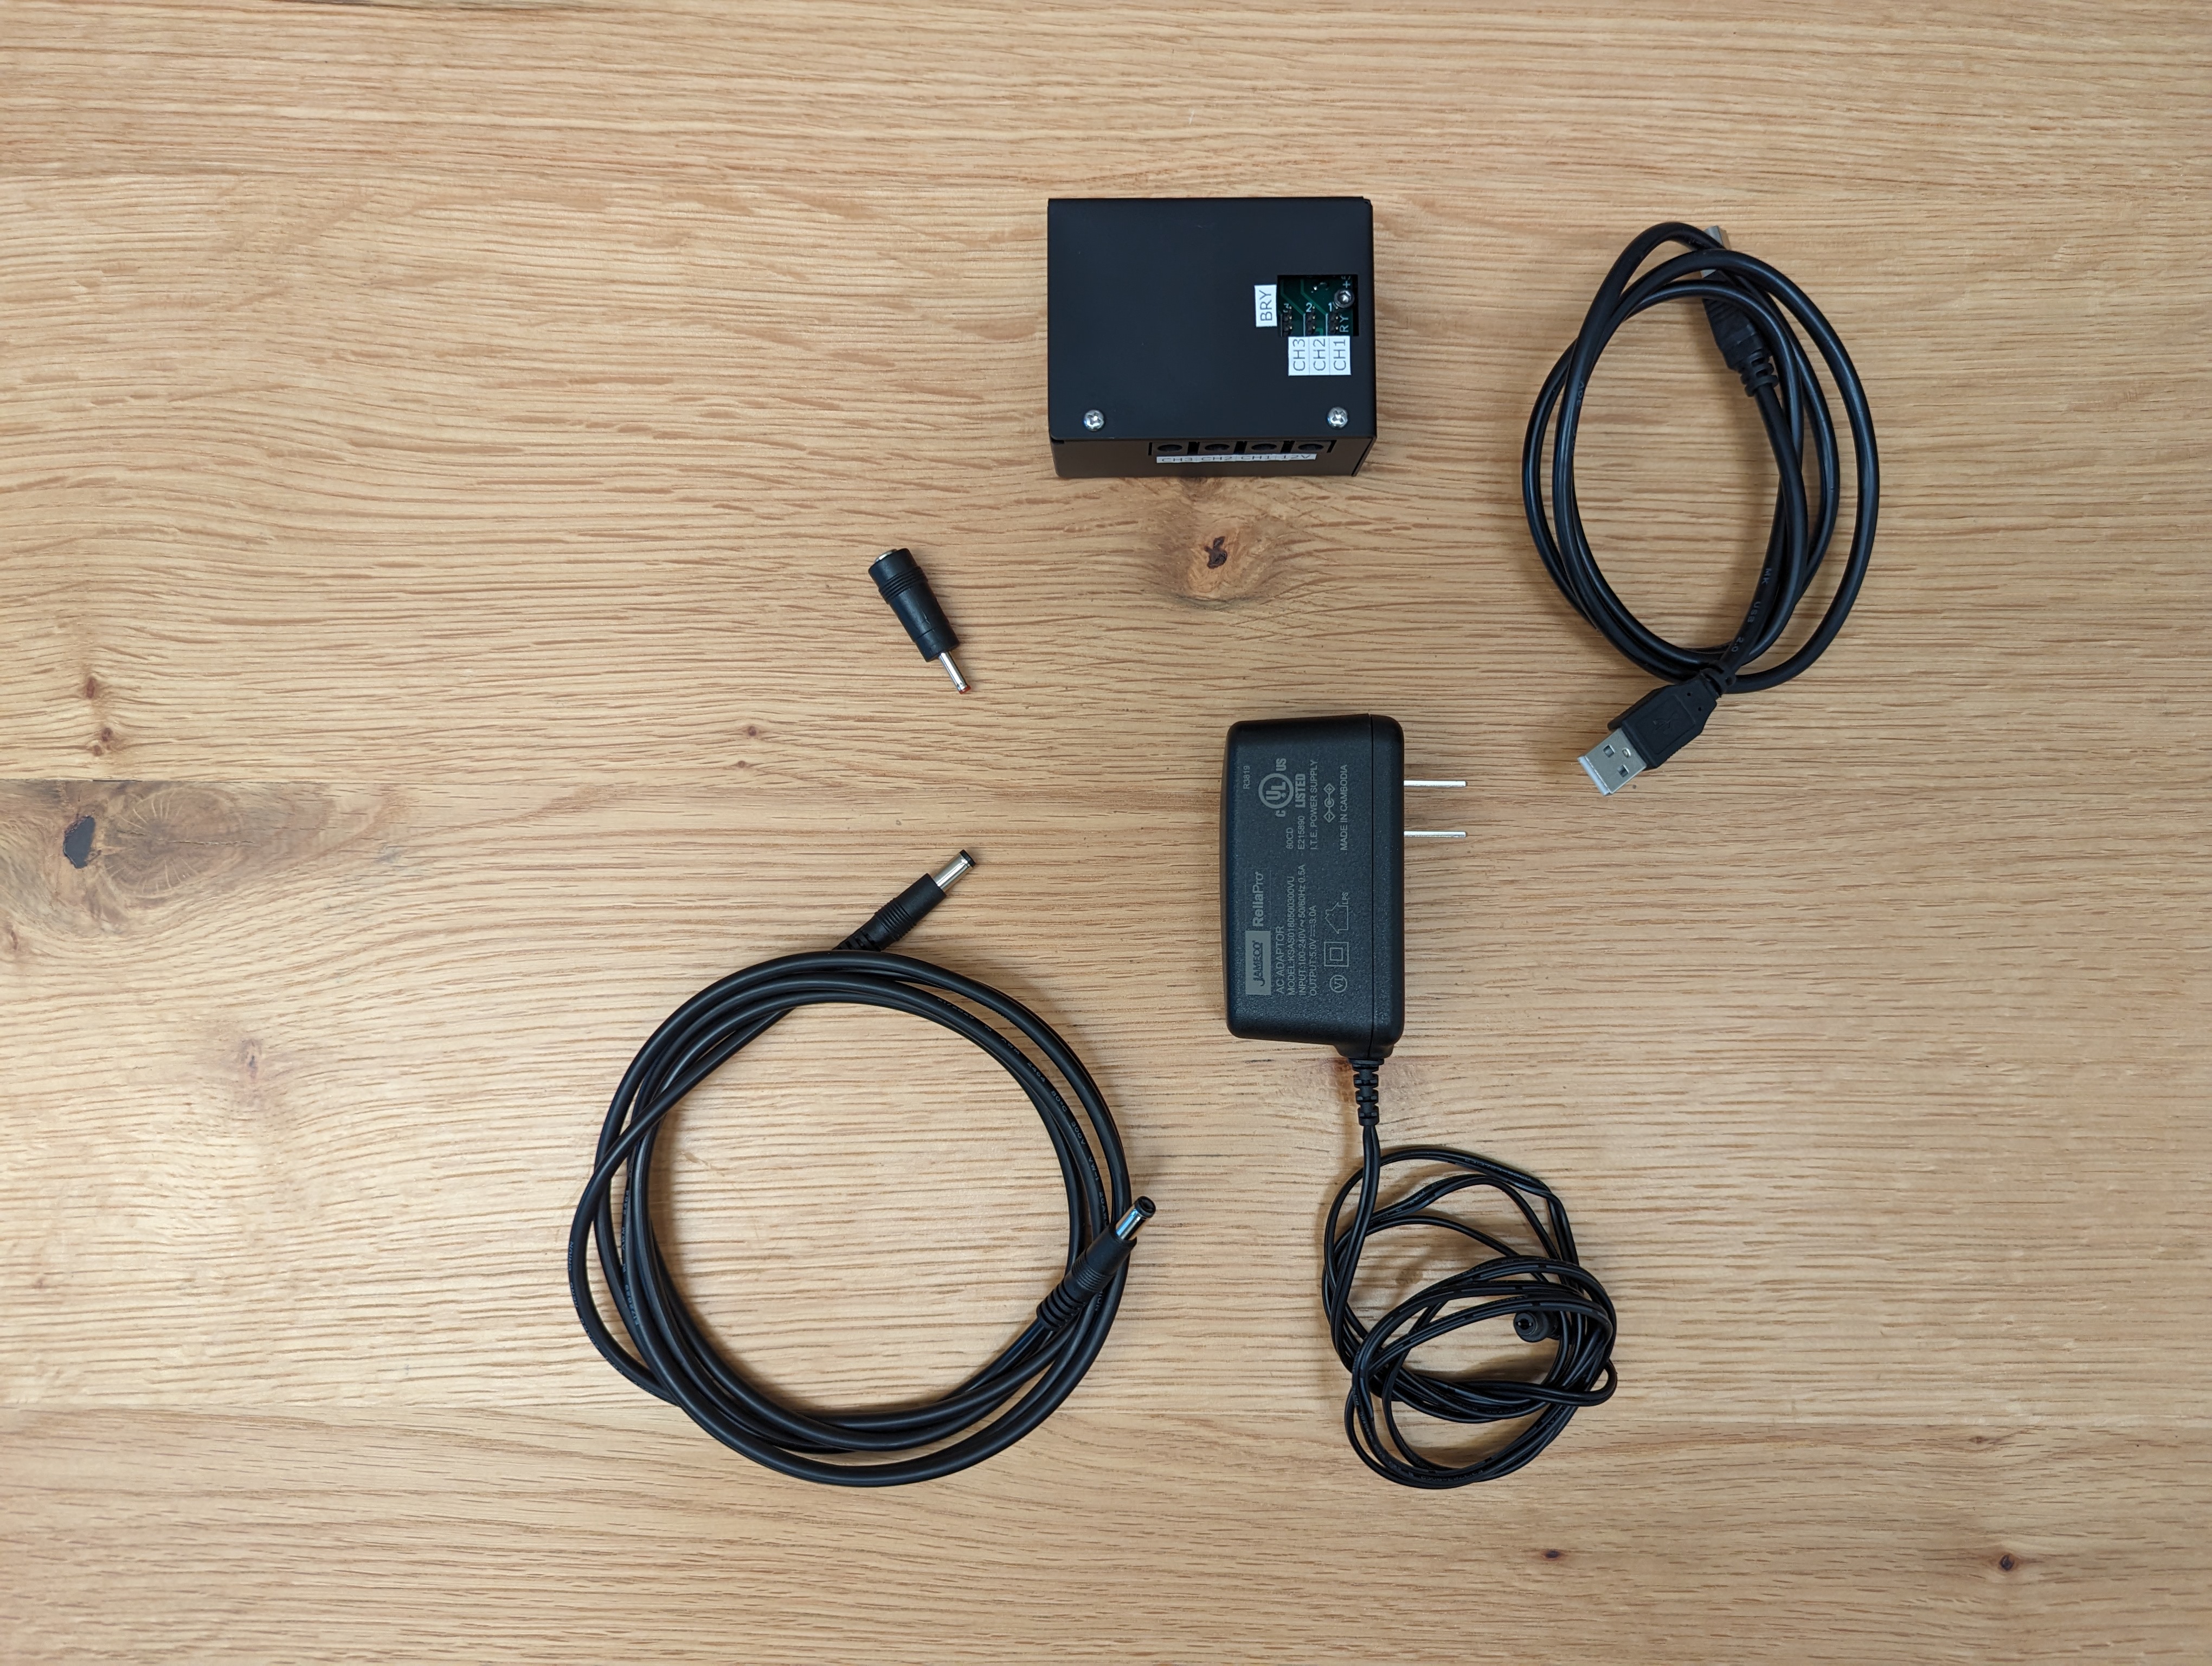
Figure 5. Optional items for modular base rig.
Ensure there are no light leakages by doing one of the following:
Fabricate an aperture to fit the camera module of the DUT and ensure there are no light leakages (as shown in Figure 6). Apertures can be cut from the foam boards provided or configured from by a qualified vendor. For proper figure orientation, DUTs with the rear camera facing the rig are rotated 90° counterclockwise and DUTs with the front camera facing the rig are rotated 90° clockwise. Make sure apertures are configured accordingly.
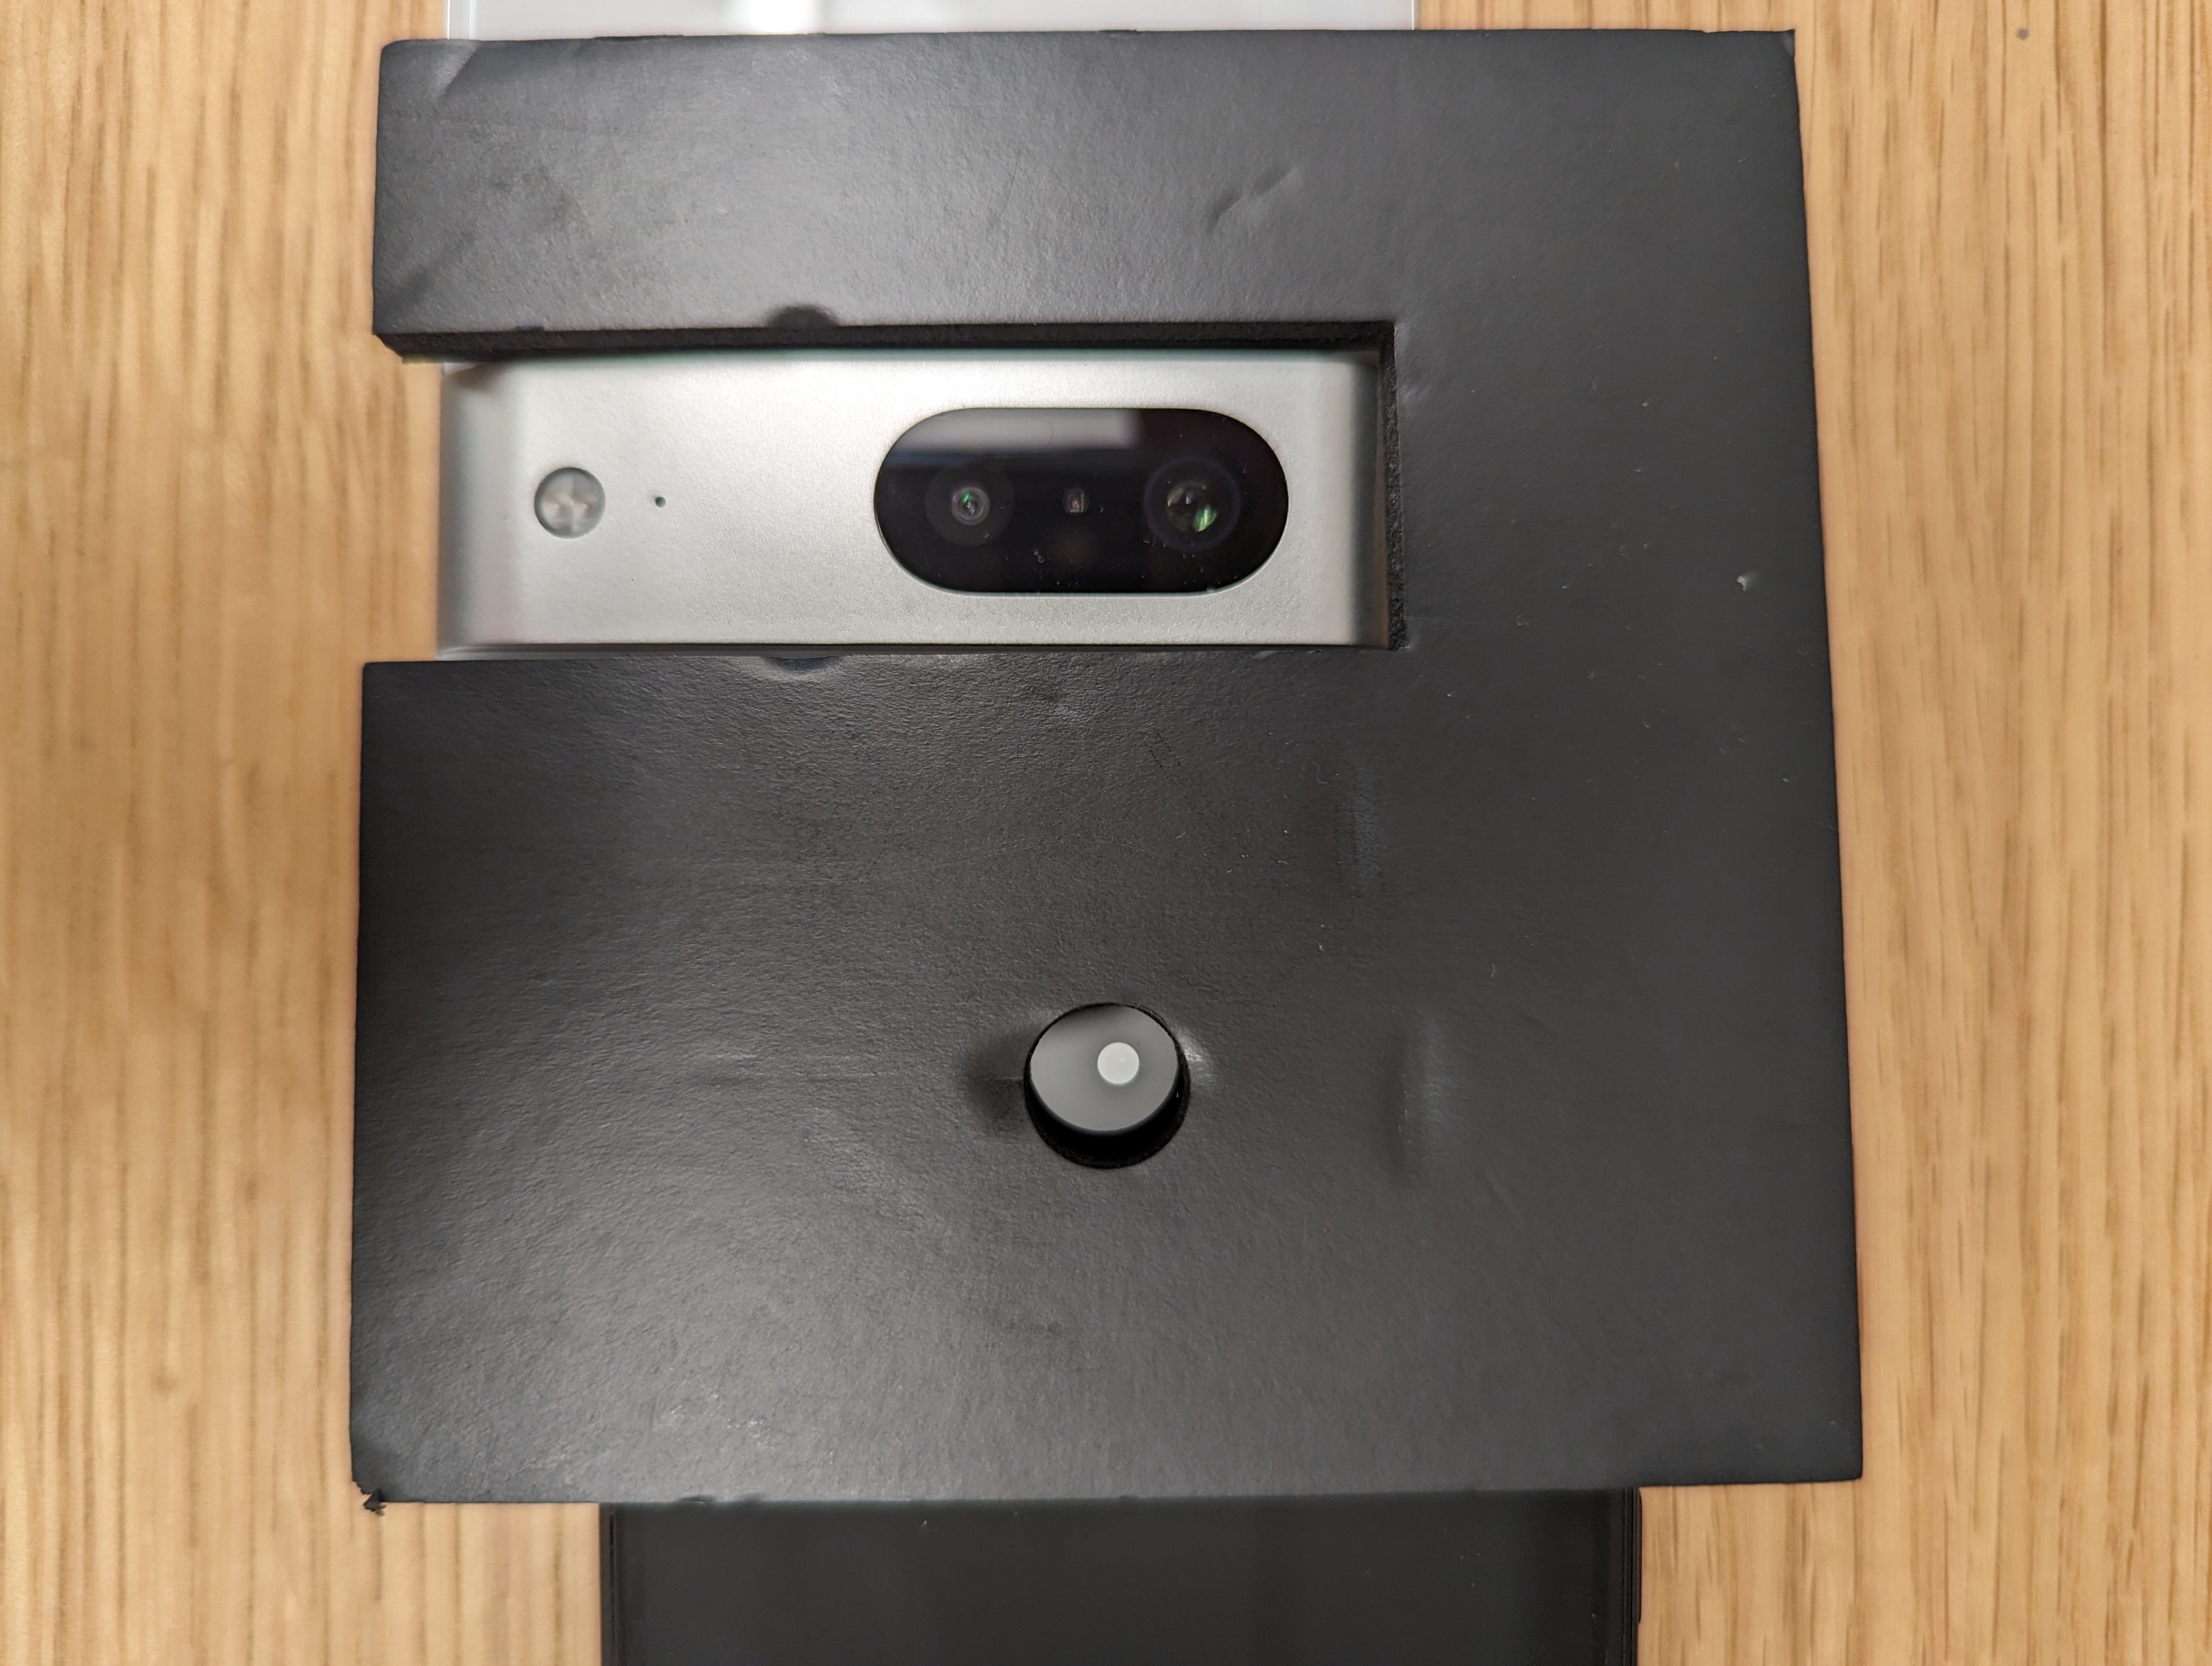
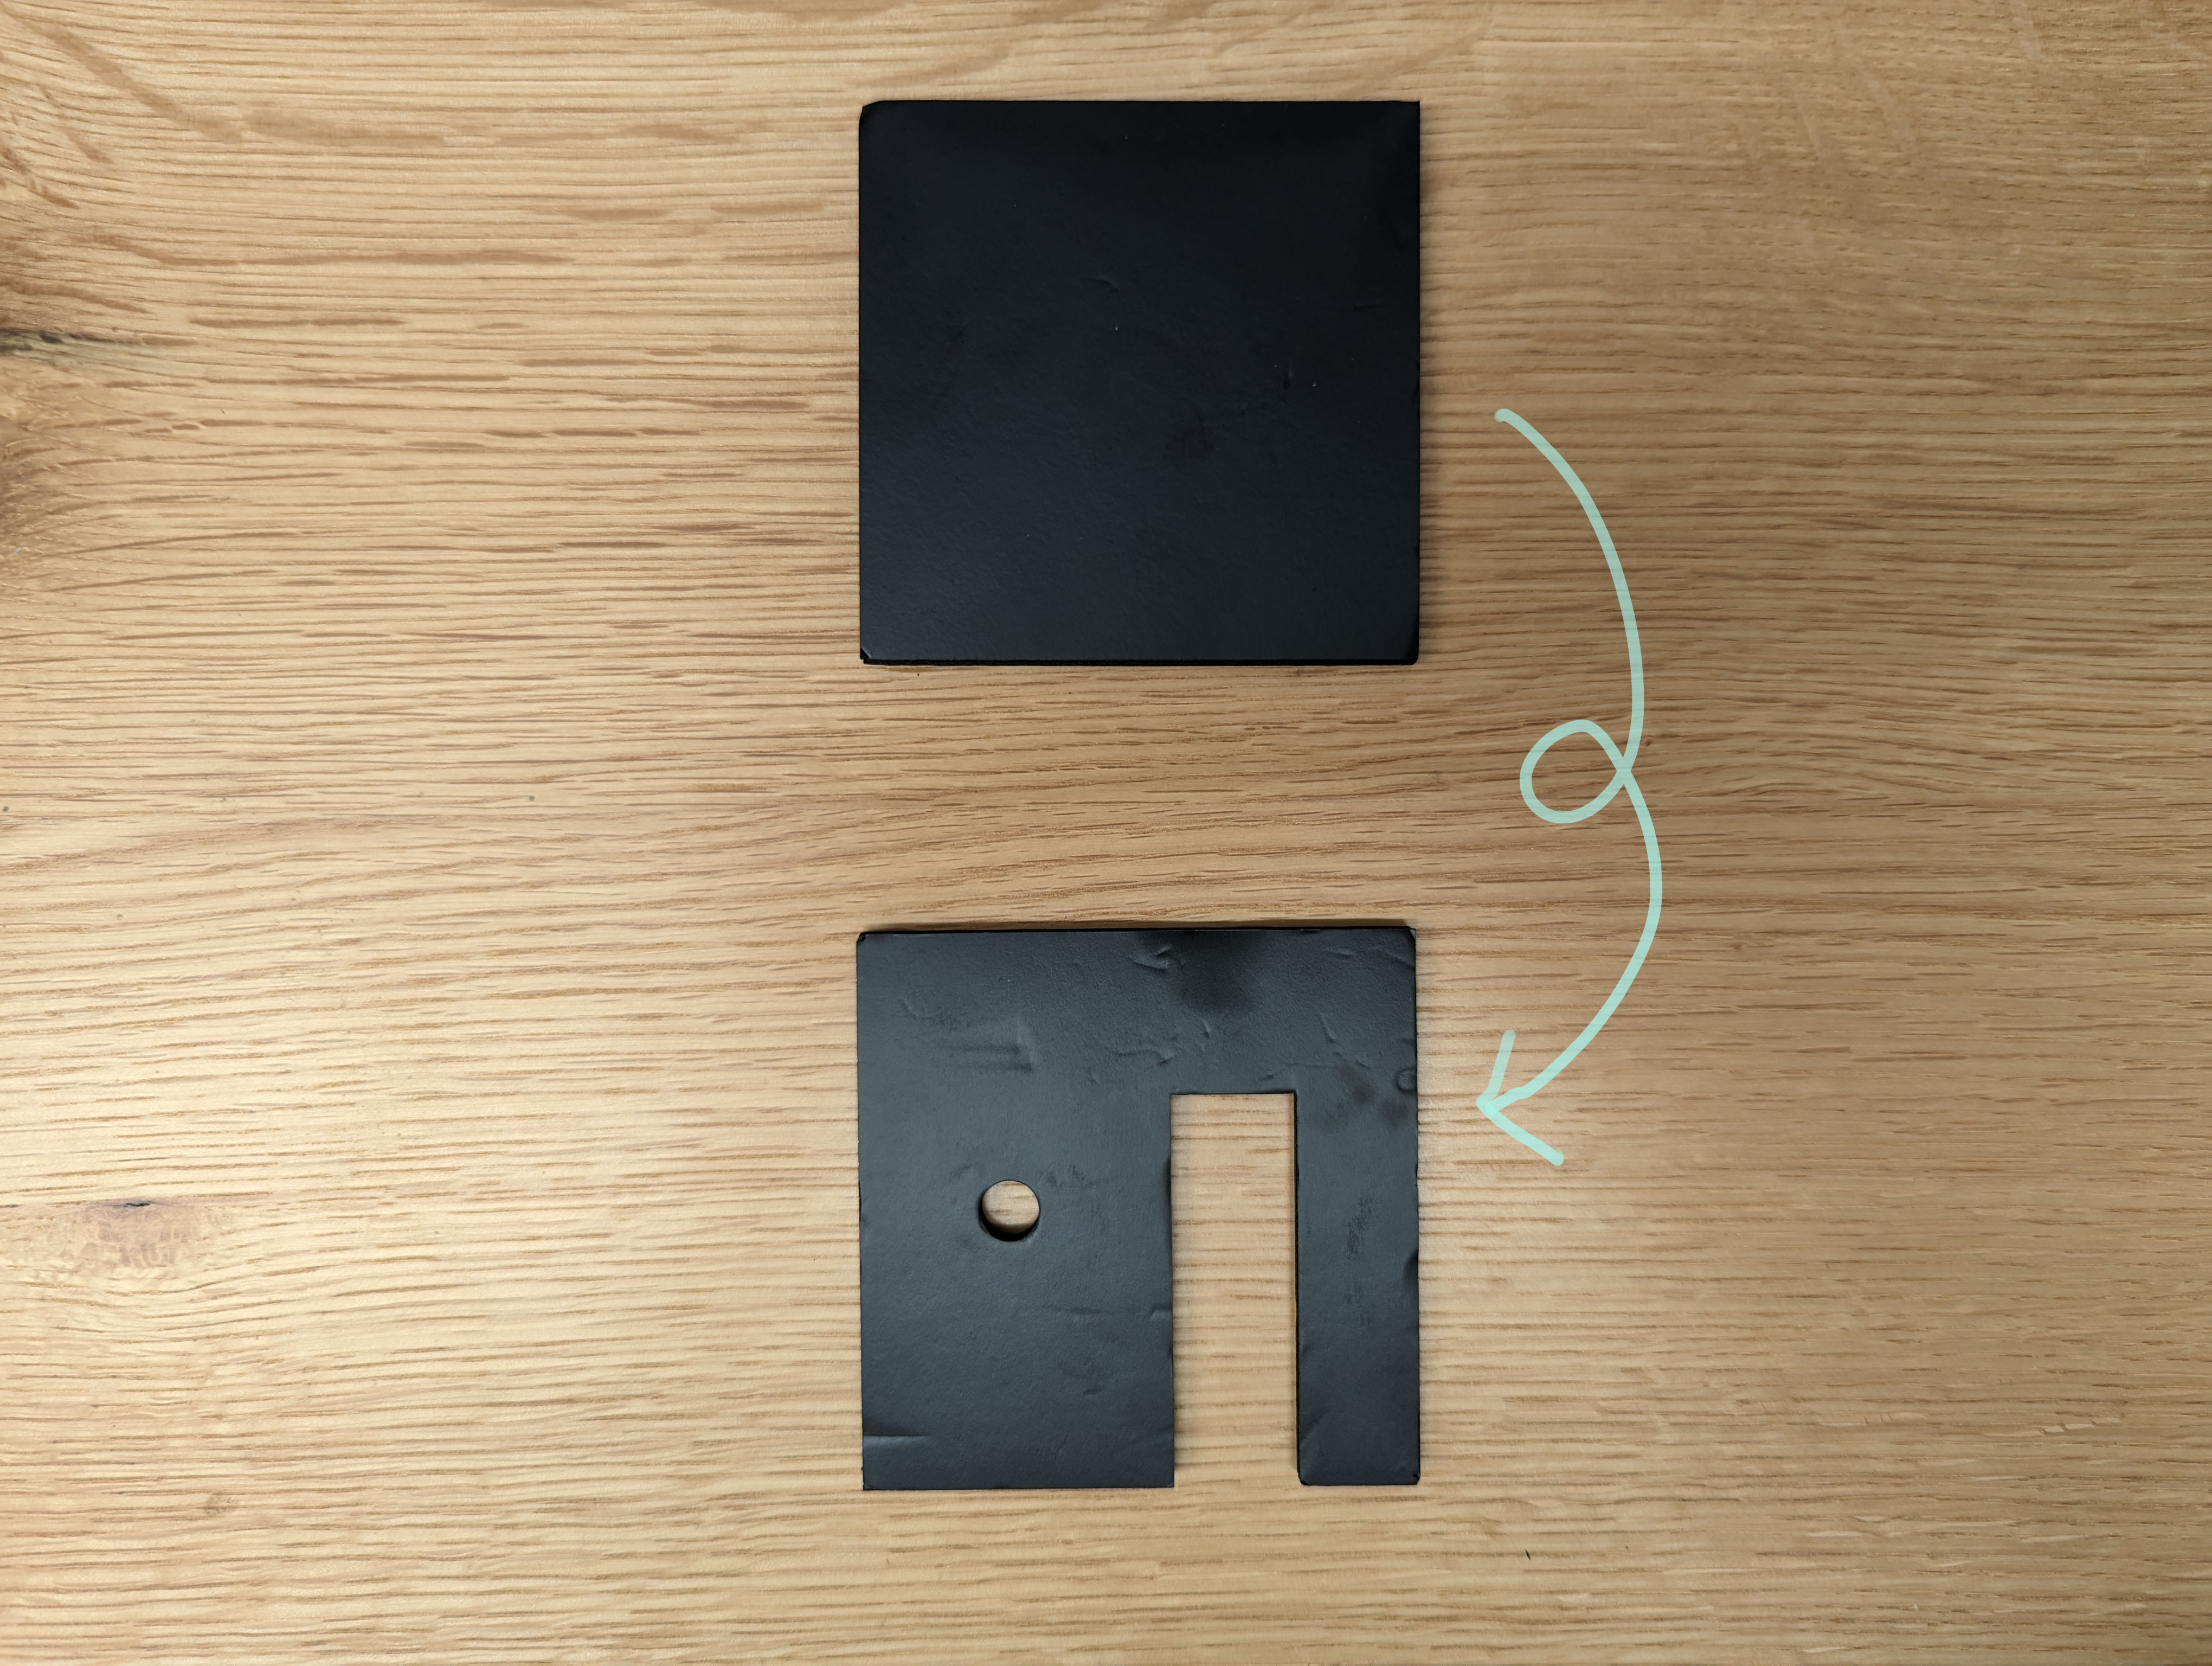
Figure 6. Fabricate apertures to prevent light leakage.
Use a dark drape to cover the rig to prevent light leakage, no apertures required. (shown in Figure 7).
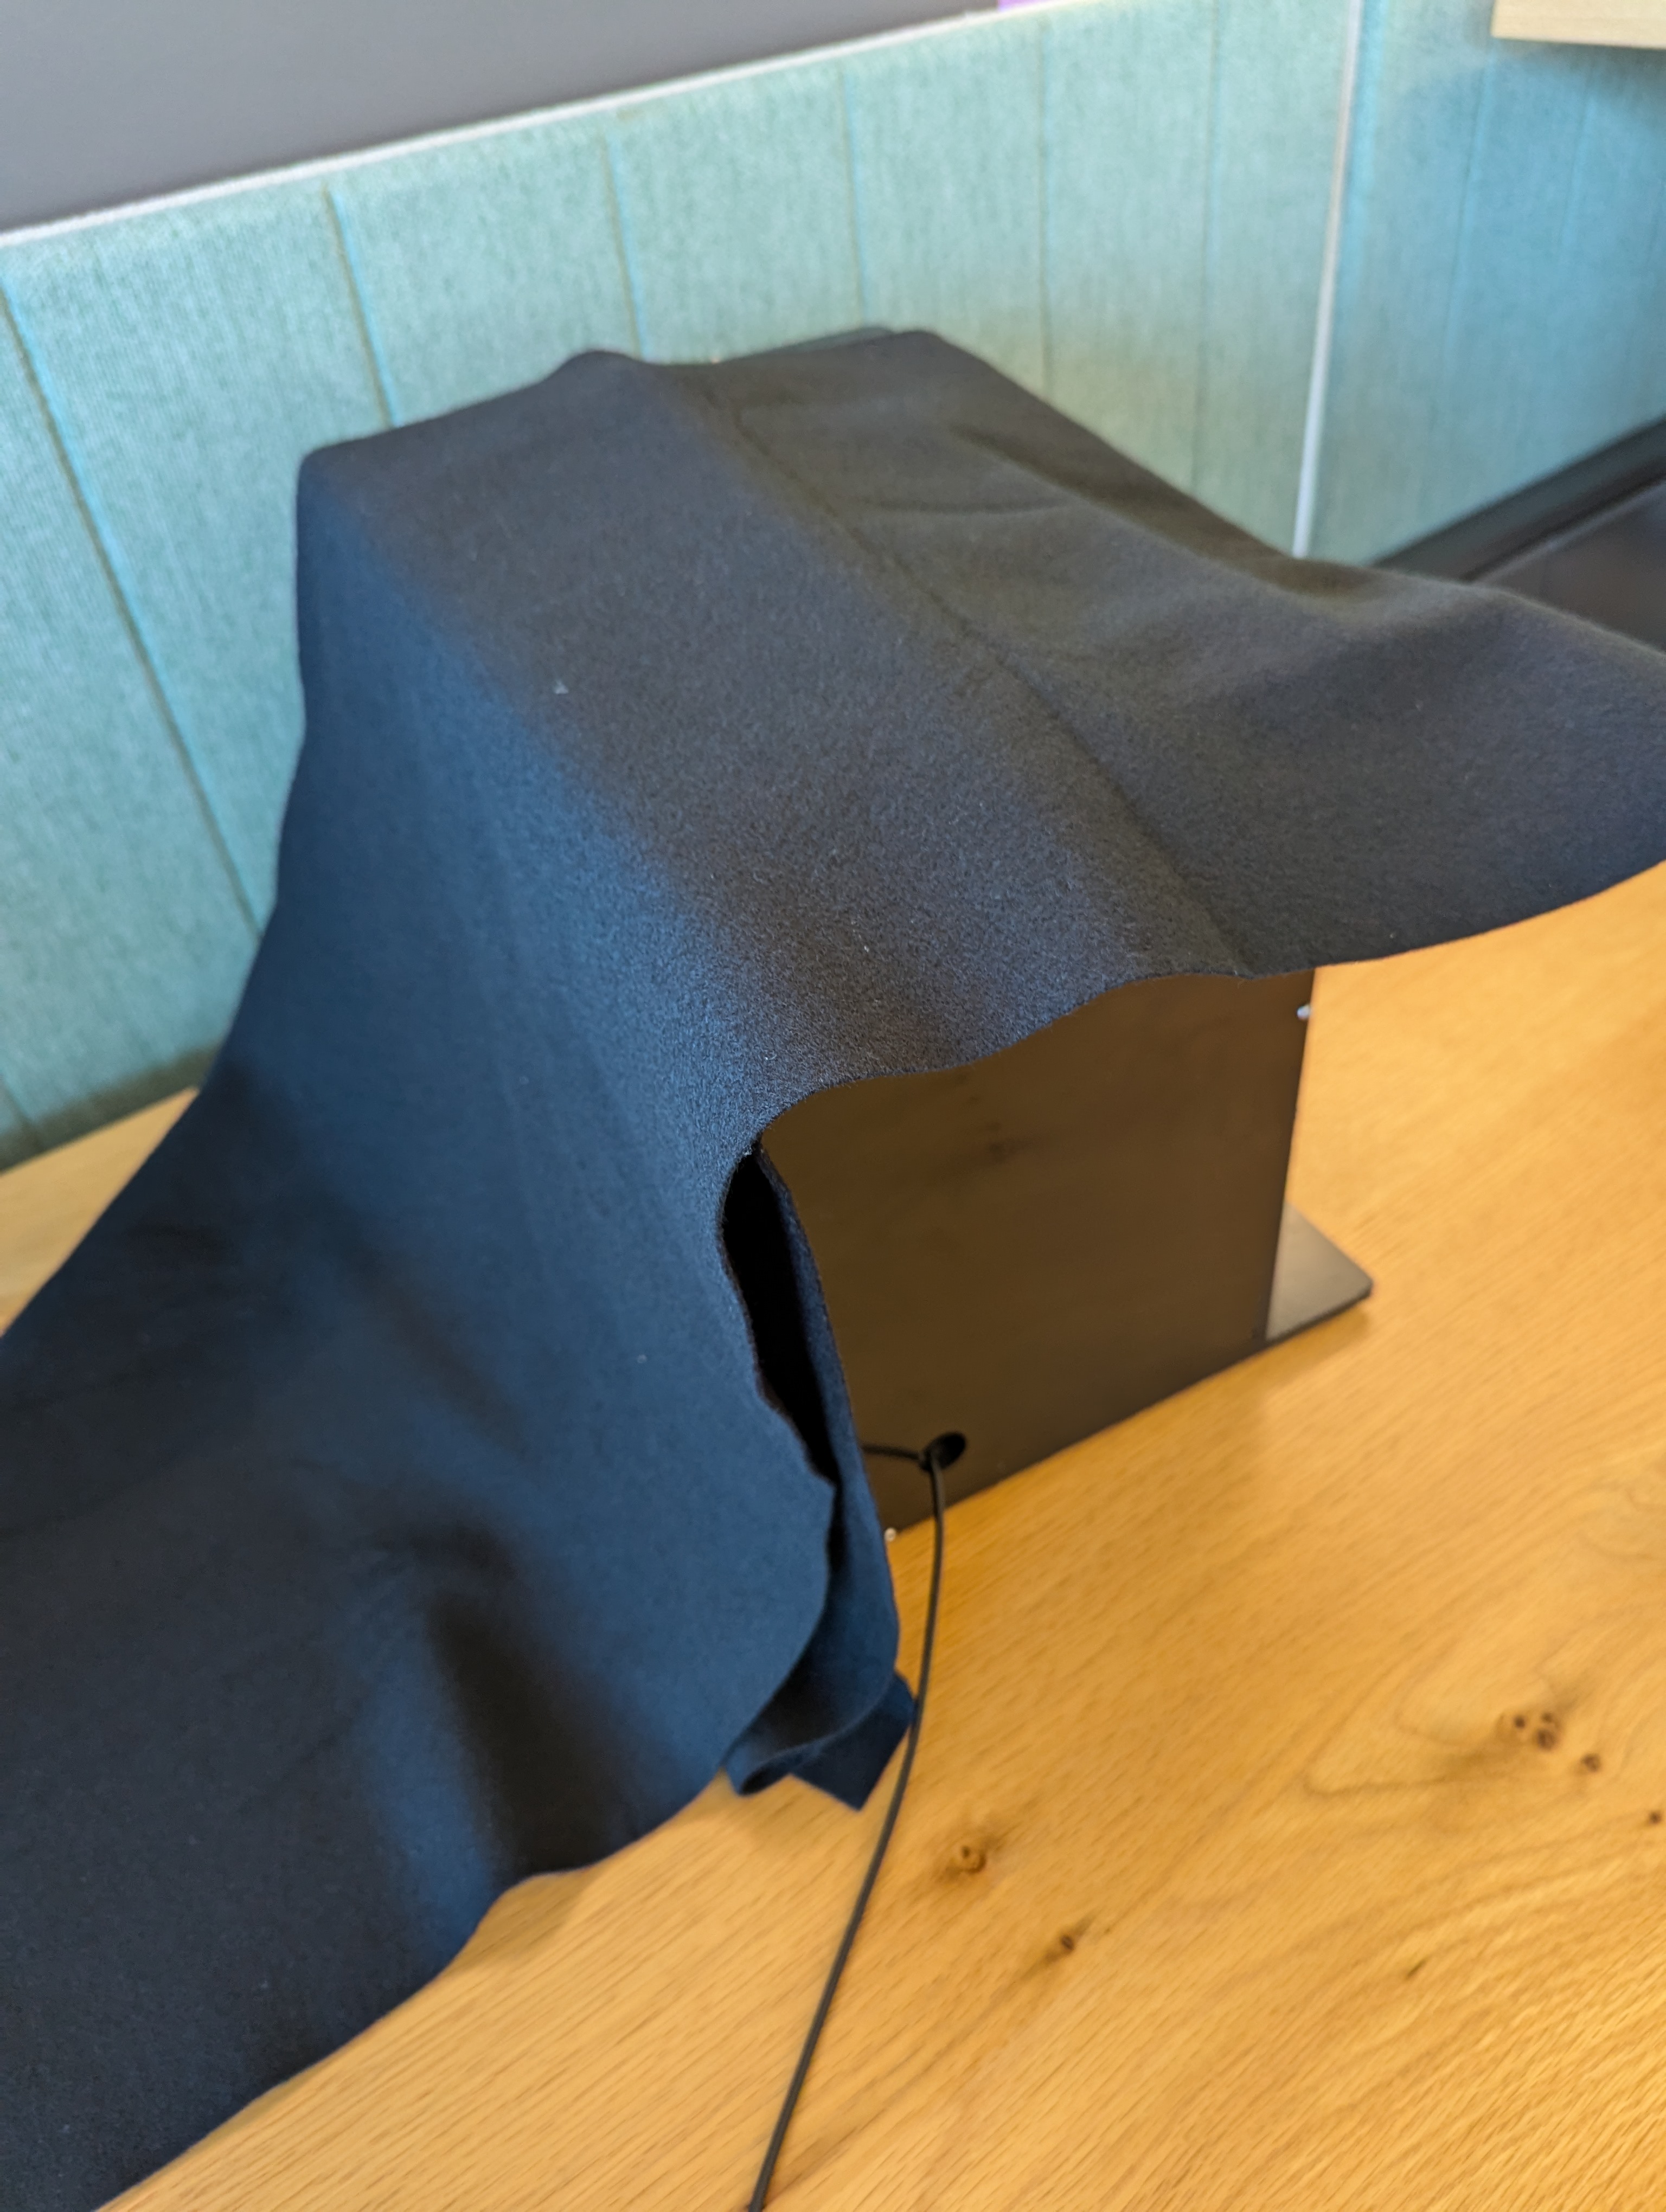
Figure 7. Preventing light leakage using a drape.
Install a standard phone mount or a foldable phone mount onto the front phone mounting panel at an appropriate height using a nylon bolt and nut as shown in Figure 8.
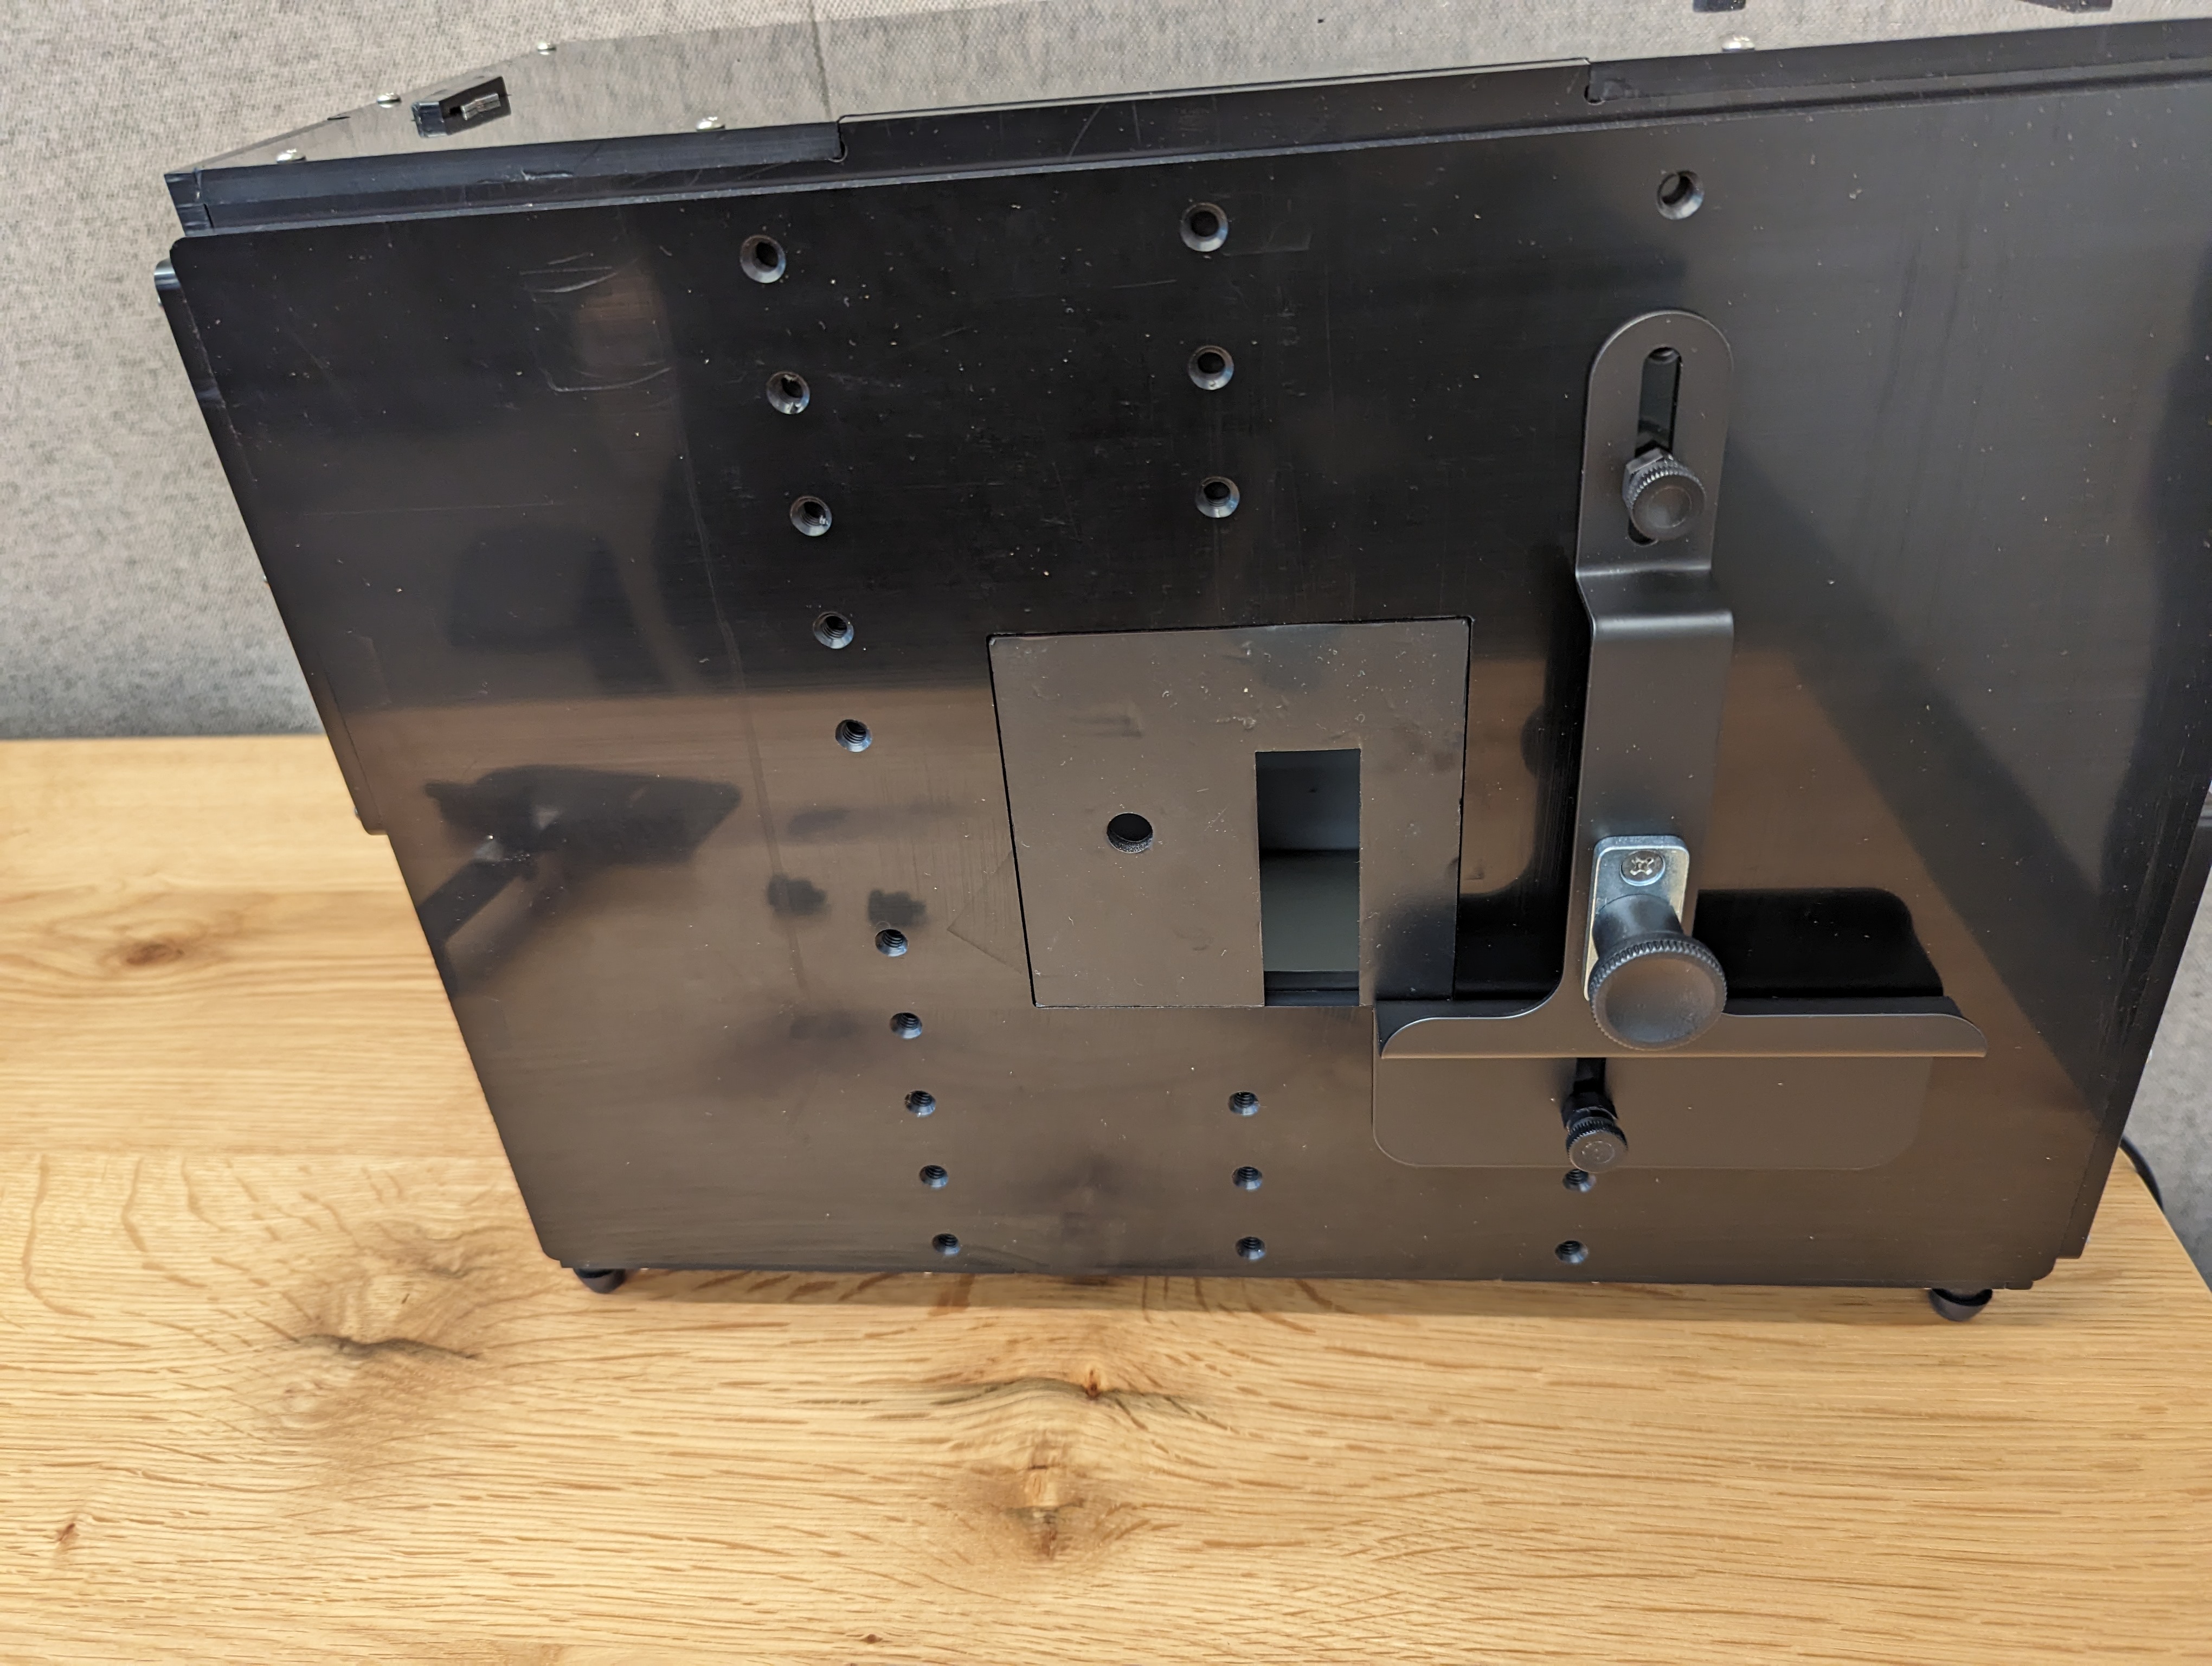
Figure 8. Aperture and phone mount installation.
Install the tablet mount onto the tablet mounting panel at an appropriate height using a nylon bolt and nut.
Mount the display tablet and connect the tablet to the host as shown in Figure 9. Secure the tablet with a plunger.
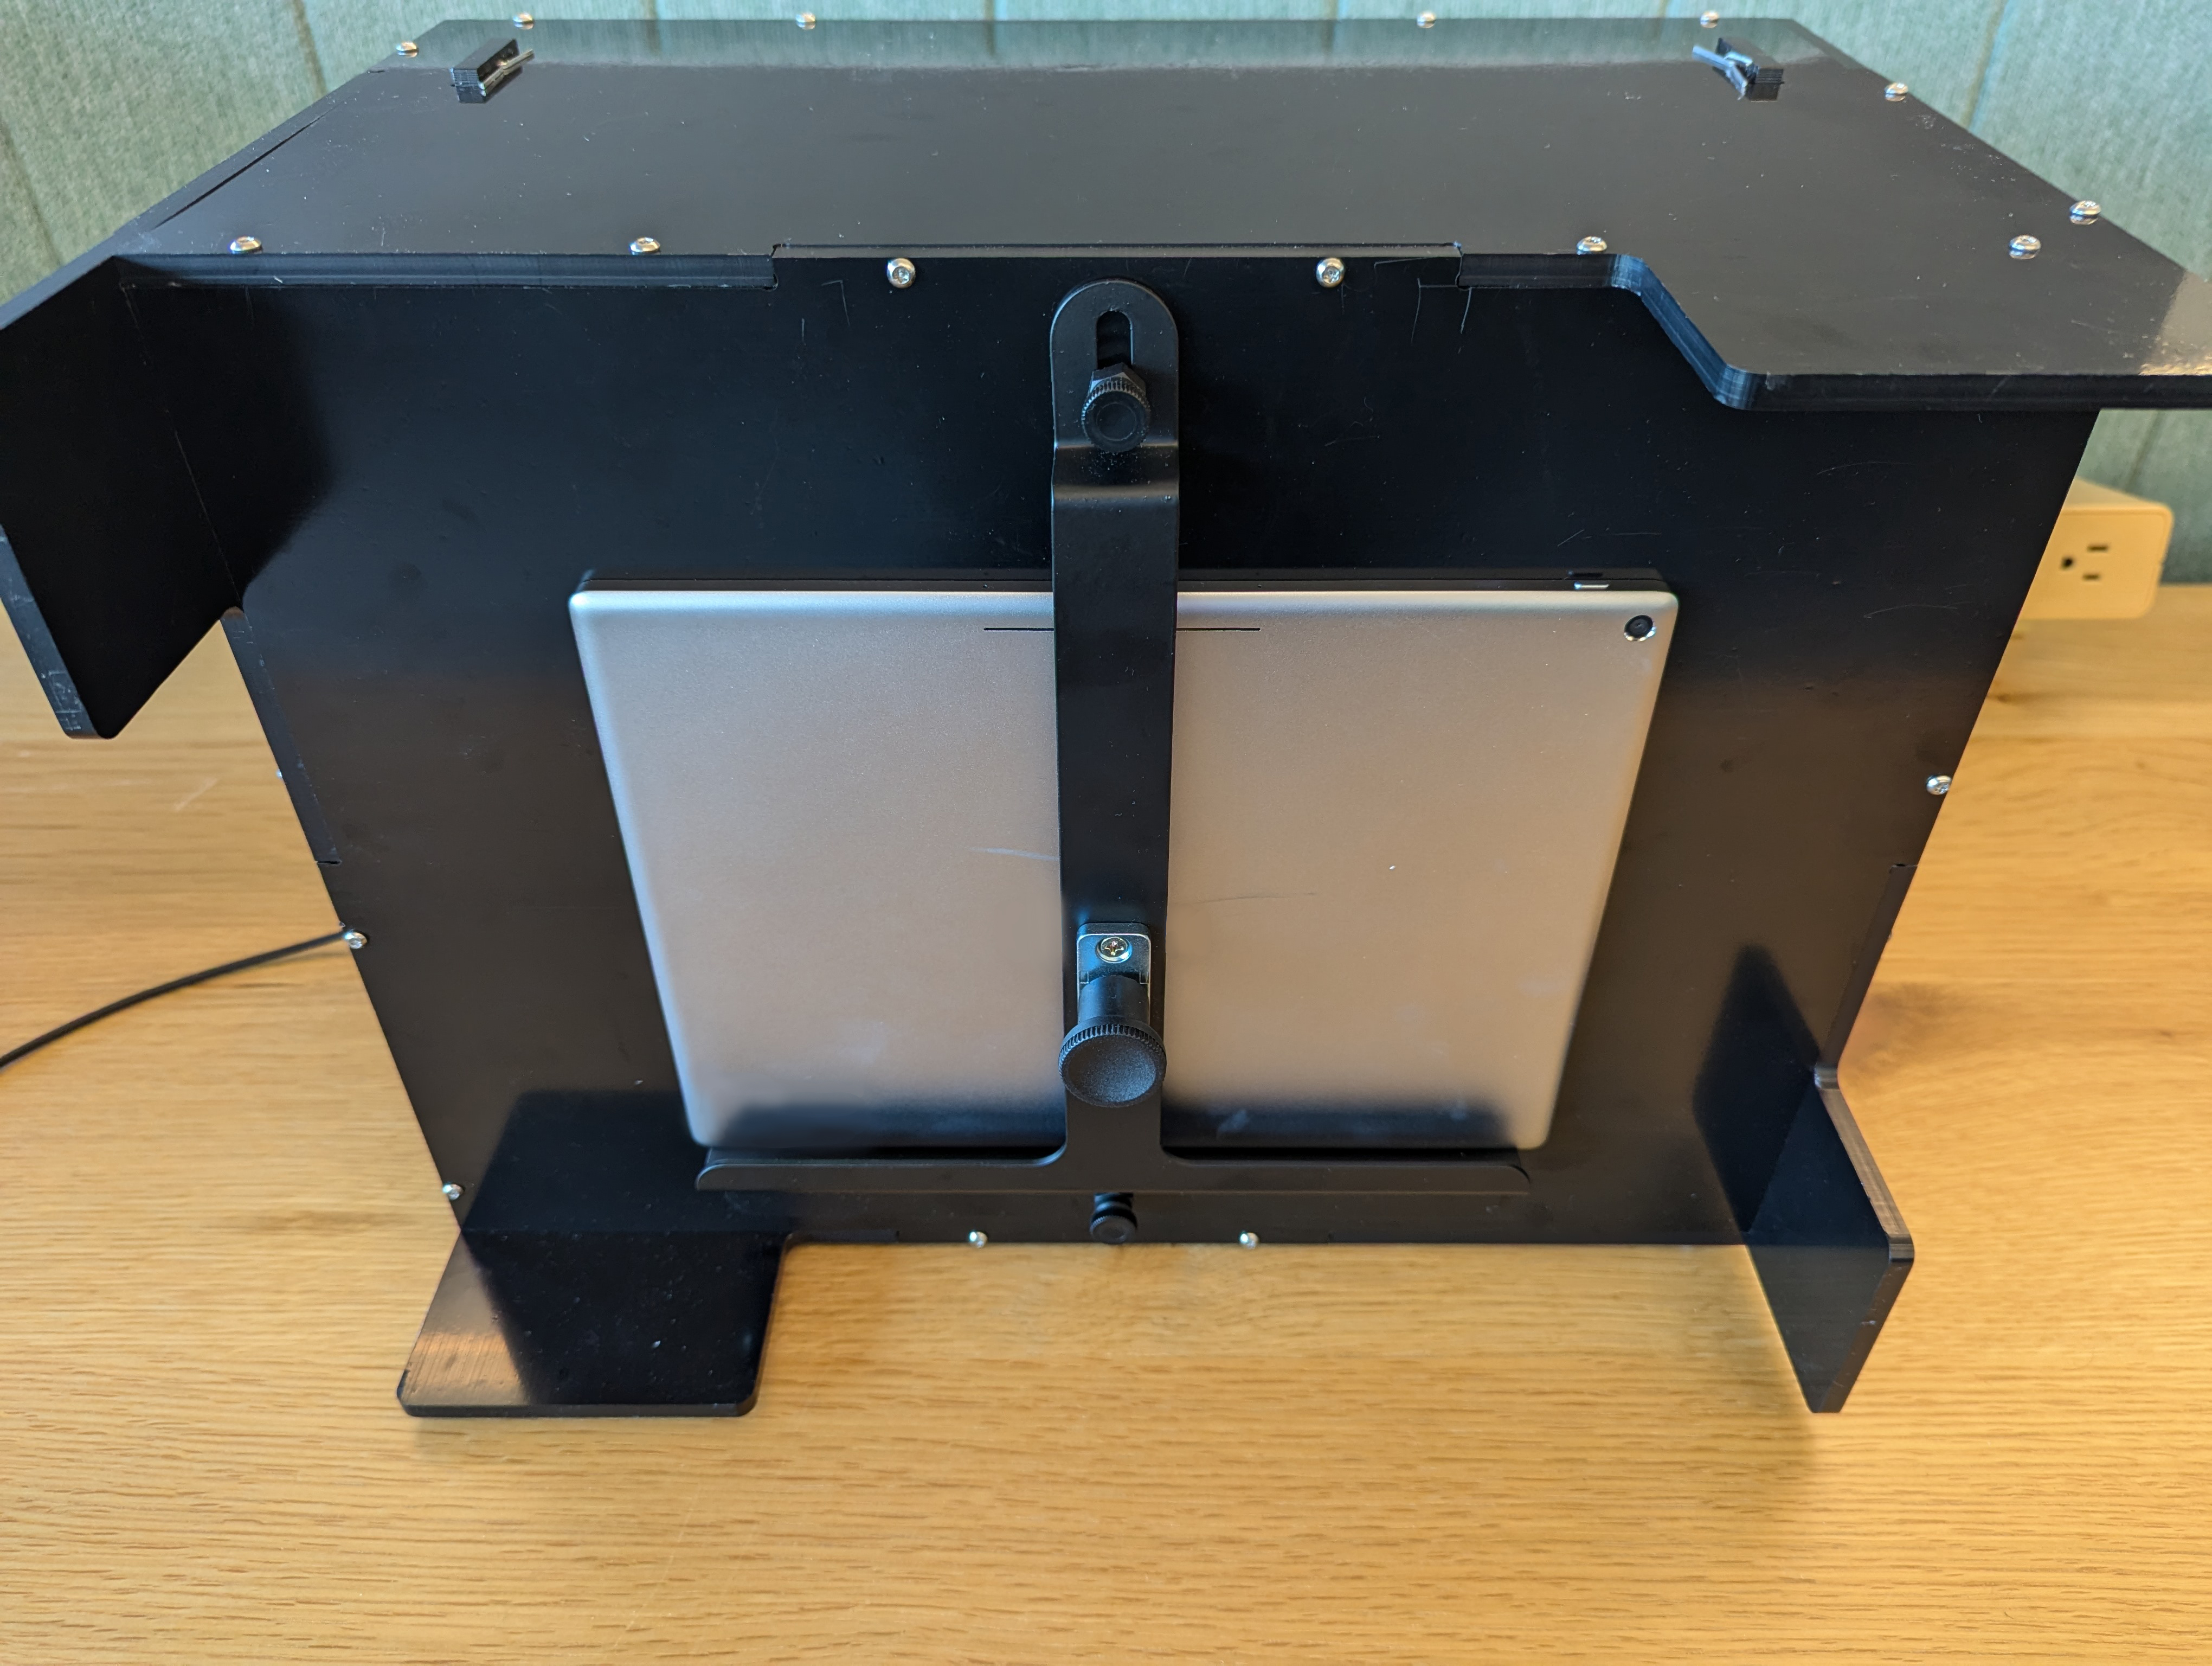
Figure 9. Tablet installation.
To make on-screen operation easier, set up your DUT before mounting the DUT.
Mount the DUT and connect to host.
Align the DUT so that the center of the camera module is aligned with (or very close to) the center of the tablet. To adjust the height, loosen the phone mounting bolts and slide the mount upwards or downwards. When aligned, secure the DUT with the mount plunger.
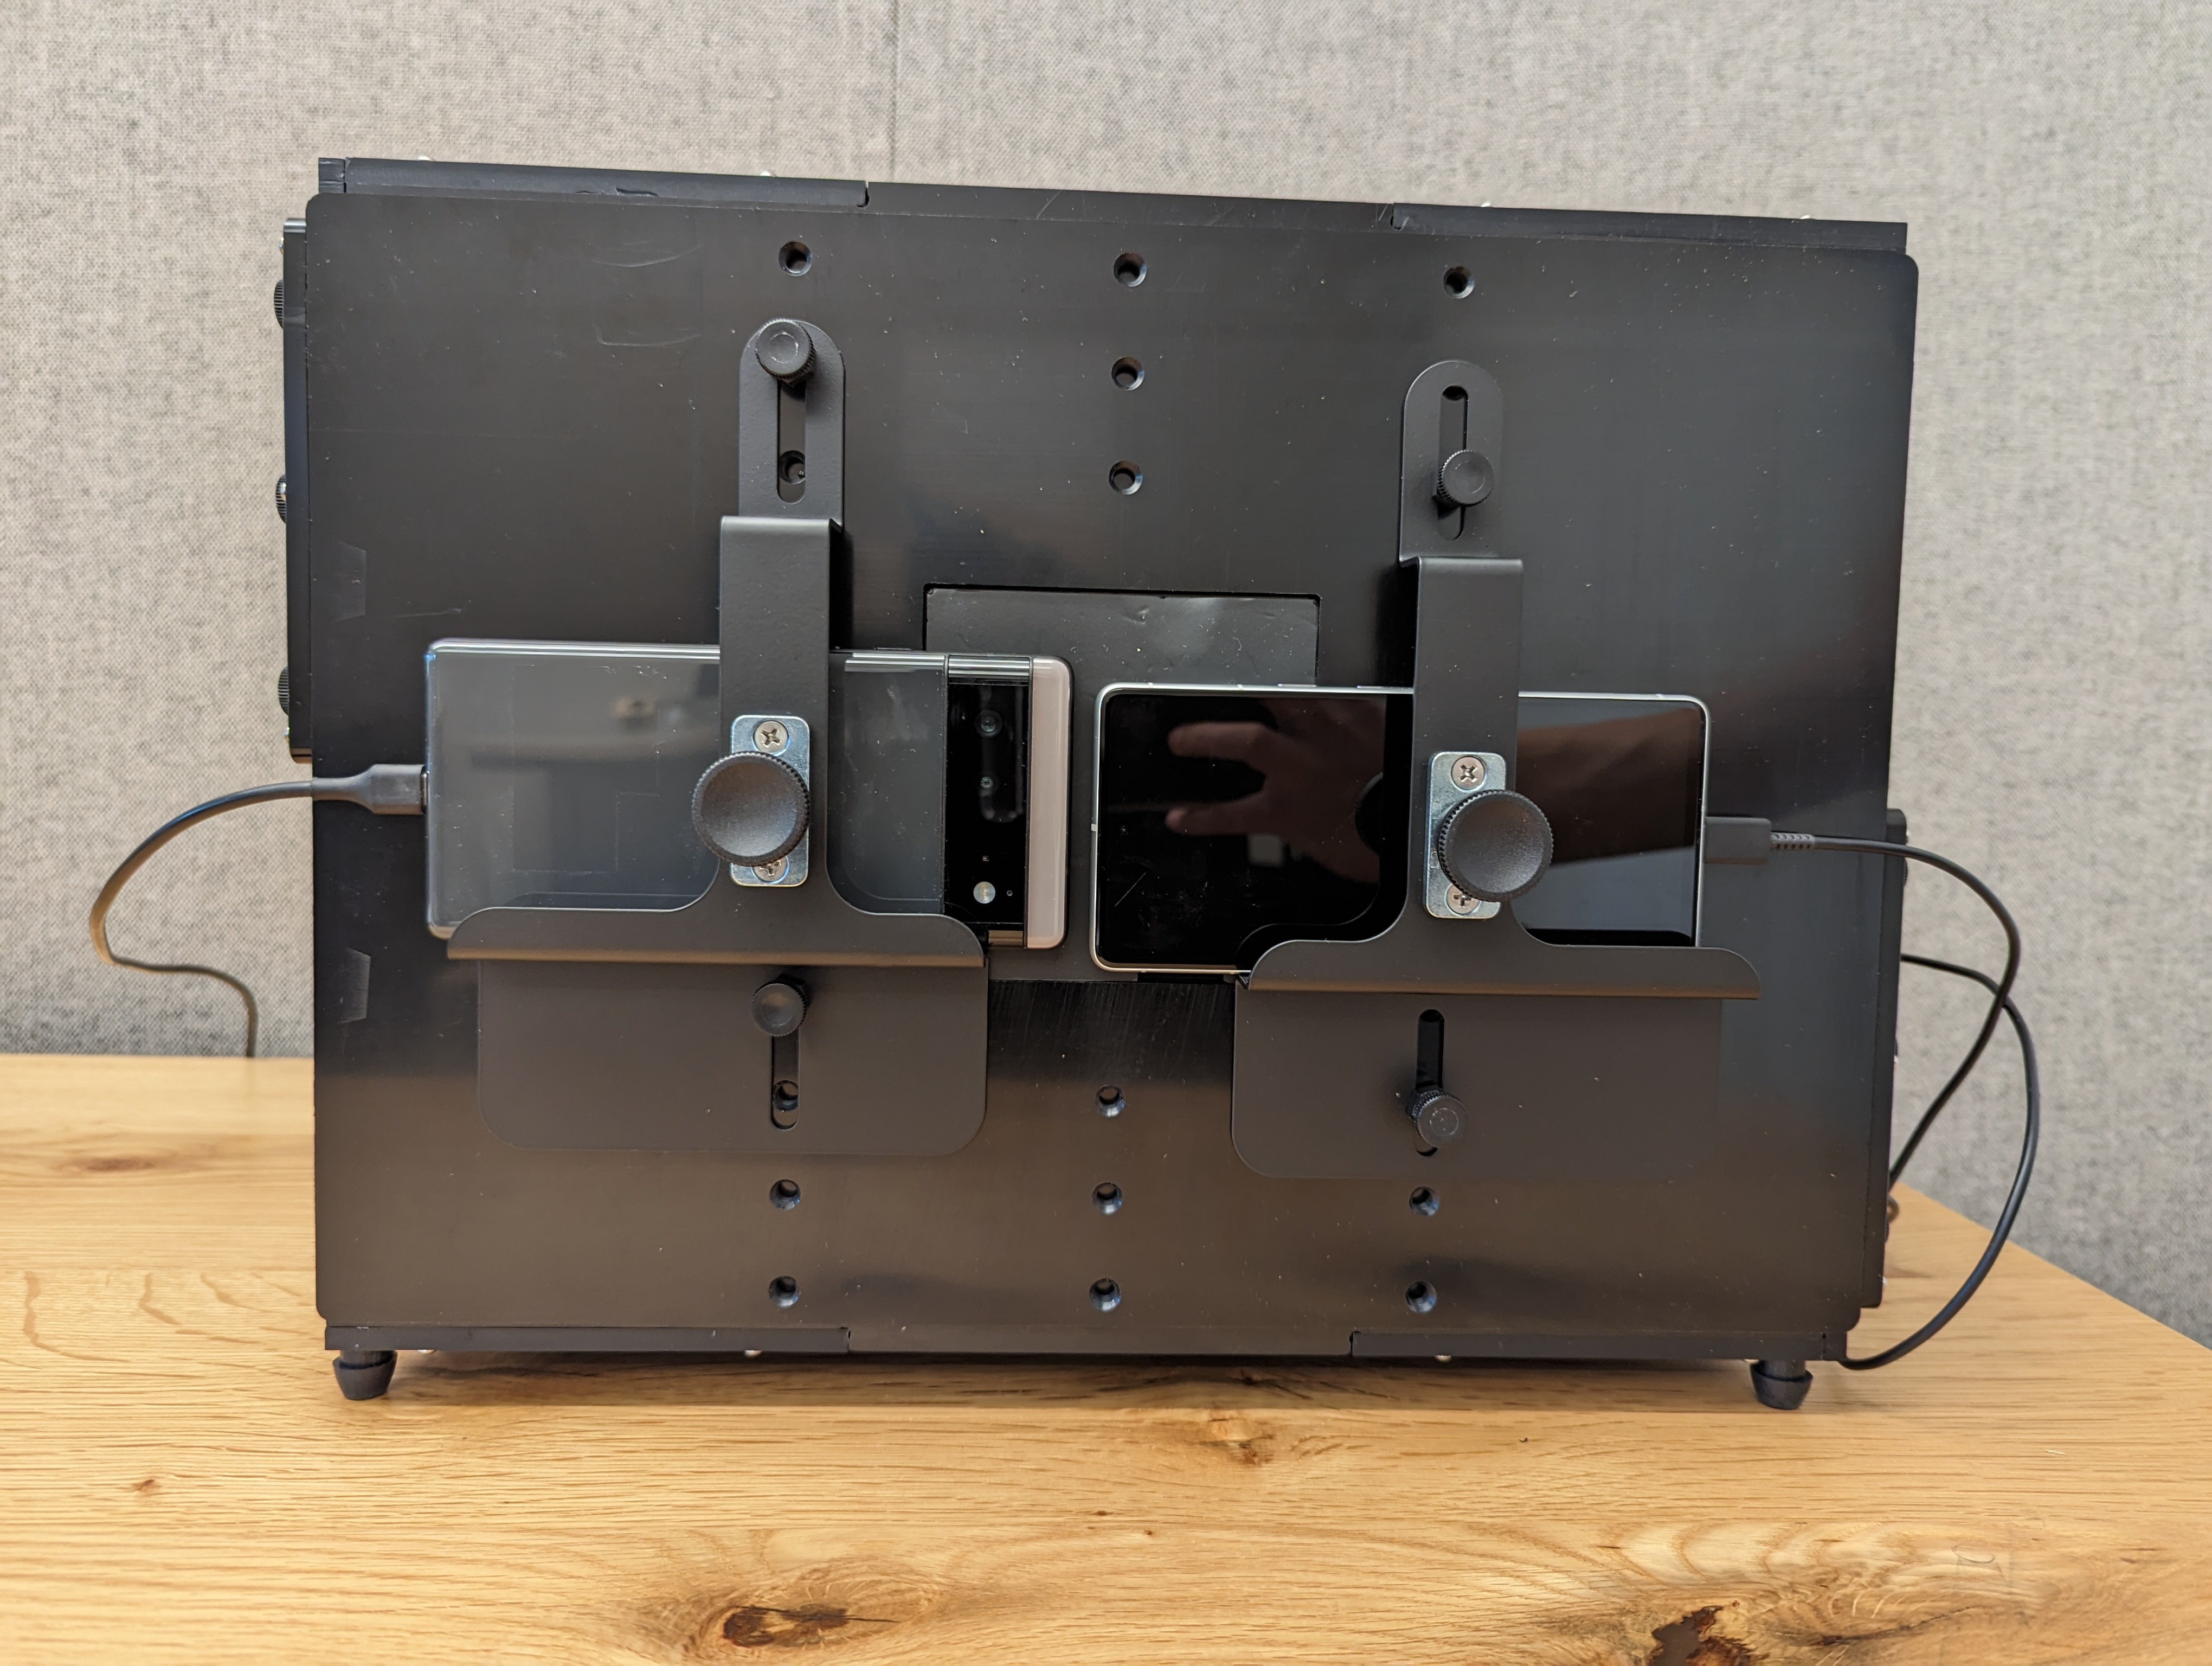
Figure 10. DUT installation.
For lighting, connect the lighting cable from the base rig to one of the following:
12V power supply
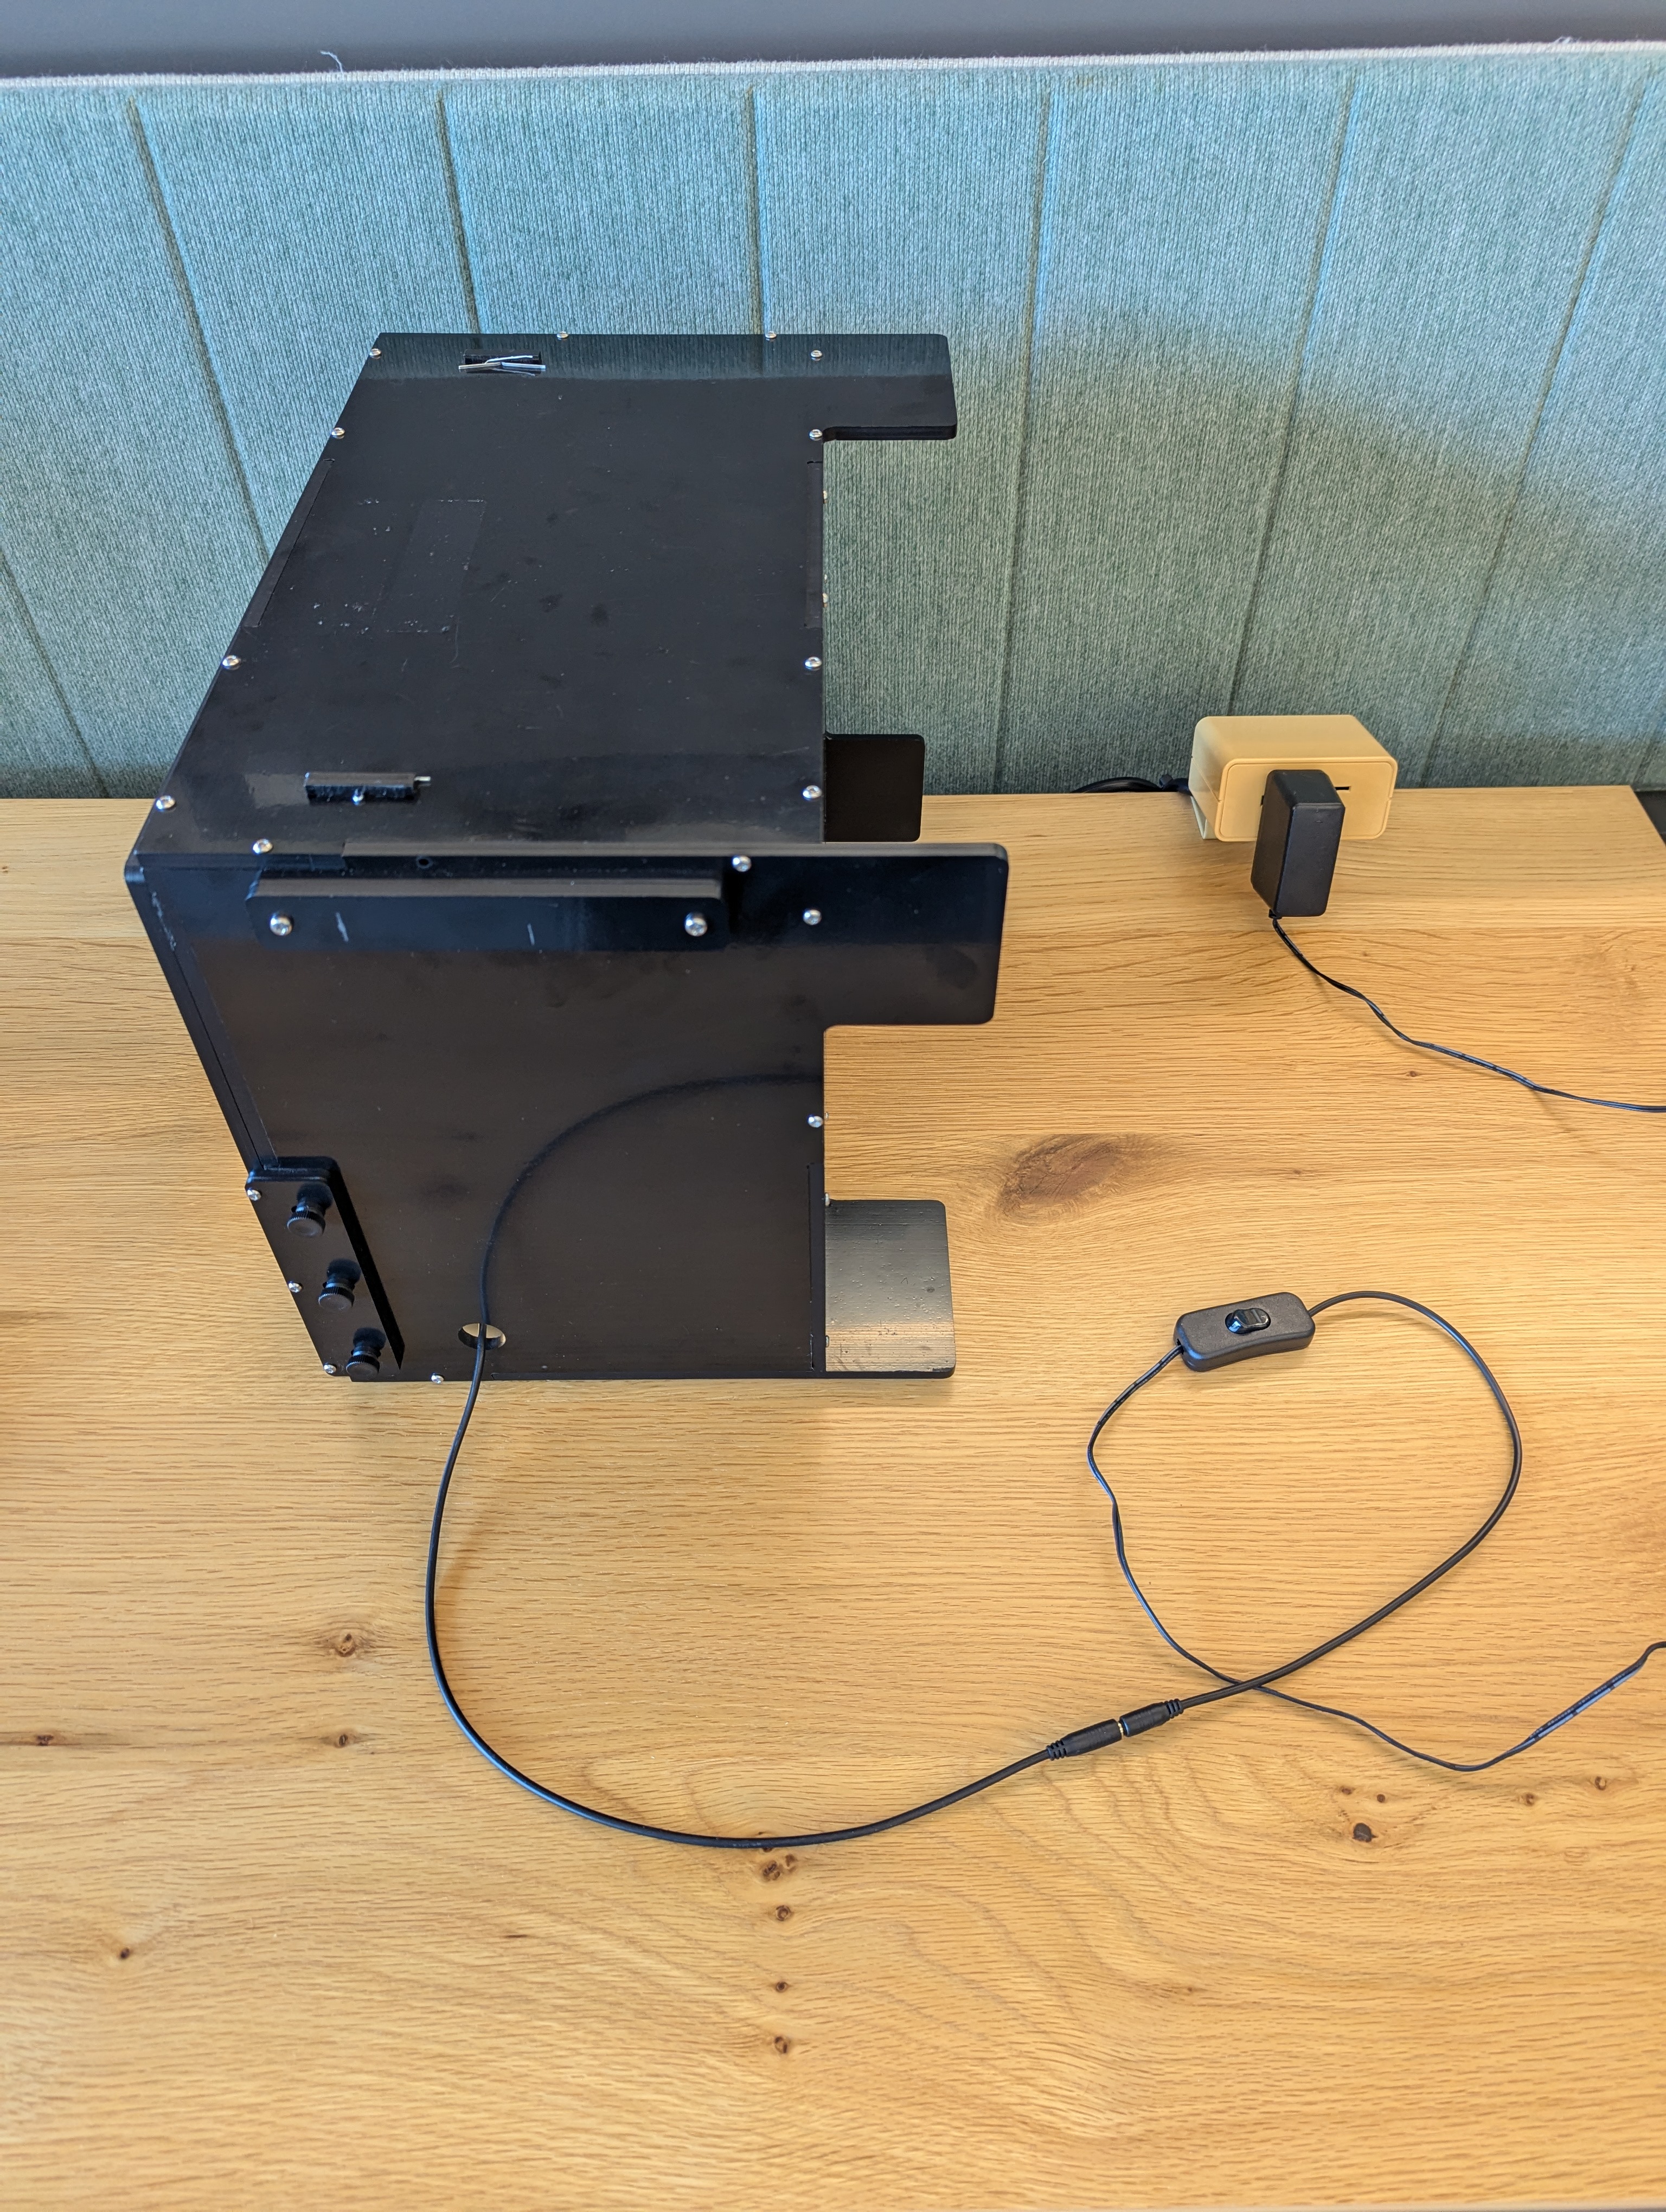
Figure 11. Light connected to 12V power supply.
Lighting controller (adaptor might be needed)
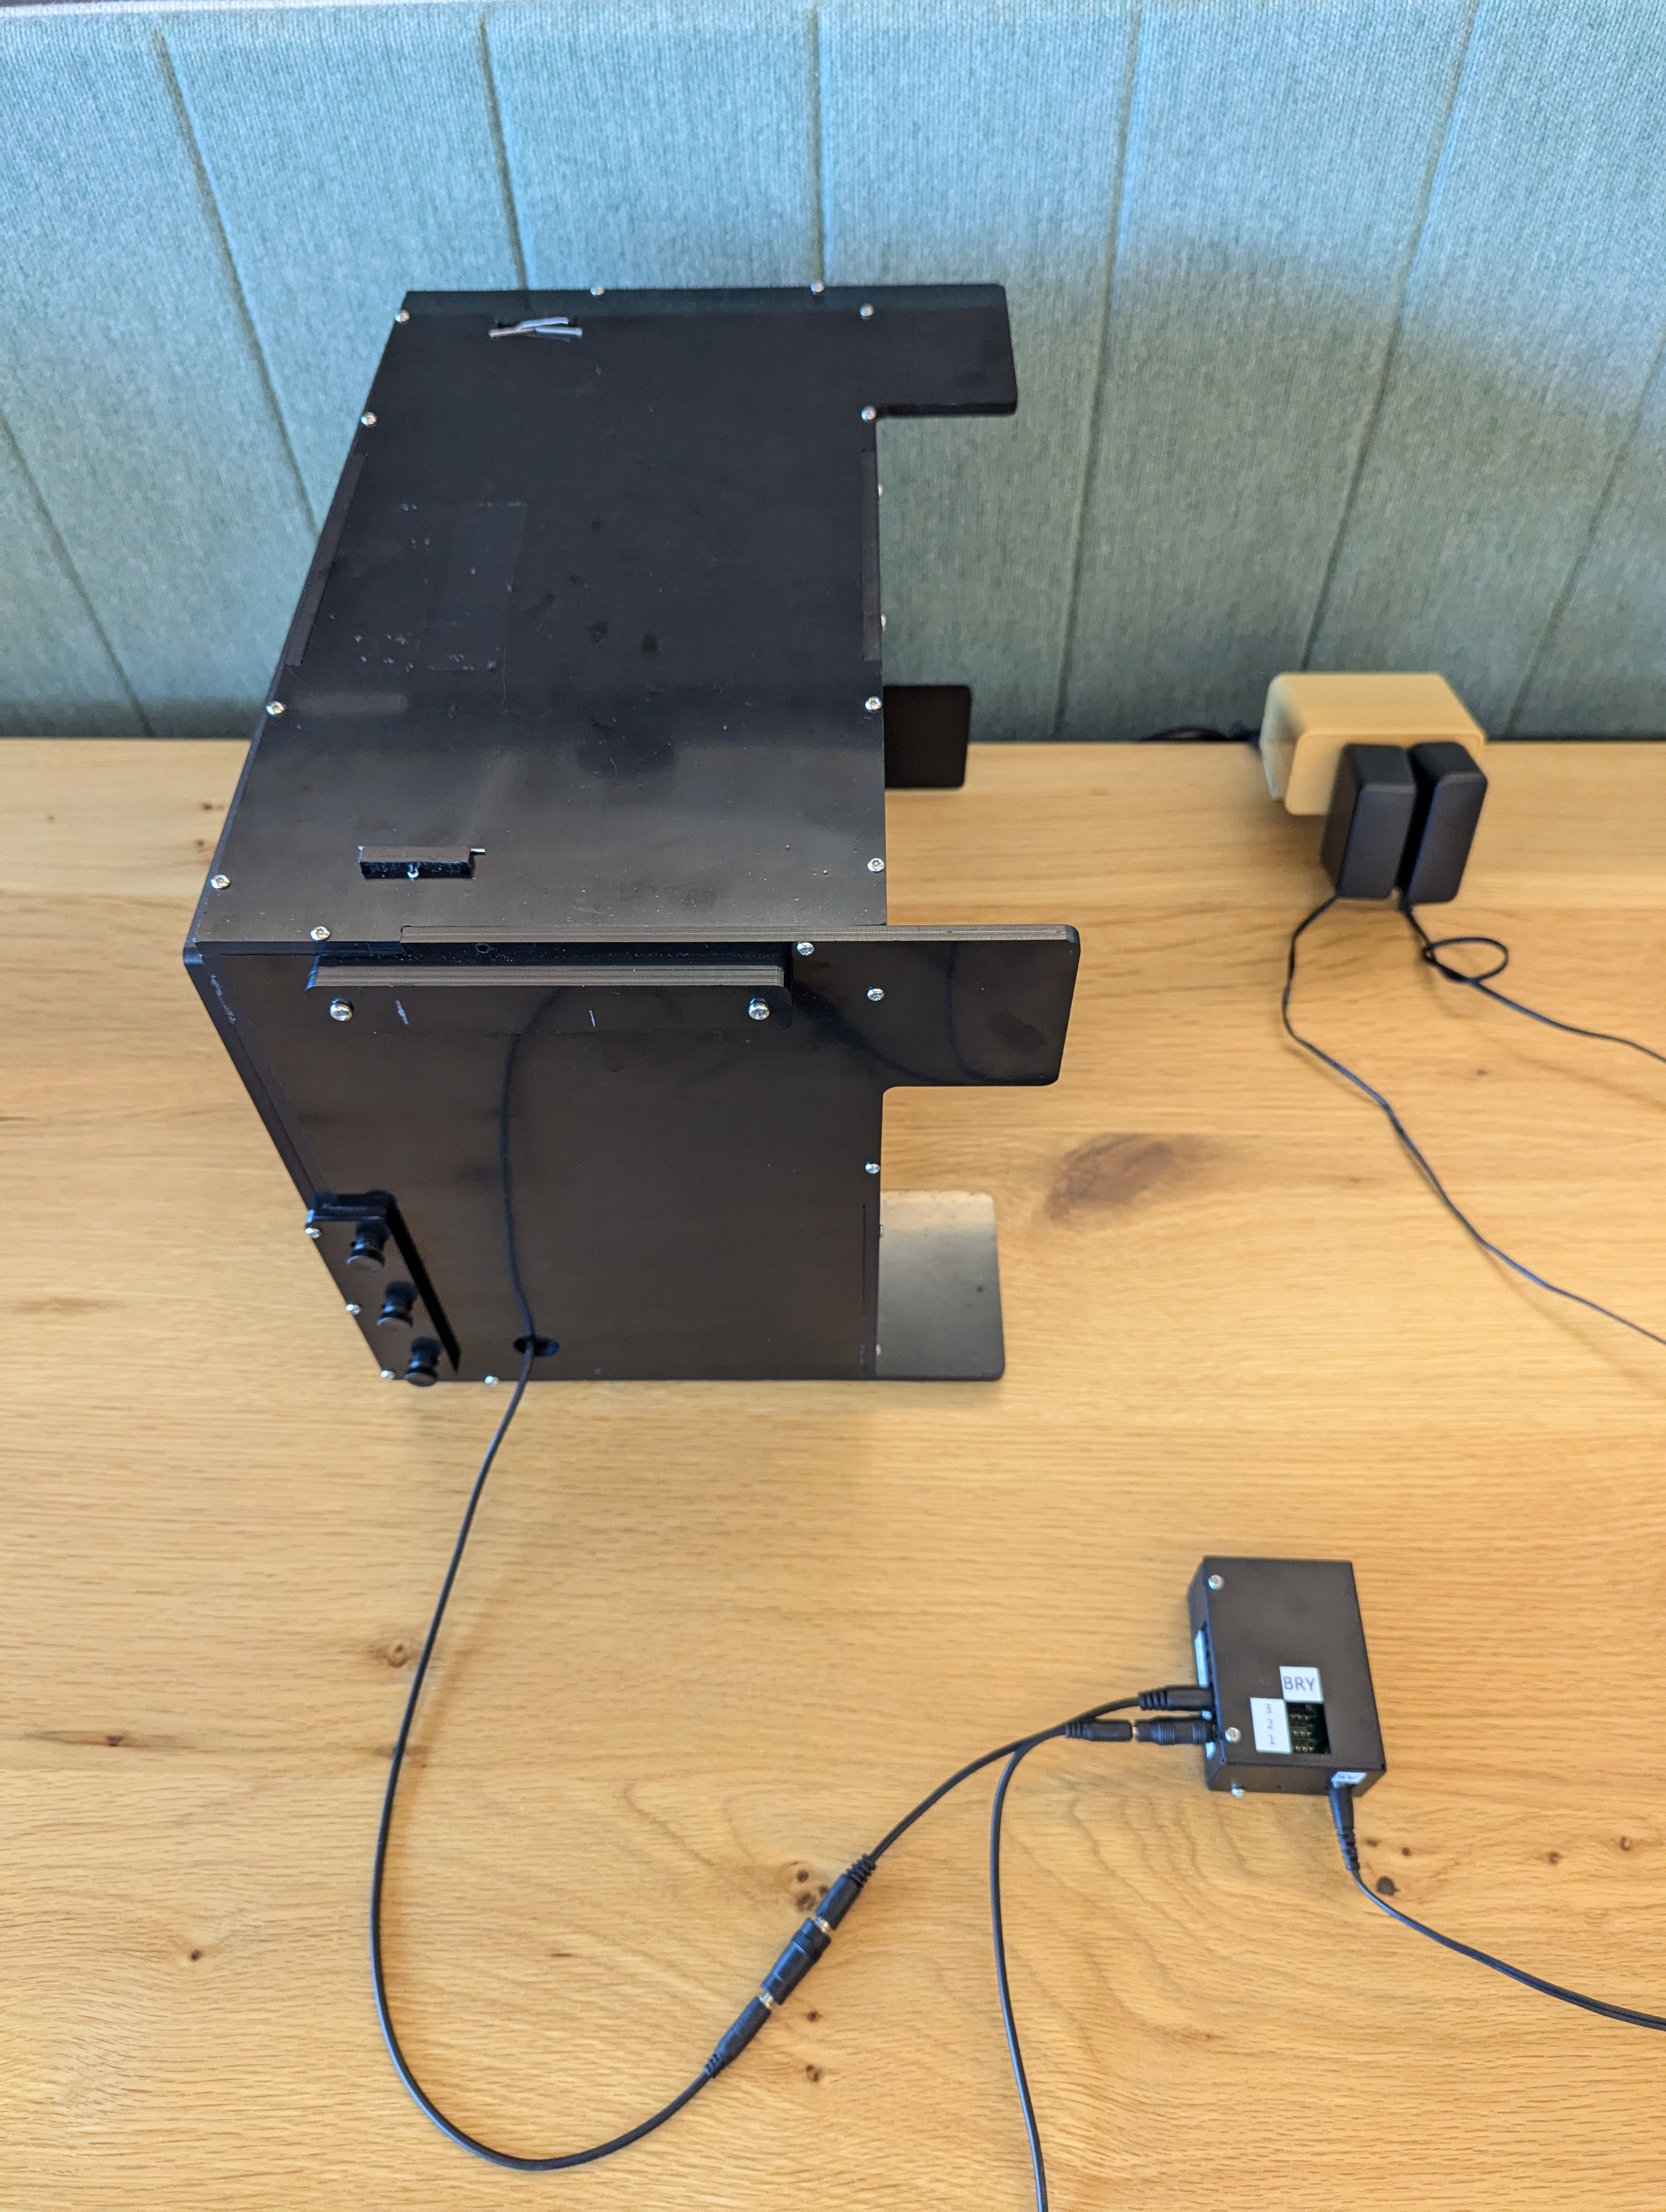
Figure 12. Light connected to lighting controller.
When you have completed the setup for the modular base rig, set up the host and
test environment (Set up CTS).
For the config.yml file, use the following configuration:
chart\_distance= 22lighting\_ch= [connected controller channel], or leave as is if not using a lighting controller.
Tele extension rig setup
Follow these steps to set up the optional tele extension rig.
Purchase the modular base rig and tele extension rig with a qualified vendor. The rig can be built using the production files but this isn't recommended because cutting and assembly must be accurate to ensure the extension rig has no fit issues.
Make sure you have a working modular base rig and a tele extension rig (as shown in Figure 13).
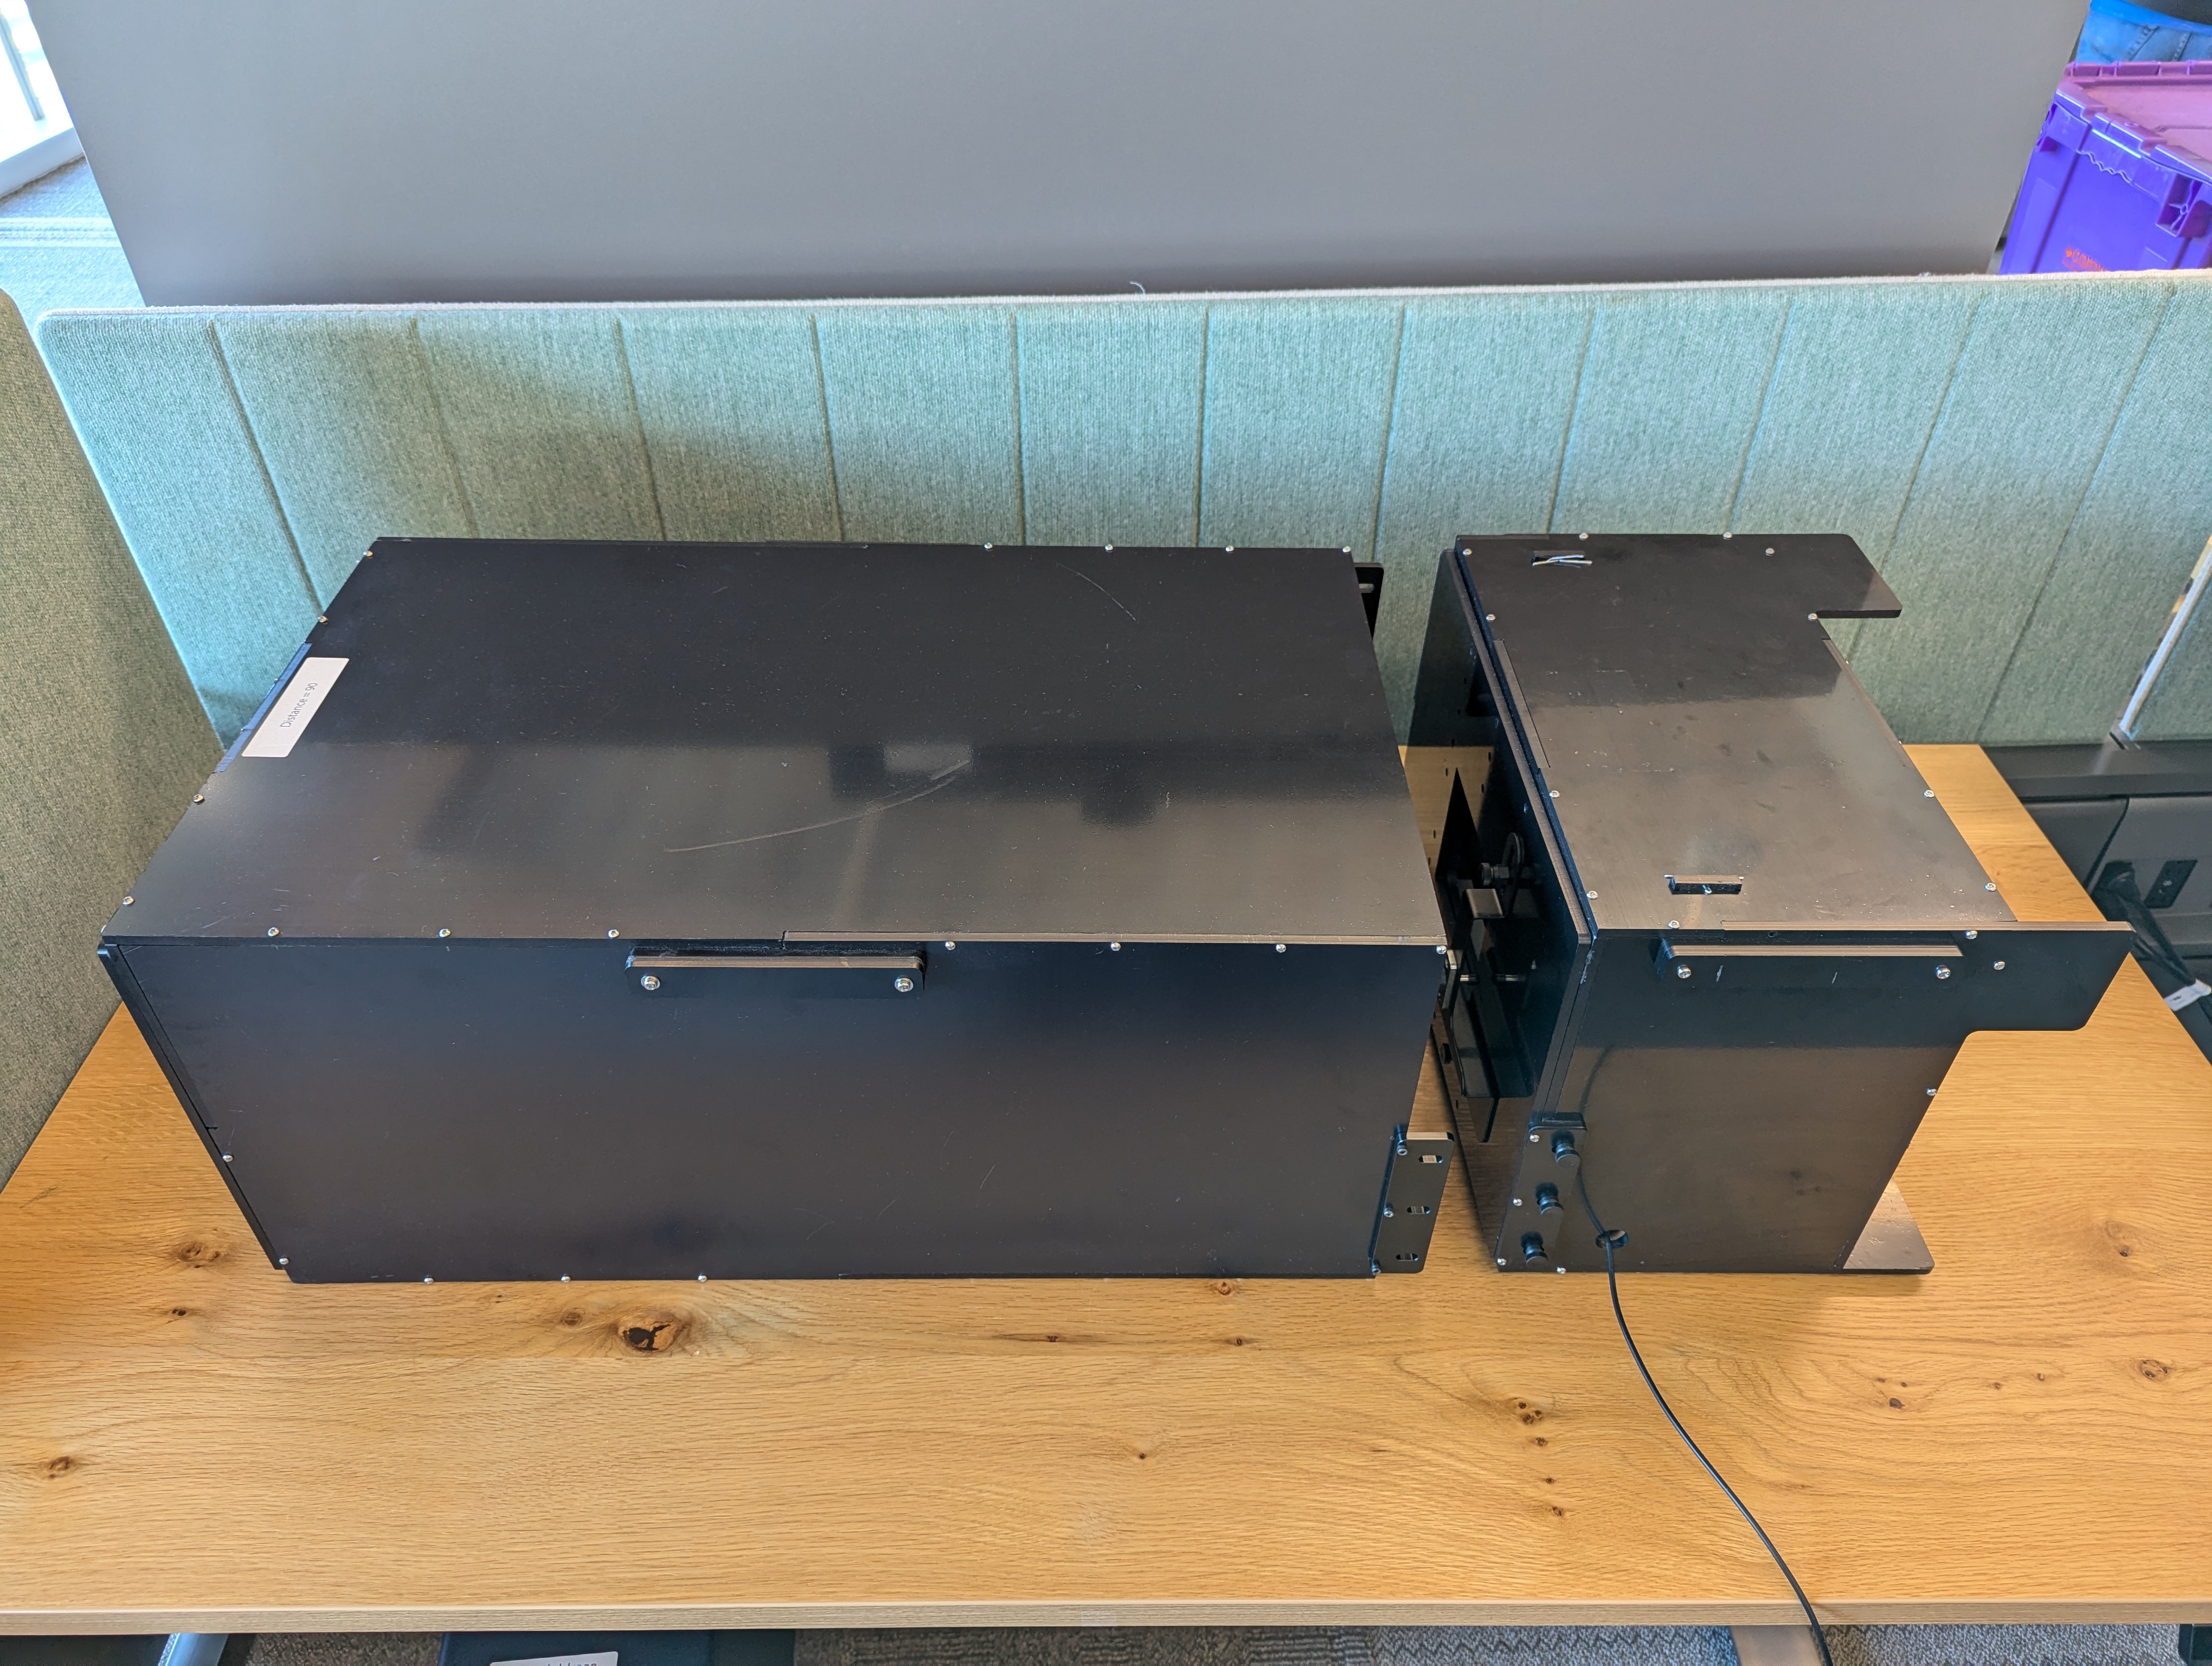
Figure 13. Modular base rig with tele extension.
Remove the phone mounting panel by removing 6x nylon bolts by hand (3 on each side).
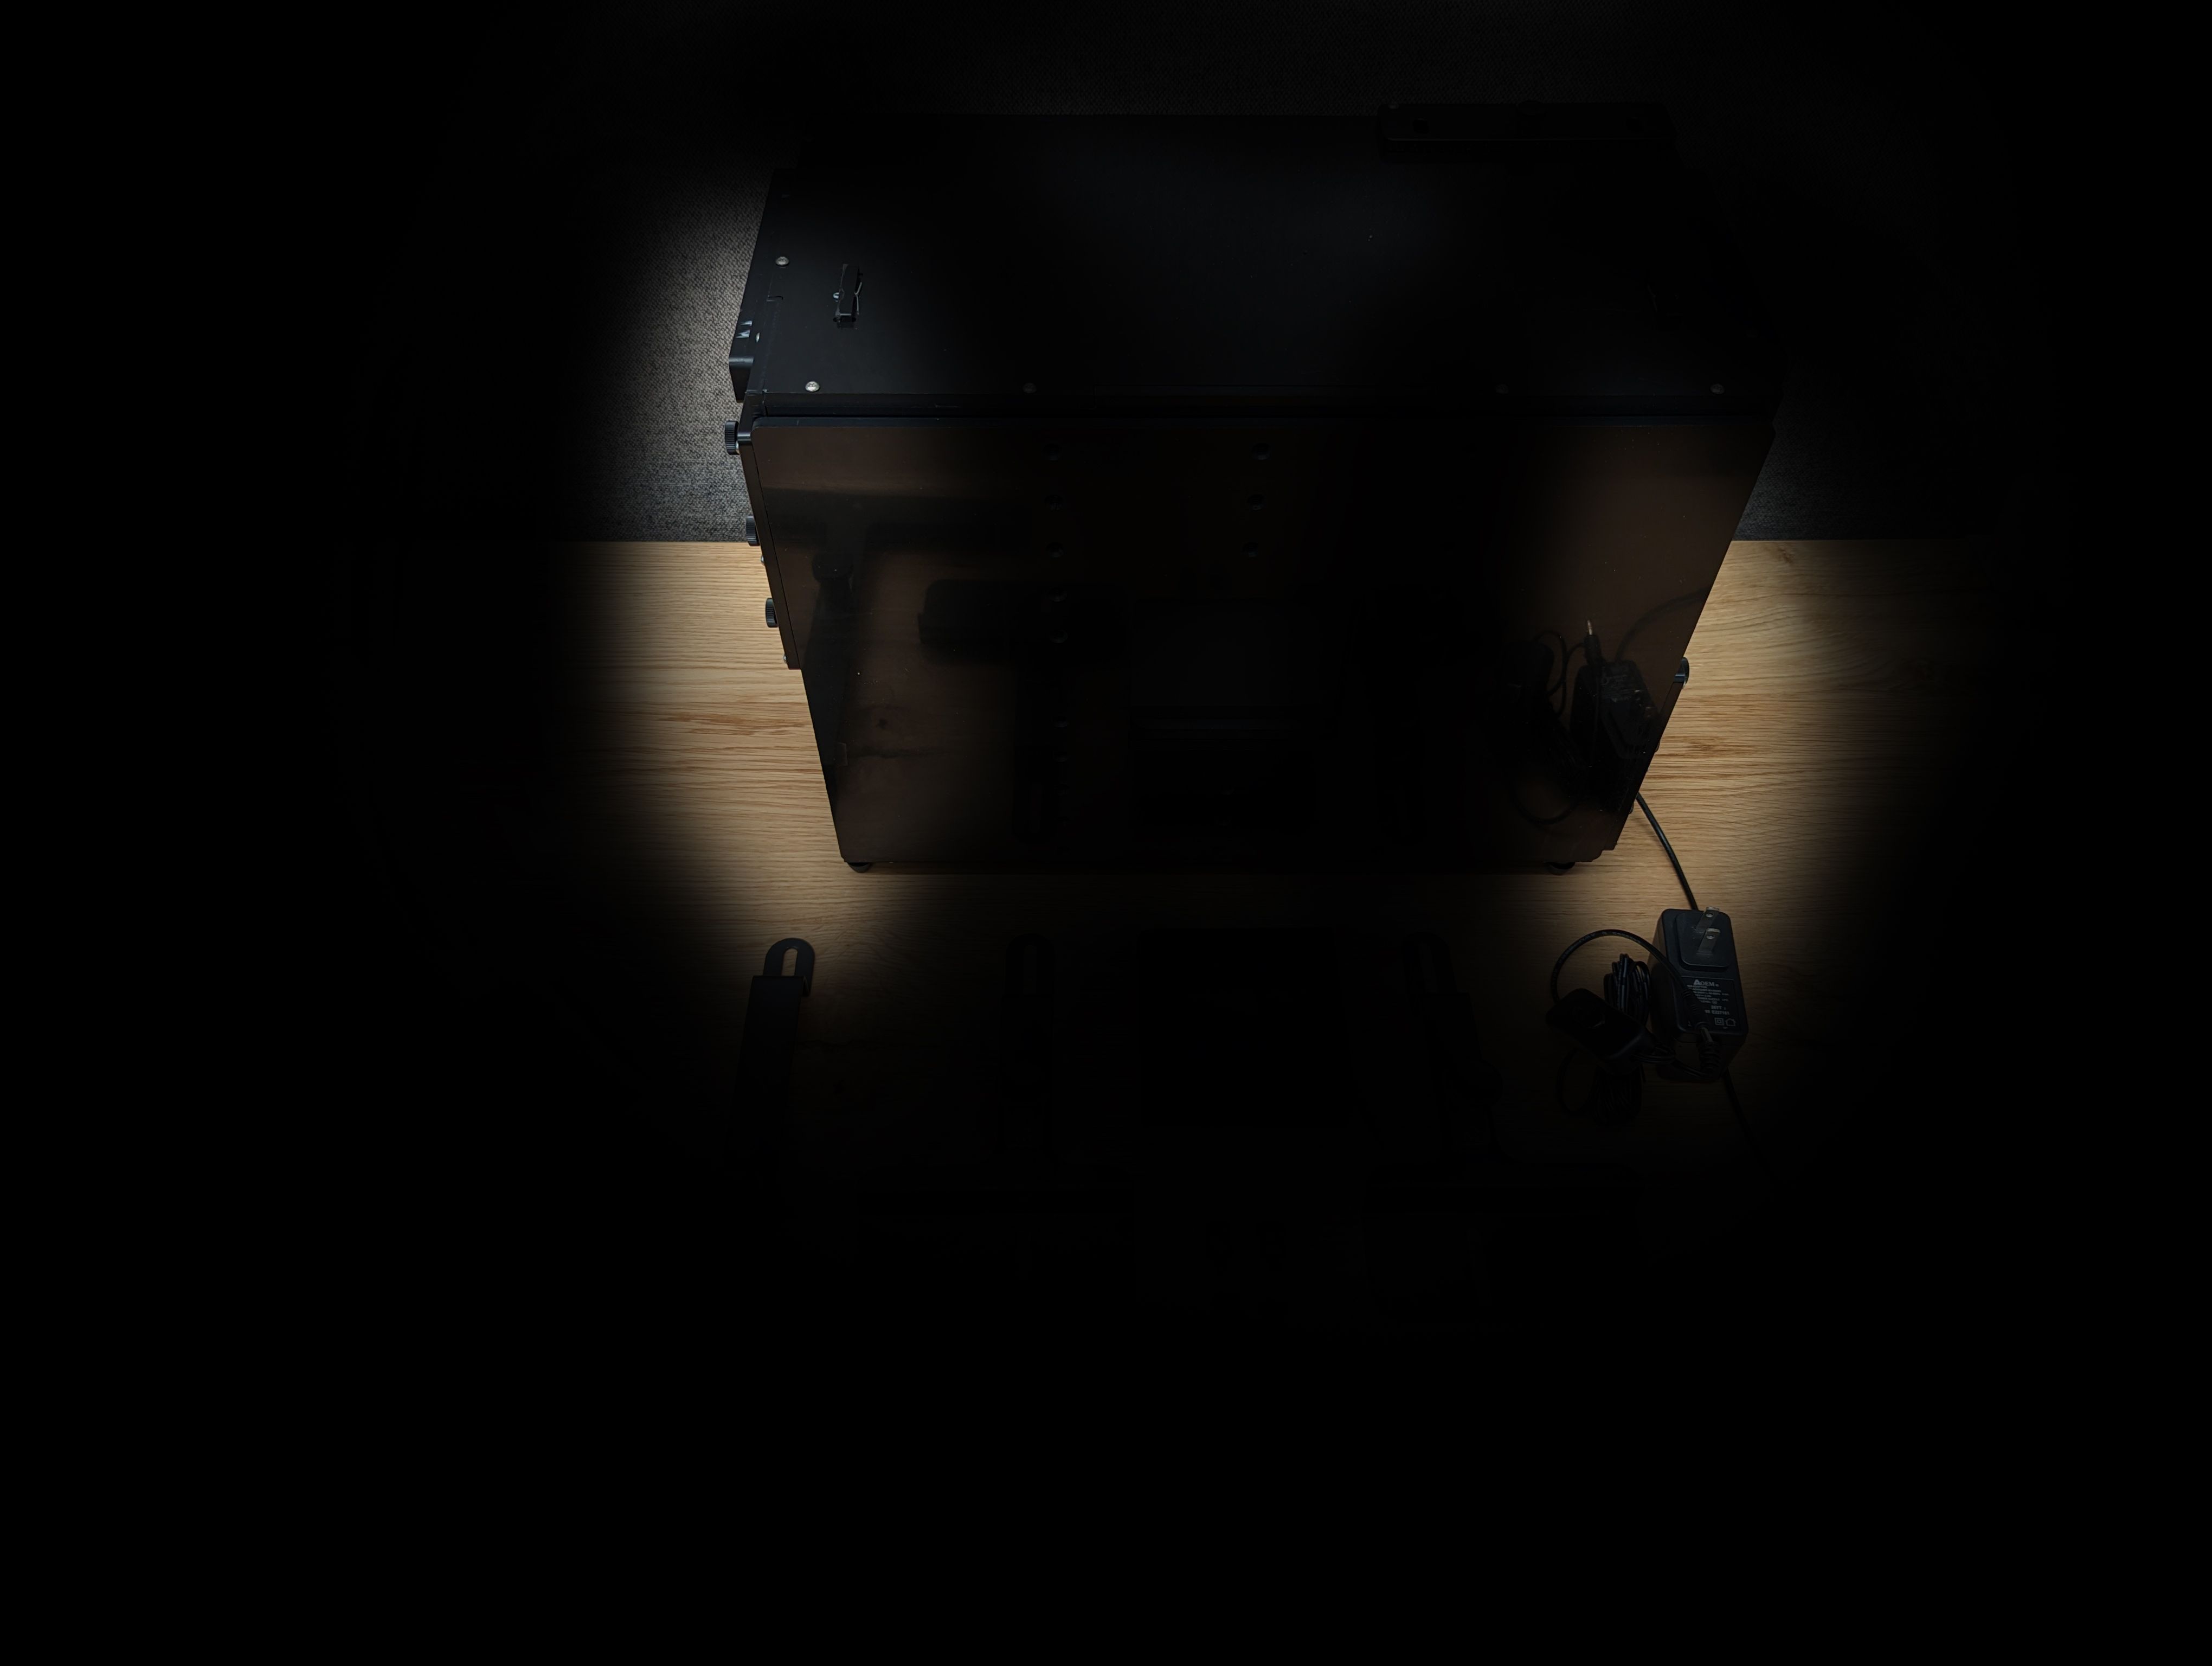
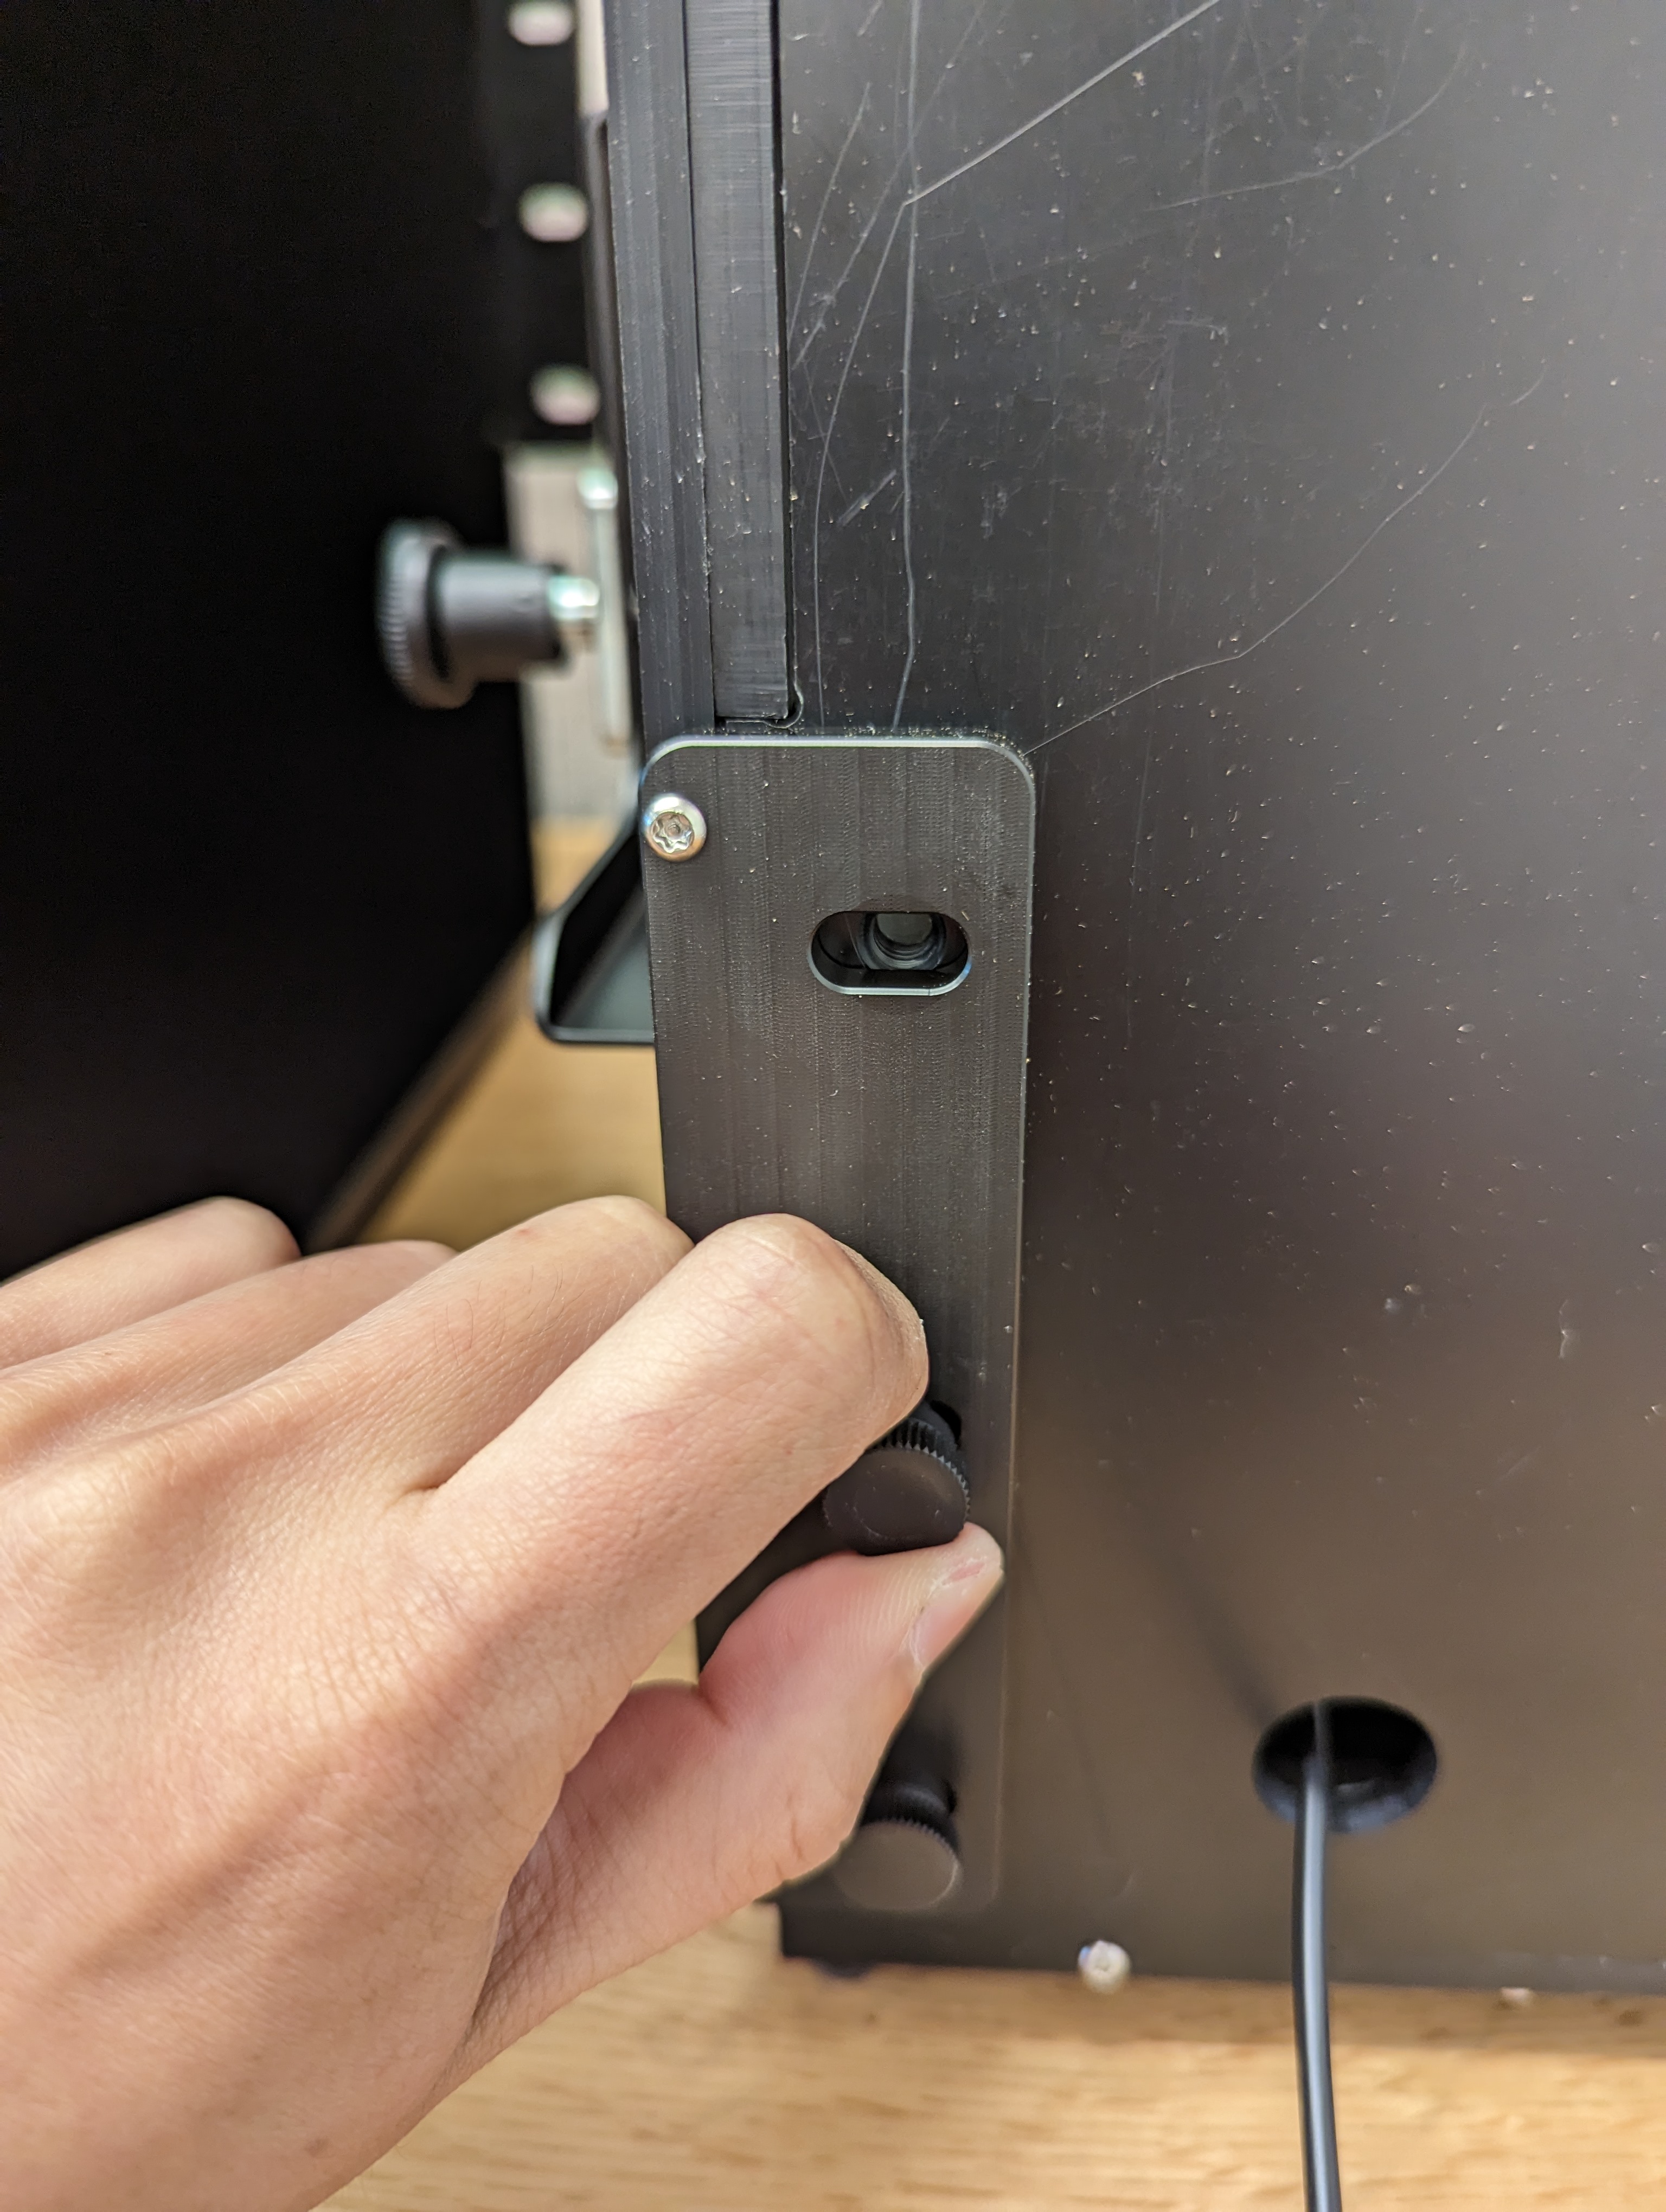
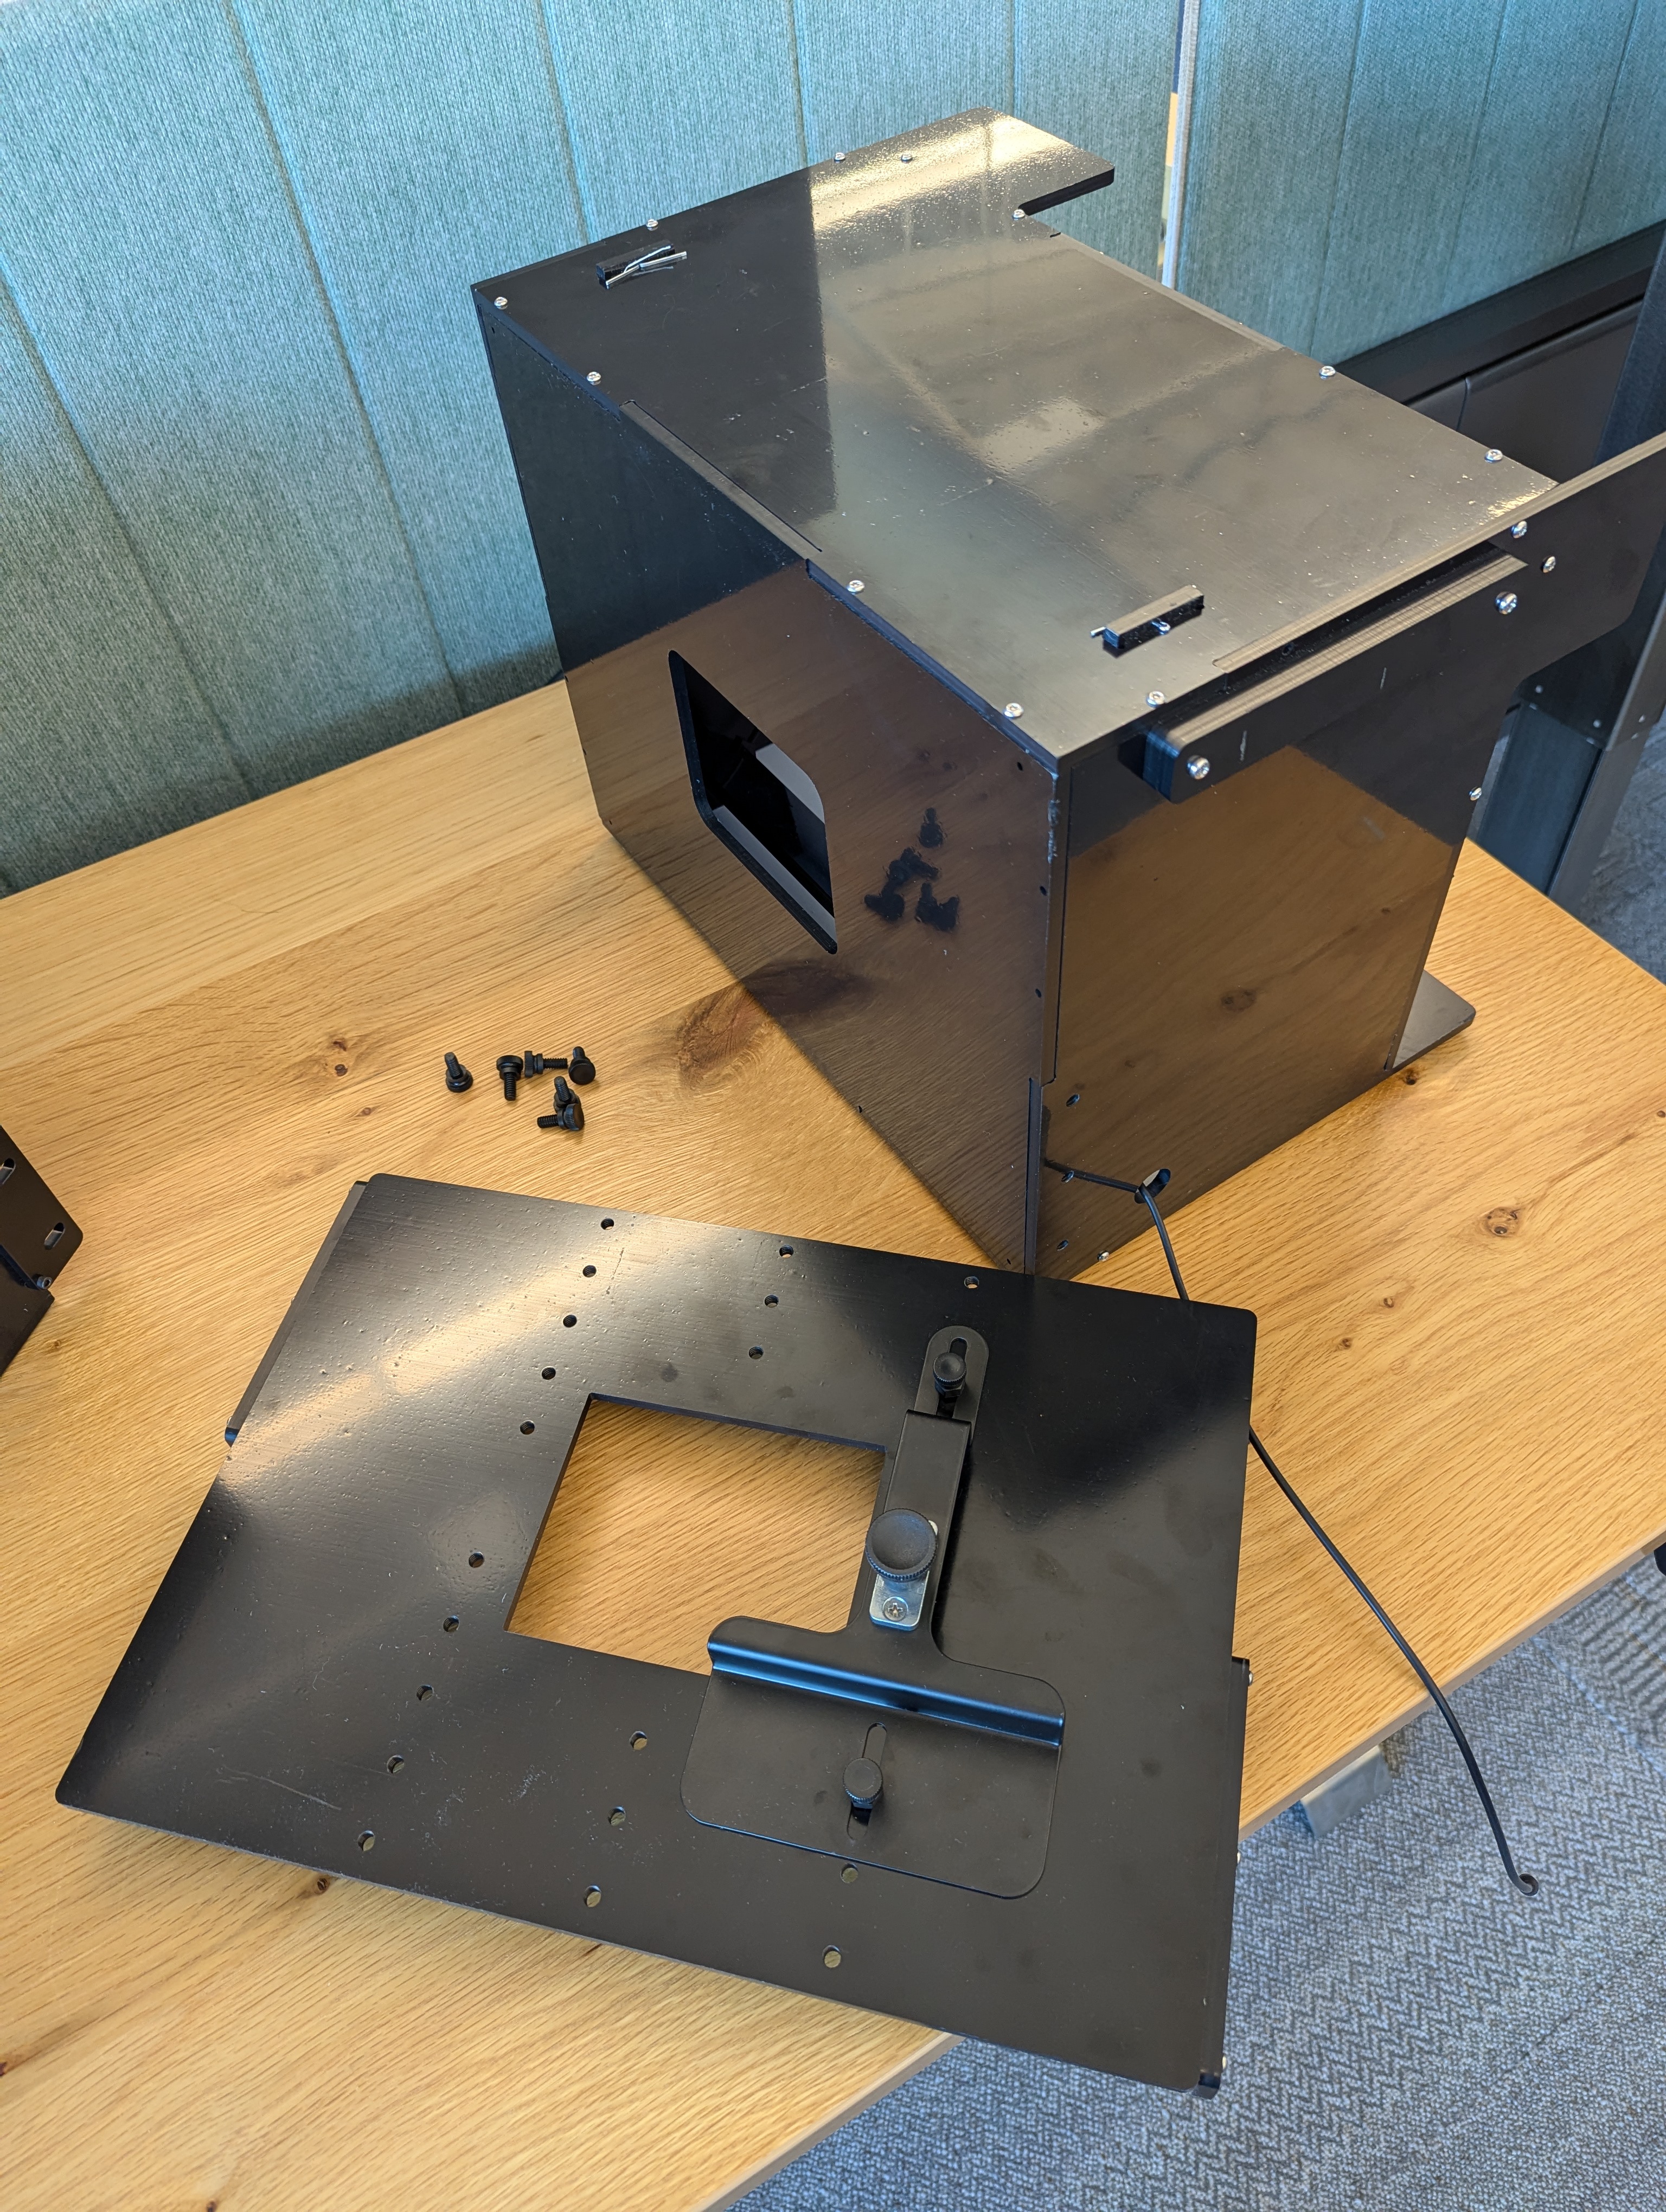
Figure 14. Removing 6 nylon bolts in the highlighted area by hand.
Place the base rig and the tele extension rig on the surface where the tests are performed. To avoid stress to the mounting points, we don't recommend moving the assembled rig.
Place the extension rig in place so that the 6 slots on the extension rig tab aligns with the 6 holes on the base rig.
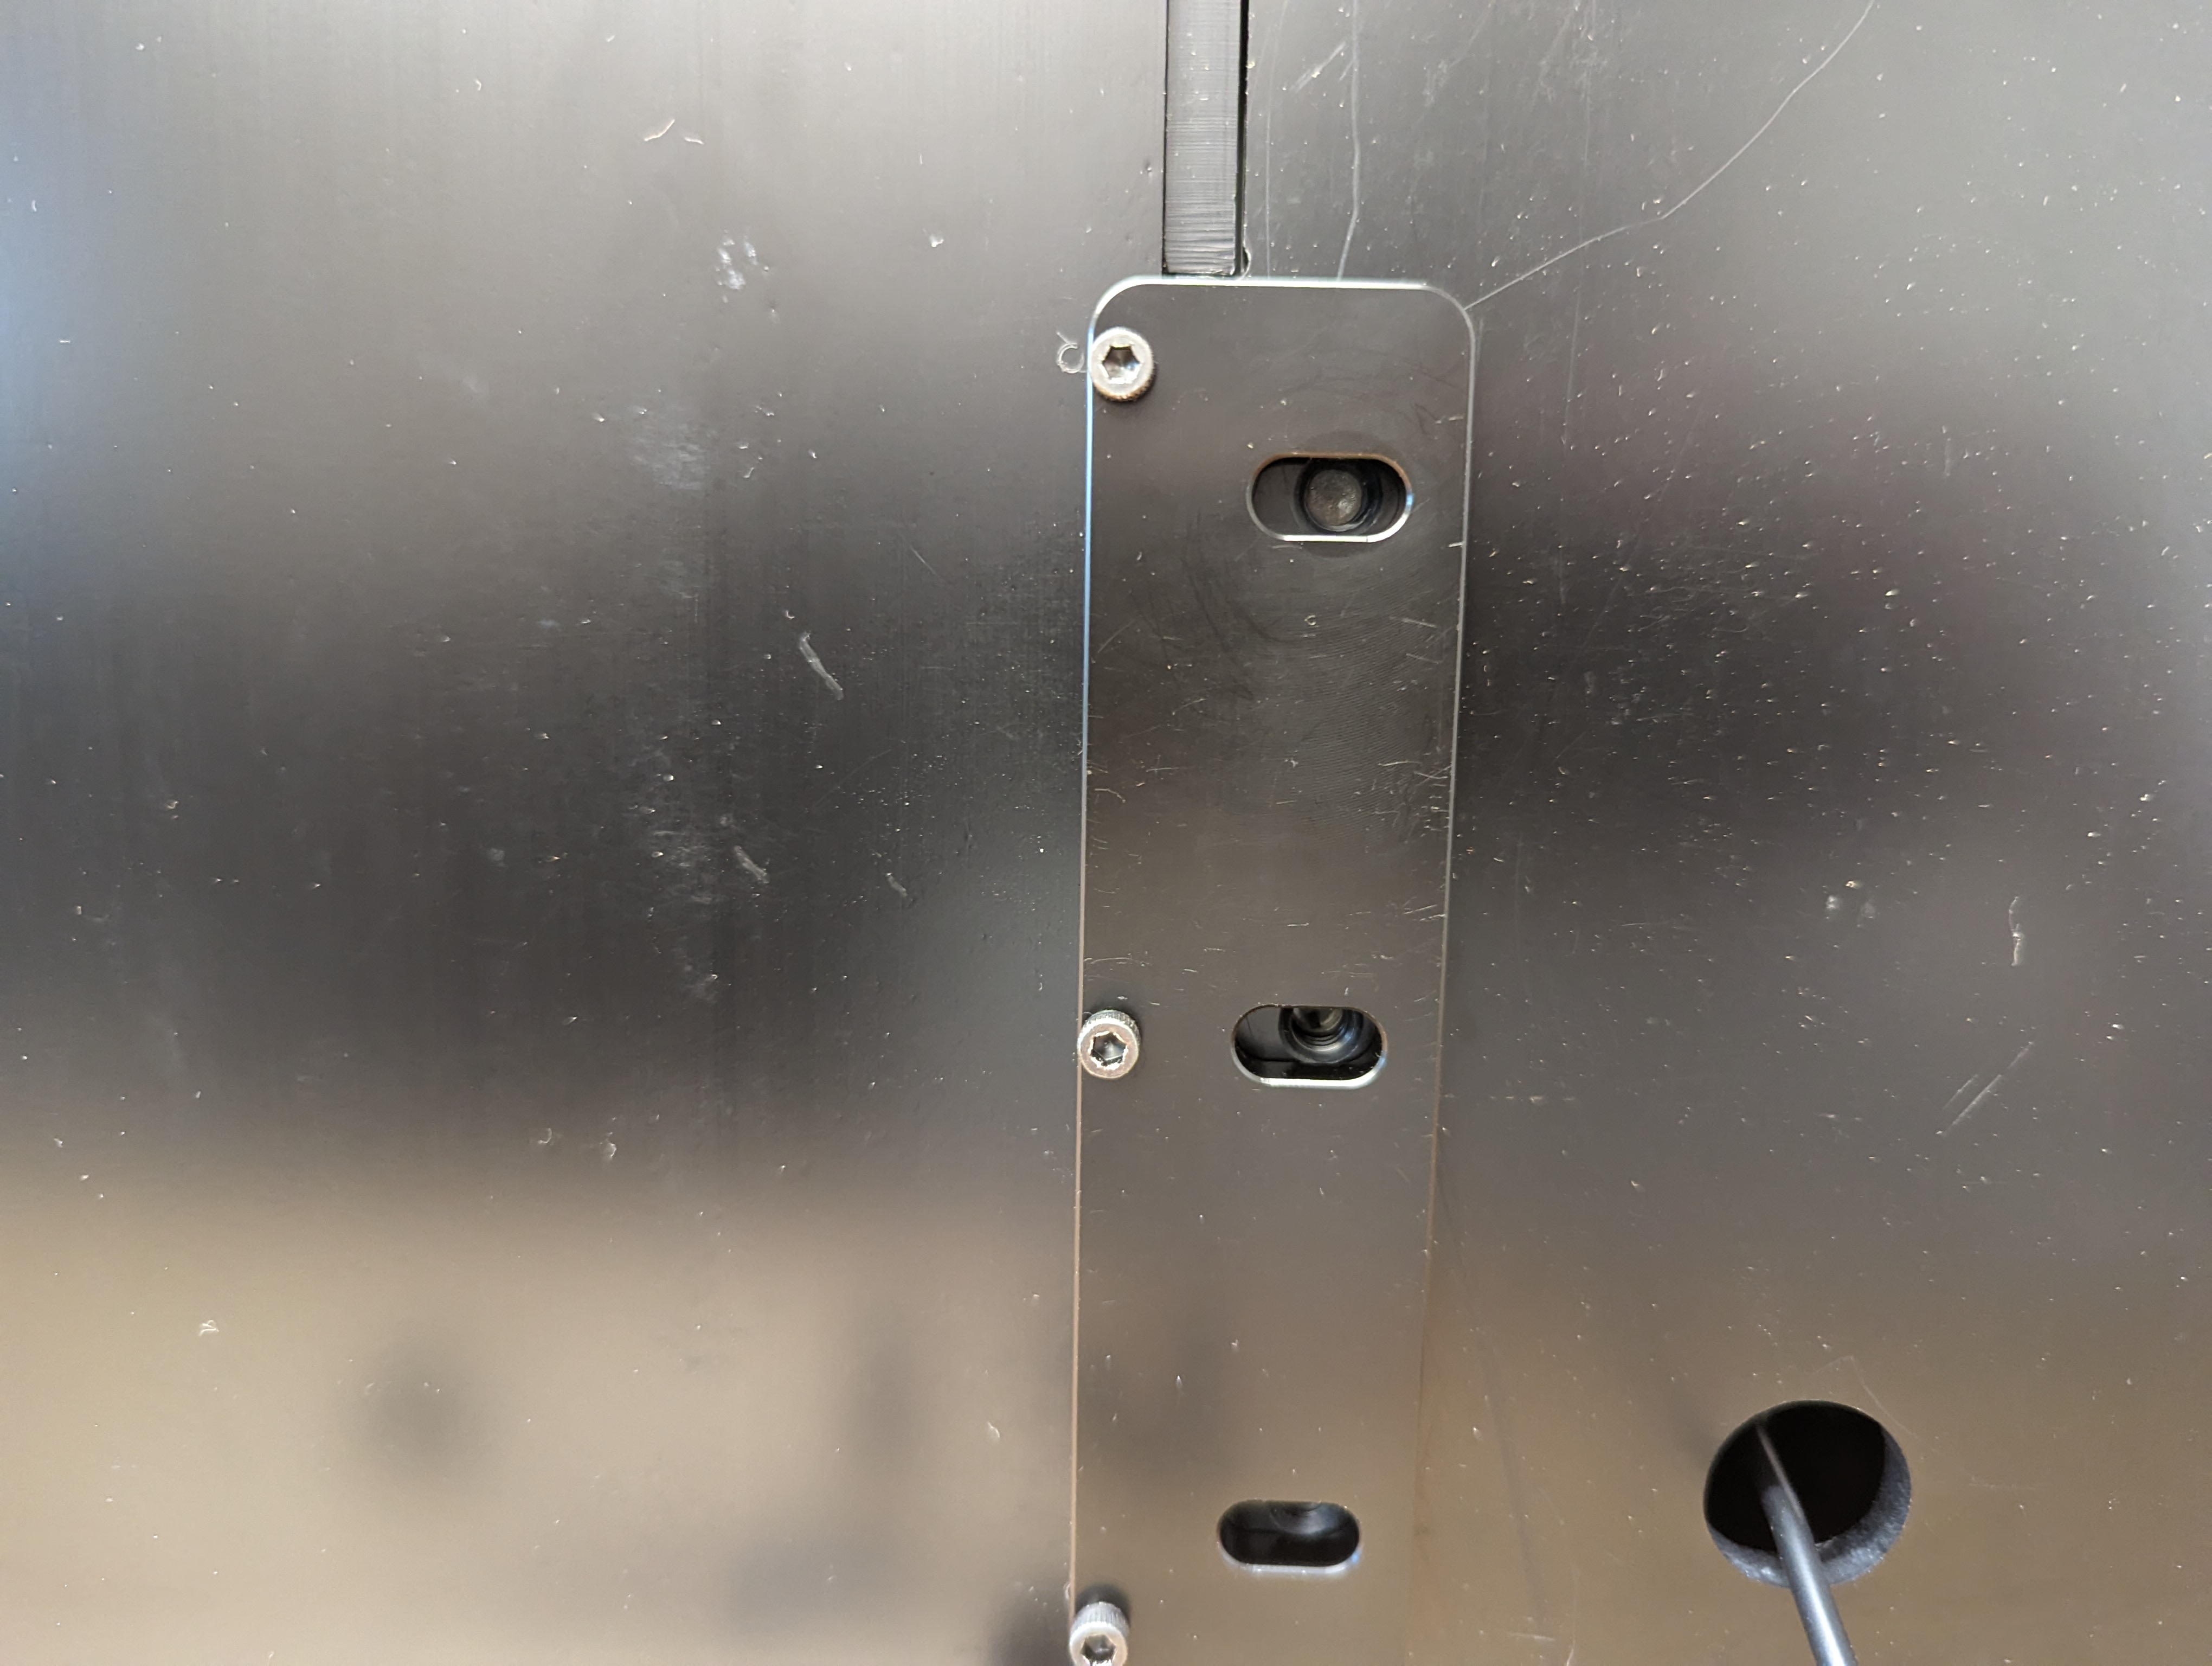
Figure 15. Aligning slots with holes.
Attach the extension rig to the base rig by installing the 6 bolts. While installing the screws, gently push the 2 rigs together to ensure there are no gaps for light leakages (ask colleague for help as necessary). Hand tighten the bolts.
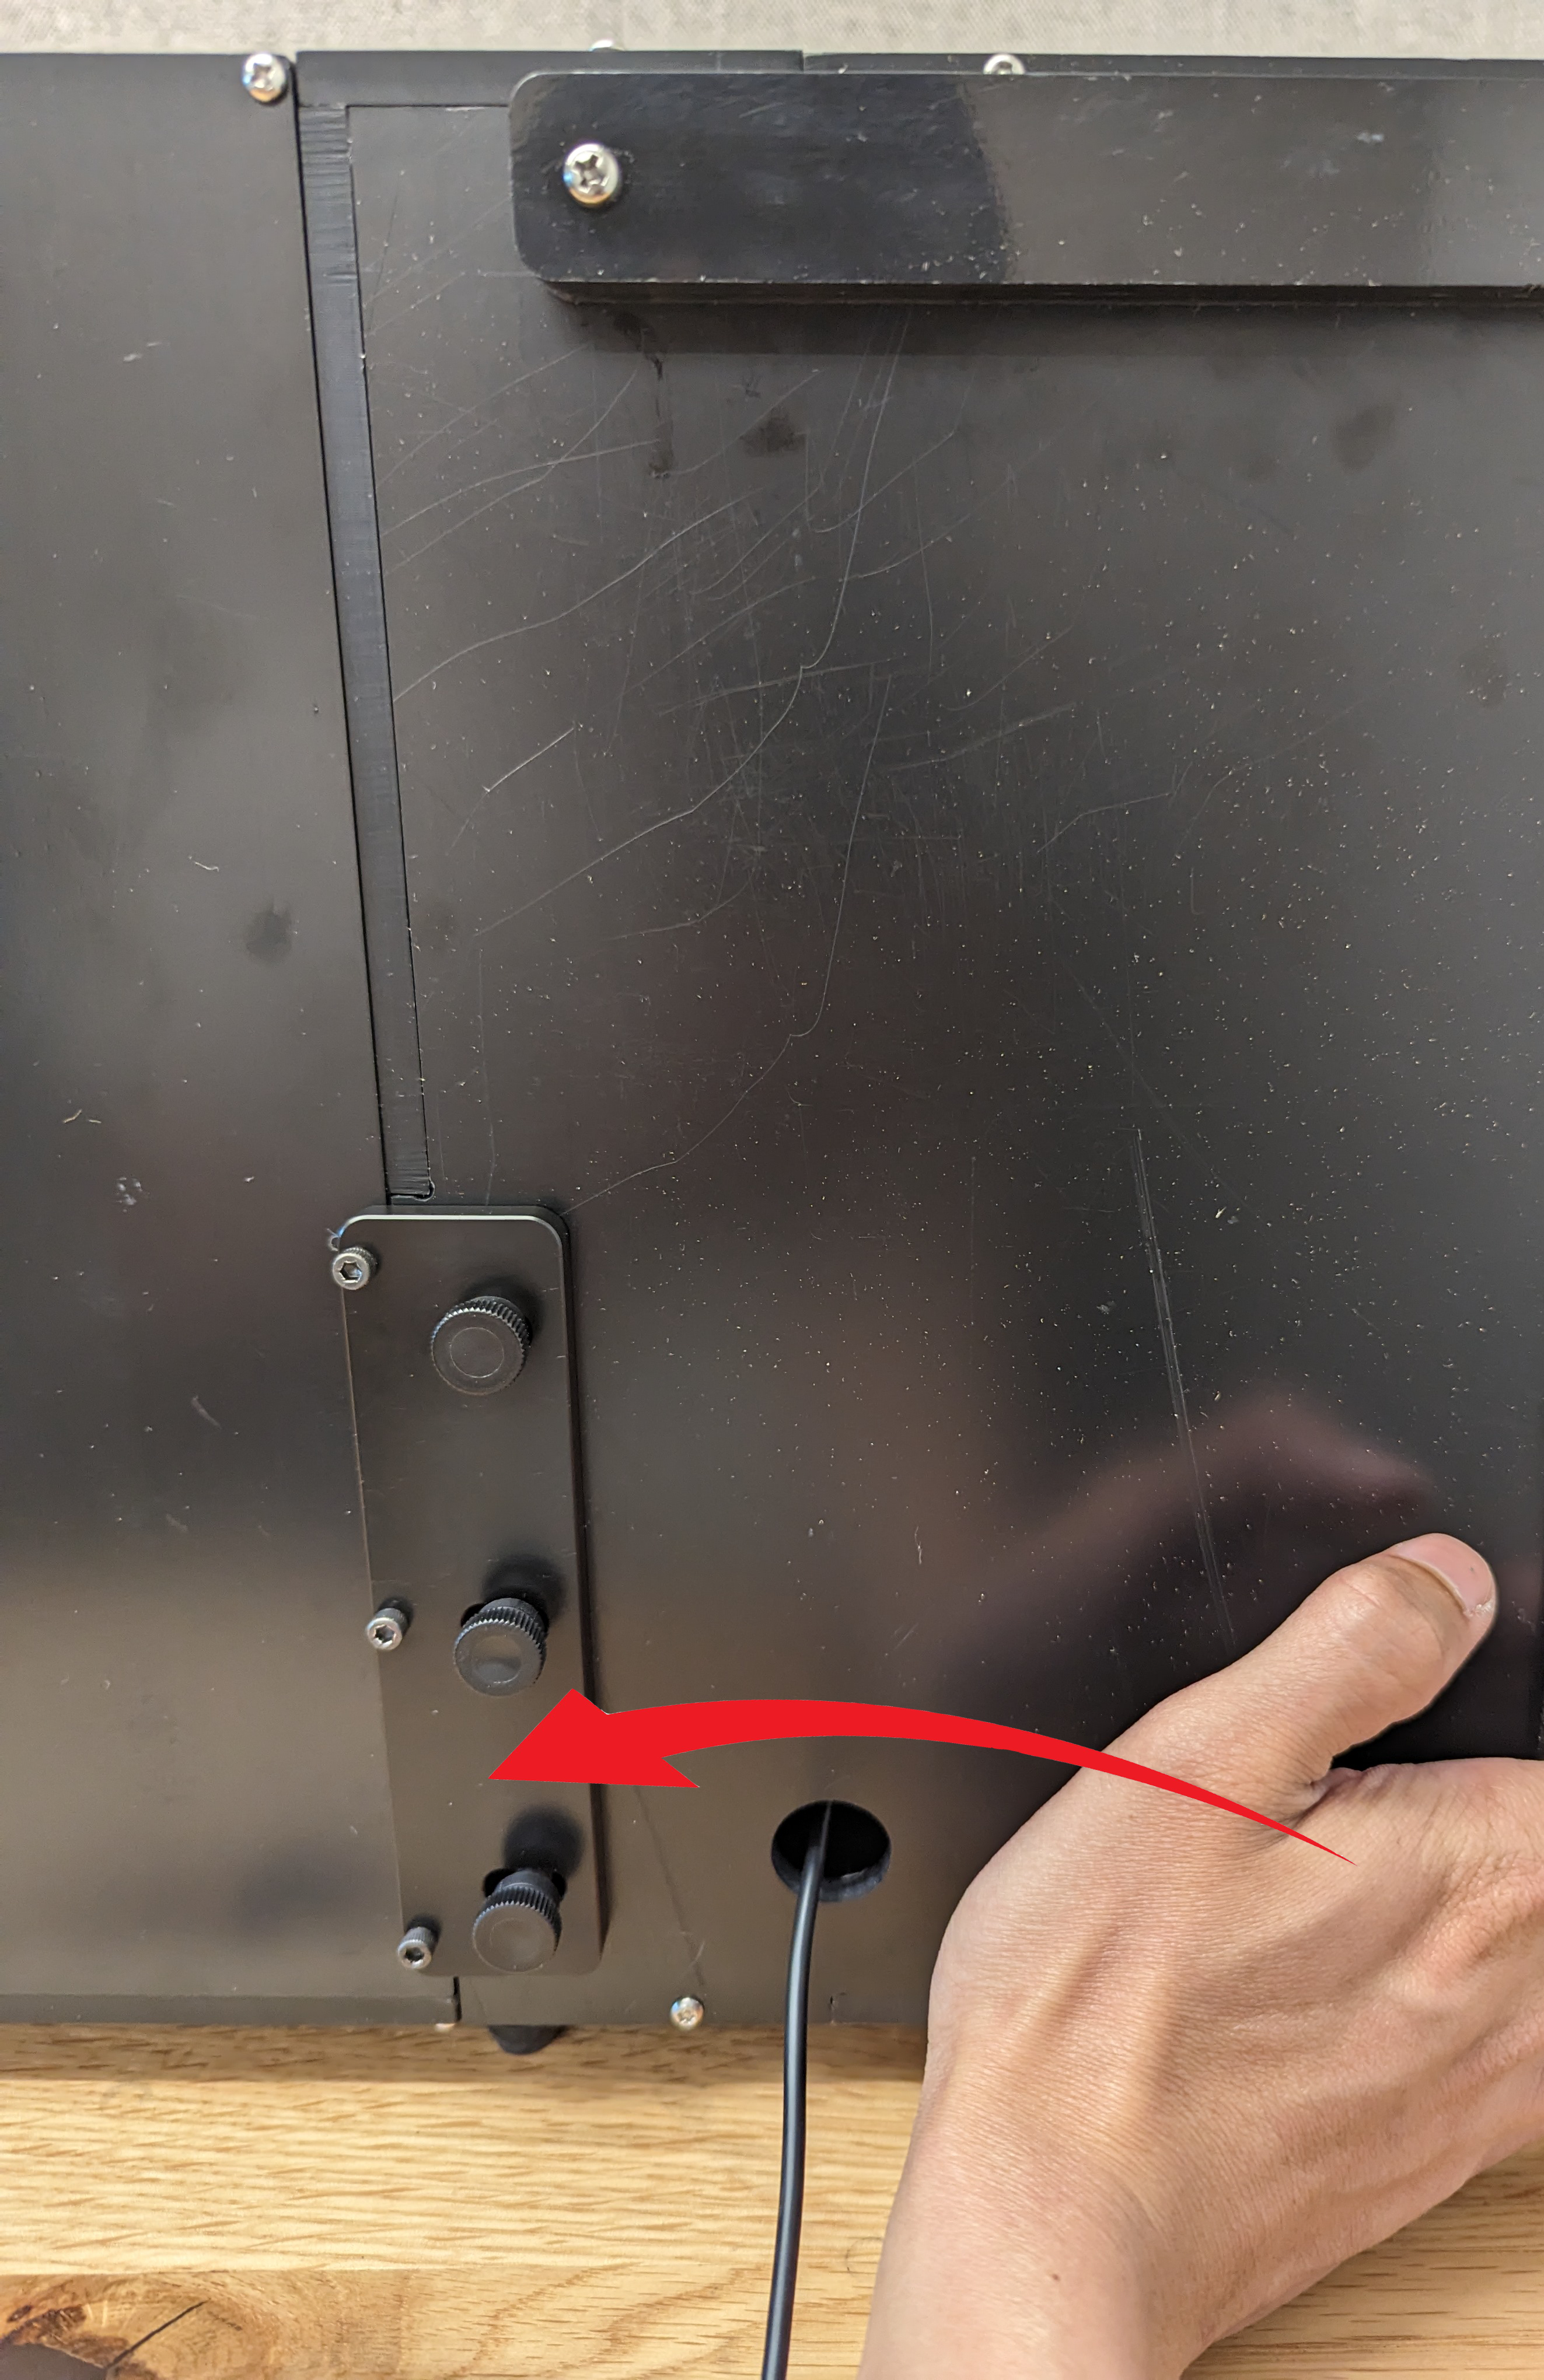
Figure 16. Attaching base and extension rigs.
Configure the aperture (or drapery) and install phone mounts and DUTs as described in Base rig setup.
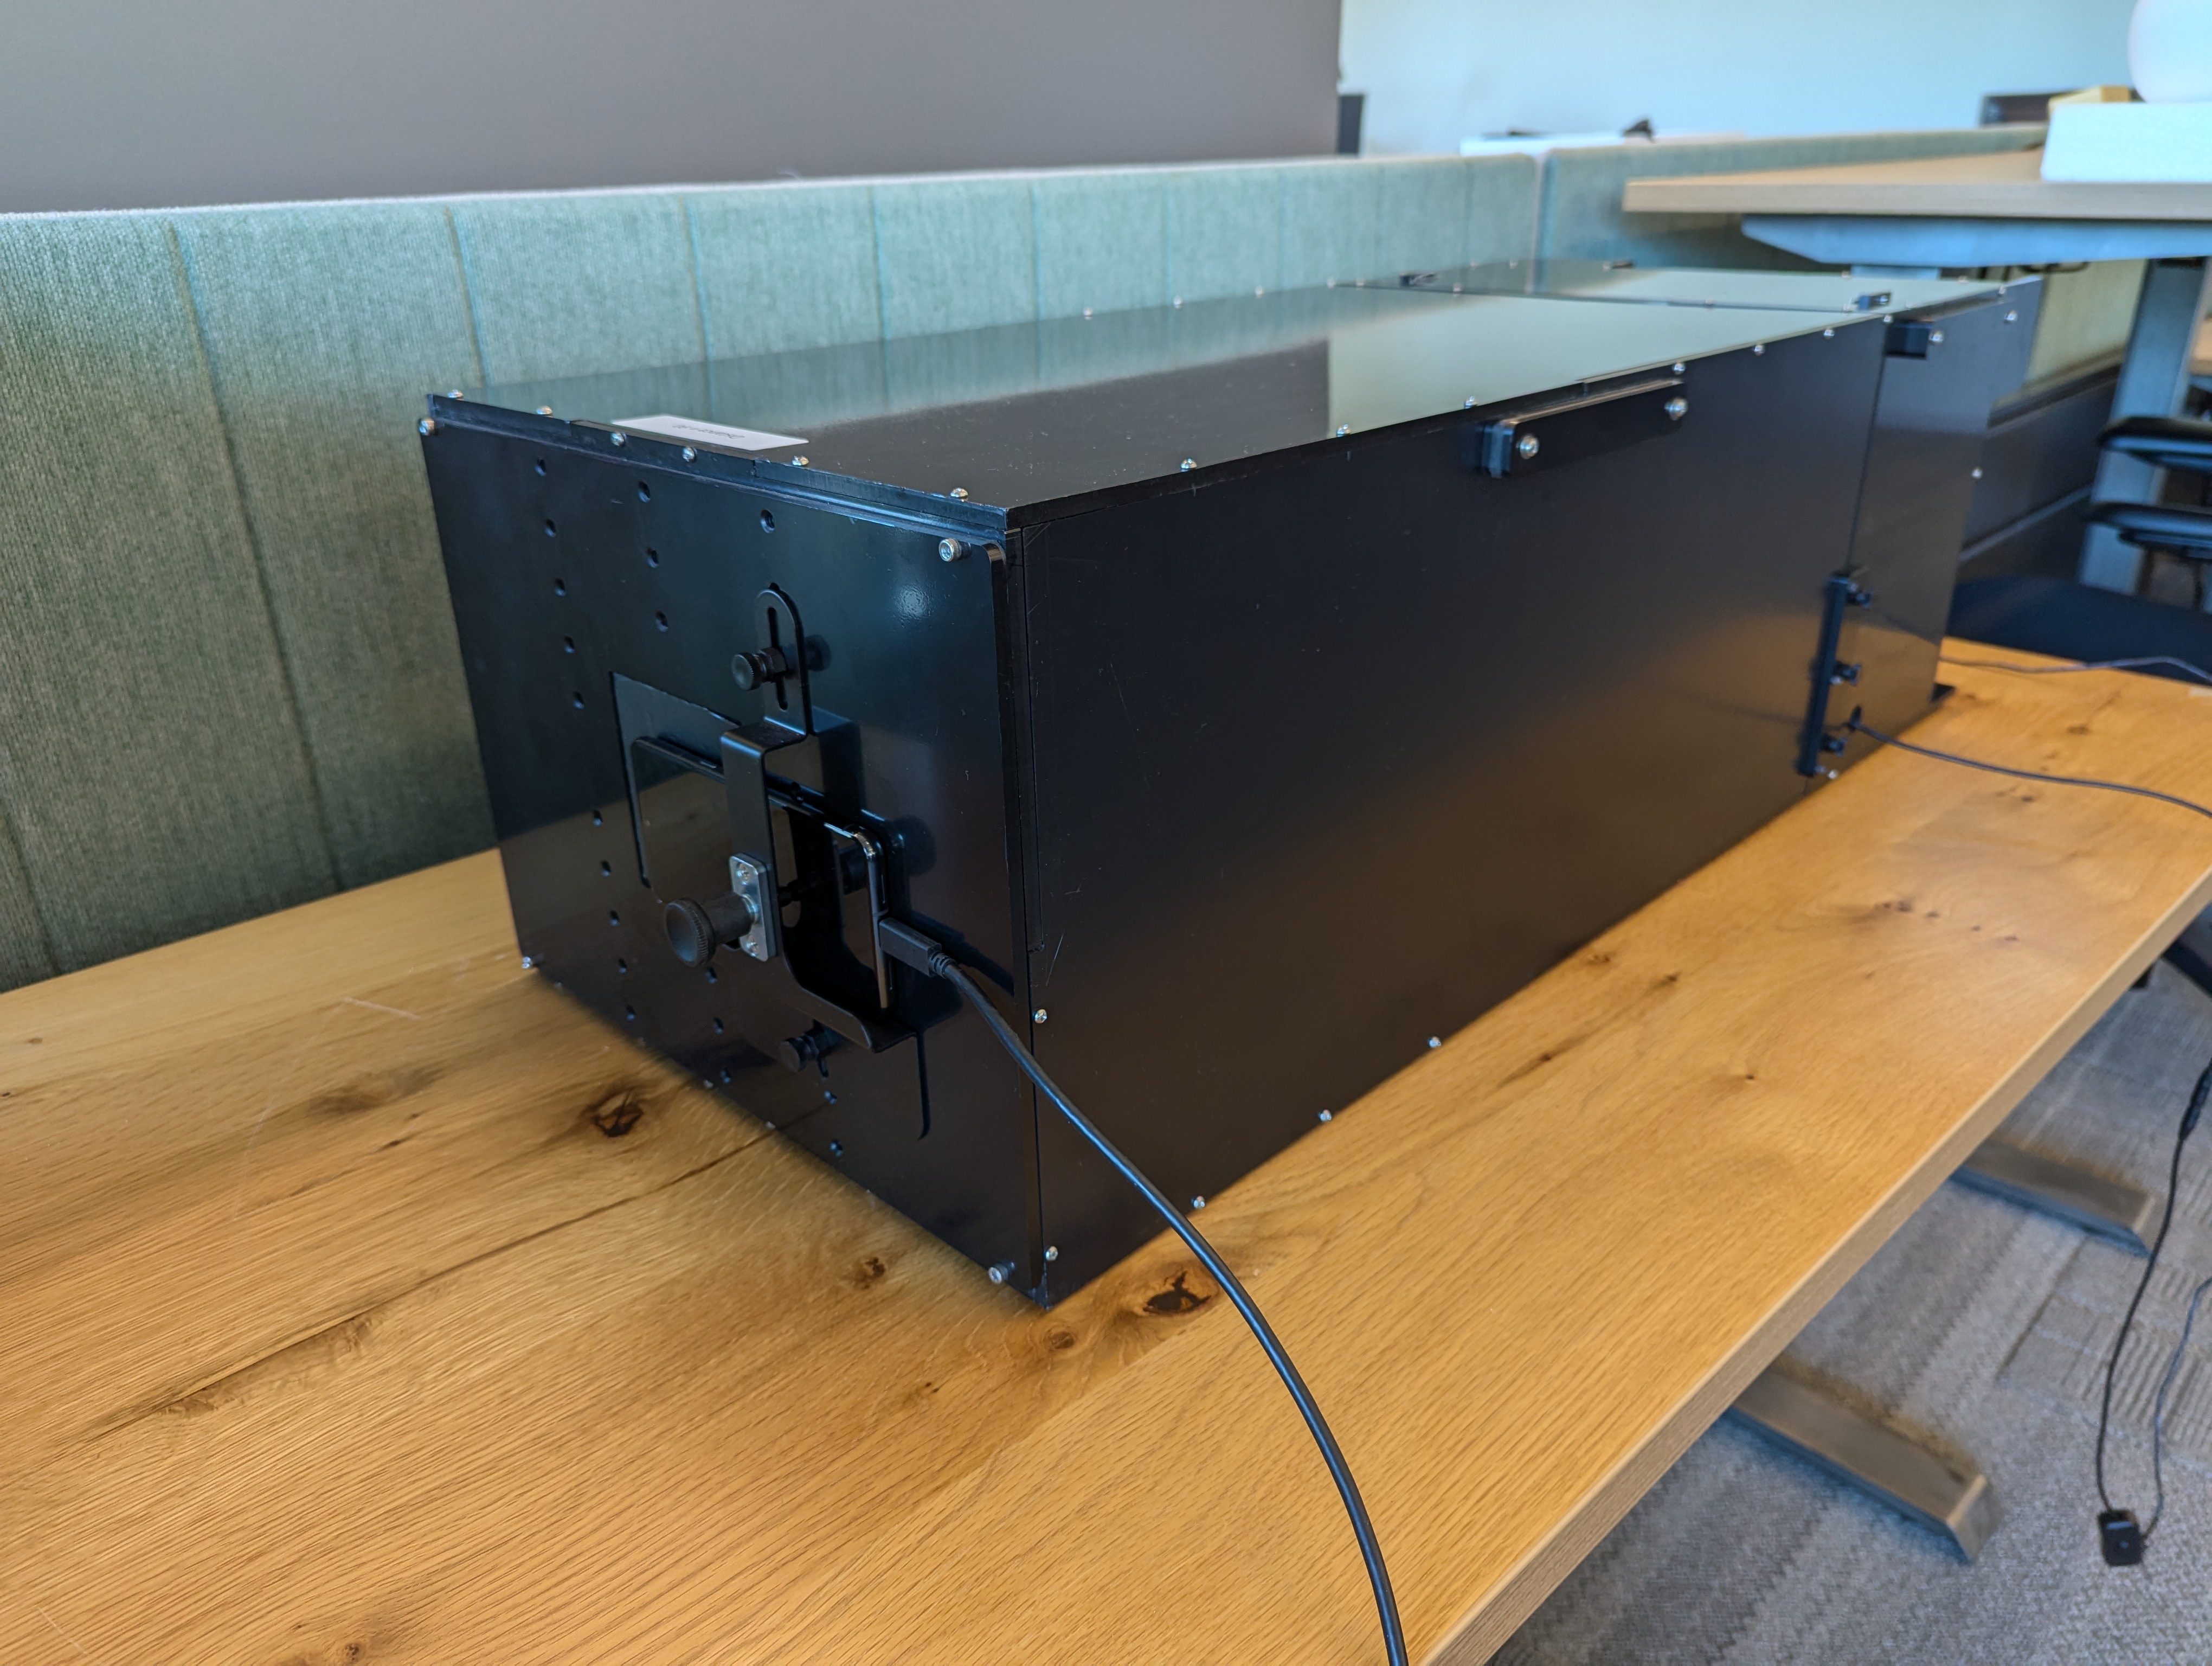
Figure 17. Attaching phone mounts and DUT.
When you have completed the setup for the extension rig, set up the host and
test environment (Set up CTS).
For the config.yml file, use the following configuration:
chart_distance= [total distance from DUT to tablet]lighting_ch= [connected control channel], or leave as is if not not using a lighting controller.
Uninstall the extension rig
To uninstall the extension rig, follow the installation steps in reverse. When installing the tablet mounting panel, push the panel against the base rig to ensure there are no gaps for light leakages (as shown in Figure 17). Hand tighten the bolts.
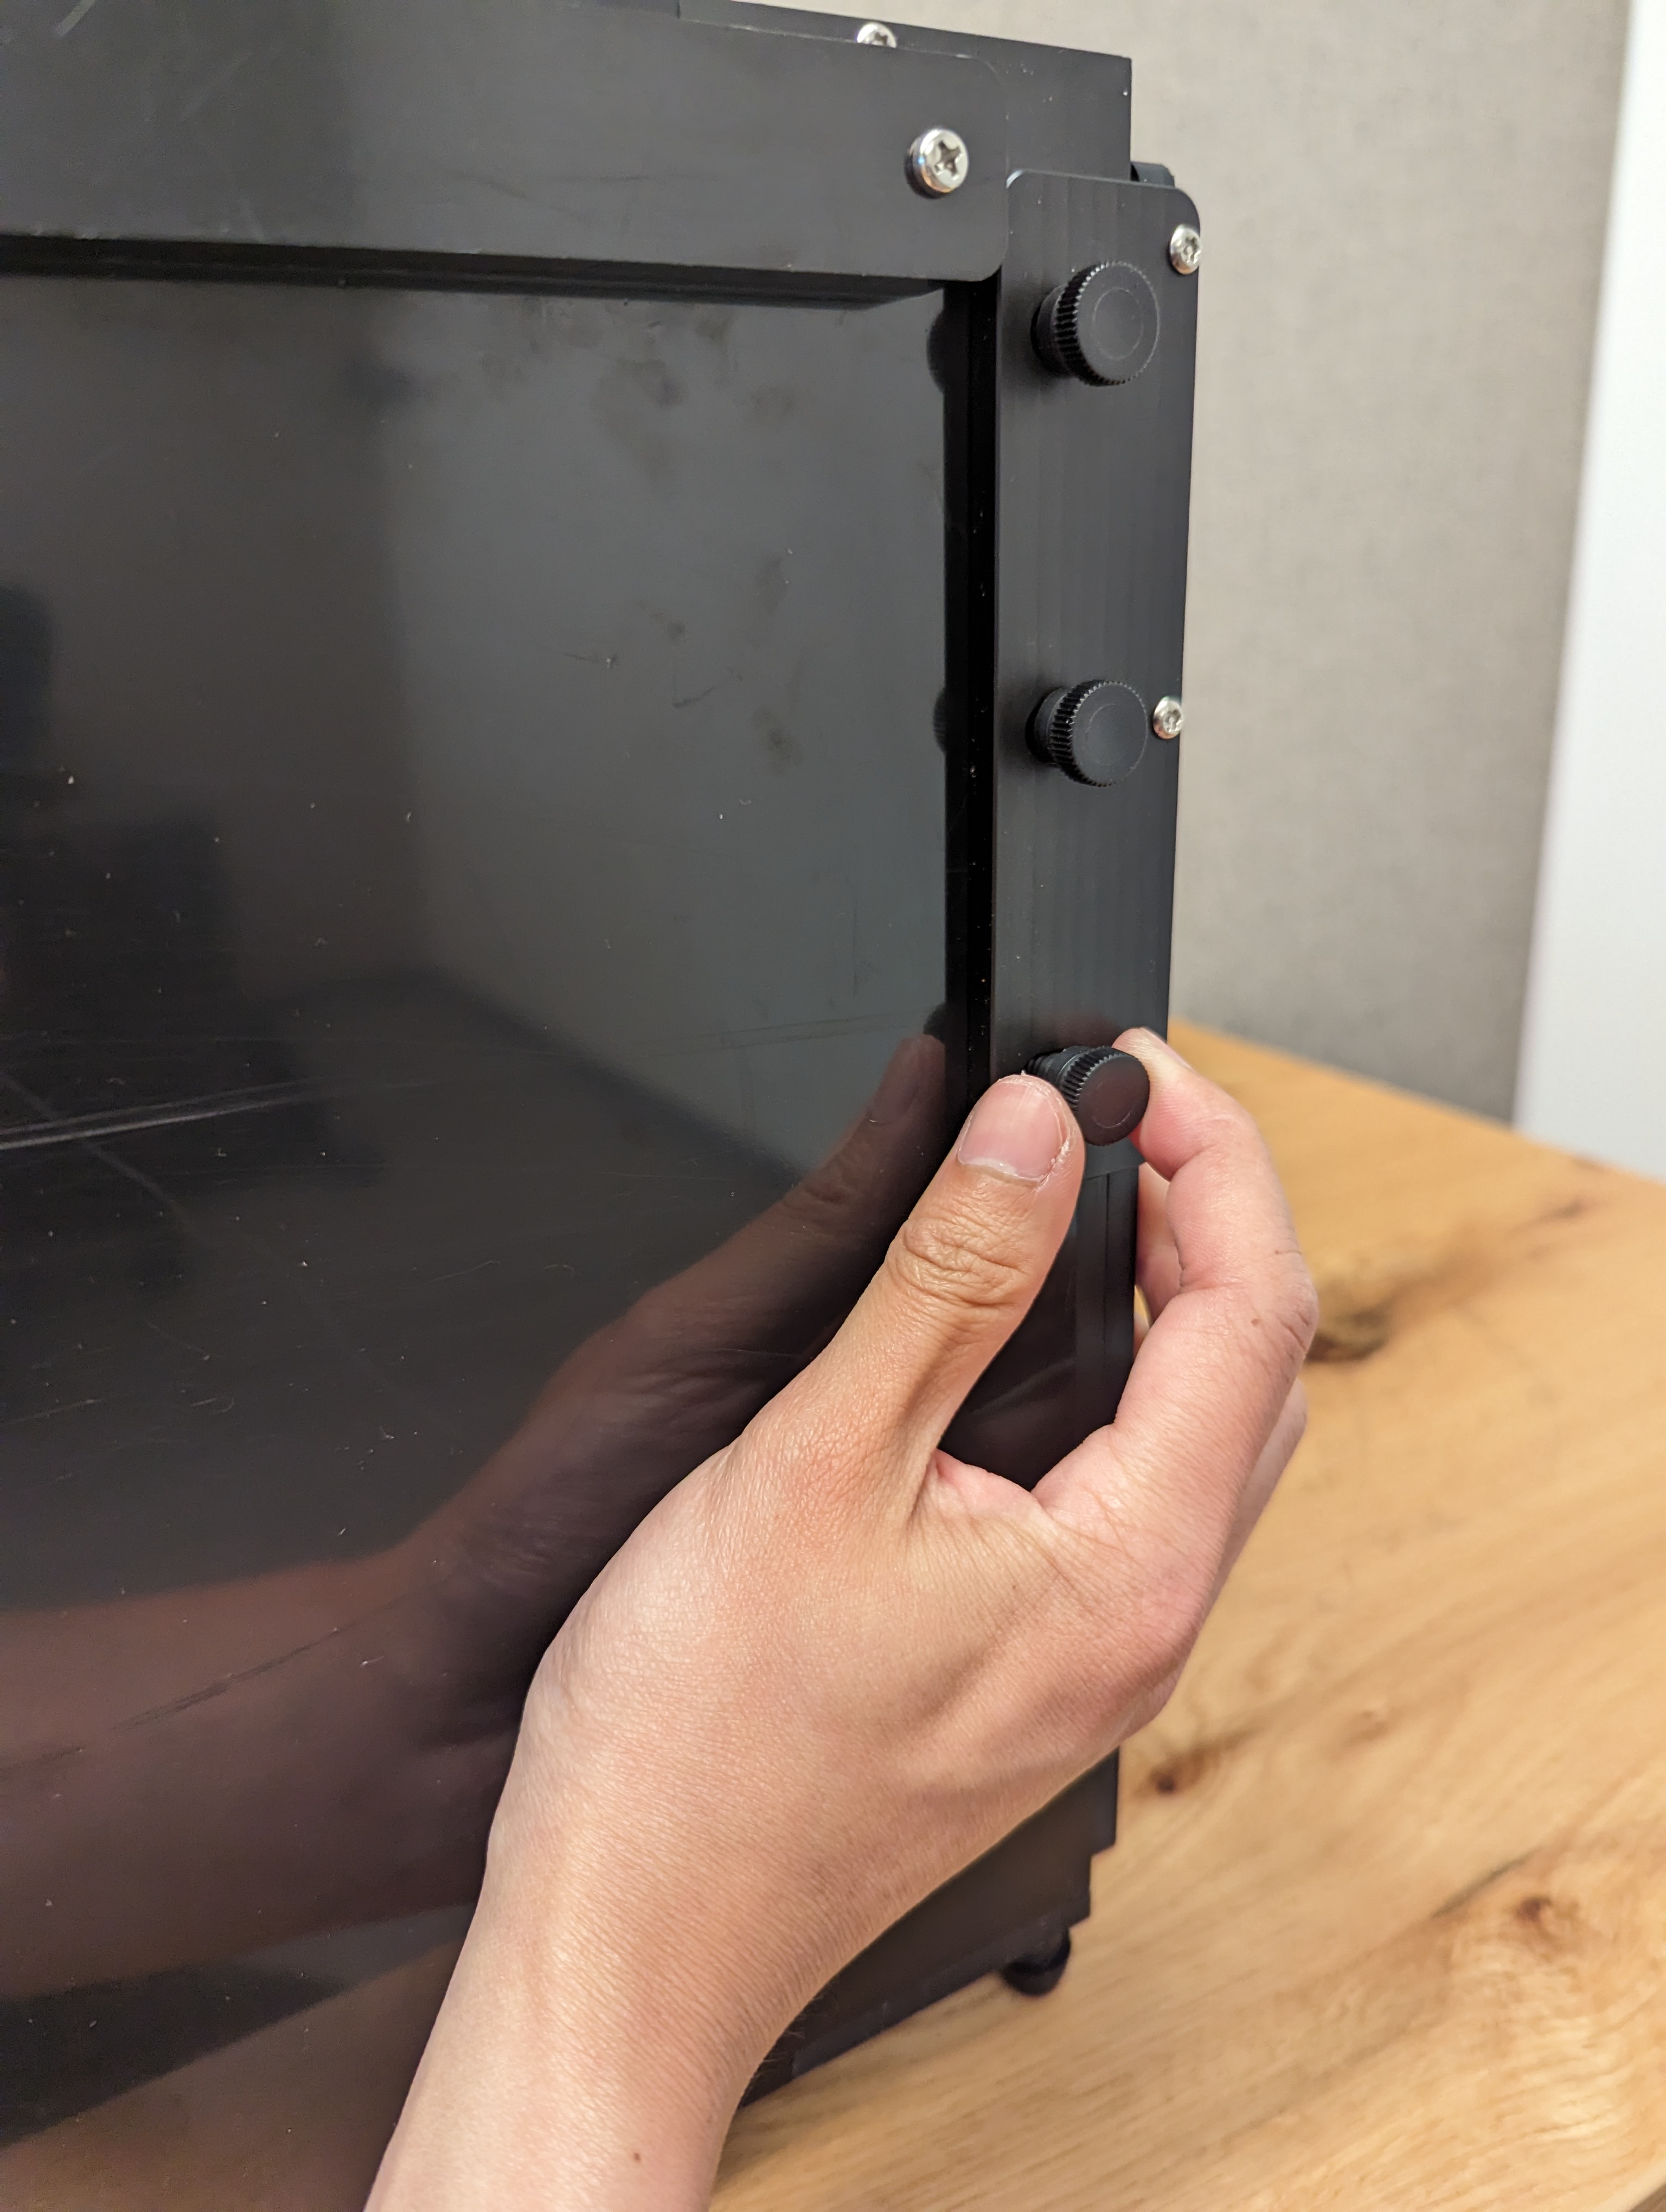
Figure 18. Pushing tablet mounting panel against the base rig.
Frequently asked questions (FAQs)
Why is the scene cropped in a tele rig?
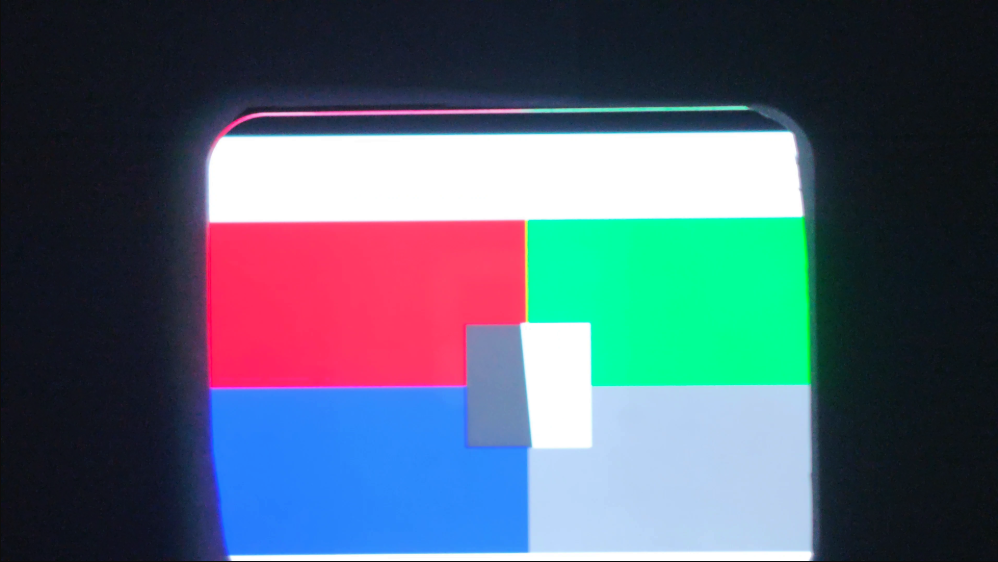
Figure 19. Scene cropped by phone plate in base rig.
This happens when a tele lens' field of view is blocked by the phone plate between the base rig and the tele extension. Make sure you take off the phone plate with a screwdriver before proceeding with testing.
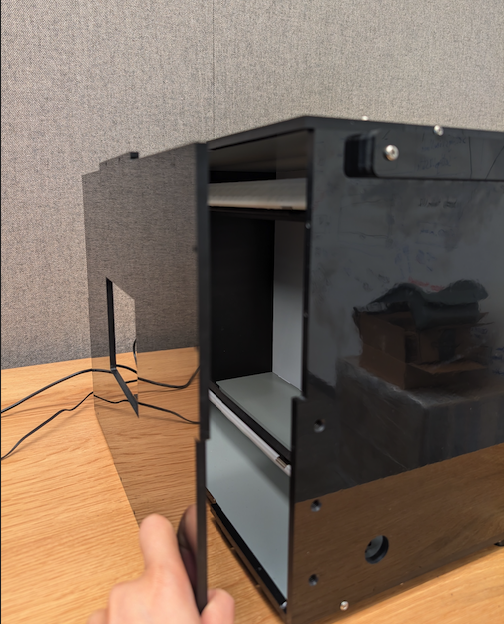
Figure 20. Removing the phone plate in the base rig.
Why do the lights appear dim or why does a validate lighting error appear when running ITS?
This error is triggered when the lighting in the rig becomes dimmer, which can be caused because of power supply and LED degradation due to age or usage, or a faulty power supply. To resolve this issue, follow these steps:
Make sure the lighting is working properly:
- Replace the power supply (UL listed 12 volts, min 2 amps).
- Replace LED (refer to the BOM or contact the vendor for more information).
To make sure the lux of the LED lights are at the appropriate level (100–300), test the lux using a digital meter. (The YF-1065 lux meter by Contempo Views is used in this example.) Place the light meter on the tablet side and turn it to 2000 lux to measure the light (shown in Figure 21).
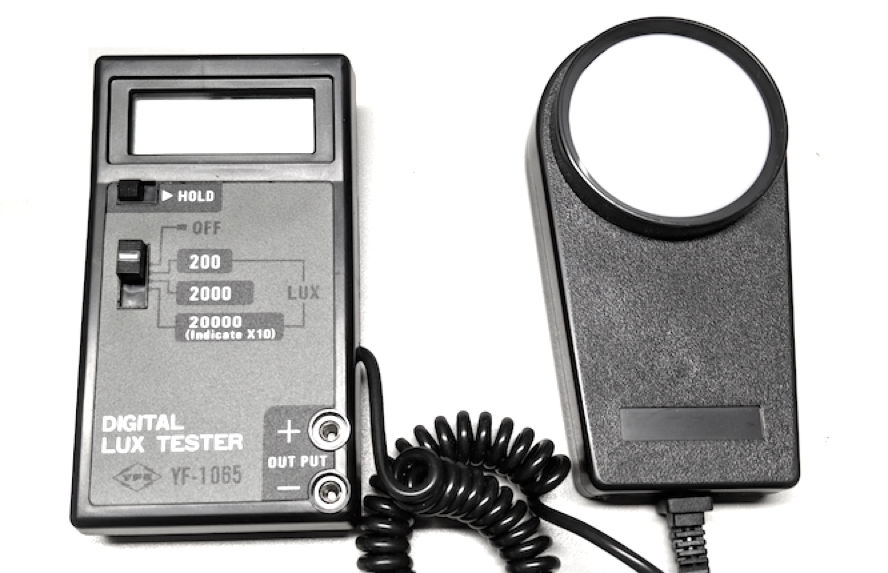
Figure 21. YF-1065 by Contempo Views.
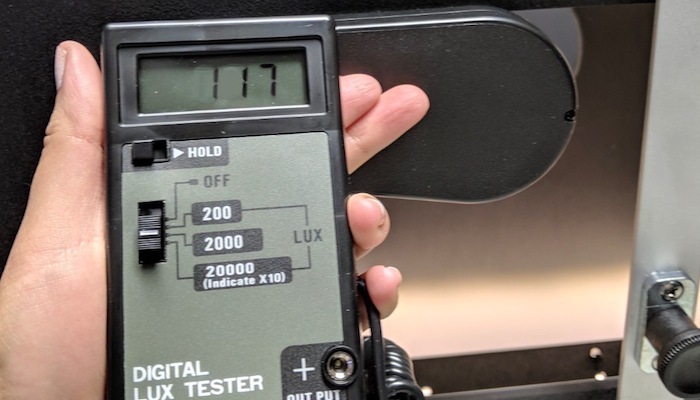
Figure 22. Lux meter measuring light from the side with the tablet mount.
Depending on the lux value measured, follow the appropriate step:
- If the light is at the correct level, screw the front and back plates into lace.
- If the light is at the incorrect level, check that the LED and power supply part number are correct.
Things to look out for
The following are examples of common manufacturing errors that can render tests flakey.
Back panel with tablet holes poked through. This causes the
find_circletest to fail because of the extra circles created by the screw holes.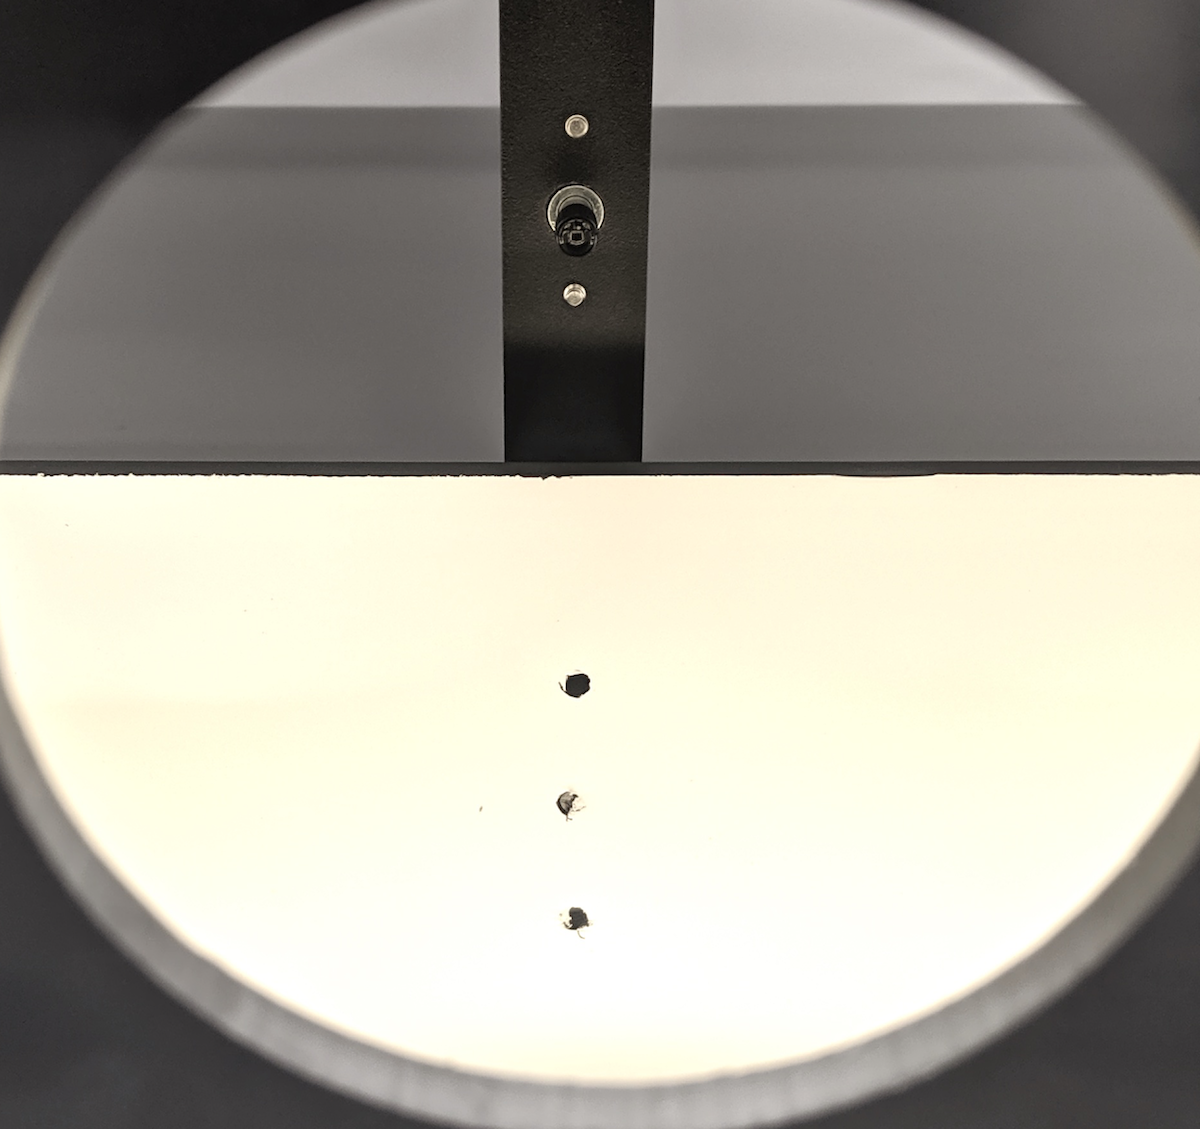
Figure 23. Back panel with holes poked through.
Missing dowels. This causes the light baffles to slip out during shipping.
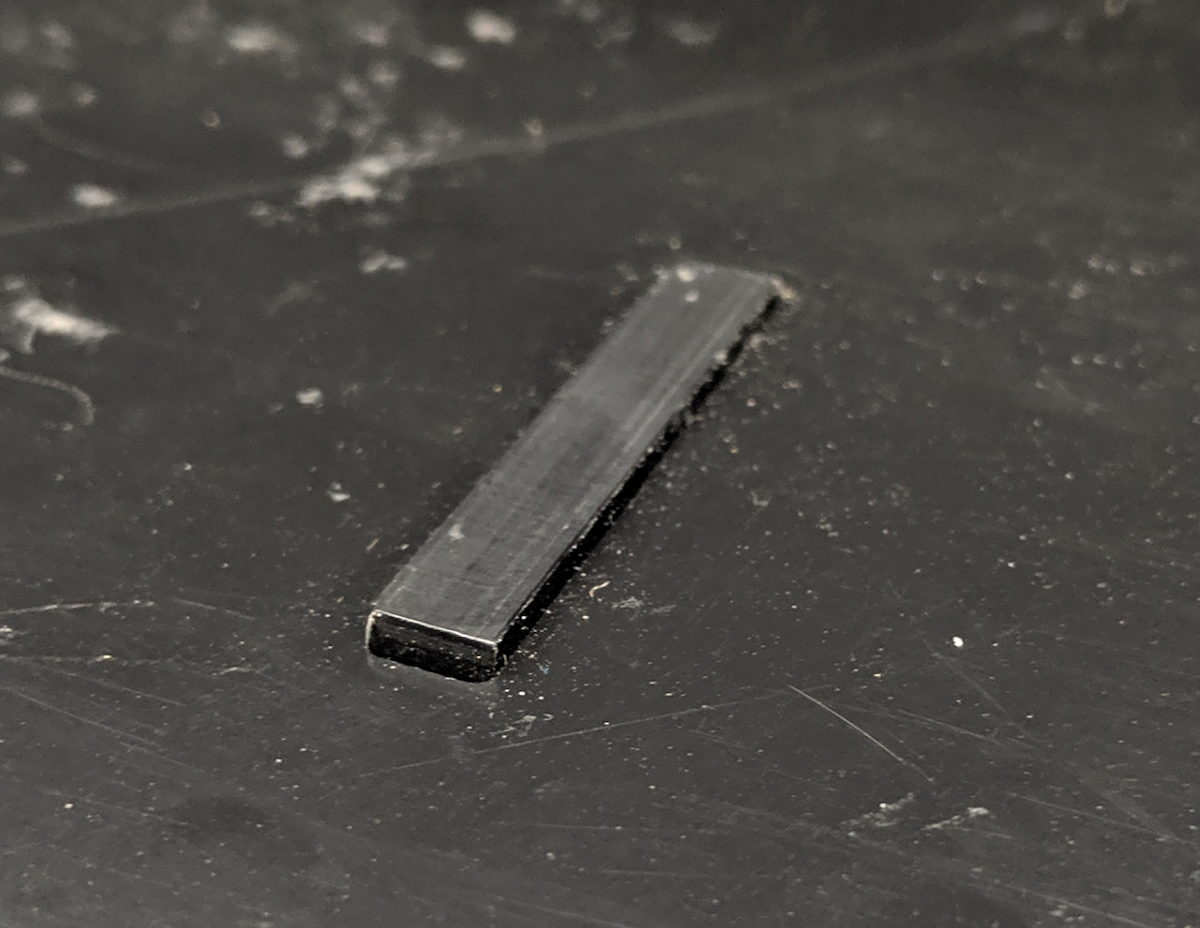
Figure 24. Missing dowel on light baffle.
Non-UL-listed power supply. Using a UL listed power supply meets the labeled specifications. This is important for operating the lighting safely.
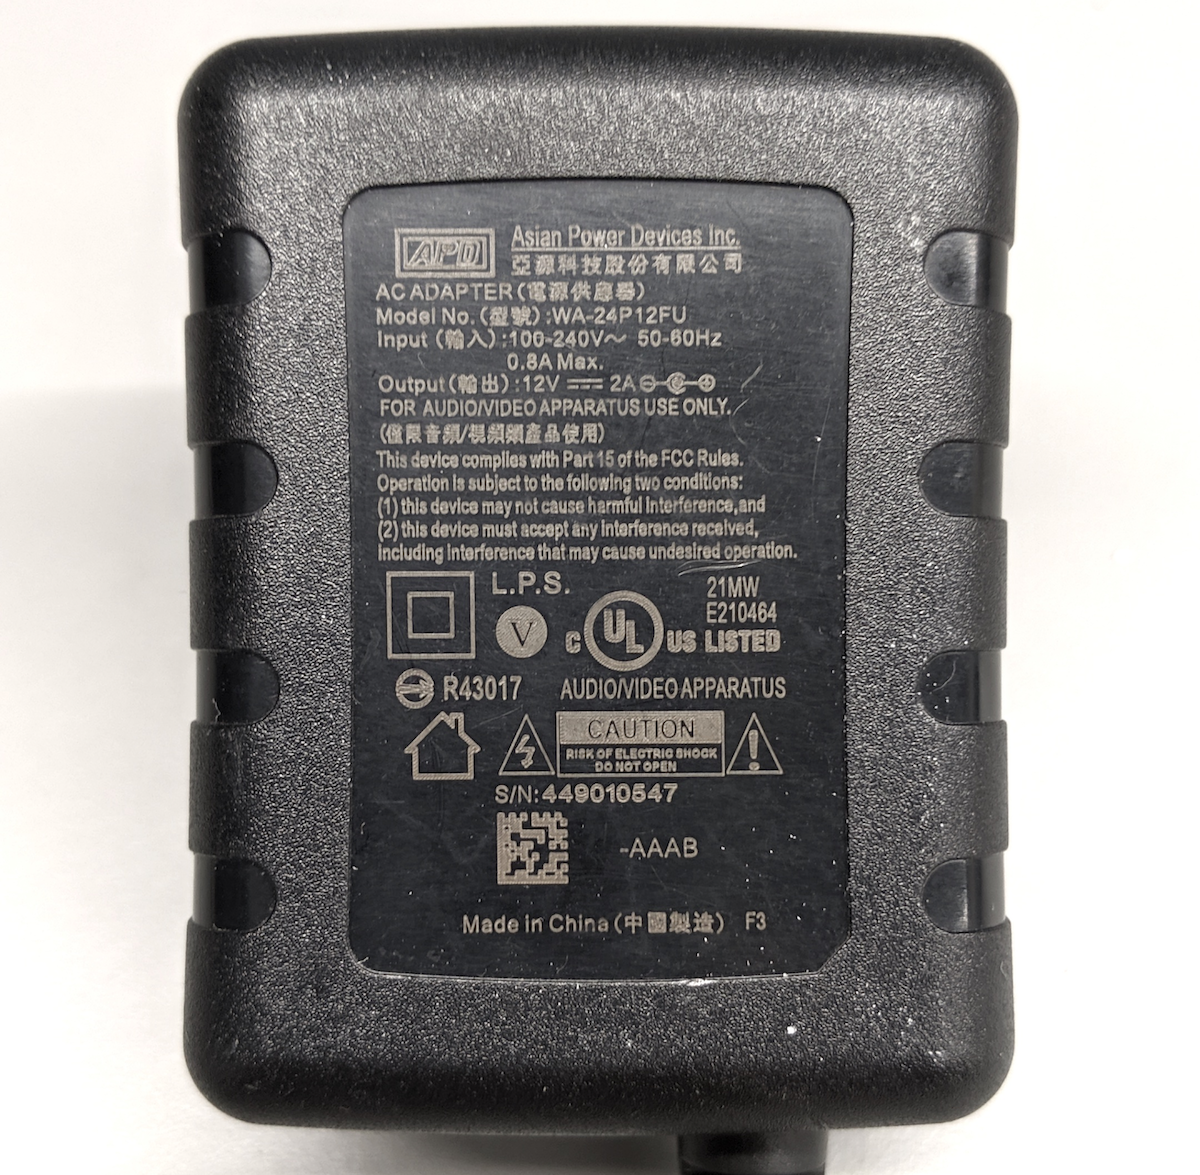
Figure 25. Example of a UL listed power supply.
Slipping screws on the tablet or phone mount that can't support the weight of a tablet or phone. This is usually caused by damaged threads and indicates that the hole needs to be rethreaded.
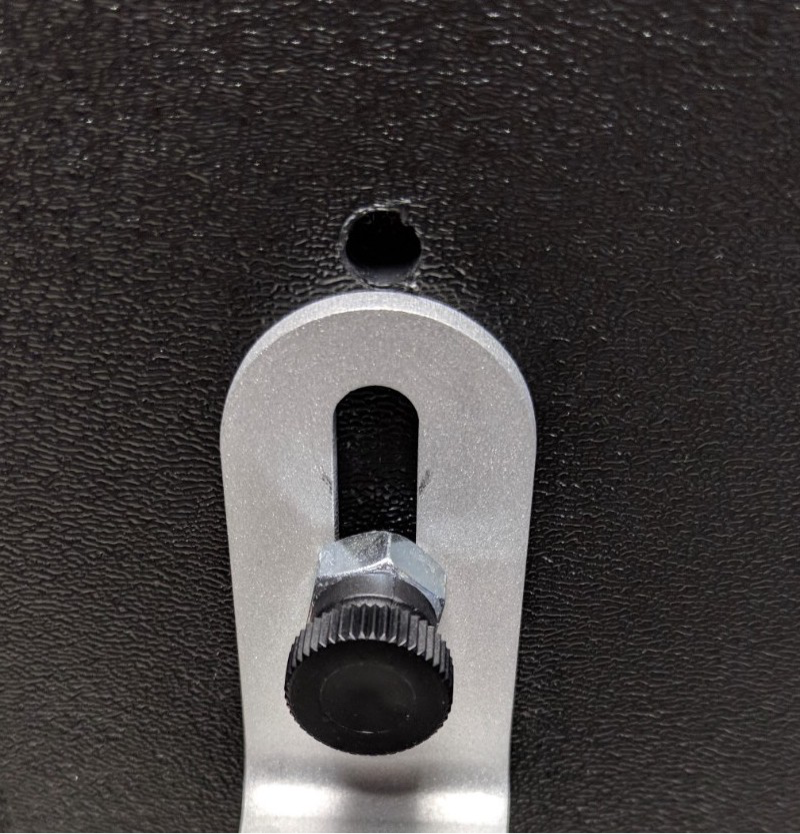
Figure 26. Hole with damaged threads.
