自 2025 年 3 月 27 日起,我们建议您使用 android-latest-release
而非 aosp-main
构建 AOSP 并为其做出贡献。如需了解详情,请参阅 AOSP 的变更。
第 2 代相机盒装 ITS
使用集合让一切井井有条
根据您的偏好保存内容并对其进行分类。
第 2 代相机盒装 ITS 由一个根据计算机辅助设计 (CAD) 图纸利用激光切割技术制成的铝盒、一张印刷的测试图表和一部被测设备 (DUT) 组成。第 2 代相机盒装 ITS 具有与常规相机盒装 ITS 相同的功能,但包含一个采用优质 LED 模块的三级照明系统、一个经过改进且可提供反馈的强劲马达,以及全金属结构,可提高结构刚度并减少光线泄漏。
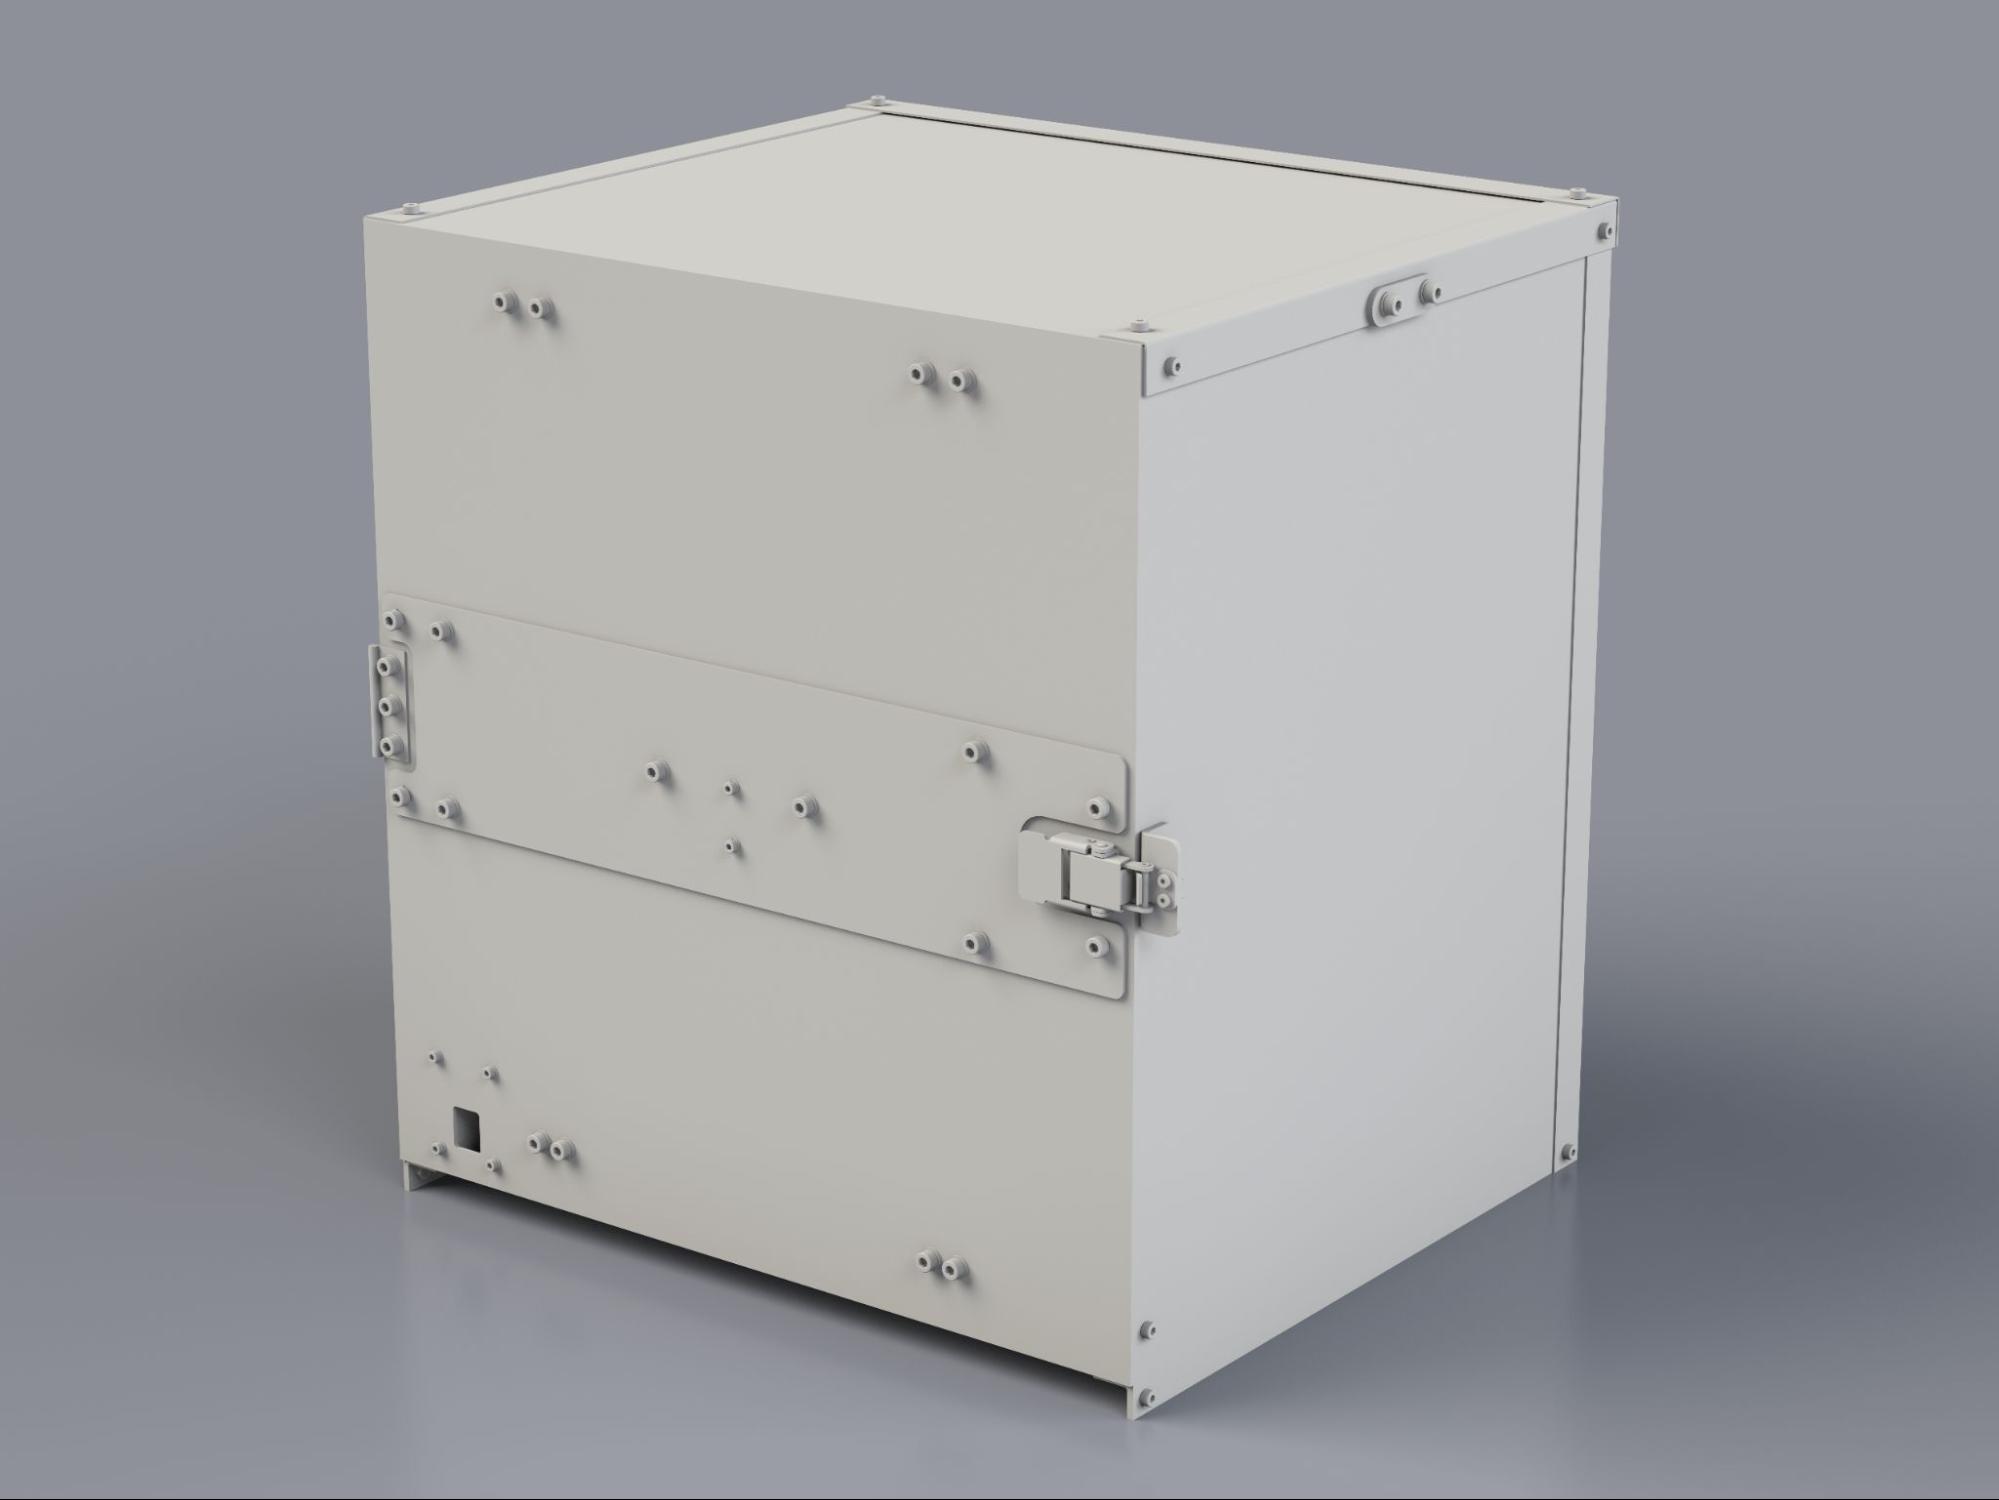
图 1. 第 2 代相机盒装 ITS
购买第 2 代相机盒装 ITS
建议您从以下任一合格供应商处购买第 2 代相机盒装 ITS。
无锡博慧斯生物医药科技有限公司
中国:江苏省无锡市马山梅梁西路 88 号,邮编:214092
http://www.biohermes.com
luweijie@biohermes.com.cn
中国:+86-186-014-73881
Byte Bridge Inc.
美国:1502 Crocker Ave, Hayward, CA 94544-7037
中国:上海市徐汇区中山西路 1600 号宏汇国际广场 A 座 22 层 06-08,邮编:200235
https://www.bytebt.com
androidpartner@bytebt.com
美国:+1-510-373-8899
中国:+86-400-8866-490
本页面上的内容和代码示例受内容许可部分所述许可的限制。Java 和 OpenJDK 是 Oracle 和/或其关联公司的注册商标。
最后更新时间 (UTC):2025-05-07。
[[["易于理解","easyToUnderstand","thumb-up"],["解决了我的问题","solvedMyProblem","thumb-up"],["其他","otherUp","thumb-up"]],[["没有我需要的信息","missingTheInformationINeed","thumb-down"],["太复杂/步骤太多","tooComplicatedTooManySteps","thumb-down"],["内容需要更新","outOfDate","thumb-down"],["翻译问题","translationIssue","thumb-down"],["示例/代码问题","samplesCodeIssue","thumb-down"],["其他","otherDown","thumb-down"]],["最后更新时间 (UTC):2025-05-07。"],[],[],null,["# Buy and set up a Gen2 box\n\nThe Gen2 camera ITS-in-a-box consists of an aluminium box that's laser cut from\ncomputer-aided design (CAD) drawings, a printed test chart, and a device under\ntest (DUT). The Gen2 camera ITS-in-a-box has the same capabilities as the\n[regular camera ITS-in-a-box](/docs/compatibility/cts/camera-its-box-assembly) but includes a three-stage lighting system with\nhigh-quality LED modules, an improved motor that's robust and provides feedback,\nand full metal construction to improve structural rigidity and reduce light\nleakage.\n\n**Figure 1.** Gen2 camera ITS-in-a-box.\n\nHow to use the Gen2 camera ITS-in-a-box\n---------------------------------------\n\n| **Note:** The Gen2 ITS box uses a test chart instead of a tablet.\n\nTo use the Gen2 camera ITS box, follow these steps:\n\n1. Purchase the Gen2 ITS box.\n2. Set up the controller and mount the DUT.\n3. Run the camera ITS tests.\n4. Retrieve the results from the DUT.\n\nPurchase a Gen2 camera ITS-in-a-box\n-----------------------------------\n\nWe recommend purchasing the Gen2 camera ITS-in-a-box from one of the following\nqualified vendors.\n\n- *Wuxi BioHermes Bio\\&Medical Technology Co., Ltd.* \n\n China: 88 West Meiliang Road. Mashan. Wuxi, Jiangsu 214092 \n\n \u003chttp://www.biohermes.com\u003e \n\n luweijie@biohermes.com.cn \n\n China: +86-0510-853-85897 ext 2121\n\n- *Byte Bridge Inc.* \n\n USA: 1502 Crocker Ave, Hayward, CA 94544-7037 \n\n China: 22F #06-08, Hongwell International Plaza Tower A,\n 1600 West Zhongshan Road, Xuhui, Shanghai, 200235 \n\n \u003chttps://www.bytebt.com\u003e \n\n androidpartner@bytebt.com \n\n USA: +1-510-373-8899 \n\n China: +86-400-8866-490\n\nVideo tutorial\n--------------\n\nThis is a video tutorial of how to set up the Gen2 camera ITS-in-a-box: \n\nSet up the controller for testing\n---------------------------------\n\nFollow these steps to set up the Gen2 camera ITS-in-a-box controller for\ntesting.\n\n\n**Figure 2.** Gen2 controller with (left) and without connections (right).\n\n1. Place the Gen2 rig at your desired location.\n2. Connect the cables to the appropriate ports as follows:\n\n 1. 4-pin cable to the **M1** port.\n 2. 5-pin cable to the **TEST RIG - 1** port.\n 3. Barrel plug to the **LED_PWR - 1** port.\n 4. Barrel plugs of the two power supplies to the **12V_IN_MOTOR** and **12V_IN_LIGHT** ports.\n 5. USB-A to USB-C cable to the **M4** USB-C port.\n 6. USB-A to USB-B cable to the **M3** USB-B port.\n 7. Power cords from the power supplies to a power outlet.\n 8. USB-A end of the USB-A/C and USB-A/B cables from the controller to your host.\n\nThe controller firmware is available at\n[gen2_production_v2.ino](/docs/compatibility/cts/gen2_production_v2.ino).\n\nFrequently asked questions (FAQs)\n---------------------------------\n\nThe following are frequently asked questions about the Gen2 camera ITS-in-a-box.\n\n### Chart\n\n**Q:** My chart is damaged, how can I get a new chart?\n\n**A:** To get a new chart, reach out to one of our qualified vendors,\nBiohermes or Byte Bridge Inc.\n\n### Motor\n\n**Q:** My rig connects, but the motor doesn't maintain its position. Is this\nnormal?\n\n**A:** Yes, this is normal in the initial test cycle. After the initial test\ncycle is complete, the motor maintains its position.\n\n**Q:** How is the LSS-HT1 motor in the Gen2 rig different from the HS-755MG\nmotor in the sensor fusion rig?\n\n**A:** The LSS-HT1 motor in the Gen2 rig improves the accuracy, precision,\nbuild quality, and feedback of the rig. The motor also provides extensive\nparameter controls.\n\n**Q:** My motor flashes and doesn't move. What should I do?\n\n**A:** This indicates that an obstruction is blocking the motor. Inspect the DUT\nand rotating plate for obstructions or tangled cables. After resolving the\nissue, send the command `#0RESET\u003ccr\u003e` to reset the motor and continue\ntesting.\n\n**Q:** Where can I find a datasheet for the motor (LSS-HT1)?\n\n**A:** You can find documentation on the LSS-HT1 motor at the\n[Lynxmotion website](https://wiki.lynxmotion.com/info/wiki/lynxmotion/view/ses-v2/lynxmotion-smart-servo/).\n\n### LED\n\n**Q:** How do I determine if my LED bars install correctly?\n\n**A:** Refer to Figure 3 for an example LED bar installation. Ensure that the\nwhite line on the LED board aligns with the 3D-printed holder, and the LEDs are\nconnected and seated correctly.\n\n\n**Figure 3.** LED bar installation with (left) and without connections (right).\n\n### Controller\n\n**Q:** What are the designated channels for the motor and LEDs?\n\n**A:** Channel 0 for the motor. Channel 1 for the LEDs.\n\n**Q:** How do I test the hardware?\n\n**A:** Send the command `f11` to the controller (Arduino Mega) to initiate a\ntest sequence for the lighting. The sequence cycles through three distinct\nlighting stages and briefly activates the buzzer multiple times. To test the\nmotor, use the Lynxmotion LSS configuration software available from\n[Lynxmotion](https://wiki.lynxmotion.com/info/wiki/lynxmotion/view/ses-software/)."]]