
This page contains steps for conducting near ultrasound (formerly known as hifi ultrasound) microphone and speaker tests. See the Audio section for general audio implementation instructions.
Near ultrasound microphone tests
Prerequisites: Prepare two devices, one as the test device, one as the reference device. The reference can be any device that is known to produce near ultrasound sound.
- Open Hifi Ultrasound Microphone Test on both devices:
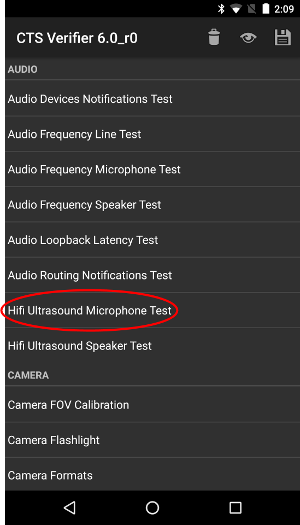
Figure 1. Hifi Ultrasound Microphone Test on the test device.
Figure 2. Hifi Ultrasound Microphone Test on the reference device. - Press RECORD on the test device, then
press PLAY on the reference device:
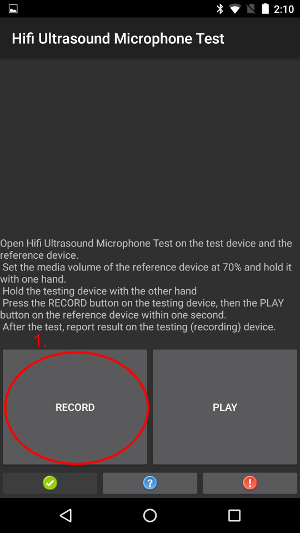
Figure 3. Press RECORD on the test device.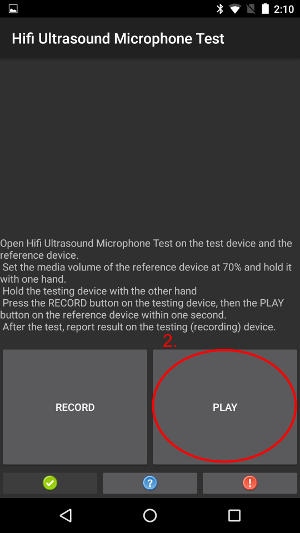
Figure 4. Press PLAY on the reference device. - Wait for the test to finish. While waiting, the devices should look like the following
images. Do nothing until you see the screens shown in Step 4.
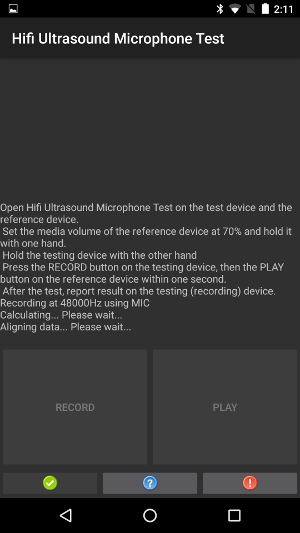
Figure 5. Test in progress on the test device.
Figure 6. Test in progress on the reference device. - On the test device, if the text PASS is shown, press the green button.
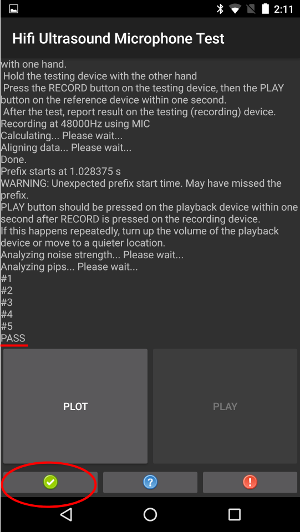
Figure 7. Test device showing PASS.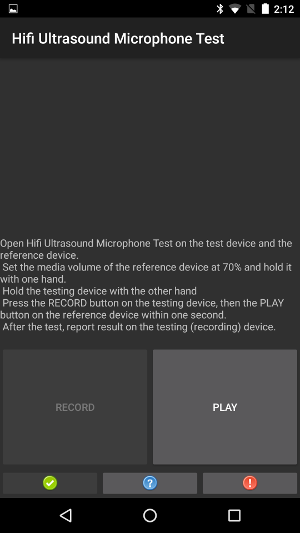
Figure 8. Reference device while the test device shows PASS. - On the test device, if the text FAIL is shown, press the red button. Then you can repeat
this sequence from step 1 to repeat the test, if desired.
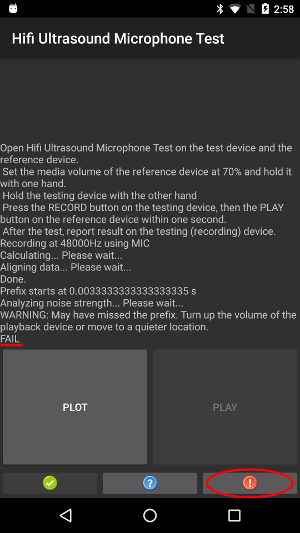
Figure 9. FAIL shown on the test device.
Figure 10. Reference device while the test device shows FAIL. - Optional: Plot the calculated response by tapping PLOT on the test device.
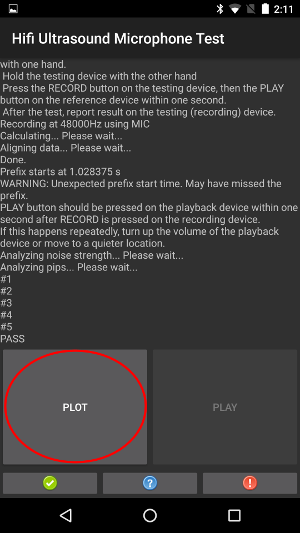
Figure 11. PLOT on the test device.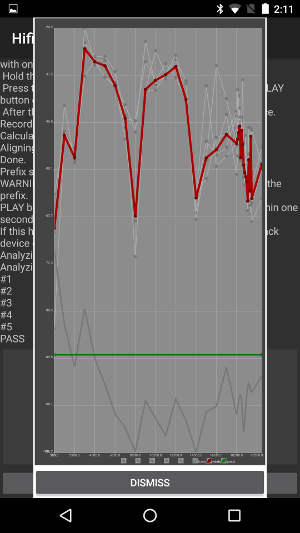
Figure 12. Reference device during PLOT.
Near ultrasound speaker tests
Prerequisites: Prepare two devices, one as the test device, one as the reference device. The reference can be any device that is known to record near ultrasound sound.
- Open Hifi Ultrasound Speaker Test on both devices:

Figure 13. Hifi Ultrasound Speaker Test on the test device.
Figure 14. Hifi Ultrasound Speaker Test on the reference device. - Press RECORD on the reference device, then
press PLAY on the test device:
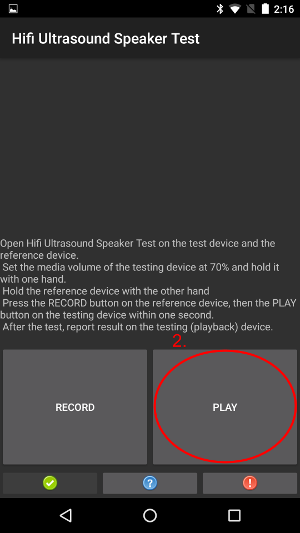
Figure 15. PLAY on the test device.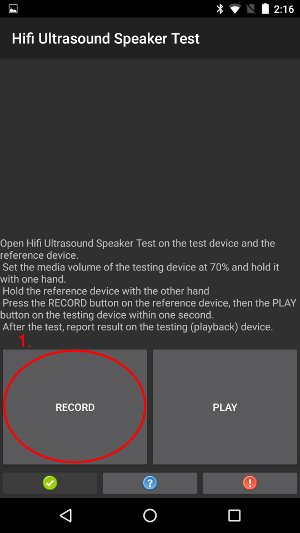
Figure 16. RECORD on the reference device. - Wait for the test to finish. While waiting, the devices should look like the following
images. Do nothing until you see the screens shown in Step 4.
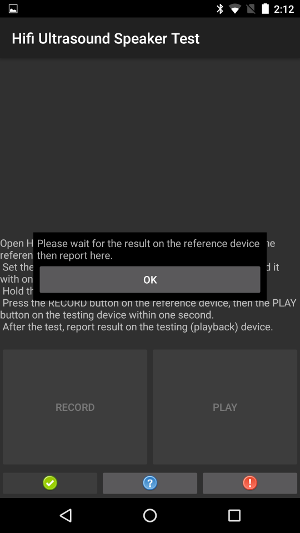
Figure 17. Test in progress on the test device.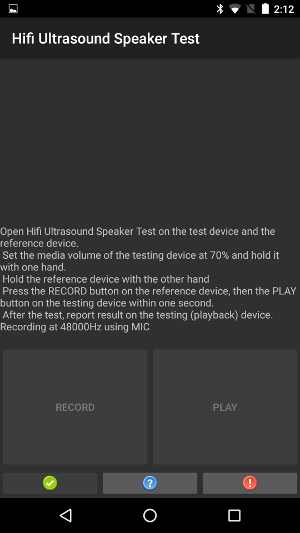
Figure 18. Test in progress on the reference device. - When you see the dialog on the reference device, press OK on the test device.
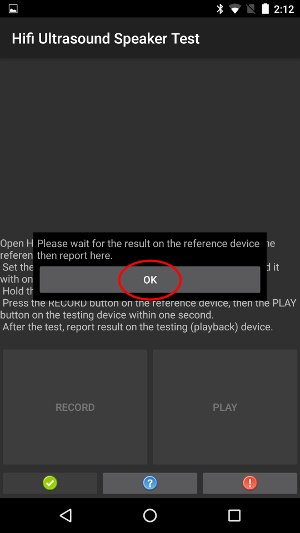
Figure 19. Test device with dialog.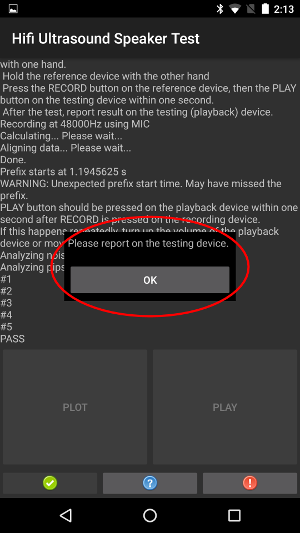
Figure 20. Reference device with dialog. - On the reference device, if the text PASS is shown, press the green button on the test device.
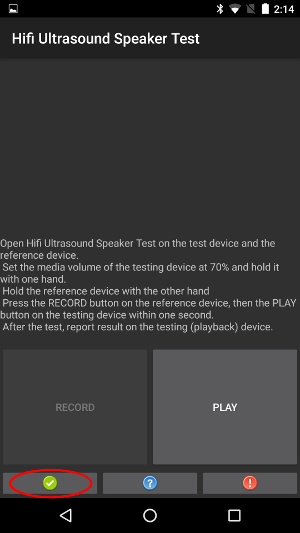
Figure 21. Green button on the test device.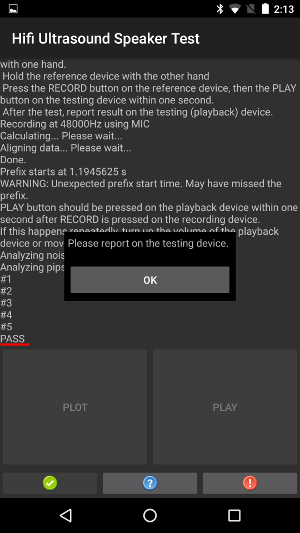
Figure 22. Reference device shows PASS. - On the reference device, if the text FAIL is shown, press the red button on the test device.
Then you can repeat this sequence from step 1 to repeat the test, if desired.
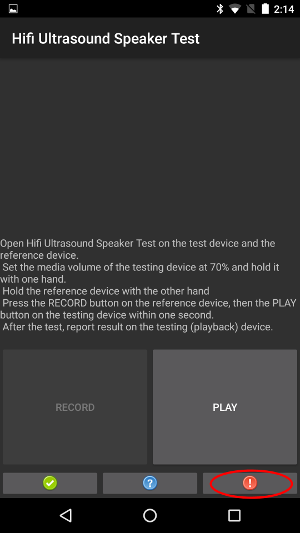
Figure 23. Red button on the test device.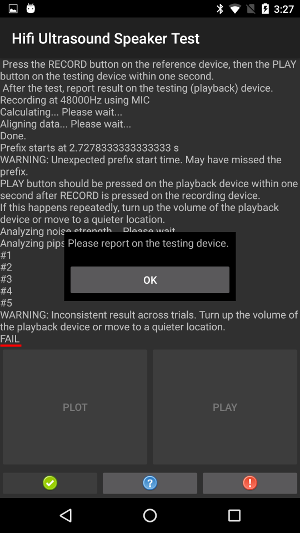
Figure 24. Reference device with dialog. - Optional: Plot the calculated response by tapping PLOT on the reference device. See the instructions in Near Ultrasound Microphone Test.