
يقيس اختبار دمج بيانات أجهزة الاستشعار دقة الطابع الزمني لأجهزة الاستشعار في أجهزة Android، وتحديدًا أدوات استشعار الصور في الكاميرا والجيروسكوبات. تقدّم هذه الصفحة تعليمات تفصيلية حول كيفية إعداد اختبار Sensor Fusion وSensor Fusion Box للمرة الأولى.
فيديو تعليمي
هذا فيديو تعليمي حول كيفية إعداد صندوق دمج البيانات من أجهزة الاستشعار.
الأدوات المطلوبة
قبل البدء، تأكَّد من توفّر المكوّنات التالية:
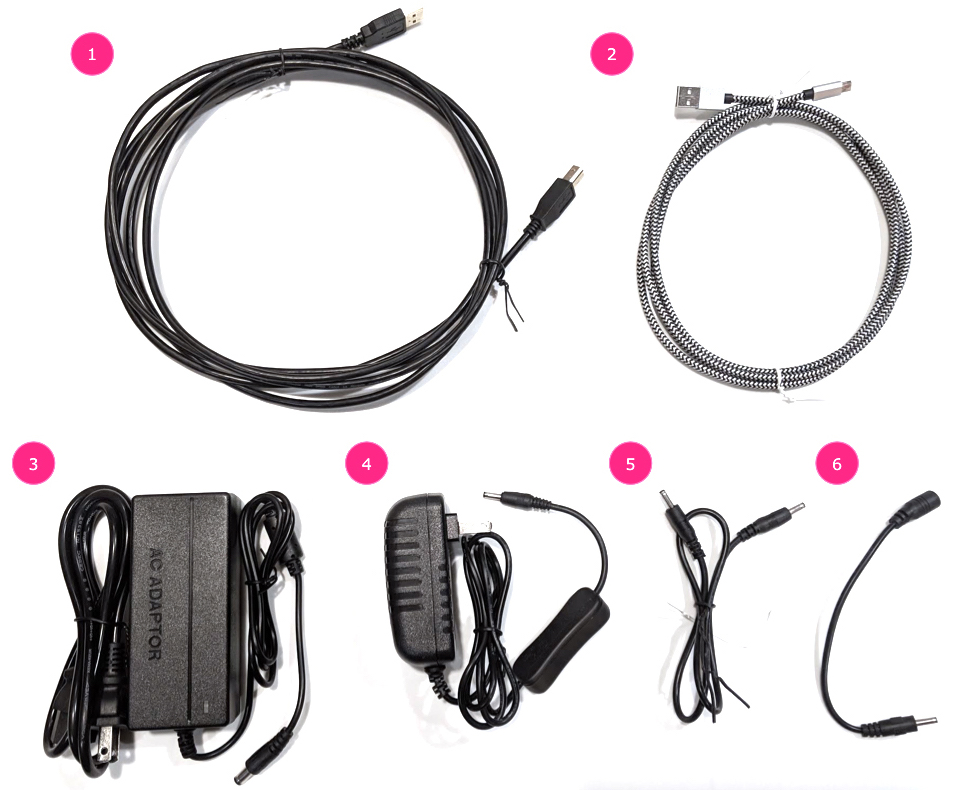
- كابل USB من النوع A إلى النوع B
- كابل USB من النوع A إلى C (للهاتف الاختباري)
- سلك طاقة 12 فولت 2 أمبير (لصندوق التحكّم في مشغل السيرفو)
- سلك طاقة بجهد 12 فولت (للإضاءة، مزوّد بمفتاح)
- كابل توصيل ذكر-ذكر بجهد 5 فولت (للإضاءة)
- كابل تحويل 5 فولت ذكر/أنثى (للإضاءة)
الخطوة 1: توصيل المصابيح
لربط المصابيح:
- استخدِم الكابل المزوّد بطرفَين ذكرَين لتوصيل المصباحَين في أسفل المصباحَين كما هو موضّح في الشكل 2. ثبِّت الكابل في أسفل العلبة لمنع تداخله مع العملية.
- وصِّل نهاية المصباح الأقرب إلى فتحة خروج كابل المصباح بخط التحويل
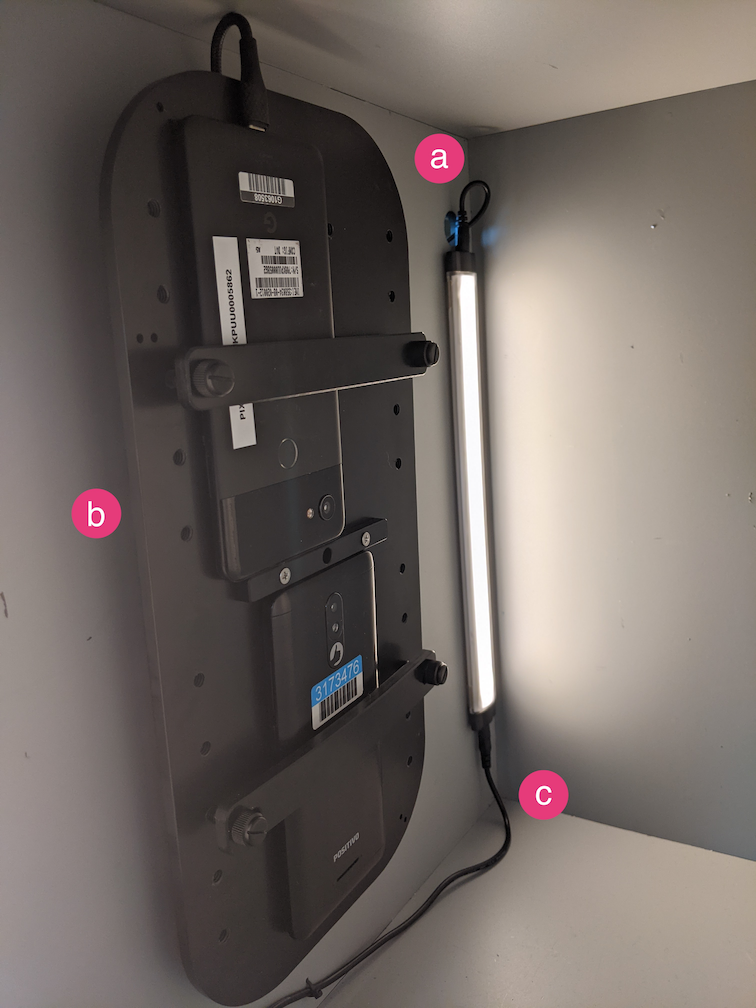
الشكل 2. توصيل المصابيح ببعضها وربط مصباح واحد بكابل التحويل - فتحة إخراج كابل الإضاءة
- فتحة خروج كابل USB
- كابل تحويل 5 فولت ذكر-ذكر
- ادفع الطرف غير المتصل من كابل التحويل من خلال الفتحة المستديرة
التي تخرج من العلبة، ثم وصِّله بكابل الصعق الكهربائي
للإضاءة.
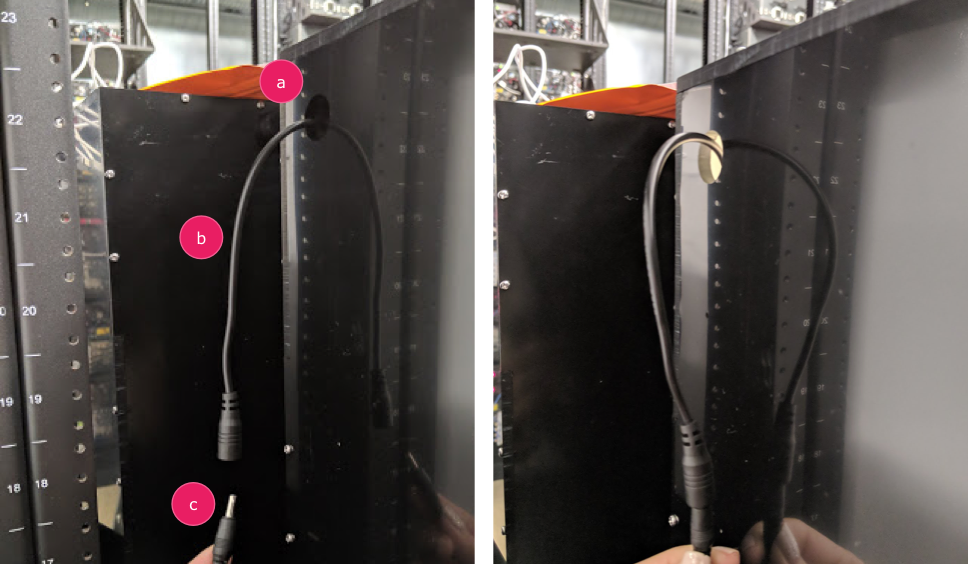
الشكل 3. كابل تحويل الإضاءة يخرج من العلبة ويتصل بكابل الطاقة - فتحة الخروج
- كابل التحويل
- كابل الطاقة
الخطوة 2: إرفاق مشغل السيرفو
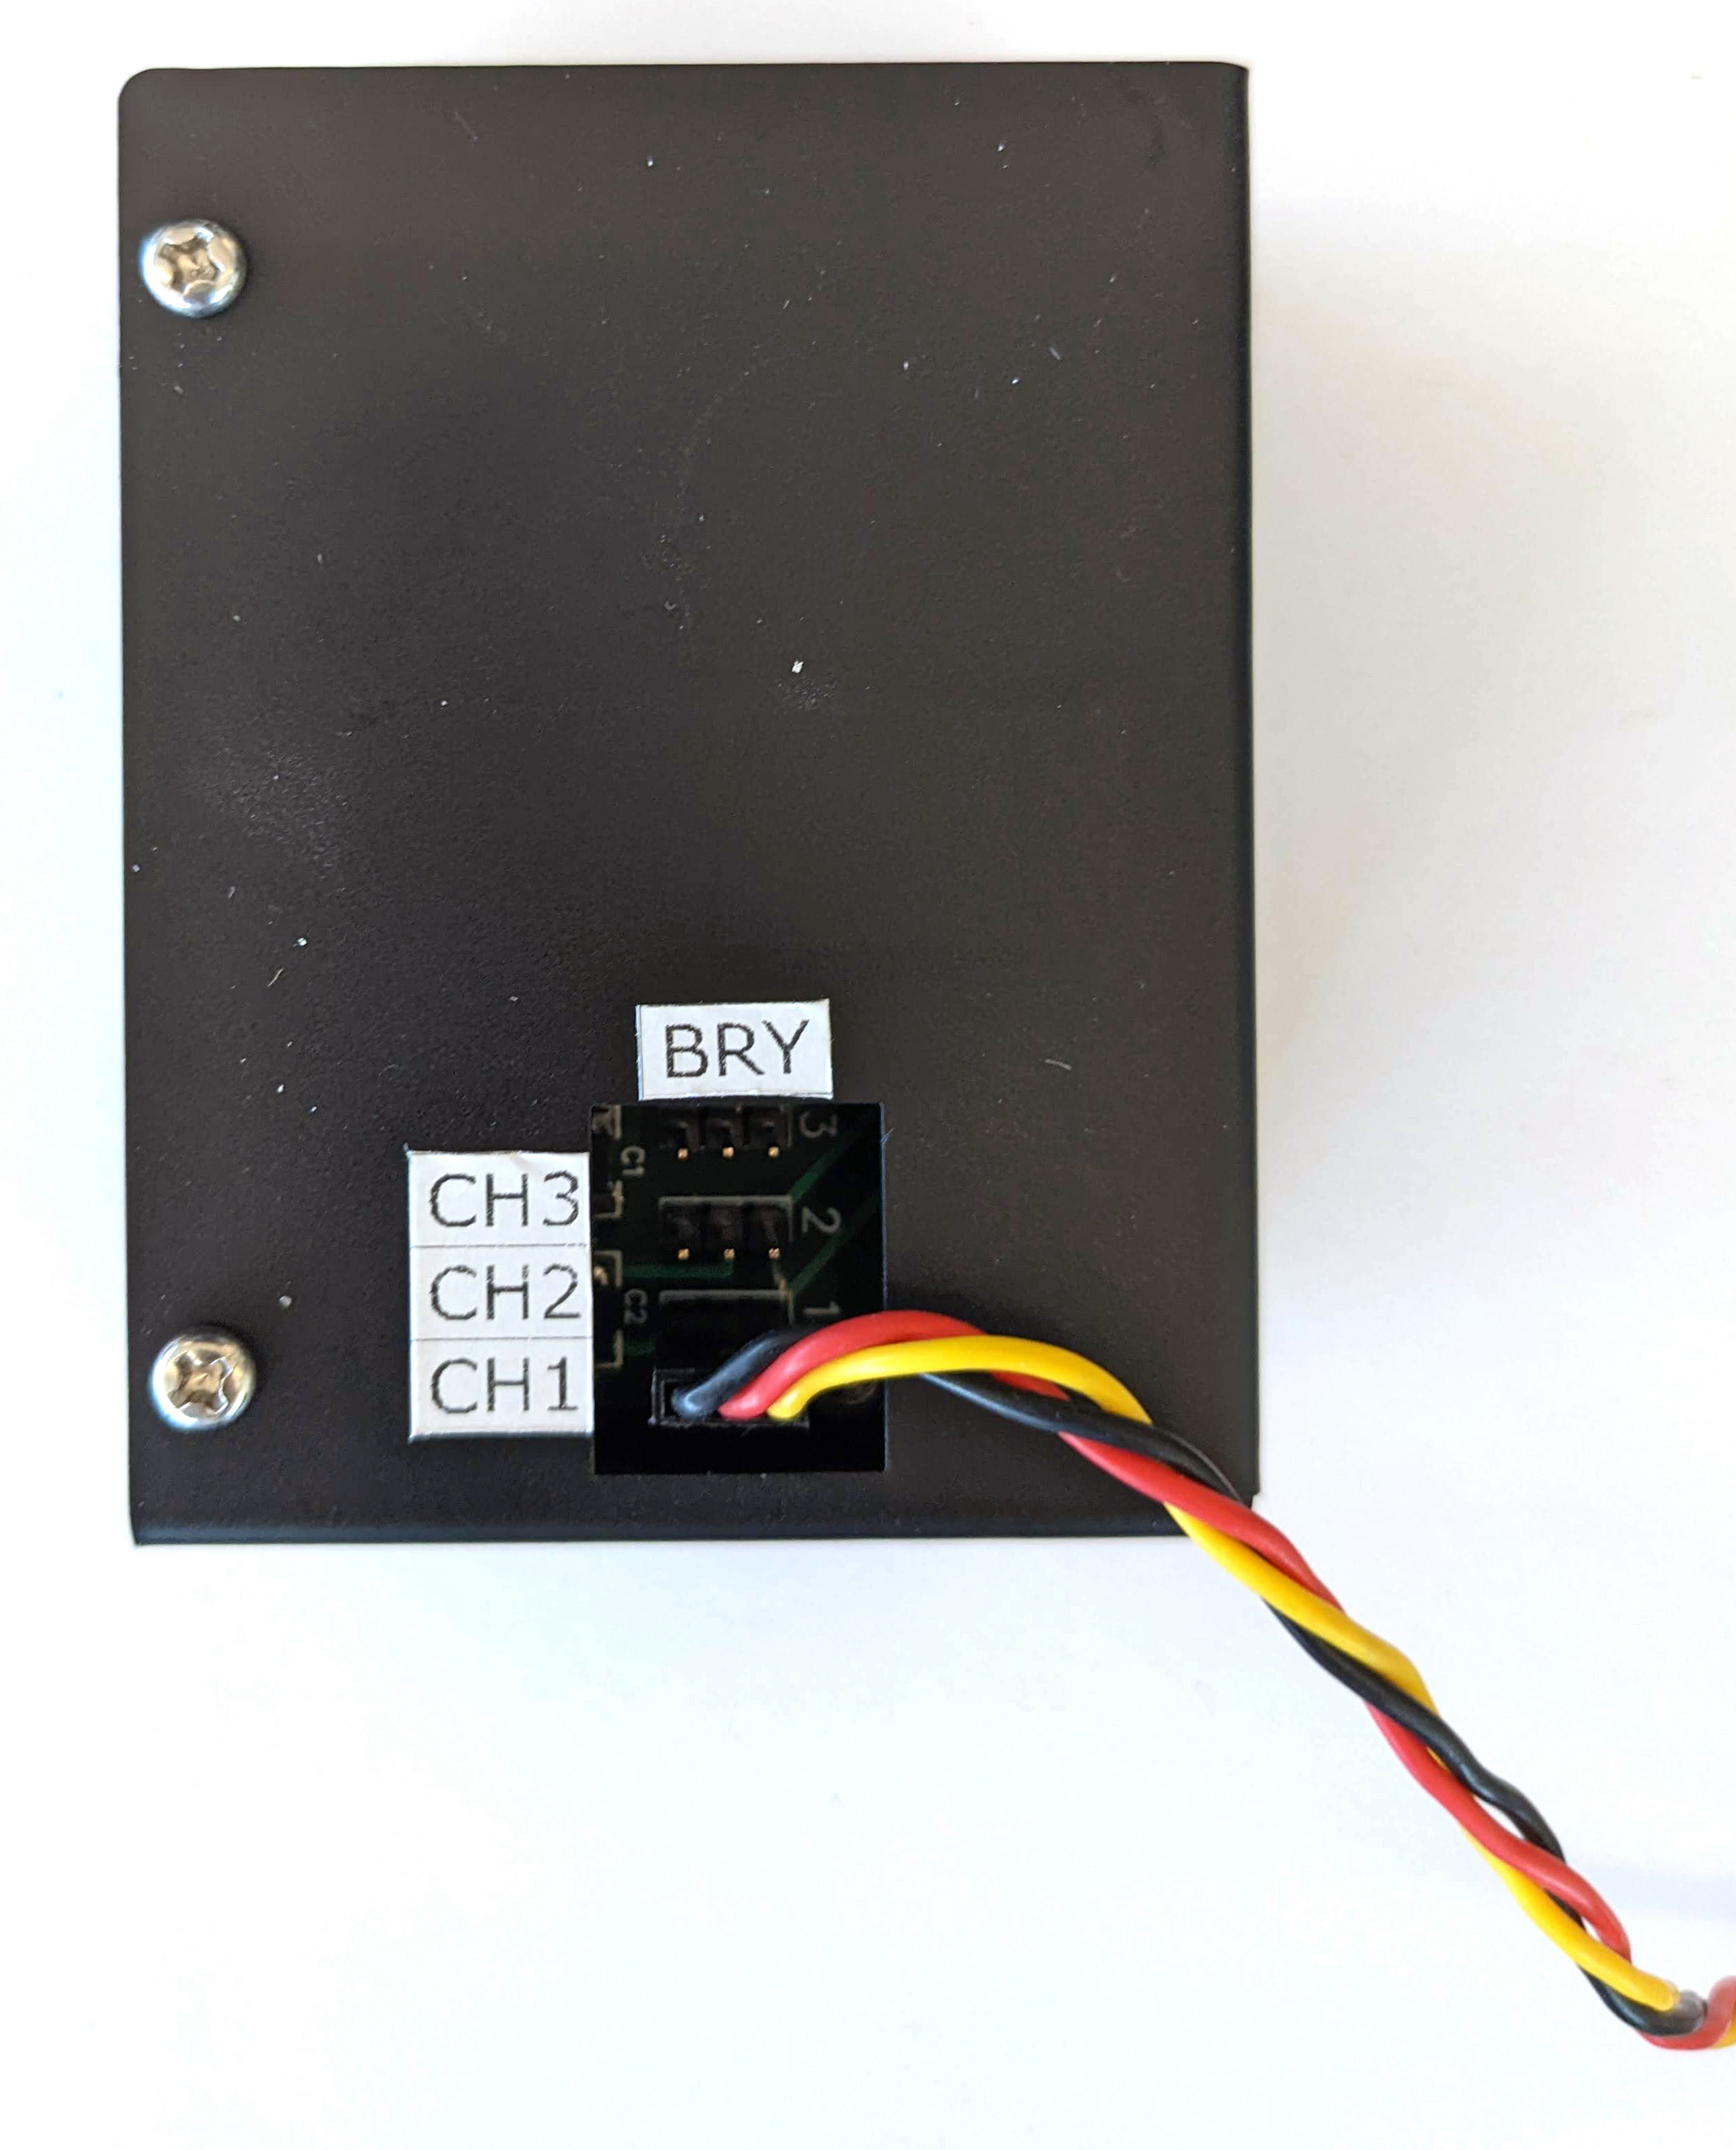
لإرفاق مشغل السيرفو:
- وصِّل موصل مشغل الالتفاف إلى وحدة التحكّم في مشغل الالتفاف. احرص على إدخال
الموصّل موجهًا إلى الألوان المقابلة كما هو موضّح (Y =
أصفر، R = أحمر، B = أسود)، لأنّ عكس الترتيب قد يؤدي إلى تلف
المحرّك. إذا كان السلك قصيرًا جدًا، استخدِم
كابل تمديد لوحدة التحكّم الآلي.
الشكل 4. توصيل مشغل سيرفو بصندوق التحكّم فيه - وصِّل وحدة التحكّم في محركات الأقراص الدوّارة باستخدام سلك الطاقة (تستخدم وحدات التحكّم في محركات الأقراص الدوّارة والإضاءة مصدرَي طاقة مستقلَين ومخصّصَين).
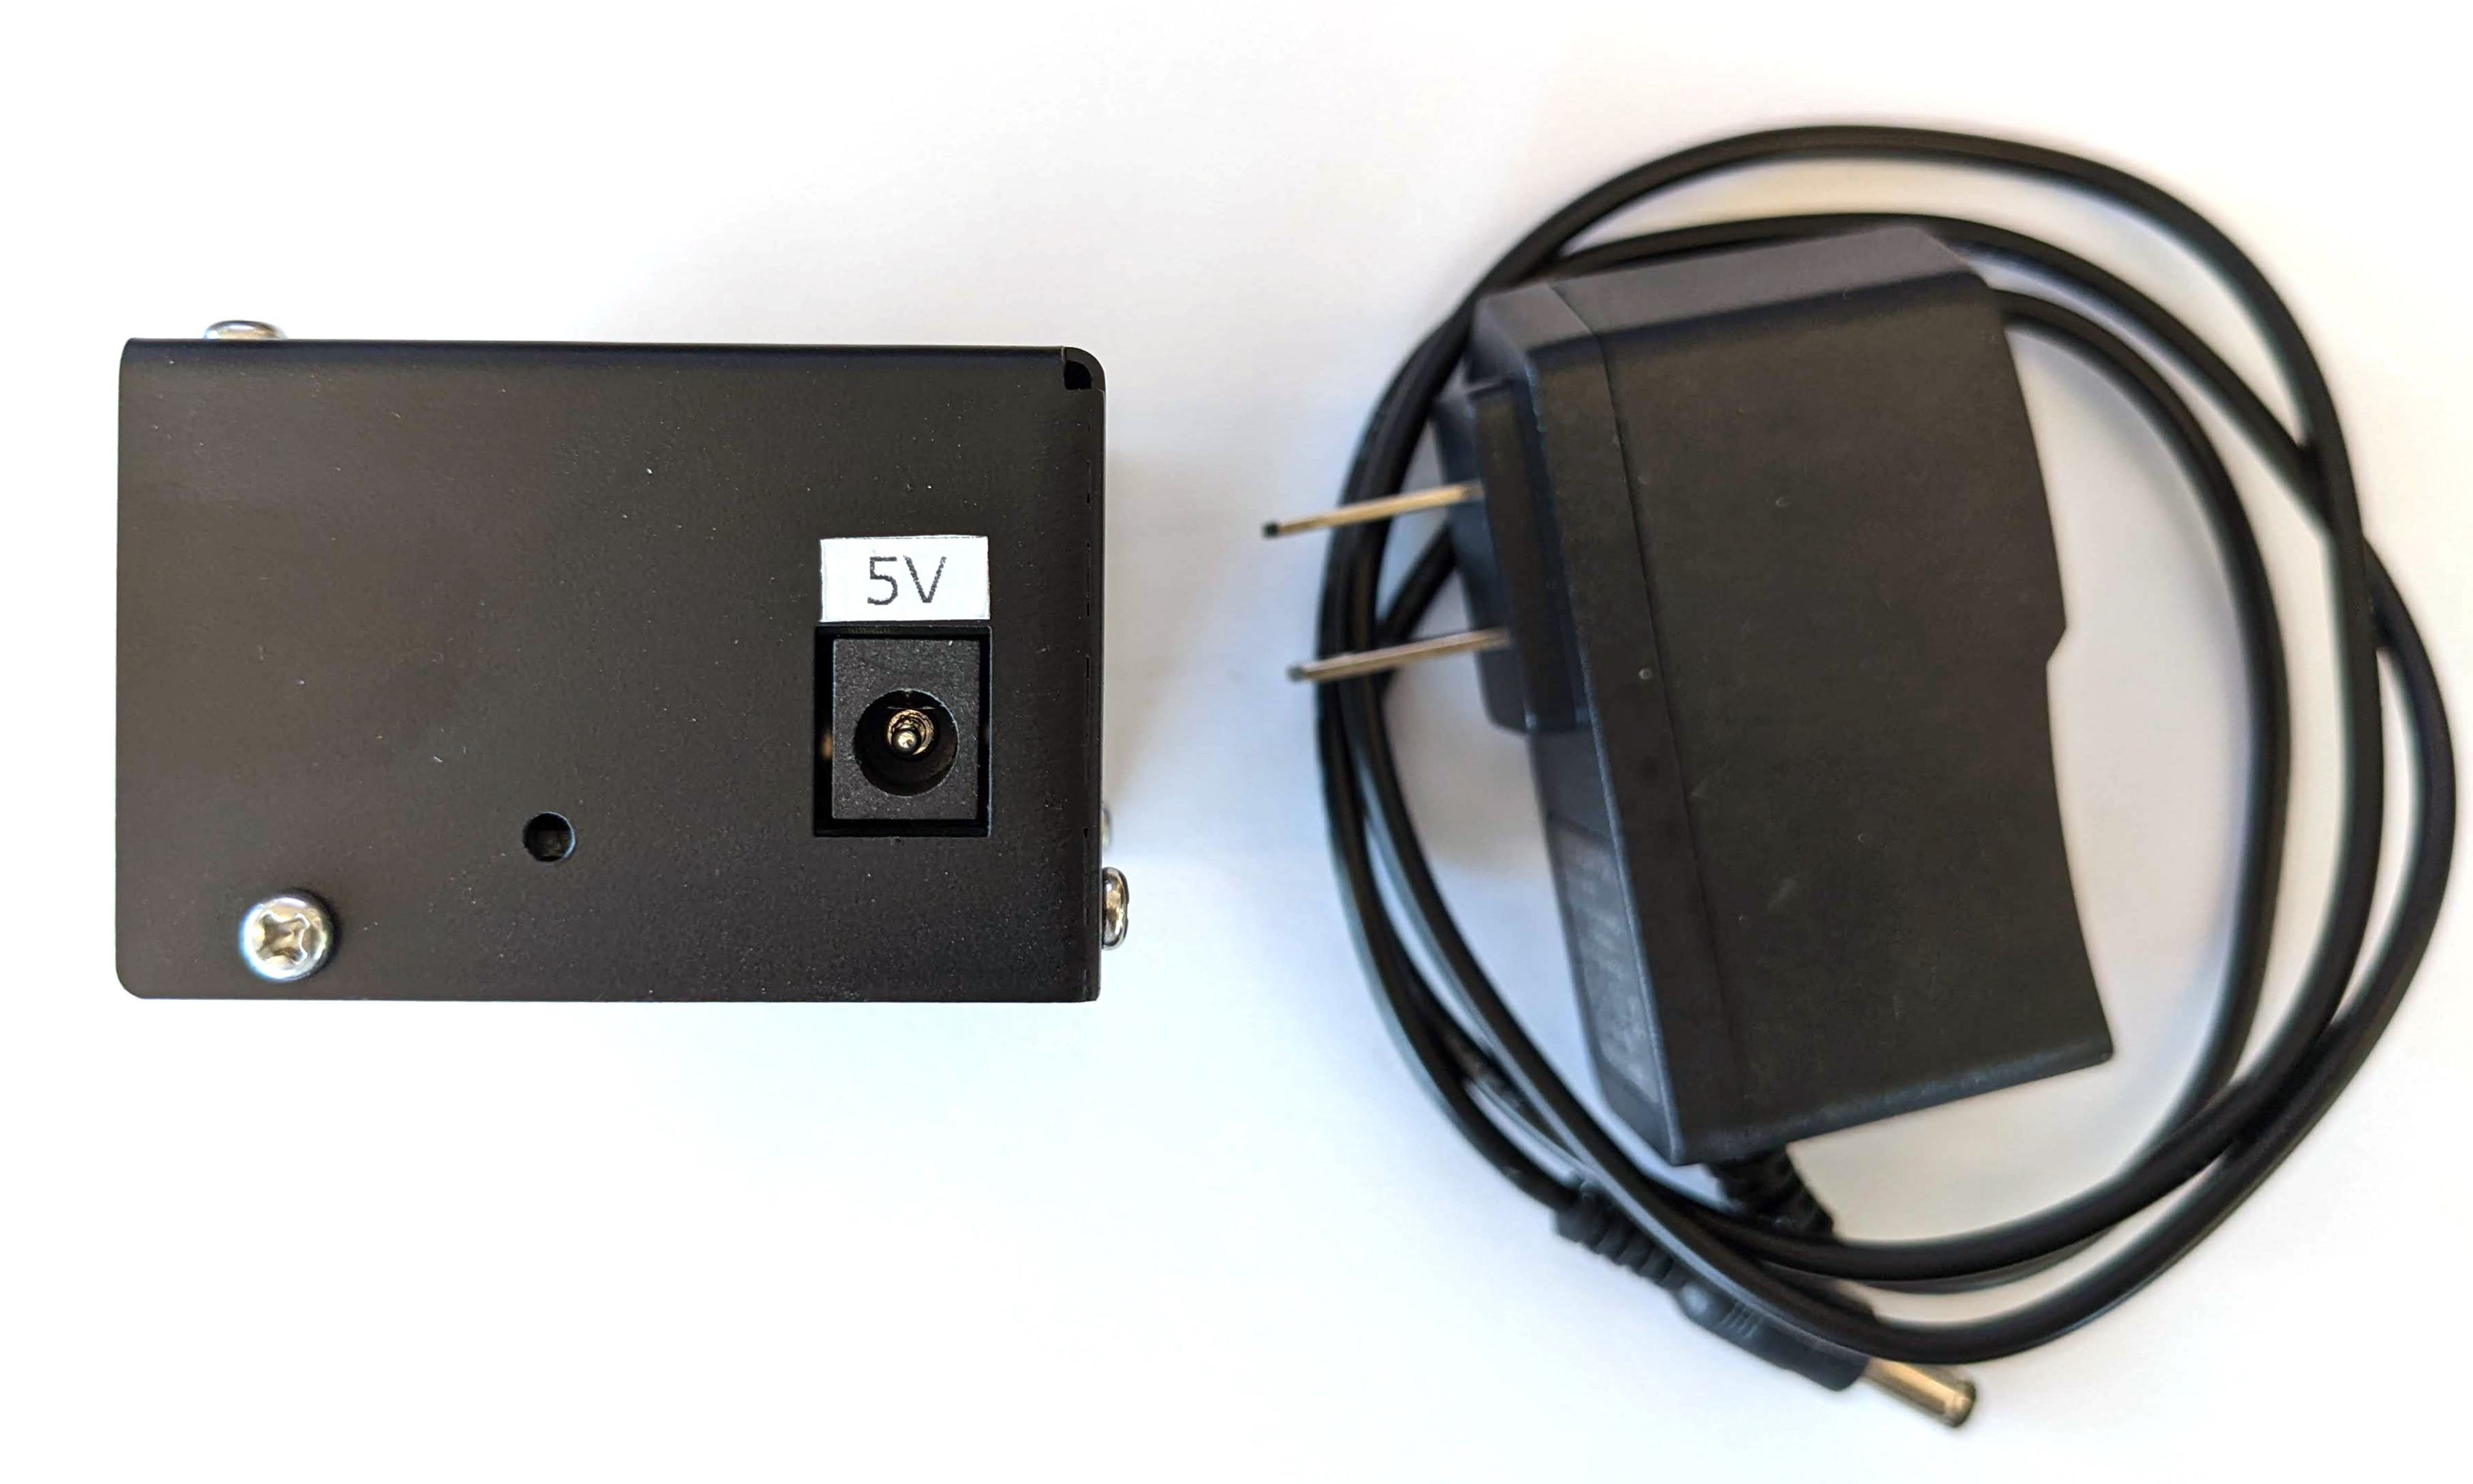
الشكل 5. توصيل وحدة التحكّم في مشغل السير بأداة التحكم في سلك الطاقة المخصّص لها - استخدِم كابل USB من النوع A إلى النوع B لتوصيل صندوق التحكّم في مشغل السيرفو بالمضيف (الجهاز الذي يُجري الاختبار).
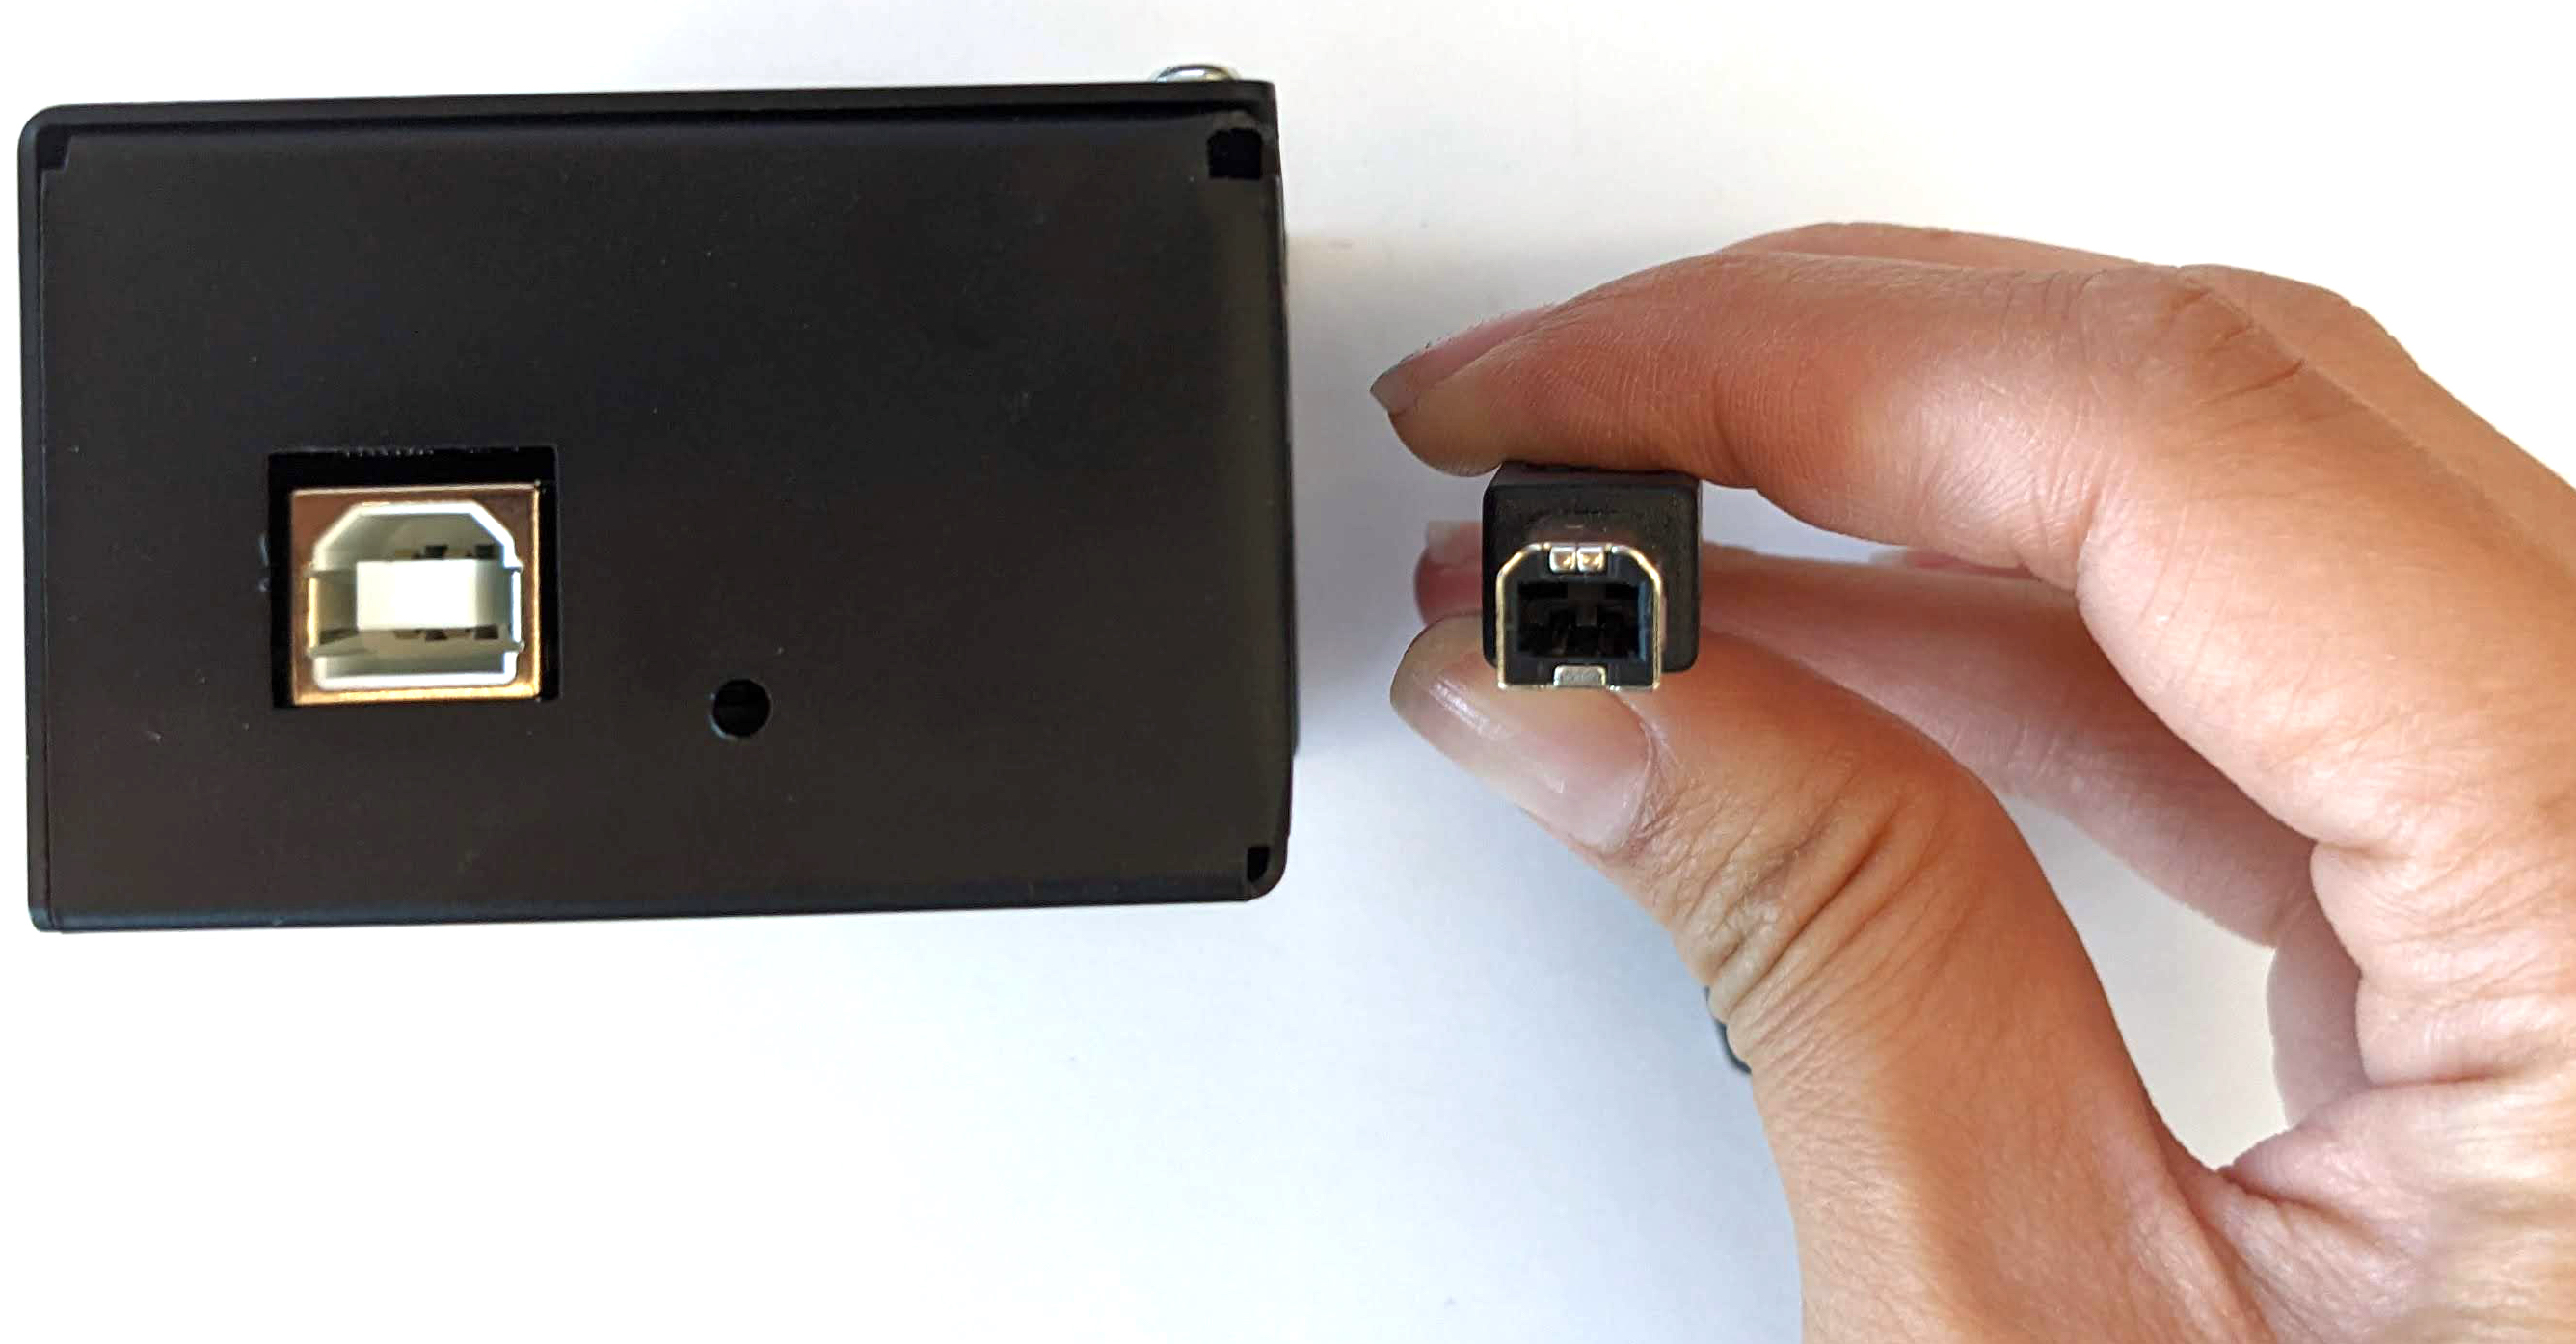
الشكل 6. توصيل صندوق التحكّم في مشغل السيرفو بالجهاز المضيف
الخطوة 3: إرفاق الهاتف
- ضَع الهاتف على الحامل واضغط عليه. اربط البراغي بإحكام عن طريق لف المسمار البلاستيكي
باتجاه اليمين.
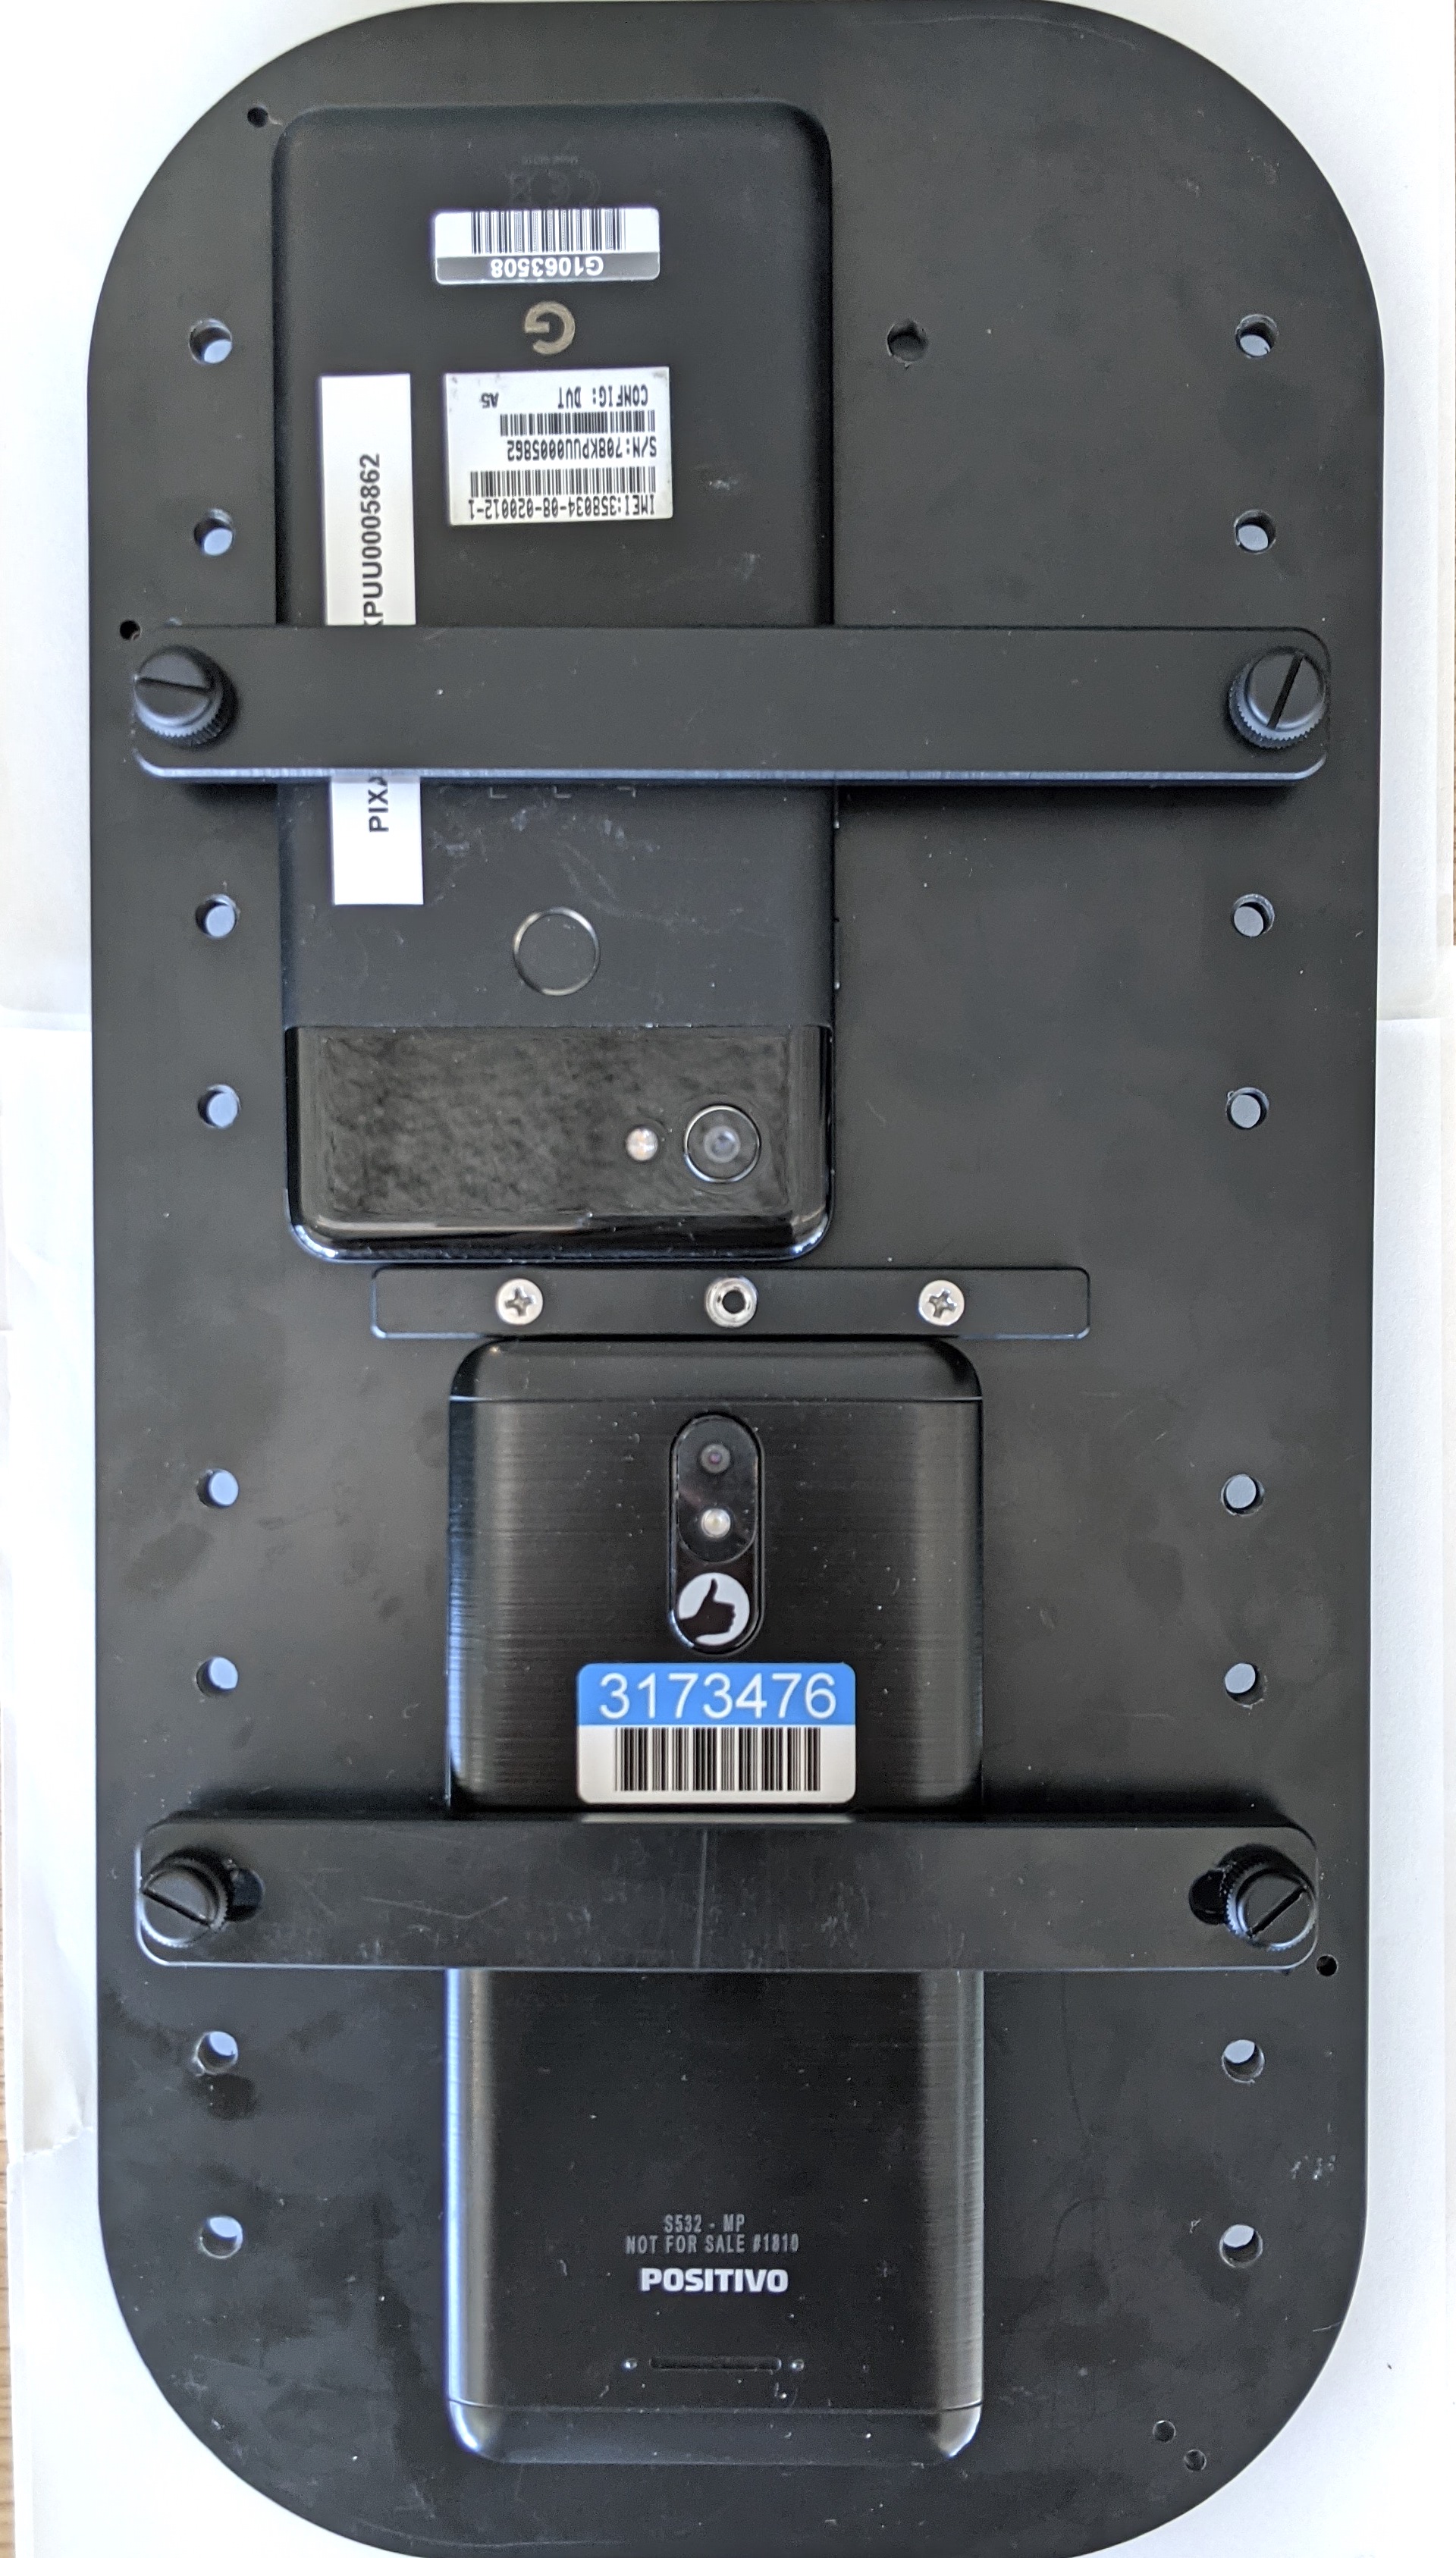
الشكل 7. وضع الهاتف وتثبيته على الحِزمة يجب وضع الهواتف بطريقة تجعل أسلاك USB في محيط حامل الهاتف والكاميرات بالقرب من منتصف الحامل.
- استخدِم رابطًا سريع الربط لتثبيت سلك USB للهاتف على لوحة التثبيت
وتوجيهه خارج العلبة من خلال فتحة الخروج. وصِّل الطرف الآخر
من السلك بالمضيف الذي يُجري الاختبار.
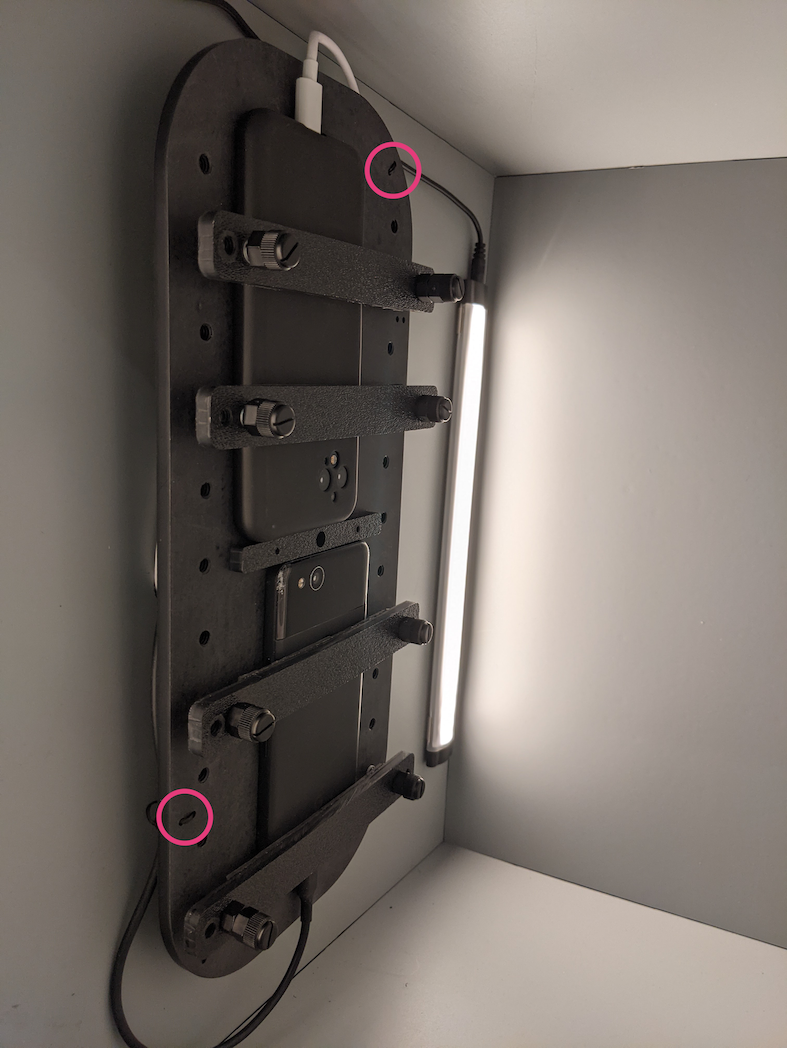
الشكل 8. كابل USB للهاتف مُثبَّت في الجهاز باستخدام أربطة بلاستيكية
الخطوة 4: تشغيل النص البرمجي للاختبار
ملف التشغيل الرئيسي لبرنامج python الخاص بنص الاختبار هو:
python tools/run_all_tests.py device=ID camera=0 scenes=sensor_fusion rot_rig=default
يمكنك تعديل الأمر لتحديد عنوان أداة التدوير الفعلية باستخدام:
rot_rig=VID:PID:CH
- لتحديد معرّف المورِّد (VID) ومعرّف المنتج (PID)، استخدِم الأمر
Linux
lsusb. - يتم ضبط VID وPID تلقائيًا
على
04d8وfc73مع القناة "1".
عمليات تنفيذ متعدّدة بتنسيقات مختلفة
لإجراء عمليات تشغيل متعددة بتنسيقات مختلفة، يمكنك استخدام
نص برمجي مختلف (ومع ذلك، لن يتم تحميل النتائج إلى
CtsVerifier.apk). نموذج نص برمجي للاختبار:
python tools/run_sensor_fusion_box.py device=FA7831A00278 camera=0 rotator=default img_size=640,360 fps=30 test_length=7مشاكل متعلقة بالأذونات
لحلّ مشاكل الأذونات المتعلّقة بالتحكم في المحرّك من خلال مَنفذ USB:
- أضِف اسم مستخدم المشغّل إلى مجموعة
dialoutباستخدام:sudo adduser USERNAME dialout - سجِّل خروج موظّف الدعم.
- سجِّل الدخول إلى حساب مزوّد الخدمة.