
This page contains instructions for setting up and running CTS Verifier (CTS-V) host-side Android 16 QPR2 and Android 17 tests. There are two types of host-side tests: multi device tests (introduced prior to Android 17) and interactive tests (new to Android 17):
- Multidevice tests are fully automated tests.
- Interactive tests are semi-automated tests, requiring you to perform some manual steps on the device under test (DUT).
In addition to new interactive tests, we converted manual ranging accuracy and telecom tests to host-side multidevice tests, and Wi-Fi connection tests are now required.
Set up host-side tests
Follow these steps to set up host-side tests (multidevice tests require additional setup):
- Verify that your desktop machine meets the operating system requirements for CTS.
- Follow steps 2 and 5 of Install desktop software
to install and verify that adb, AAPT2, and Python are correctly installed on
your desktop.
- Your Python version should be 3.11 or higher. To determine your Python
version, run
python3 --version. If the version is lower than 3.11, install the latest official Python release. For further information, see the Downloads section ofpython.org. - Certain tests require the host to have the Python
venvmodule. On Debian and Ubuntu systems, this module might not be installed by default. To determine if your Python version has thevenvmodule, runpython3 -m venv venv. If this command fails, an error message is shown. Follow the prompt to install thepython3.x-venvpackage.
- Your Python version should be 3.11 or higher. To determine your Python
version, run
If you run only the host-side interactive tests, proceed to Run host-side tests. However, if you want to run multidevice tests, proceed to Set up host-side multidevice tests.
Set up host-side multidevice tests
Follow these steps to set up host-side multidevice tests:
- Verify that your desktop machine meets the operating system requirements for CTS.
Follow steps 2 and 5 of Install desktop software to install and verify that adb, AAPT2, and Python are correctly installed on your desktop.
- Your Python version should be 3.11 or higher. To determine your Python
version, run
python3 --version. If the version is lower than 3.11, install the latest official Python release. For further information, see the Downloads section ofpython.org. - Certain tests require the host to have the Python
venvmodule. On Debian and Ubuntu systems, this module might not be installed by default. To determine if your Python version has thevenvmodule, runpython3 -m venv venv. If this command fails, an error message is shown. Follow the prompt to install thepython3.x-venvpackage.
- Your Python version should be 3.11 or higher. To determine your Python
version, run
Prepare two matching DUTs, each with CTS-V set up.
- For information on setting up a DUT, see Set up the DUT.
- For instructions on setting up CTS-V, see Setup.
Go to the setup section for your test type:
- For NFC tests, go to Set up NFC tests.
- For Wi-Fi AP connection tests, go to Set up Wi-Fi AP connection tests.
- For the ranging accuracy tests, go to Set up ranging accuracy tests.
- To test the CDM module, go to Set up standard two-device tests and then go to Set up CDM tests.
If your test isn't in this list, proceed to Set up standard two-device tests.
Set up NFC tests
NFC tests use one DUT and one PN532 NFC chip.
To set up NFC tests:
- Purchase a PN532 NFC chip. We recommend the All-In-One PN532.
- On the DUT, navigate to the Settings app.
- Enable NFC.
Position the NFC chip:
For phones, position the DUT's NFC reader as shown in Figure 1:
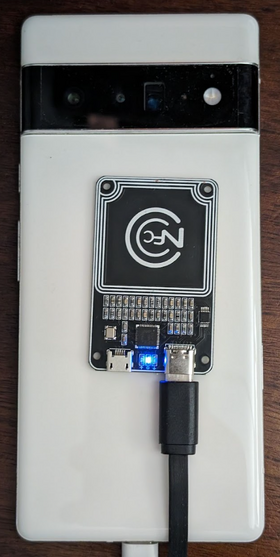
Figure 1. NFC chip positioning.
For other device types, position the chip next to the device's NFC antenna.
Attach the PN532 NFC chip to your testing workstation using a USB cable.
Set up Wi-Fi AP connection tests
The Wi-Fi access point (AP) connection tests (CtsWifiConnectionTests) test
connectivity between a DUT and AP. You can set up these tests in the following
two ways:
- Option 1: Use an existing Wi-Fi network that you set up for CTS-V.
- Option 2: Set up a programmable access point (AP).
For Android 17, we strongly recommend option 2, but it isn't required. The following two sections explain each option.
Option 1: Use an existing Wi-Fi network that you set up for CTS-V
Option 1 requires one Android DUT within the Wi-Fi network coverage area. If the DUT is in a shield box and can't connect to the Wi-Fi network, remove it from the shield box.
Option 2: Set up a programmable AP
To set up a programmable AP for the Wi-Fi connection tests:
Purchase the Banana Pi R3 AP and set it up. For information on purchasing and setting up the Banana Pi R3 AP, see Set up the Banana Pi BPI-R3 AP.
Optional: If you don't have a shield box, we recommend the JTP-SR101 shield box. Purchase this box using the following information:
Dong Guan Zheng Sheng Electronics Technology Co., LTD
Bohui Industrial Park, Panlong Road, Liaobu Town, Dongguan City, Guangdong Province, China
Contact: Forest Pan
Email: forest.pan@jtpmak.cn
Phone (China): +86 18676993556Connect the DUT and AP to the host and place in an RF shield box. The DUT and AP should be at least 10 cm apart. Figure 2 shows this configuration:
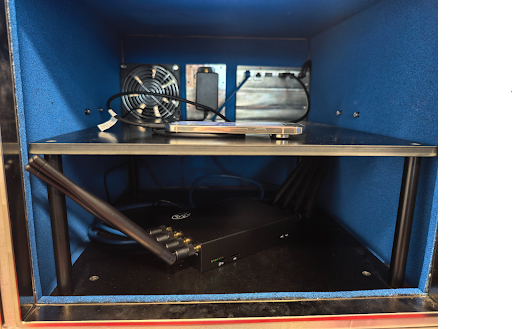
Figure 2. DUT and AP in shield box.
Use SSH to verify that the AP is accessible from the host.
Set up ranging accuracy tests
To set up ranging accuracy tests:
Place two matching Android DUTs 1 meter apart, at the same height, with direct line of sight, and with the back of each device facing each other. Figure 3 shows this orientation:

Figure 3. Device orientation.
Connect both devices with the desktop machine through USB cables.
Set up standard two-device tests
For the default two-device setup:
- Place two matching Android DUTs approximately 20 cm apart.
Strongly recommended: Place both devices in a shield box. The shield box improves test stability and makes test failures easier to debug.
For telecom tests, each DUT must have a SIM card and cellular signal. If the DUTs are in a shield box, the cellular signal must be coupled into the box. Otherwise, move the devices out of the shield box.
Optional: Set up an OTA sniffer for Wi-Fi debugging.
Set up CDM tests
The test_permissions_sync() test case has different behavior depending on the
build type of the devices on which the test is executed. It is critical that
both debuggable (userdebug or eng) and non-debuggable (user) builds are
tested by OEMs and that tests pass for both.
Exemption
The CDD clause for the permissions sync API implementation only requires it to be able to successfully transfer data between devices over a secure channel. Since the secure channel implementation isn't a CDD compliance requirement, this test can be skipped on non-debuggable (user) builds, but only if you want to opt out of supporting the CDM permissions sync feature.
The tests must pass on debuggable builds without exception.
Prerequisites for testing on non-debuggable builds
If you aren't exempt, verify that you meet the following prerequisites.
The secure channel uses AVF (AttestationVerificationFramework) to verify the
trustworthiness of hardware. Attestations generated by both parties contain
several pieces of information about themselves to verify that there hasn't been
any unauthorized alteration in their system. AVF checks for the following states
during the verification process:
- Device has access to internet
- Device uses verified boot and the build must be signed with a release-key, not a dev-key
- Device is bootloader locked. For detailed instructions, see locking the bootloader
- OS, key boot, and key vendor patch levels are within 12 months. Don't use a build older than a year
- Device attestation is backed by one of the vendor-approved root
certificates. Specify your trusted root certificates in the
vendor_required_attestation_certificates.xmlresource overlay.
Run host-side tests
Some multidevice tests, such as NFC tests, require additional setup. For tests that require additional setup, each test is run separately. For tests that don't require additional setup, you can run the tests in a group.
On your test workstation, launch the
cts-v-hostconsole from the directory where the CTS-V zip package was unzipped:./android-cts-verifier/android-cts-v-host/tools/cts-v-host-tradefedFrom within the CTS-V app on the DUT, click Host-side Tests. Figure 4 shows the host-side tests in the CTS-V app:
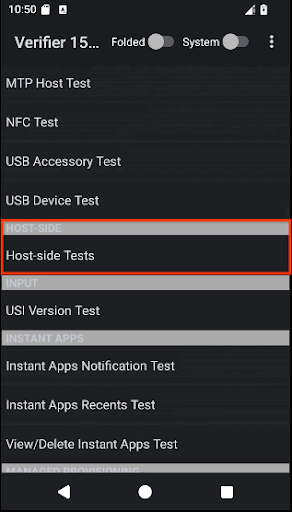
Figure 4. Host-side tests in CTS-V app.
A list of test host-side multidevice test modules is displayed.
In the CTS-V host console, use the following command to run multidevice tests that use a standard two-device setup:
run cts-v-host-multidevice-defaultThe results appear under each test module in the CTS-V app on the DUT. Tests marked green have passed, tests marked red have failed.
Figure 5 shows example results for the CtsCompanionDeviceManager tests:
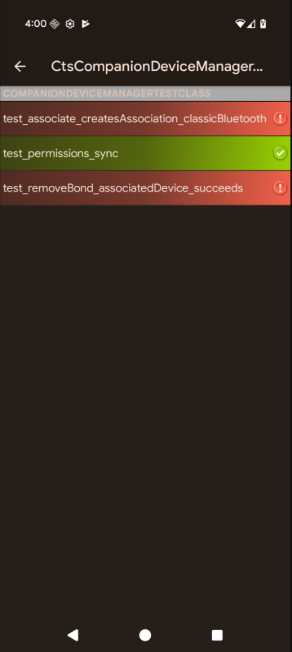
Figure 5. Host-side multidevice test results in CTS-V app.
In the CTS-V host console, use the following command to run the interactive tests:
run cts-v-host-interactiveThe results appear under each test module in the CTS-V app on the DUT. Tests marked green have passed, tests marked red have failed.
For each test that required additional setup, run the test separately using the following command:
run cts-v-host -m test_module_nameFor example, to run the NFC tests, use this command:
run cts-v-host -m CtsNfcHceMultiDeviceTestCasesThe results appear under each test module in the CTS-V app on the DUT. Tests marked green have passed, tests marked red have failed.
Run Wi-Fi AP connection tests
You can run the Wi-Fi AP connection tests in the following two ways:
- Option 1: Use an existing Wi-Fi network that you set up for CTS-V.
- Option 2: Set up a programmable AP.
Option 1: Use an existing Wi-Fi network that you set up for CTS-V
To run the Wi-Fi AP connection tests on an existing Wi-Fi network:
Edit the testbed configuration file (
WifiConnectionTestbed.yaml). This file is in the directory where CTS-Verifier is unzipped. For example:./android-cts-verifier/android-cts-v-host/testcases/CtsWifiConnectionTests/x86_64/connection/WifiConnectionTestbed.yamlChange the value of the
wifi_ssidandwifi_passwordfields to the SSID and password of the Wi-Fi network. The following example shows the location of these settings:TestBeds: - Name: WifiConnectionTestbed Controllers: AndroidDevice: '*' TestParams: use_programmable_ap: False wifi_ssid: WIFI-SSID wifi_password: WIFI-PASSWORDIn the CTS-V host console, run the following command:
run cts-v-host -m CtsWifiConnectionTests
Option 2: Run with a programmable AP
To run the Wi-Fi AP connection tests on a programmable AP:
Edit the testbed configuration file (
WifiConnectionTestbed.yaml). This file is in the directory where CTS-Verifier is unzipped. For example:./android-cts-verifier/android-cts-v-host/testcases/CtsWifiConnectionTests/x86_64/connection/WifiConnectionTestbed.yamlChange the value of the
hostnameto the IP address of the AP, based on your local SSH settings. To identify the IP address, see Find the IP address of the AP. The following example shows the location of thehostnamesetting:TestBeds: - Name: WifiConnectionTestbed Controllers: AndroidDevice: '*' # Specify settings for the AP. OpenWrtDevice: - hostname: AP-IP skip_init_reboot: True TestParams: use_programmable_ap: TrueIn the CTS-V host console, run the following command:
run cts-v-host -m CtsWifiConnectionTests
Run USB host-side tests
Android 17 includes USB CTS-V host-side tests that
require adb over Wi-Fi to run.
Some USB tests require the use of the CTS-V host to access SystemAPIs that have
permissions that the normal CTS-V app can't access. These tests are untethered
and require the use of adb over Wi-Fi.
The following Type-C accessories are required if the DUT supports reporting
the port partner BC 1.2 type or USB power profiles in UsbPort.java:
- A USB Type-C power delivery (PD) charger
- A USB battery charging 1.2 (BC 1.2) standard downstream port (SDP). These ports are limited to providing 500 mA or 900 mA to the DUT and are commonly found on the USB ports of external hubs.
- A USB BC 1.2 charging downstream port (CDP). These ports can provide 1.5 A of current to the DUT and data. A Type-C port on a laptop or computer is likely to be a CDP.
- A USB BC 1.2 dedicated charging port (DCP). These ports can provide 1.5 A of current to the DUT without data. The USB Type-C PD charger in this list is likely to be a DCP.
Connect the DUT using
adbover Wi-Fi. For setup details, see Connect to a device over Wi-Fi.Physically detach the device from all USB connections. The test fails if the device is attached to any USB host or accessory when the test command is run.
Run the following test command:
run cts-v-host -m CtsUsbTypecTestCases
After the tests, the results appear within the CTS-V app under Host-side tests as shown in the following figures:
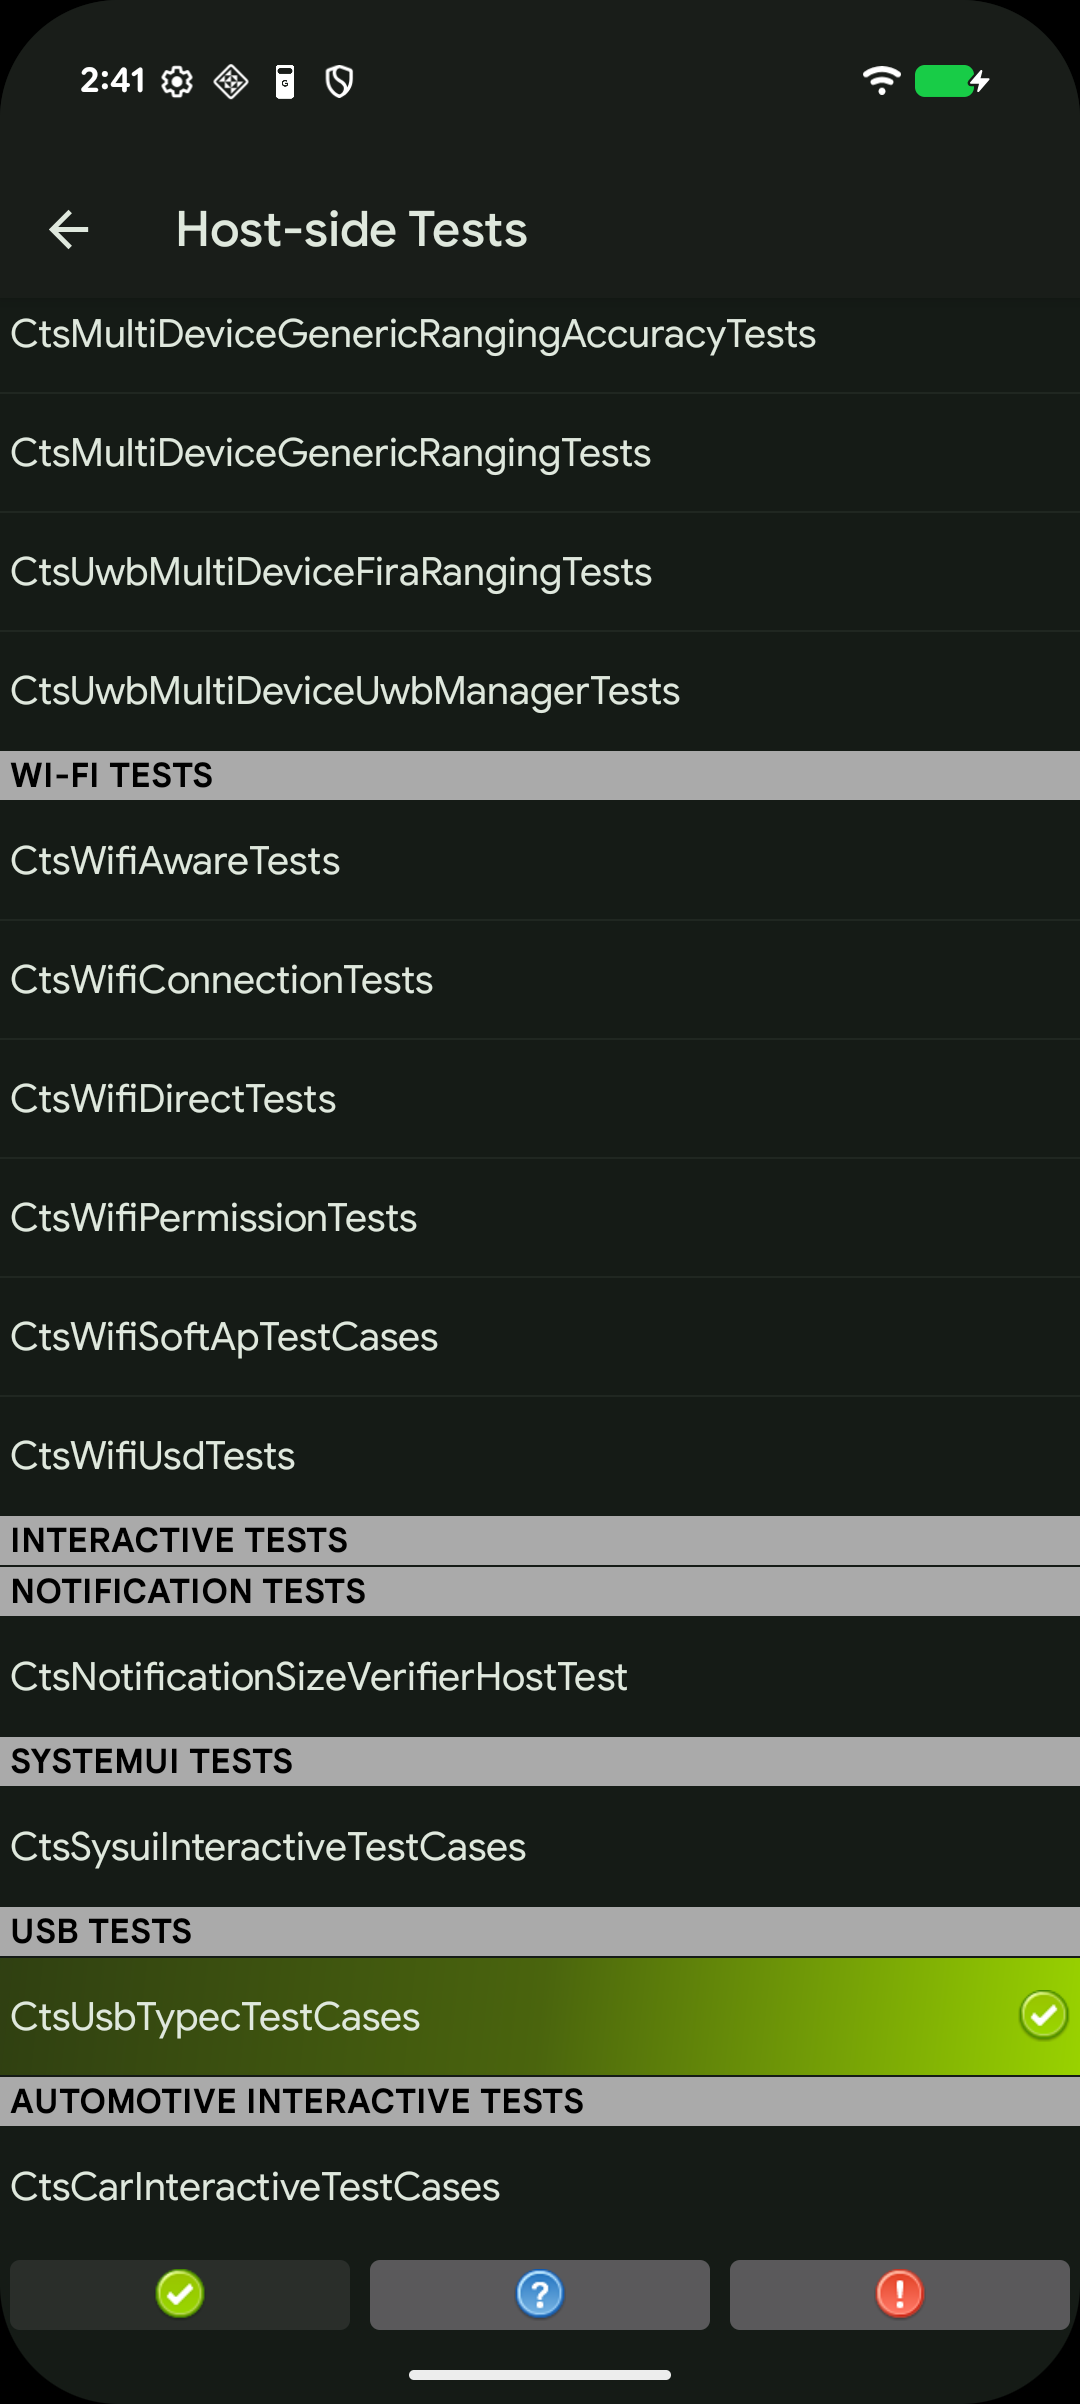
Figure 6. Host-side USB tests in CTS-V app.

Figure 7. CtsUsbTypecTestCases suite in the host-side USB CTS-V app.
Troubleshoot multidevice tests
This section helps you troubleshoot common issues.
Failure to get phone number during CtsTelecomTest
If you receive the error message Failed to get phone number for <serial>,
follow these steps:
Verify each DUT has a SIM card installed.
If the error persists, the SIM cards might not support automatic number retrieval, in which case you must explicitly provide the phone numbers in the command.
For example, for DUT 1 (serial
17011FDEE0002N, phone number555-0000) and DUT 2 (serialR3CN90YNAR, phone number555-1111), append the following arguments to therun cts-v-hostcommand:--module-arg CtsTelecomTest:dut_serial:17011FDEE0002N \ --module-arg CtsTelecomTest:dut_phone_number:555-0000 \ --module-arg CtsTelecomTest:ref_phone_number:555-1111
No response from server during CtsMultiDeviceGenericRangingAccuracyTests
If you receive the following error message, the test app can be frozen or killed by OEM-specific background process management on certain devices:
mobly.snippet.errors.ProtocolError: <AndroidDevice|Initiator> No response from server. Check the device logcat for crashes.
To resolve this issue, disable background restrictions or allowlist the following packages:
| Package | Display name |
|---|---|
com.google.snippet.uwb |
CtsUwbSnippetApp |
com.google.snippet.ranging |
CtsRangingSnippetApp |
com.google.snippet.bluetooth |
CtsBluetoothMultiDeviceSnippetApp |
com.google.android.mobly.snippet.bundled |
androidx.multidex.MultDexApplication |
Fix No response for GetFirmwareVersion during NFC tests
If you receive the message verify_firmware_version RuntimeError: No response
for GetFirmwareVersion while running the multidevice tests, the tests
can't access the PN532 NFC board.
To fix this issue, identify the serial path used by the PN532 NFC board on
your host, such as dev/ttyUSB1, then manually specify it using the
--module-arg argument in the console:
run cts-v-host -m CtsNfcHceMultiDeviceTestCases --module-arg CtsNfcHceMultiDeviceTestCases:pn532_serial_path:/dev/ttyUSB1
Fix Transaction failed error message during NFC tests
If you receive the message Transaction failed, check device logs for more
information. for all NFC test cases, it is likely because the DUT's NFC chip
can't detect the PN532.
If you have multiple devices connected to the host, and some of them don't have a PN532 placed on top, the wrong DUT may have been selected. For more information, see Set up NFC tests.
To fix this problem, do one of the following:
Set the correct DUT's serial in your host-side test command using the
-sflag.Disconnect all non-DUT devices from the host.
CDM test case test_permissions_sync is ignored
If the test is being run on non-debuggable devices, then see if you are exempted. Otherwise, verify that both devices meet the prerequisites.