2025년 3월 27일부터 AOSP를 빌드하고 기여하려면 aosp-main
대신 android-latest-release
를 사용하는 것이 좋습니다. 자세한 내용은 AOSP 변경사항을 참고하세요.
멀티 디바이스 NFC 테스트 실행
컬렉션을 사용해 정리하기
내 환경설정을 기준으로 콘텐츠를 저장하고 분류하세요.
이 문서에서는 멀티 디바이스 NFC 테스트 실행 방법을 설명합니다.
기본 요건 충족
멀티 디바이스 NFC 테스트를 실행하기 전에 다음 단계를 따르세요.
- Android 15 구현이 적용된 기기를 준비합니다.
- CTS-V 요구사항을 따릅니다.
- CTS-V 설정을 따릅니다.
테스트용 DUT와 PN532 NFC 리더 준비
이전 단계를 완료한 후에는 다음 단계를 따라 DUT와 PN532 NFC 리더를 테스트를 위해 준비합니다.
- DUT를 USB를 통해 호스트 머신에 연결합니다.
- 호스트에서 ADB를 통해 DUT에 액세스하도록 권한을 부여합니다.
DUT에 CTS 인증 도구 앱(CtsVerifier.apk
)을 설치합니다.
extract root/out/host/linux-x86/cts-verifier/android-cts-verifier.zip
cd android-cts-verifier
adb install -r -g CtsVerifier.apk
NFC 테스트에 필요한 APK를 설치합니다.
cd MultiDevice
adb install -r -g NfcEmulatorTestApp.apk
DUT의 NFC 설정
다음 단계를 따라 DUT의 NFC를 설정하세요.
- DUT에서 설정 메뉴로 이동합니다.
- NFC 또는 연결된 기기 섹션을 찾습니다.
- NFC 전환 스위치가 켜져 있는지 확인합니다.
NFC 칩을 휴대전화의 NFC 리더 위에 놓습니다.
- PN532 NFC 칩을 획득합니다. BLE가 아닌 All-In-One PN532 옵션이 권장됩니다.
- USB 케이블을 사용하여 PN532 NFC 칩을 Linux 호스트에 연결합니다.
- PN532 NFC 칩을 휴대전화의 NFC 리더 위에 둡니다(다음 이미지 참고).
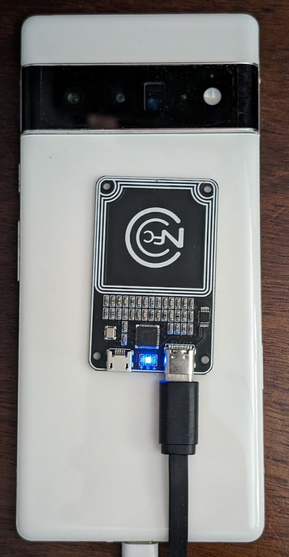
그림 1. NFC 칩 배치
테스트 환경 설정
다음 단계를 따라 테스트 환경을 설정하세요.
다음 명령어를 실행하여 테스트 환경을 설정합니다.
cd MultiDevice
source build/envsetup.sh
이 명령어를 통해 Python을 확인하고 PYTHONPATH
환경 변수를 설정합니다. 터미널에 오류가 출력되지 않으면 환경이 멀티 디바이스 테스트를 실행할 준비가 된 것입니다.
런타임에 libtinfo.so.6: no version information
available (required by /bin/sh)
오류 메시지가 표시되면 다음 명령어를 실행하여 libtinfo.so.6
파일의 이름을 바꾸세요.
mv $ENV_DIRECTORY/lib/libtinfo.so.6 $ENV_DIRECTORY/lib/libtinfo.so.6.bak
MultiDevice/config.yml
에서 DUT와 PN532 NFC 리더의 기기 일련번호 ID를 설정하여 테스트베드를 설정합니다.
TestBeds:
- Name: CtsNfcHceMultiDeviceTestCases-py-ctsv
Controllers:
AndroidDevice:
- serial: "<device-id>"
TestParams:
pn532_serial_path: "<pn532-serial-path>"
NFC 테스트 실행
NFC 테스트를 실행하려면 다음 단계를 따르세요.
CTS-V 앱을 열고 NFC Tests를 탭합니다.
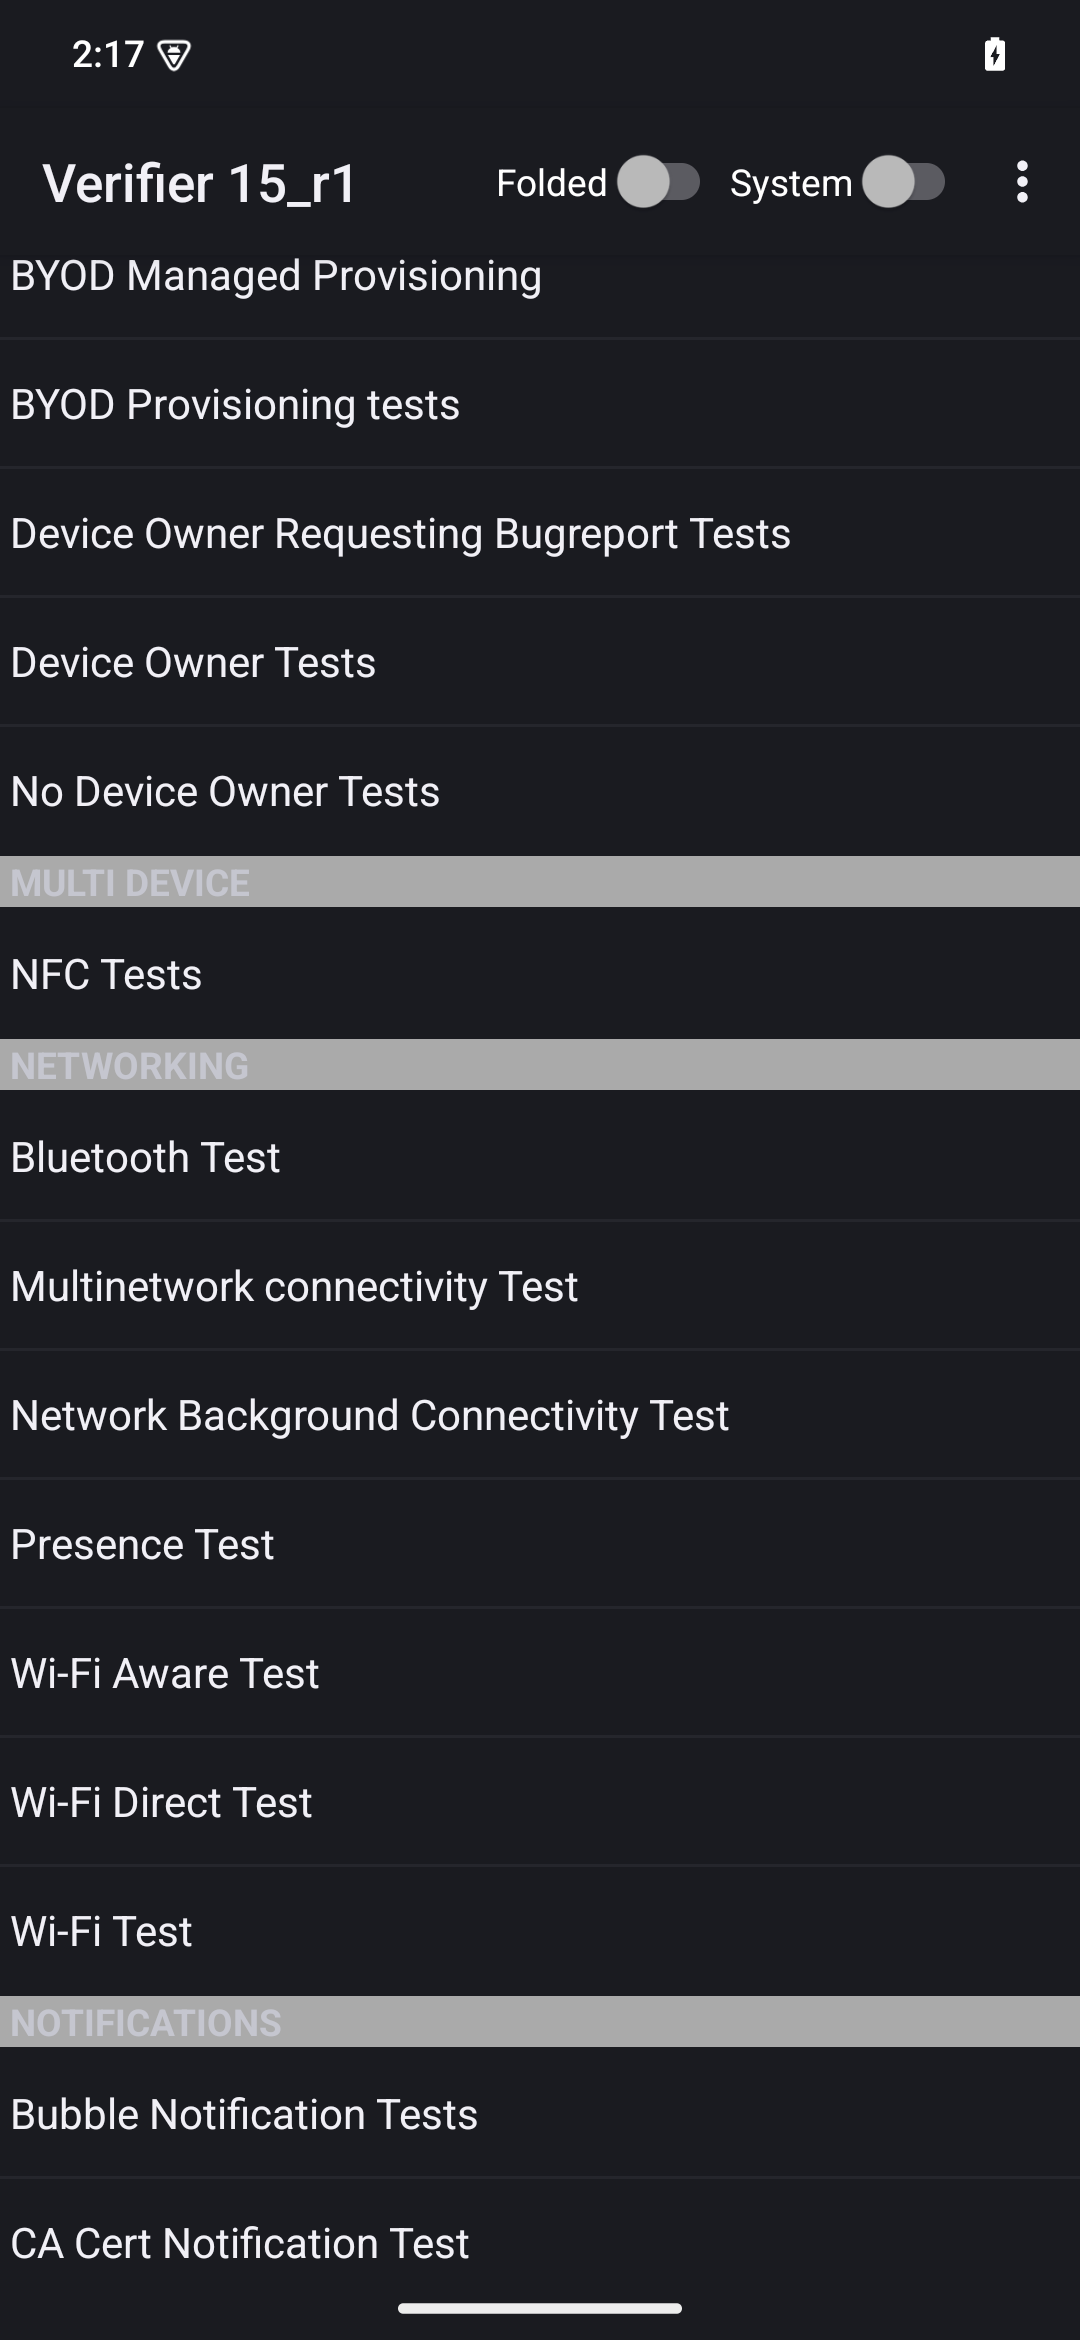
그림 2. CTS-V 앱
테스트 사례 목록이 있는 정보 창이 다음과 같이 표시됩니다.
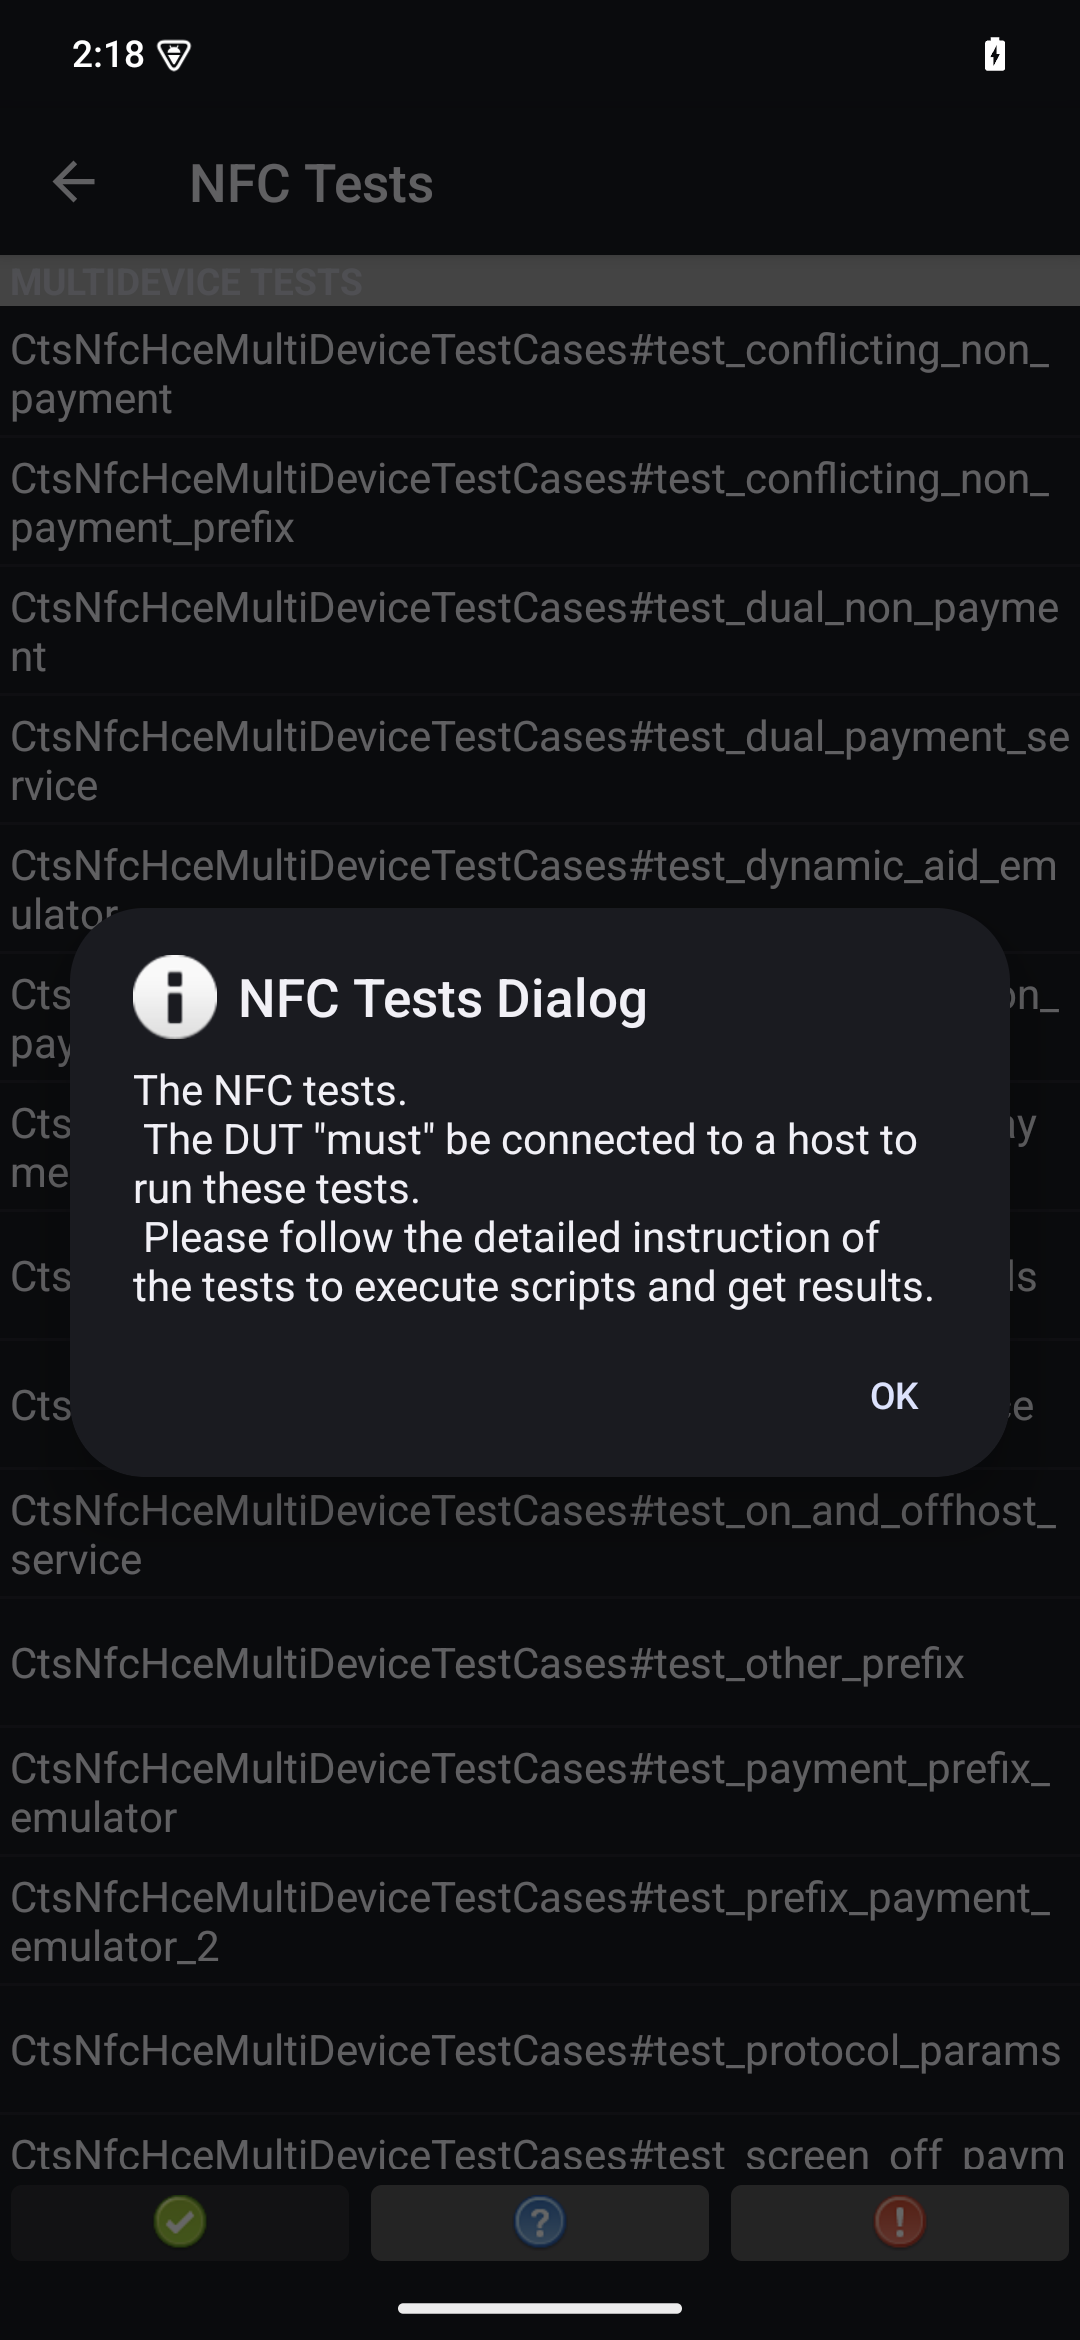
그림 3. CTS-V 앱 테스트 사례
호스트에서 테스트를 실행합니다.
MultiDevice$ python3 tools/run_all_tests.py
테스트가 완료되면 테스트 결과가 CTS-V 앱에 업데이트됩니다. 성공한 테스트는 녹색으로 표시됩니다.
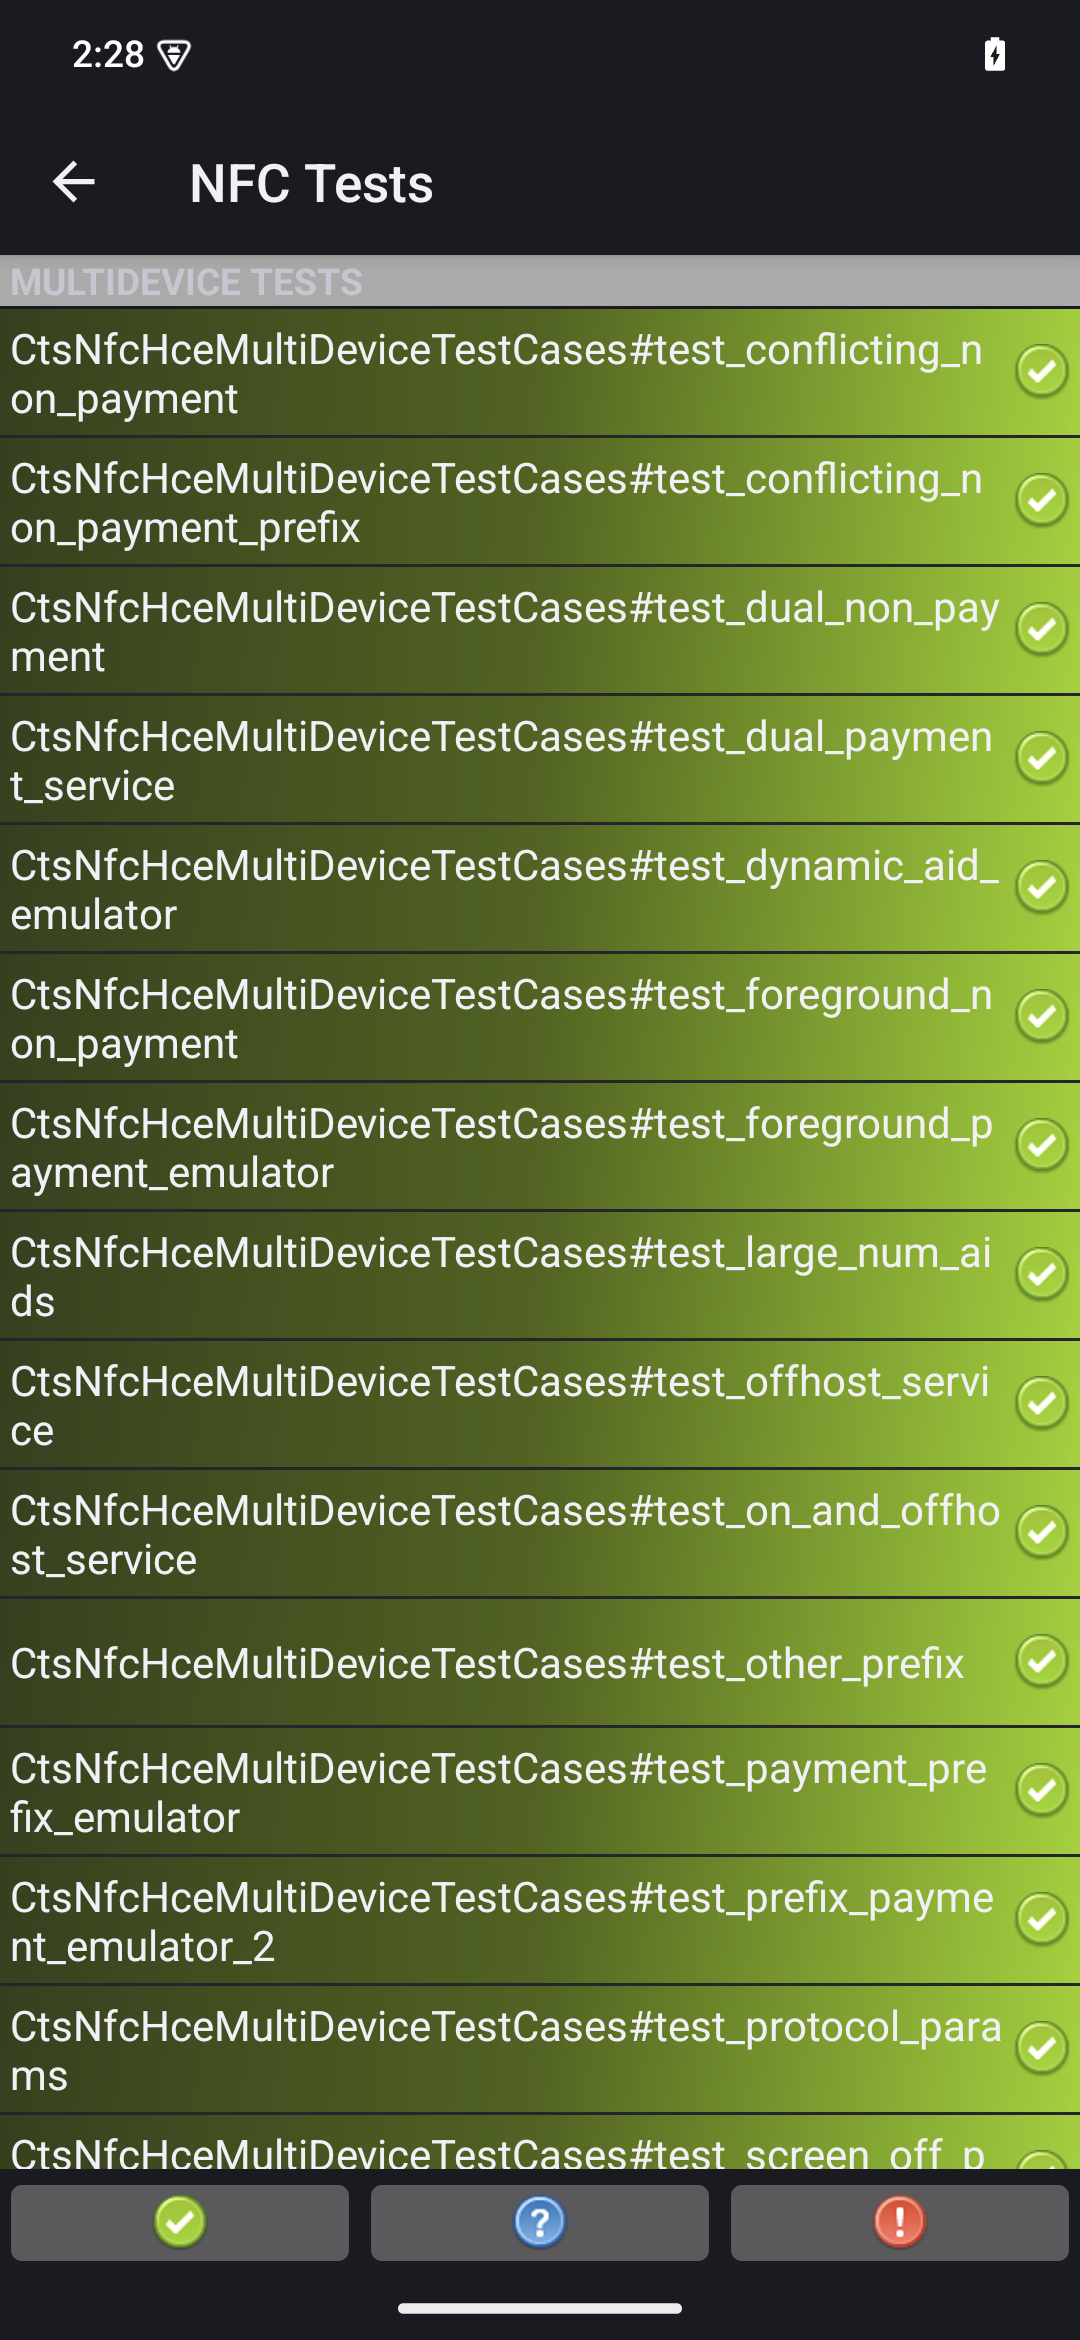
그림 4. CTS-V 테스트 결과
빨간색으로 표시된 실패가 보이면 다음 명령어를 사용하여 실패한 테스트를 다시 실행합니다.
python3 tools/run_all_tests.py --test_cases "`TestCaseA`" "`TestCaseB`" --test_files "`TestFileA`"
각각의 의미는 다음과 같습니다.
TestCaseA
및 TestCaseB
는 CTS-V에 표시된 테스트 사례의 이름입니다.
TestFileA
는 테스트 사례가 포함된 테스트 파일입니다.
예를 들면 다음과 같습니다.
python3 tools/run_all_tests.py --test_cases "test_conflicting_non_payment" "test_conflicting_non_payment_prefix" --test_files "CtsNfcHceMultiDeviceTestCases-py-ctsv"
이 페이지에 나와 있는 콘텐츠와 코드 샘플에는 콘텐츠 라이선스에서 설명하는 라이선스가 적용됩니다. 자바 및 OpenJDK는 Oracle 및 Oracle 계열사의 상표 또는 등록 상표입니다.
최종 업데이트: 2025-05-09(UTC)
[[["이해하기 쉬움","easyToUnderstand","thumb-up"],["문제가 해결됨","solvedMyProblem","thumb-up"],["기타","otherUp","thumb-up"]],[["필요한 정보가 없음","missingTheInformationINeed","thumb-down"],["너무 복잡함/단계 수가 너무 많음","tooComplicatedTooManySteps","thumb-down"],["오래됨","outOfDate","thumb-down"],["번역 문제","translationIssue","thumb-down"],["샘플/코드 문제","samplesCodeIssue","thumb-down"],["기타","otherDown","thumb-down"]],["최종 업데이트: 2025-05-09(UTC)"],[],[],null,["# Run multi-device NFC tests (Android 15)\n\nThis document explains how to run multi-device NFC tests.\n\nMeet prerequisites\n------------------\n\nBefore you run multi-device NFC tests, do the following:\n\n1. Prepare a device with your Android 15 implementation.\n2. Follow CTS-V [requirements](/docs/compatibility/cts/verifier#requirements).\n3. Follow CTS-V [setup](/docs/compatibility/cts/verifier#setup).\n\nPrepare a DUT and a PN532 NFC reader for the test\n-------------------------------------------------\n\nAfter you finish the previous steps, follow these steps to run\nprepare a DUT and a PN532 NFC reader for the test:\n\n1. Connect the DUT to a host machine over USB.\n2. Grant permissions for the host to access the DUT over ADB.\n3. Install the CTS Verifier app (`CtsVerifier.apk`) on the DUT:\n\n extract root/out/host/linux-x86/cts-verifier/android-cts-verifier.zip\n\n cd android-cts-verifier\n\n adb install -r -g CtsVerifier.apk\n\n4. Install the NFC test required APKs:\n\n cd MultiDevice\n\n adb install -r -g NfcEmulatorTestApp.apk\n\nSet up NFC for the DUT\n----------------------\n\nFollow these steps to run set up NFC for the DUT:\n\n1. On the DUT, go to the **Settings** menu.\n2. Look for the **NFC** or **Connected Devices** section.\n3. Ensure the NFC toggle switch is turned on.\n4. Position an NFC chip on the phone's NFC reader:\n\n 1. Acquire a PN532 NFC chip. We recommend the [All-In-One PN532](https://shop.mtoolstec.com/product/mtools-all-in-one-pn532), non-BLE option.\n 2. Attach the PN532 NFC chip to the Linux host using a USB cable.\n 3. Place the PN532 NFC chip over the phone's NFC reader as shown in the following image:\n\n **Figure 1.** NFC chip placement.\n\nSet up the test environment\n---------------------------\n\nFollow these steps to run set up the test environment:\n\n1. Run these commands to set up the test environment:\n\n cd MultiDevice\n\n source build/envsetup.sh\n\n This command checks the Python and sets up the `PYTHONPATH` environment\n variable. If no errors are printed to the terminal, the environment is ready\n to run the multi-device tests.\n\n If you see the error message `libtinfo.so.6: no version information\n available (required by /bin/sh)` at runtime, run the following command\n to rename the `libtinfo.so.6` file: \n\n mv $ENV_DIRECTORY/lib/libtinfo.so.6 $ENV_DIRECTORY/lib/libtinfo.so.6.bak\n\n2. Set up the test bed by setting the device serial IDs of the DUT and PN532 NFC\n reader in `MultiDevice/config.yml`:\n\n TestBeds:\n - Name: CtsNfcHceMultiDeviceTestCases-py-ctsv\n Controllers:\n AndroidDevice:\n - serial: \"\u003cdevice-id\u003e\"\n TestParams:\n pn532_serial_path: \"\u003cpn532-serial-path\u003e\"\n\nRun the NFC tests\n-----------------\n\nTo run the NFC tests:\n\n1. Open the CTS-V app and tap **NFC Tests**:\n\n **Figure 2.** The CTS-V app.\n\n The info window with list of test cases appears:\n\n **Figure 3.** CTS-V app test cases.\n2. Run the tests on your host:\n\n MultiDevice$ python3 tools/run_all_tests.py\n\n When the tests are completed, the test results are updated in the CTS-V\n app. Successful tests are green:\n\n **Figure 4.** CTS-V test results.\n3. If you see any failures marked in red, use the following command to rerun\n the failed tests:\n\n python3 tools/run_all_tests.py --test_cases \"`\u003cvar translate=\"no\"\u003eTestCaseA\u003c/var\u003e`\" \"`\u003cvar translate=\"no\"\u003eTestCaseB\u003c/var\u003e`\" --test_files \"`\u003cvar translate=\"no\"\u003eTestFileA\u003c/var\u003e`\"\n\n Where:\n - \u003cvar translate=\"no\"\u003eTestCaseA\u003c/var\u003e and \u003cvar translate=\"no\"\u003eTestCaseB\u003c/var\u003e are the names of the test cases as displayed in CTS-V.\n - \u003cvar translate=\"no\"\u003eTestFileA\u003c/var\u003e is the test file containing the test cases.\n\n For example: \n\n python3 tools/run_all_tests.py --test_cases \"test_conflicting_non_payment\" \"test_conflicting_non_payment_prefix\" --test_files \"CtsNfcHceMultiDeviceTestCases-py-ctsv\""]]