自 2025 年 3 月 27 日起,我們建議您使用 android-latest-release
而非 aosp-main
建構及貢獻 AOSP。詳情請參閱「Android 開放原始碼計畫變更」。
執行多裝置 NFC 測試 (Android 15)
透過集合功能整理內容
你可以依據偏好儲存及分類內容。
本文件說明如何執行多裝置 NFC 測試。
符合必要條件
執行多裝置 NFC 測試前,請先執行下列操作:
- 準備搭載 Android 15 的裝置。
- 遵守 CTS-V 規定。
- 按照 CTS-V 設定。
準備測試用的 DUT 和 PN532 NFC 讀取器
完成前述步驟後,請按照下列步驟準備測試的 DUT 和 PN532 NFC 讀取器:
- 透過 USB 將 DUT 連接至主機。
- 授予主機透過 ADB 存取 DUT 的權限。
在測試裝置上安裝 CTS Verifier 應用程式 (CtsVerifier.apk
):
extract root/out/host/linux-x86/cts-verifier/android-cts-verifier.zip
cd android-cts-verifier
adb install -r -g CtsVerifier.apk
安裝 NFC 測試所需的 APK:
cd MultiDevice
adb install -r -g NfcEmulatorTestApp.apk
為 DUT 設定 NFC
請按照下列步驟為 DUT 設定 NFC:
- 在 DUT 上前往「設定」選單。
- 找出「NFC」或「已連結的裝置」部分。
- 確認 NFC 切換鈕已開啟。
將 NFC 晶片放在手機的 NFC 讀取器上:
- 取得 PN532 NFC 晶片。建議使用All-In-One PN532 (非 BLE) 選項。
- 使用 USB 傳輸線將 PN532 NFC 晶片連接至 Linux 主機。
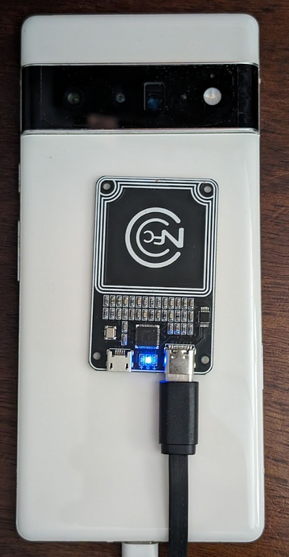
- 將 PN532 NFC 晶片放在手機的 NFC 讀取器上,如以下圖所示:
圖 1. NFC 晶片的位置。
設定測試環境
請按照下列步驟設定測試環境:
執行下列指令來設定測試環境:
cd MultiDevice
source build/envsetup.sh
這個指令會檢查 Python,並設定 PYTHONPATH
環境變數。如果終端機沒有顯示任何錯誤,表示環境已準備好執行多裝置測試。
如果您在執行階段看到錯誤訊息 libtinfo.so.6: no version information
available (required by /bin/sh)
,請執行下列指令,重新命名 libtinfo.so.6
檔案:
mv $ENV_DIRECTORY/lib/libtinfo.so.6 $ENV_DIRECTORY/lib/libtinfo.so.6.bak
在 MultiDevice/config.yml
中設定 DUT 和 PN532 NFC 讀卡機的裝置序號 ID,藉此設定測試平台:
TestBeds:
- Name: CtsNfcHceMultiDeviceTestCases-py-ctsv
Controllers:
AndroidDevice:
- serial: "<device-id>"
TestParams:
pn532_serial_path: "<pn532-serial-path>"
執行 NFC 測試
如何執行 NFC 測試:
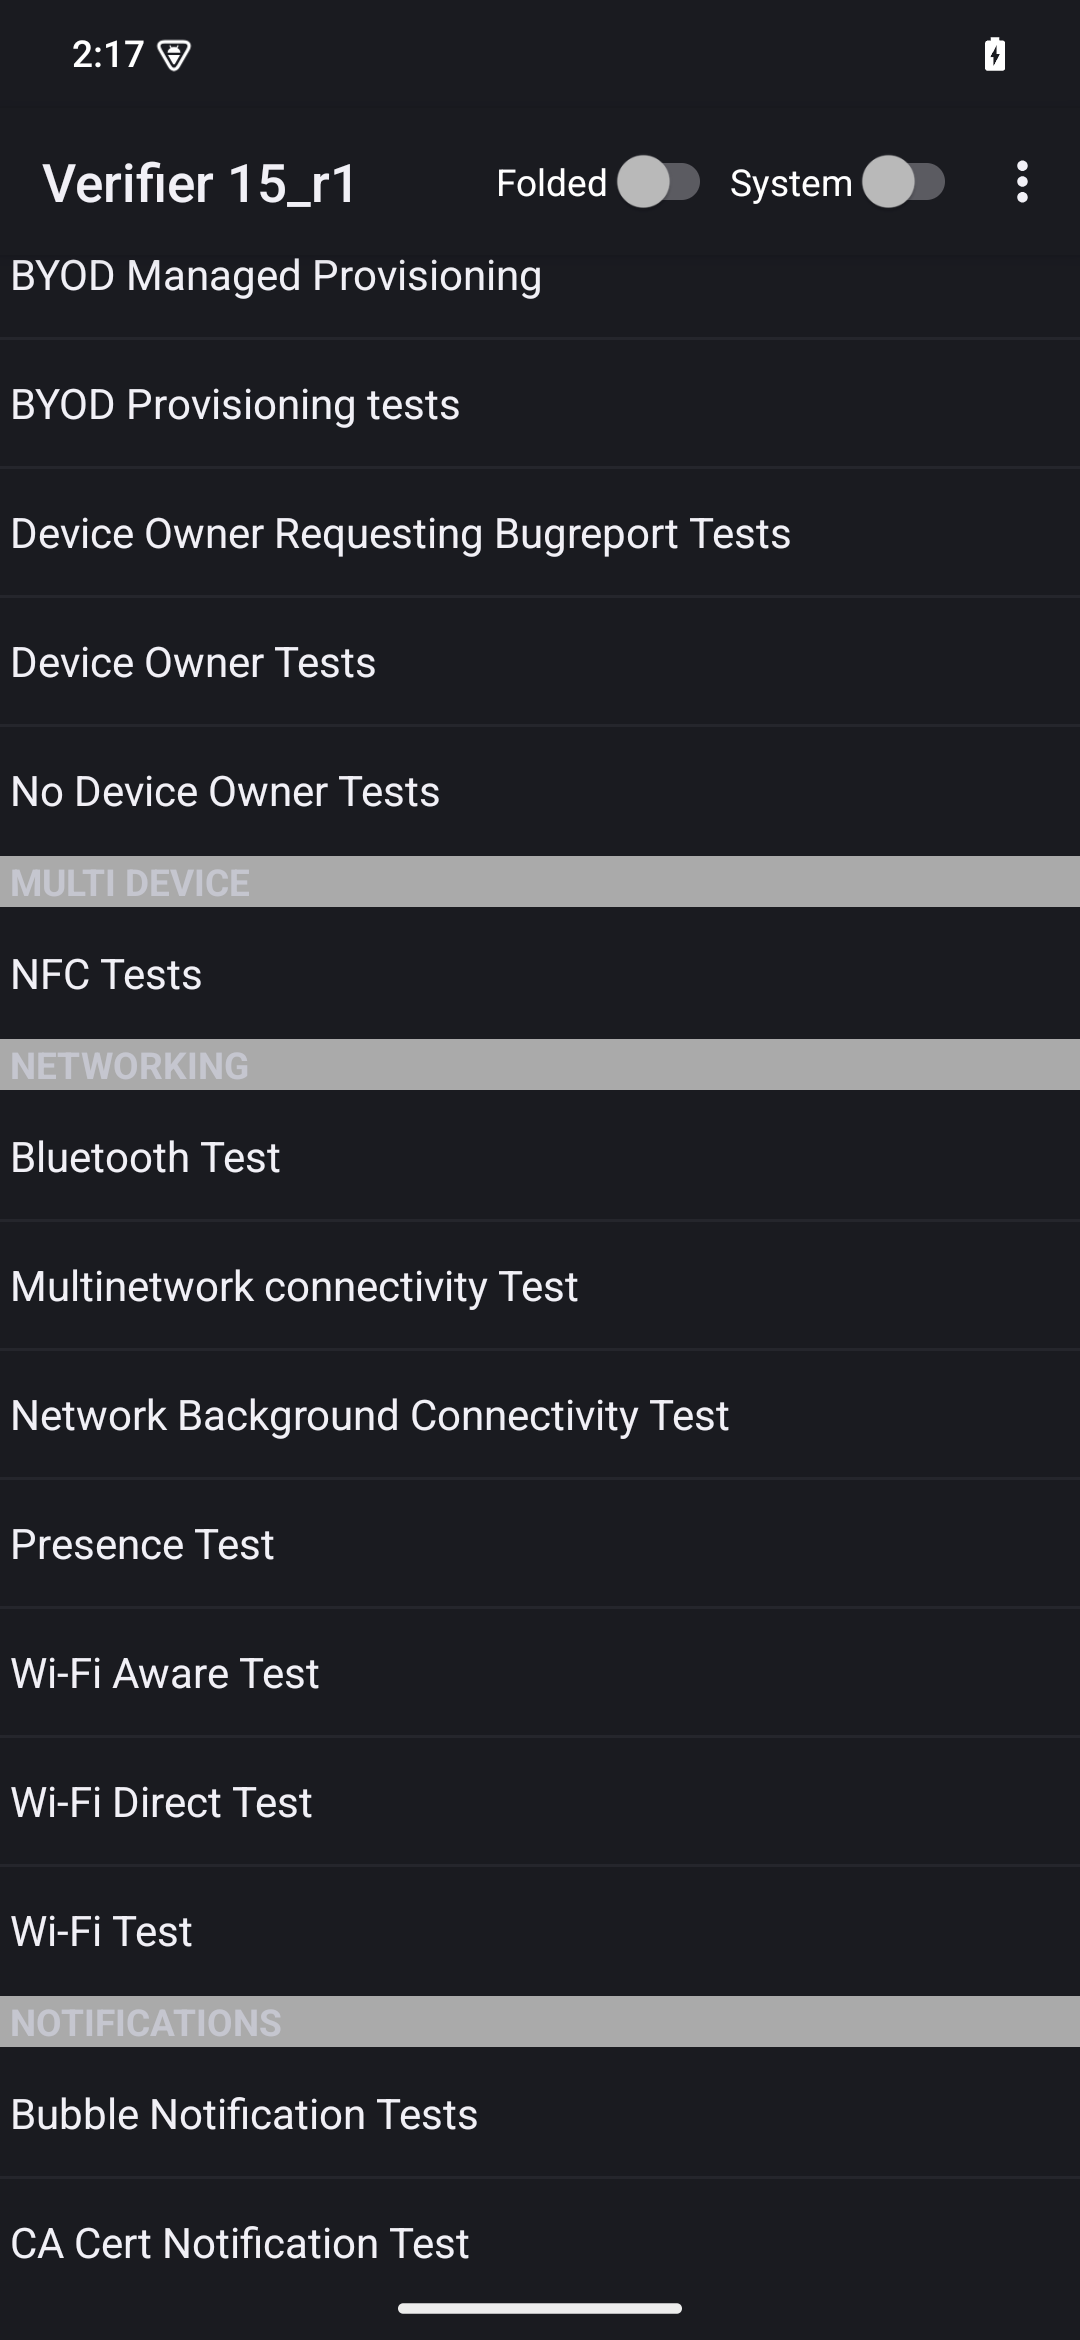
開啟 CTS-V 應用程式,然後輕觸「NFC 測試」:
圖 2. CTS-V 應用程式。
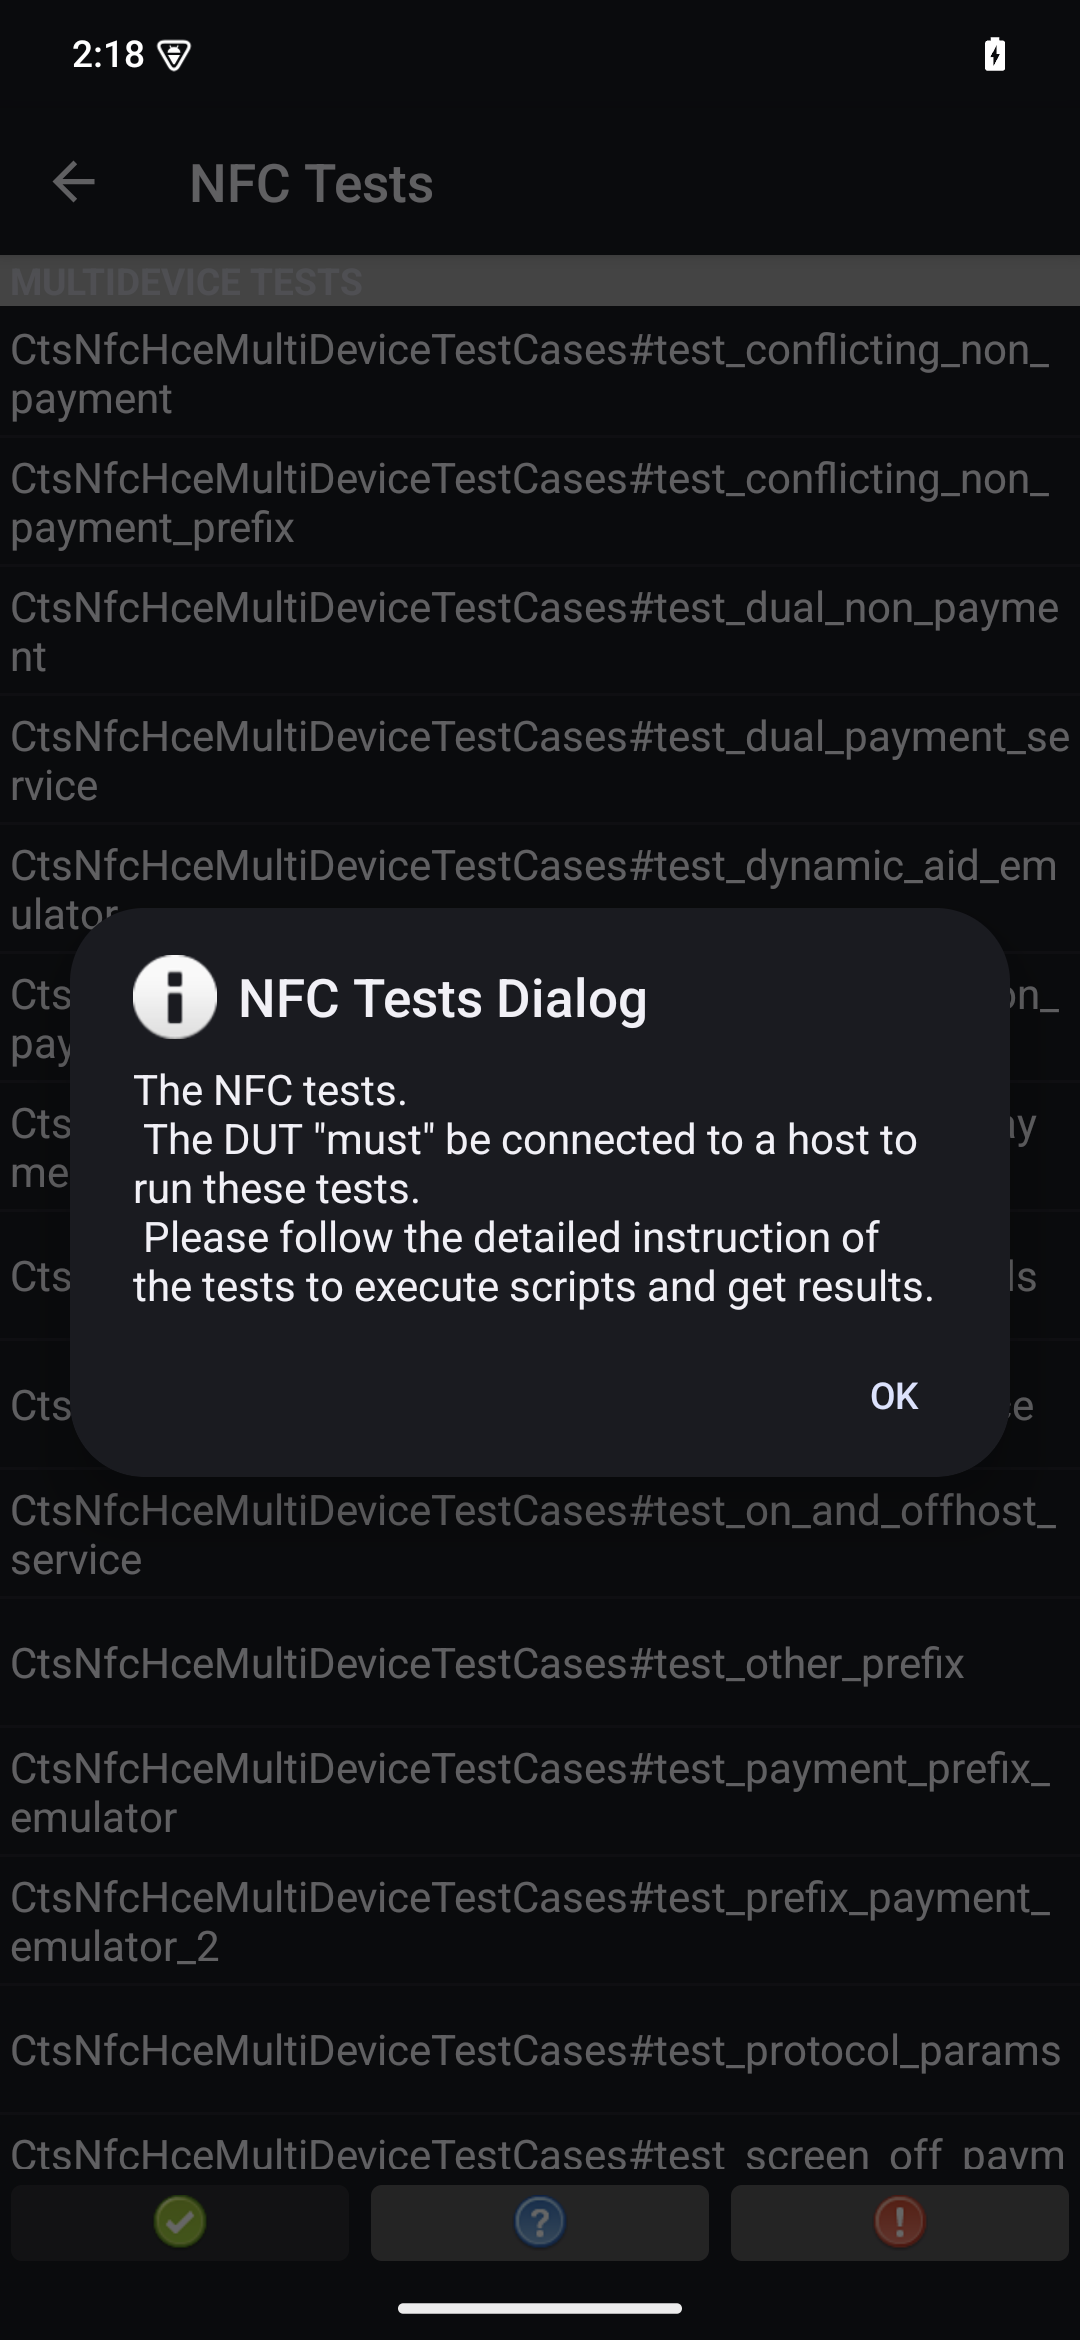
畫面上會顯示資訊視窗,內含測試案例清單:
圖 3. CTS-V 應用程式測試案例。
在主機上執行測試:
MultiDevice$ python3 tools/run_all_tests.py
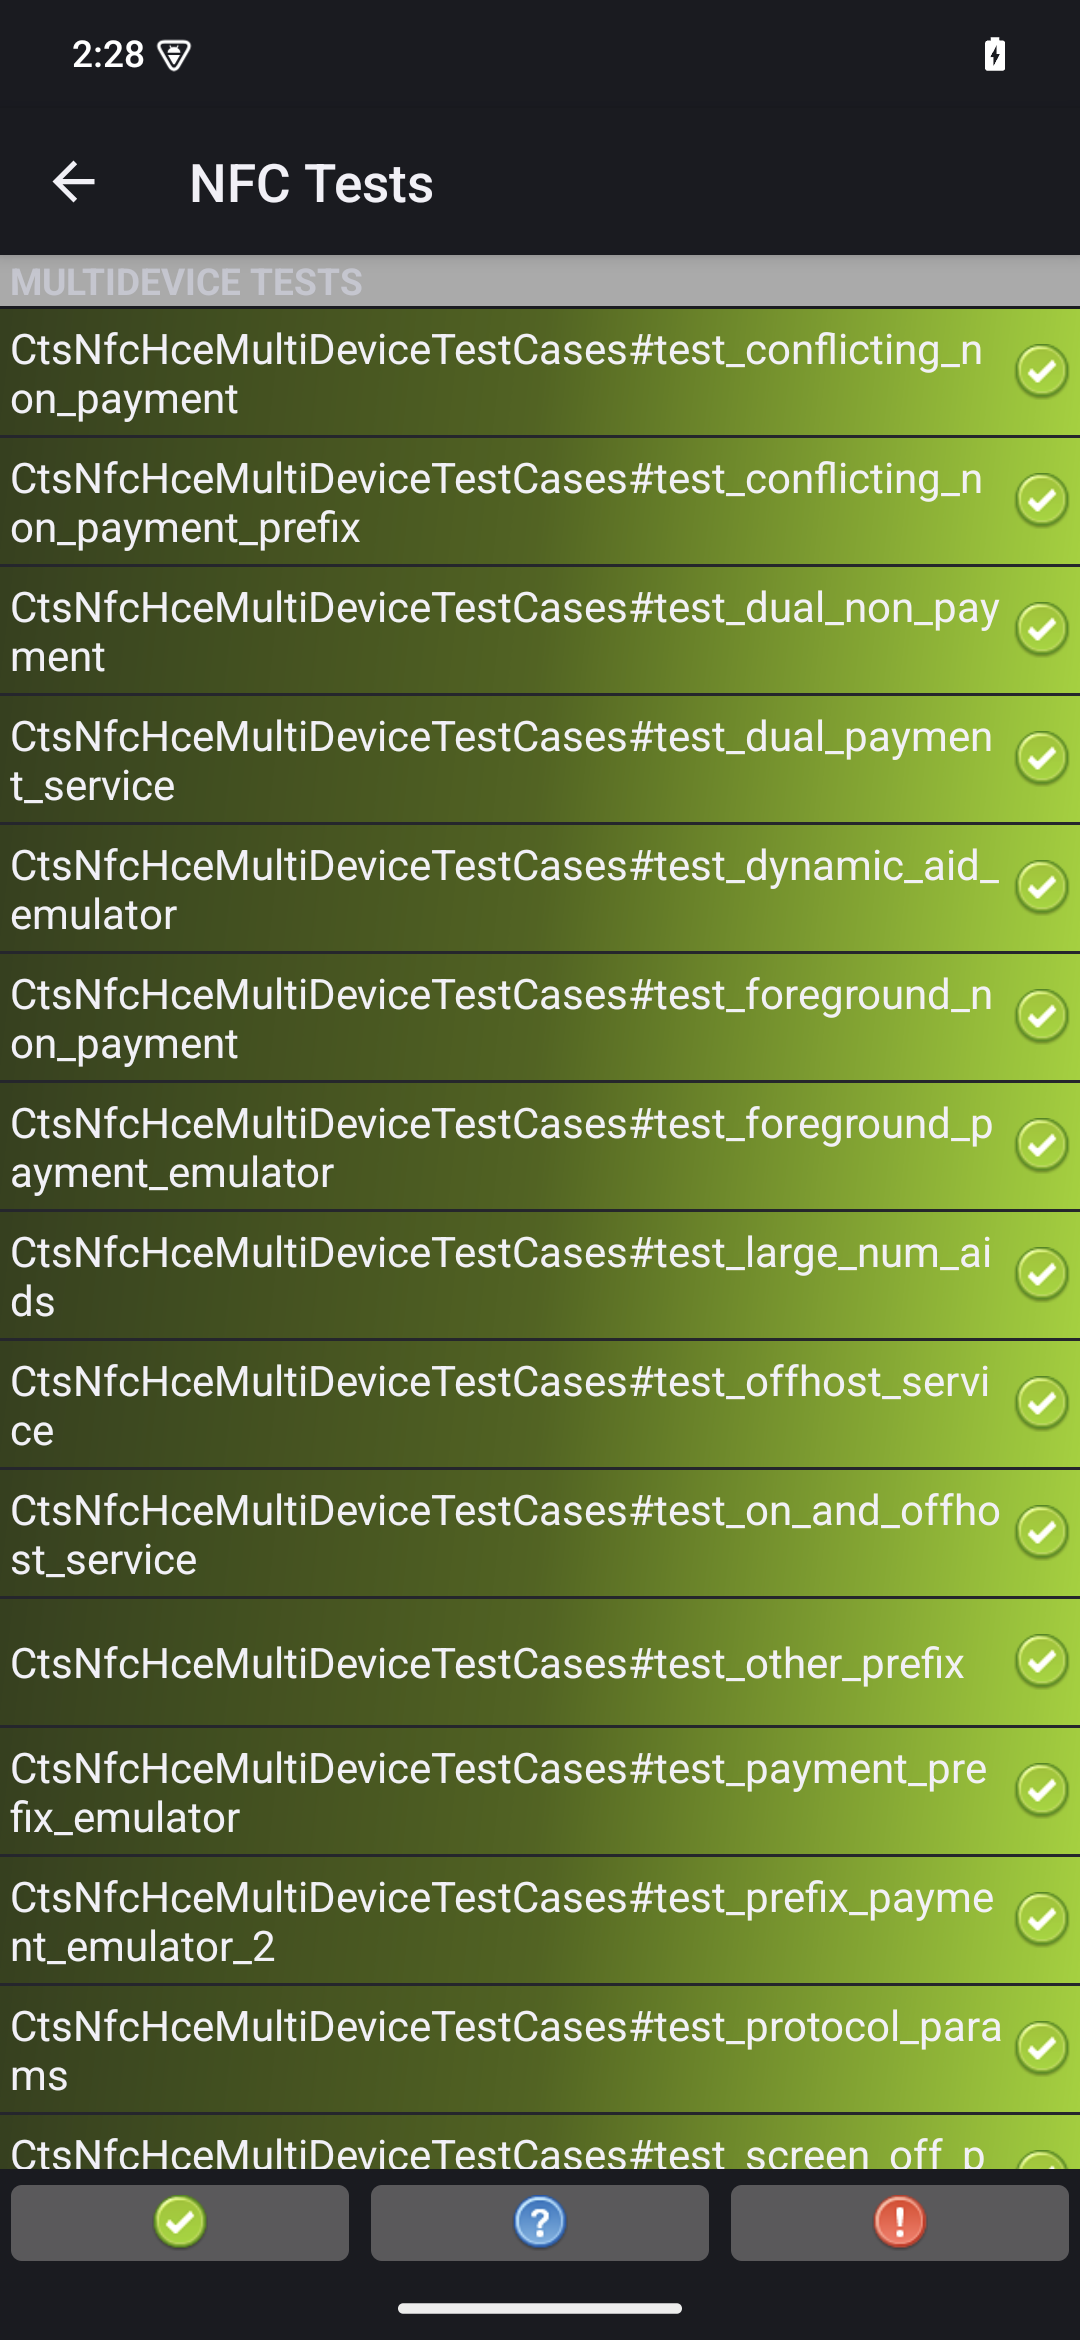
測試完成後,CTS-V 應用程式會更新測試結果。通過測試的項目會顯示綠色:
圖 4. CTS-V 測試結果。
如果您看到任何以紅色標示的失敗項目,請使用下列指令重新執行失敗的測試:
python3 tools/run_all_tests.py --test_cases "`TestCaseA`" "`TestCaseB`" --test_files "`TestFileA`"
地點:
TestCaseA
和 TestCaseB
是 CTS-V 中顯示的測試案例名稱。
TestFileA
是包含測試案例的測試檔案。
例如:
python3 tools/run_all_tests.py --test_cases "test_conflicting_non_payment" "test_conflicting_non_payment_prefix" --test_files "CtsNfcHceMultiDeviceTestCases-py-ctsv"
這個頁面中的內容和程式碼範例均受《內容授權》中的授權所規範。Java 與 OpenJDK 是 Oracle 和/或其關係企業的商標或註冊商標。
上次更新時間:2025-07-27 (世界標準時間)。
[[["容易理解","easyToUnderstand","thumb-up"],["確實解決了我的問題","solvedMyProblem","thumb-up"],["其他","otherUp","thumb-up"]],[["缺少我需要的資訊","missingTheInformationINeed","thumb-down"],["過於複雜/步驟過多","tooComplicatedTooManySteps","thumb-down"],["過時","outOfDate","thumb-down"],["翻譯問題","translationIssue","thumb-down"],["示例/程式碼問題","samplesCodeIssue","thumb-down"],["其他","otherDown","thumb-down"]],["上次更新時間:2025-07-27 (世界標準時間)。"],[],[],null,["# Run multi-device NFC tests (Android 15)\n\nThis document explains how to run multi-device NFC tests.\n\nMeet prerequisites\n------------------\n\nBefore you run multi-device NFC tests, do the following:\n\n1. Prepare a device with your Android 15 implementation.\n2. Follow CTS-V [requirements](/docs/compatibility/cts/verifier#requirements).\n3. Follow CTS-V [setup](/docs/compatibility/cts/verifier#setup).\n\nPrepare a DUT and a PN532 NFC reader for the test\n-------------------------------------------------\n\nAfter you finish the previous steps, follow these steps to run\nprepare a DUT and a PN532 NFC reader for the test:\n\n1. Connect the DUT to a host machine over USB.\n2. Grant permissions for the host to access the DUT over ADB.\n3. Install the CTS Verifier app (`CtsVerifier.apk`) on the DUT:\n\n extract root/out/host/linux-x86/cts-verifier/android-cts-verifier.zip\n\n cd android-cts-verifier\n\n adb install -r -g CtsVerifier.apk\n\n4. Install the NFC test required APKs:\n\n cd MultiDevice\n\n adb install -r -g NfcEmulatorTestApp.apk\n\nSet up NFC for the DUT\n----------------------\n\nFollow these steps to run set up NFC for the DUT:\n\n1. On the DUT, go to the **Settings** menu.\n2. Look for the **NFC** or **Connected Devices** section.\n3. Ensure the NFC toggle switch is turned on.\n4. Position an NFC chip on the phone's NFC reader:\n\n 1. Acquire a PN532 NFC chip. We recommend the [All-In-One PN532](https://shop.mtoolstec.com/product/mtools-all-in-one-pn532), non-BLE option.\n 2. Attach the PN532 NFC chip to the Linux host using a USB cable.\n 3. Place the PN532 NFC chip over the phone's NFC reader as shown in the following image:\n\n **Figure 1.** NFC chip placement.\n\nSet up the test environment\n---------------------------\n\nFollow these steps to run set up the test environment:\n\n1. Run these commands to set up the test environment:\n\n cd MultiDevice\n\n source build/envsetup.sh\n\n This command checks the Python and sets up the `PYTHONPATH` environment\n variable. If no errors are printed to the terminal, the environment is ready\n to run the multi-device tests.\n\n If you see the error message `libtinfo.so.6: no version information\n available (required by /bin/sh)` at runtime, run the following command\n to rename the `libtinfo.so.6` file: \n\n mv $ENV_DIRECTORY/lib/libtinfo.so.6 $ENV_DIRECTORY/lib/libtinfo.so.6.bak\n\n2. Set up the test bed by setting the device serial IDs of the DUT and PN532 NFC\n reader in `MultiDevice/config.yml`:\n\n TestBeds:\n - Name: CtsNfcHceMultiDeviceTestCases-py-ctsv\n Controllers:\n AndroidDevice:\n - serial: \"\u003cdevice-id\u003e\"\n TestParams:\n pn532_serial_path: \"\u003cpn532-serial-path\u003e\"\n\nRun the NFC tests\n-----------------\n\nTo run the NFC tests:\n\n1. Open the CTS-V app and tap **NFC Tests**:\n\n **Figure 2.** The CTS-V app.\n\n The info window with list of test cases appears:\n\n **Figure 3.** CTS-V app test cases.\n2. Run the tests on your host:\n\n MultiDevice$ python3 tools/run_all_tests.py\n\n When the tests are completed, the test results are updated in the CTS-V\n app. Successful tests are green:\n\n **Figure 4.** CTS-V test results.\n3. If you see any failures marked in red, use the following command to rerun\n the failed tests:\n\n python3 tools/run_all_tests.py --test_cases \"`\u003cvar translate=\"no\"\u003eTestCaseA\u003c/var\u003e`\" \"`\u003cvar translate=\"no\"\u003eTestCaseB\u003c/var\u003e`\" --test_files \"`\u003cvar translate=\"no\"\u003eTestFileA\u003c/var\u003e`\"\n\n Where:\n - \u003cvar translate=\"no\"\u003eTestCaseA\u003c/var\u003e and \u003cvar translate=\"no\"\u003eTestCaseB\u003c/var\u003e are the names of the test cases as displayed in CTS-V.\n - \u003cvar translate=\"no\"\u003eTestFileA\u003c/var\u003e is the test file containing the test cases.\n\n For example: \n\n python3 tools/run_all_tests.py --test_cases \"test_conflicting_non_payment\" \"test_conflicting_non_payment_prefix\" --test_files \"CtsNfcHceMultiDeviceTestCases-py-ctsv\""]]