Starting March 27, 2025, we recommend using android-latest-release
instead of aosp-main
to build and contribute to AOSP. For more information, see Changes to AOSP.
Near ultrasound tests
Stay organized with collections
Save and categorize content based on your preferences.
This page contains steps for conducting near ultrasound (formerly known
as hifi ultrasound) microphone and speaker tests. See the Audio section for general audio
implementation instructions.
Near ultrasound microphone tests
Prerequisites: Prepare two devices, one as the test device, one as the reference
device. The reference can be any device that is known to produce near ultrasound sound.
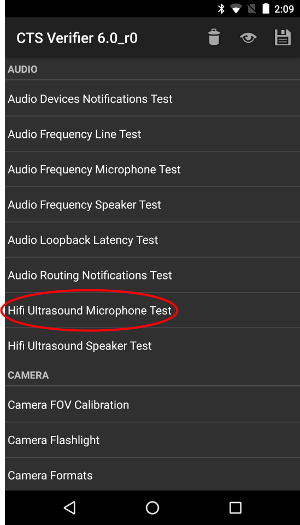
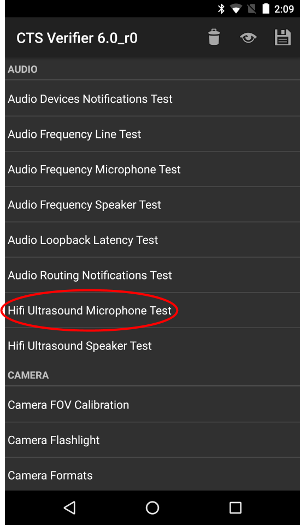
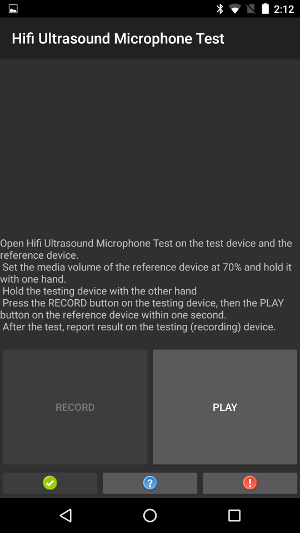
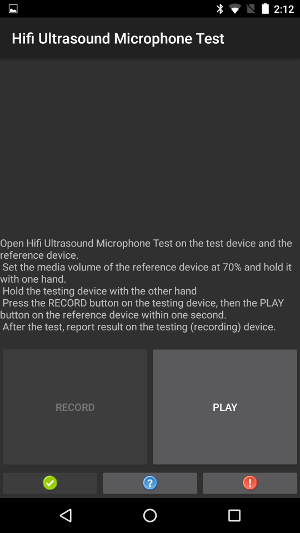
Step 1: Open Near Ultrasound Microphone Tests on both devices |
|
 Test device |
 Reference device |
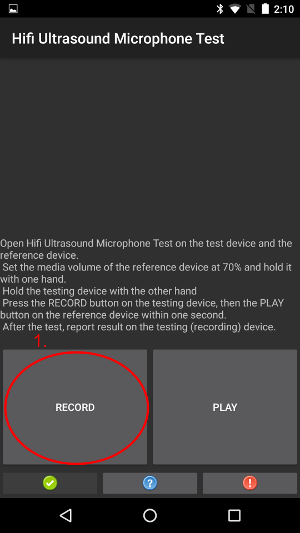
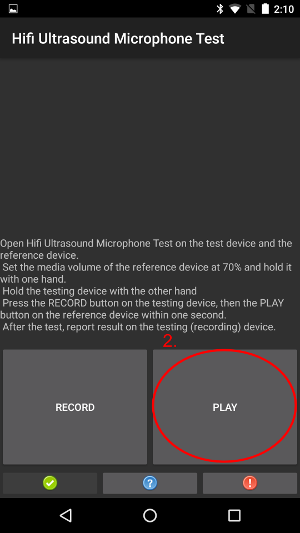
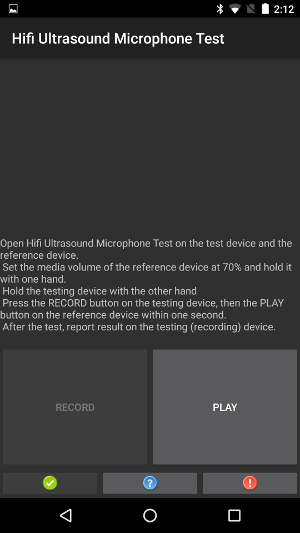
Step 2: After opening the test, press RECORD on the test device, then quickly
press PLAY on the reference device. |
|
 Test device |
 Reference device |
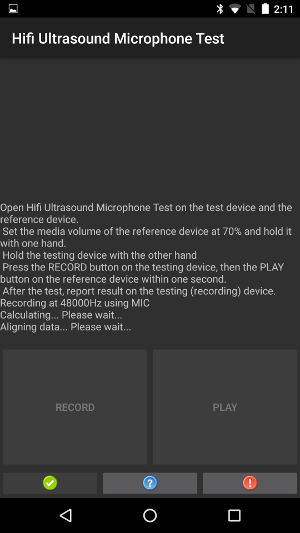
Step 3: Wait for the test to finish. While waiting, the devices should look
like the following screenshots. Do nothing until you see the screens shown in
Step 4. |
|
 Test device |
 Reference device |
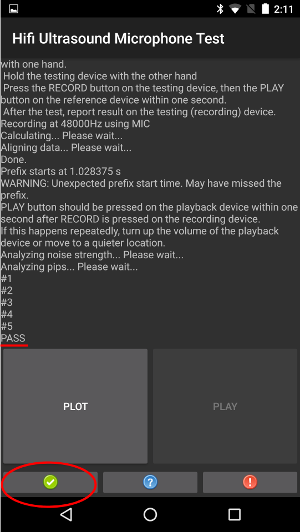
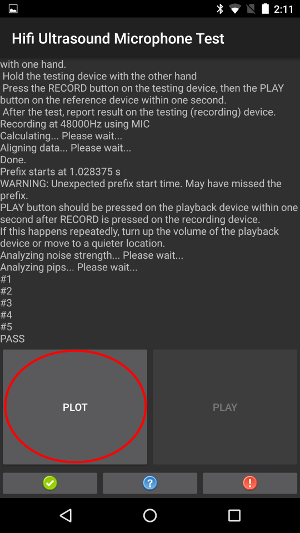
Step 4a: On the test device, if text PASS is shown, report passed by pressing
the green button. |
|
 Test device |
 Reference device |
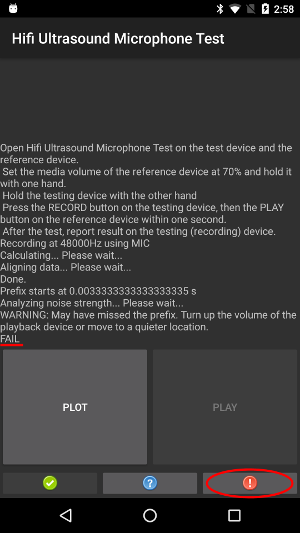
Step 4b: On the test device, if text FAIL is shown, report failed by pressing
the red button. Afterward you can repeat from step 1 to repeat the test if desired. |
|
 Test device |
 Reference device |
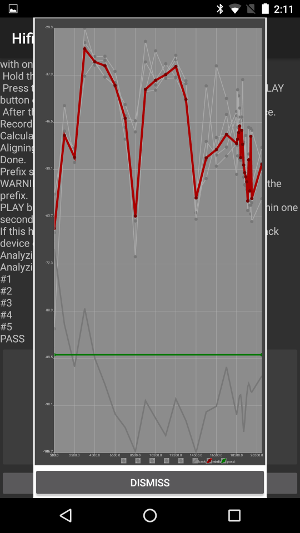
Extra step: This step isn't required. You can plot the calculated
response using the PLOT button on the test device. |
|
  Test
device |
Reference device N/A |
Near ultrasound speaker tests
Prerequisites: Prepare two devices, one as the test device, one as the reference
device. The reference can be any device that is known to record near ultrasound sound.
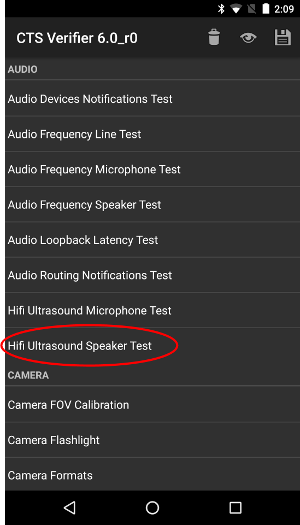
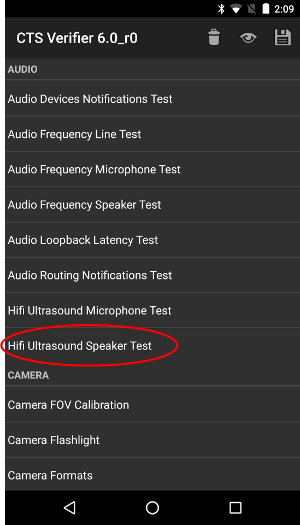
Step 1: Open Near Ultrasound Speaker Tests on both devices |
|
 Test device |
 Reference device |
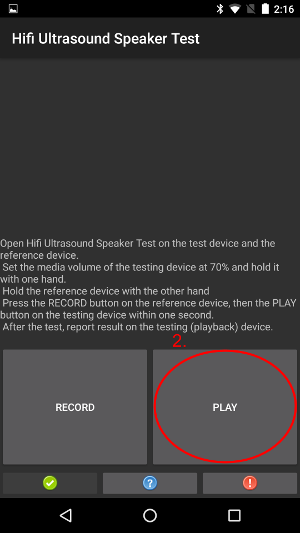
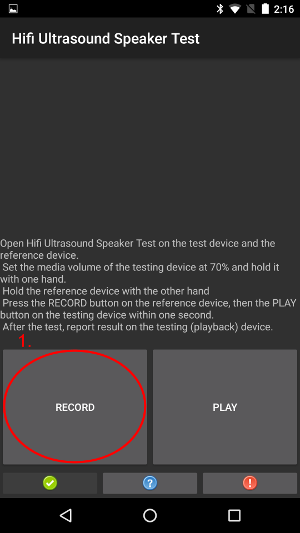
Step 2: After opening the test, press RECORD on the reference device, then
quickly press PLAY on the test device. |
|
 Test device |
 Reference device |
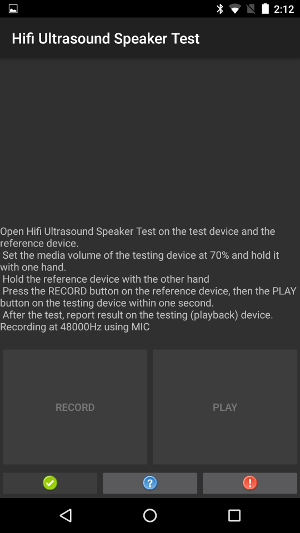
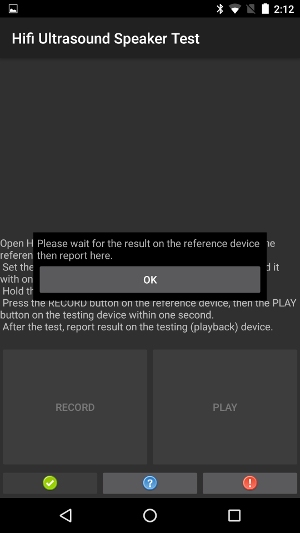
Step 3: Wait for the test to finish. While waiting, the devices should look
like the following screenshots. Do nothing until you see the screens shown in
Step 4. |
|
 Test device |
 Reference device |
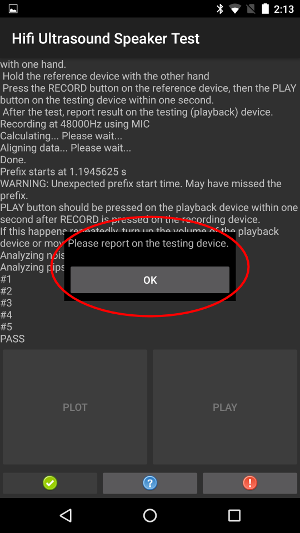
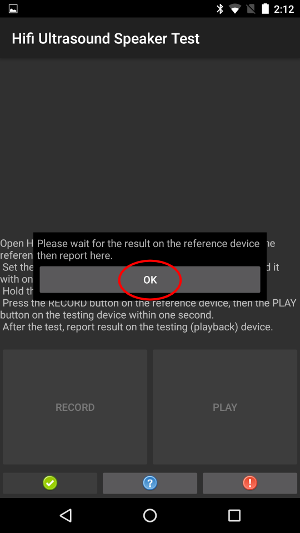
Step 4: When you see the popup on the reference device, press OK on the test
device. |
|
 Test device |
 Reference device |
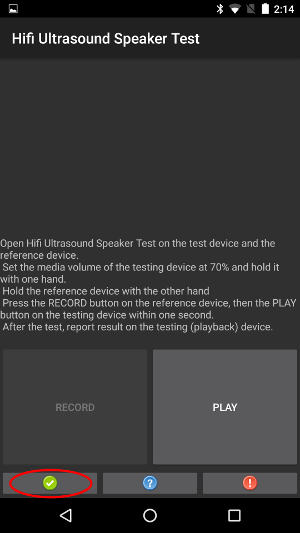
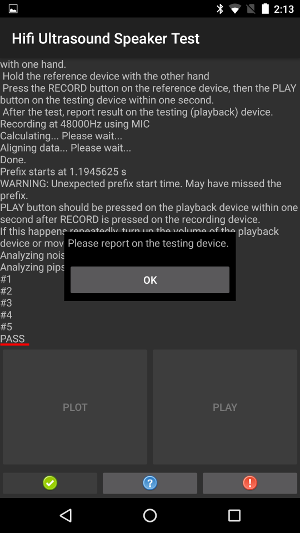
Step 5a: On the reference device, if text PASS is shown, report passed by
pressing the green button on the test device. |
|
 Test device |
 Reference device |
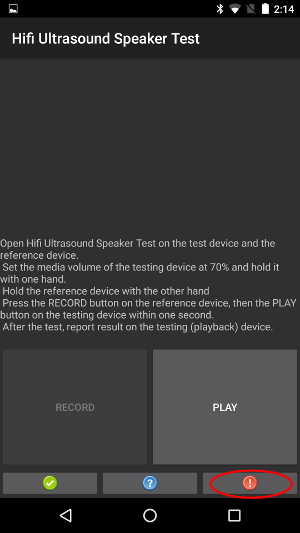
Step 5b: On the reference device, if text FAIL is shown, report failed by
pressing the red button on the test device. Afterward you can repeat from step 1 to repeat the
test if desired. |
|
 Test device |
 Reference device |
Extra step: This step isn't required. You can plot the calculated response using the PLOT
button on the reference
device. See the instructions in
Near Ultrasound
Microphone Test. |
|
Content and code samples on this page are subject to the licenses described in the Content License. Java and OpenJDK are trademarks or registered trademarks of Oracle and/or its affiliates.
Last updated 2025-03-11 UTC.
[[["Easy to understand","easyToUnderstand","thumb-up"],["Solved my problem","solvedMyProblem","thumb-up"],["Other","otherUp","thumb-up"]],[["Missing the information I need","missingTheInformationINeed","thumb-down"],["Too complicated / too many steps","tooComplicatedTooManySteps","thumb-down"],["Out of date","outOfDate","thumb-down"],["Samples / code issue","samplesCodeIssue","thumb-down"],["Other","otherDown","thumb-down"]],["Last updated 2025-03-11 UTC."],[],[],null,["# Near ultrasound tests\n\nThis page contains steps for conducting near ultrasound (formerly known\nas hifi ultrasound) microphone and speaker tests. See the [Audio](/docs/core/audio) section for general audio\nimplementation instructions.\n\nNear ultrasound microphone tests\n--------------------------------\n\nPrerequisites: Prepare two devices, one as the test device, one as the reference\ndevice. The reference can be any device that is known to produce near ultrasound sound.\n\n|-------------------------------------------------------------------------------------------------------------------------------------------------------------------|----------------------|\n| Step 1: Open Near Ultrasound Microphone Tests on both devices | |\n| Test device | Reference device |\n| Step 2: After opening the test, press RECORD on the test device, then quickly press PLAY on the reference device. | |\n| Test device | Reference device |\n| Step 3: Wait for the test to finish. While waiting, the devices should look like the following screenshots. Do nothing until you see the screens shown in Step 4. | |\n| Test device | Reference device |\n| Step 4a: On the test device, if text PASS is shown, report passed by pressing the green button. | |\n| Test device | Reference device |\n| Step 4b: On the test device, if text FAIL is shown, report failed by pressing the red button. Afterward you can repeat from step 1 to repeat the test if desired. | |\n| Test device | Reference device |\n| Extra step: This step isn't required. You can plot the calculated response using the PLOT button on the test device. | |\n| Test device | Reference device N/A |\n\nNear ultrasound speaker tests\n-----------------------------\n\nPrerequisites: Prepare two devices, one as the test device, one as the reference\ndevice. The reference can be any device that is known to record near ultrasound sound.\n\n|--------------------------------------------------------------------------------------------------------------------------------------------------------------------------------------------------------------------|------------------|\n| Step 1: Open Near Ultrasound Speaker Tests on both devices | |\n| Test device | Reference device |\n| Step 2: After opening the test, press RECORD on the reference device, then quickly press PLAY on the test device. | |\n| Test device | Reference device |\n| Step 3: Wait for the test to finish. While waiting, the devices should look like the following screenshots. Do nothing until you see the screens shown in Step 4. | |\n| Test device | Reference device |\n| Step 4: When you see the popup on the reference device, press OK on the test device. | |\n| Test device | Reference device |\n| Step 5a: On the reference device, if text PASS is shown, report passed by pressing the green button on the test device. | |\n| Test device | Reference device |\n| Step 5b: On the reference device, if text FAIL is shown, report failed by pressing the red button on the test device. Afterward you can repeat from step 1 to repeat the test if desired. | |\n| Test device | Reference device |\n| Extra step: This step isn't required. You can plot the calculated response using the PLOT button on the reference device. See the instructions in [Near Ultrasound Microphone Test](#ultrasound_microphone_tests). | |"]]