ตั้งแต่วันที่ 27 มีนาคม 2025 เป็นต้นไป เราขอแนะนำให้ใช้ android-latest-release
แทน aosp-main
เพื่อสร้างและมีส่วนร่วมใน AOSP โปรดดูข้อมูลเพิ่มเติมที่หัวข้อการเปลี่ยนแปลงใน AOSP
เรียกใช้การทดสอบ NFC หลายอุปกรณ์ (Android 15)
จัดทุกอย่างให้เป็นระเบียบอยู่เสมอด้วยคอลเล็กชัน
บันทึกและจัดหมวดหมู่เนื้อหาตามค่ากำหนดของคุณ
เอกสารนี้จะอธิบายวิธีทำการทดสอบ NFC หลายอุปกรณ์
มีคุณสมบัติตรงตามข้อกําหนดเบื้องต้น
ก่อนทำการทดสอบ NFC หลายอุปกรณ์ ให้ทำดังนี้
- เตรียมอุปกรณ์ที่ใช้ Android 15
- ปฏิบัติตามข้อกำหนด CTS-V
- ทำตามการตั้งค่า CTS-V
เตรียม DUT และเครื่องอ่าน NFC PN532 สำหรับการทดสอบ
หลังจากทำตามขั้นตอนก่อนหน้าเสร็จแล้ว ให้ทำตามขั้นตอนต่อไปนี้เพื่อเตรียม DUT และเครื่องอ่าน NFC PN532 สำหรับการทดสอบ
- เชื่อมต่อ DUT กับเครื่องโฮสต์ผ่าน USB
- ให้สิทธิ์แก่โฮสต์ในการเข้าถึง DUT ผ่าน ADB
ติดตั้งแอปโปรแกรมตรวจสอบ CTS (CtsVerifier.apk
) ใน DUT โดยทำดังนี้
extract root/out/host/linux-x86/cts-verifier/android-cts-verifier.zip
cd android-cts-verifier
adb install -r -g CtsVerifier.apk
ติดตั้ง APK ที่จําเป็นสําหรับการทดสอบ NFC
cd MultiDevice
adb install -r -g NfcEmulatorTestApp.apk
ตั้งค่า NFC สำหรับ DUT
ทำตามขั้นตอนต่อไปนี้เพื่อตั้งค่า NFC สำหรับ DUT
- ใน DUT ให้ไปที่เมนูการตั้งค่า
- มองหาส่วน NFC หรืออุปกรณ์ที่เชื่อมต่อ
- ตรวจสอบว่าสวิตช์เปิด/ปิด NFC เปิดอยู่
วางชิป NFC บนตัวอ่าน NFC ของโทรศัพท์โดยทำดังนี้
- ซื้อชิป NFC PN532 เราขอแนะนำให้ใช้ตัวเลือก All-In-One PN532 แบบไม่ใช่ BLE
- เชื่อมต่อชิป NFC PN532 กับโฮสต์ Linux โดยใช้สาย USB
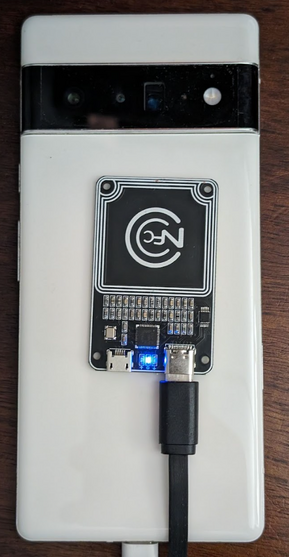
- วางชิป NFC PN532 เหนือเครื่องอ่าน NFC ของโทรศัพท์ดังที่แสดงในรูปภาพต่อไปนี้
รูปที่ 1 ตำแหน่งชิป NFC
ตั้งค่าสภาพแวดล้อมการทดสอบ
ทําตามขั้นตอนต่อไปนี้เพื่อตั้งค่าสภาพแวดล้อมการทดสอบ
เรียกใช้คําสั่งเหล่านี้เพื่อตั้งค่าสภาพแวดล้อมการทดสอบ
cd MultiDevice
source build/envsetup.sh
คำสั่งนี้จะตรวจสอบ Python และตั้งค่าตัวแปรสภาพแวดล้อม PYTHONPATH
หากไม่มีการพิมพ์ข้อผิดพลาดในเทอร์มินัล แสดงว่าสภาพแวดล้อมพร้อมที่จะทำการทดสอบหลายอุปกรณ์
หากเห็นข้อความแสดงข้อผิดพลาด libtinfo.so.6: no version information
available (required by /bin/sh)
ขณะรันไทม์ ให้เรียกใช้คําสั่งต่อไปนี้เพื่อเปลี่ยนชื่อไฟล์ libtinfo.so.6
mv $ENV_DIRECTORY/lib/libtinfo.so.6 $ENV_DIRECTORY/lib/libtinfo.so.6.bak
ตั้งค่าแท่นทดสอบโดยตั้งค่ารหัสซีเรียลของอุปกรณ์ DUT และเครื่องอ่าน NFC PN532 ใน MultiDevice/config.yml
TestBeds:
- Name: CtsNfcHceMultiDeviceTestCases-py-ctsv
Controllers:
AndroidDevice:
- serial: "<device-id>"
TestParams:
pn532_serial_path: "<pn532-serial-path>"
เรียกใช้การทดสอบ NFC
วิธีทำการทดสอบ NFC
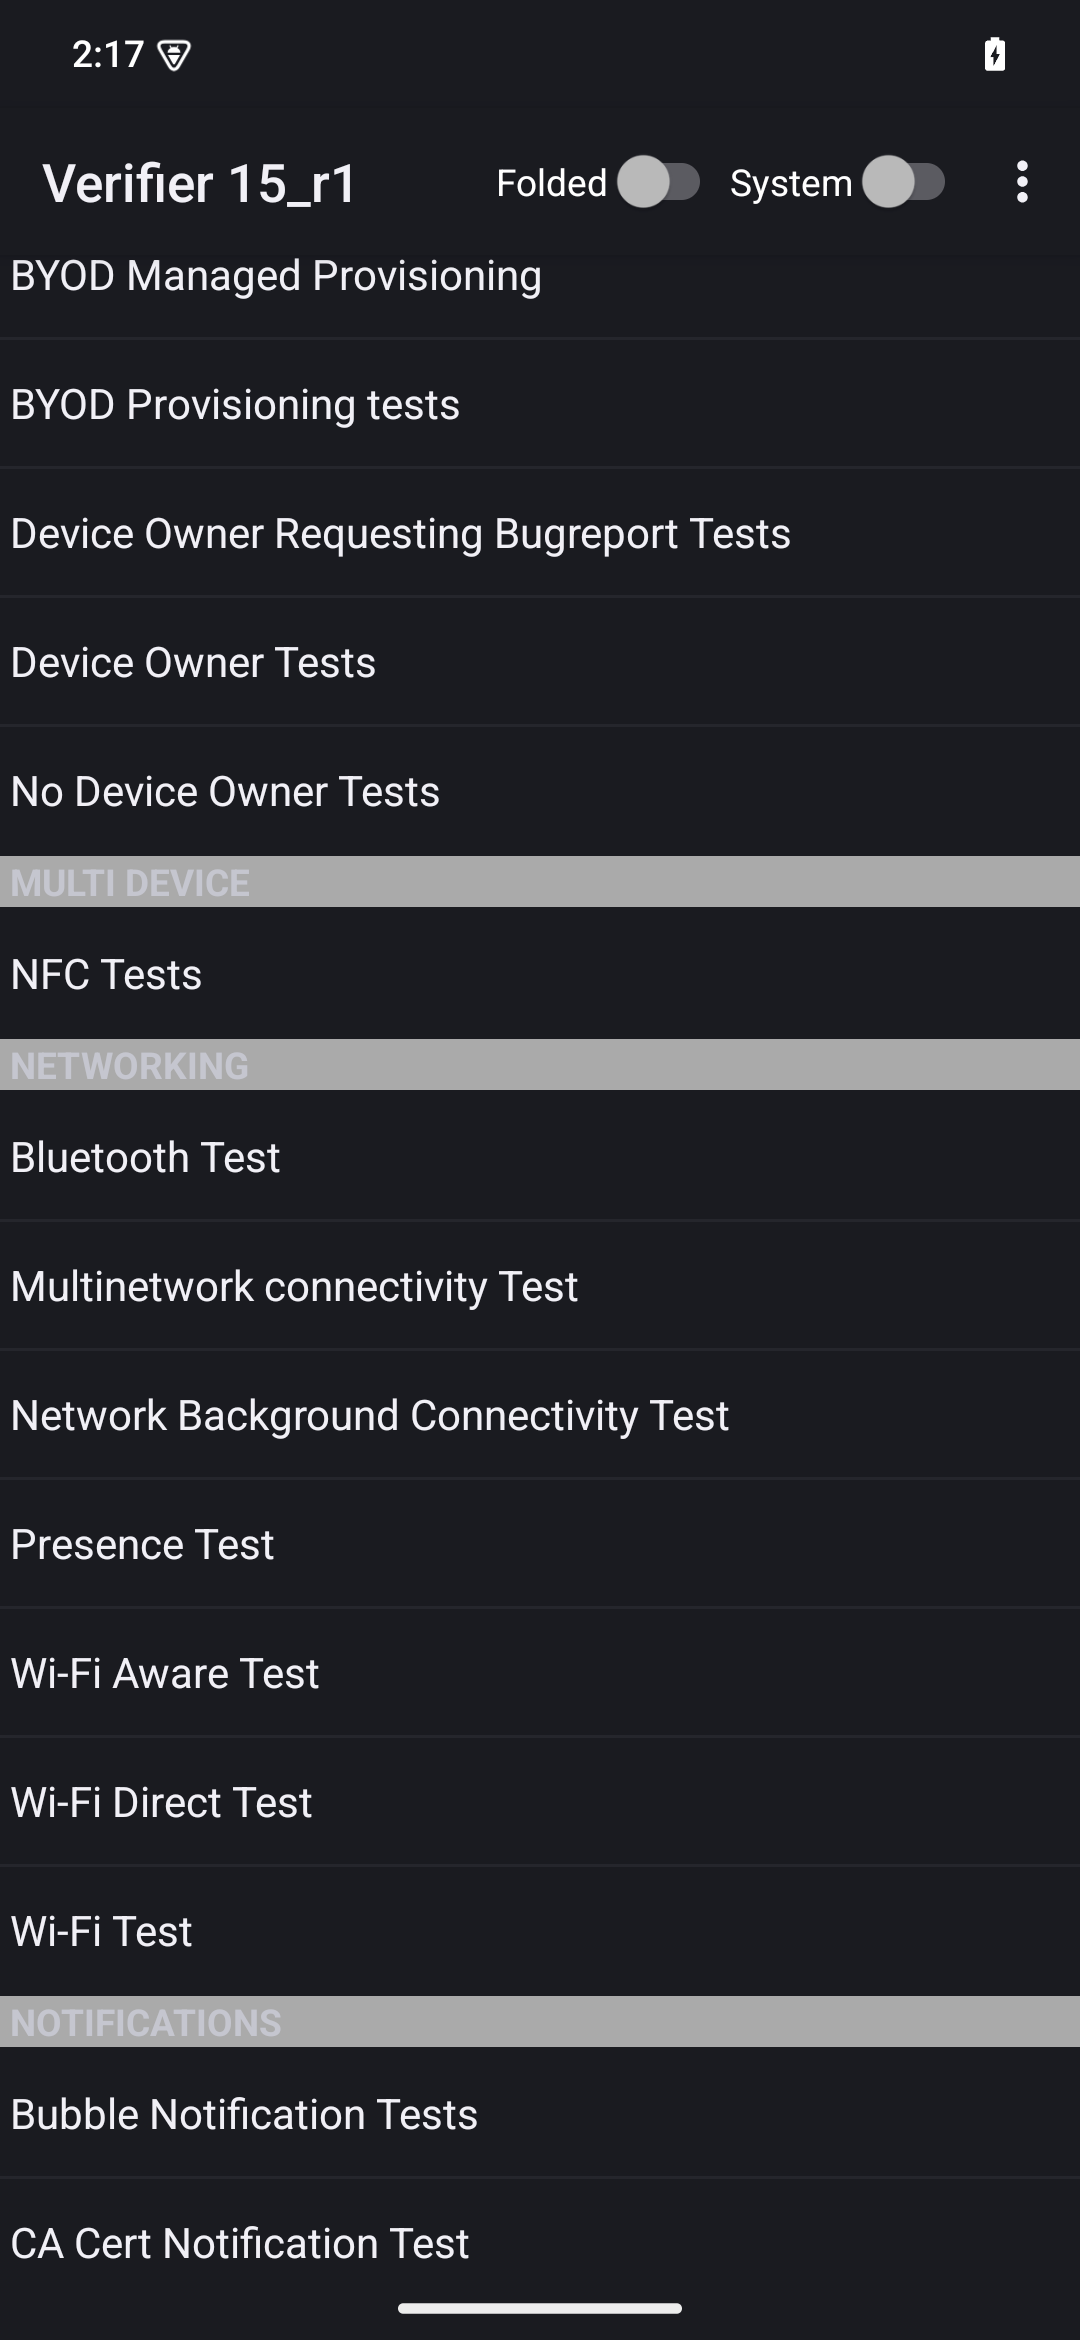
เปิดแอป CTS-V แล้วแตะการทดสอบ NFC
รูปที่ 2 แอป CTS-V
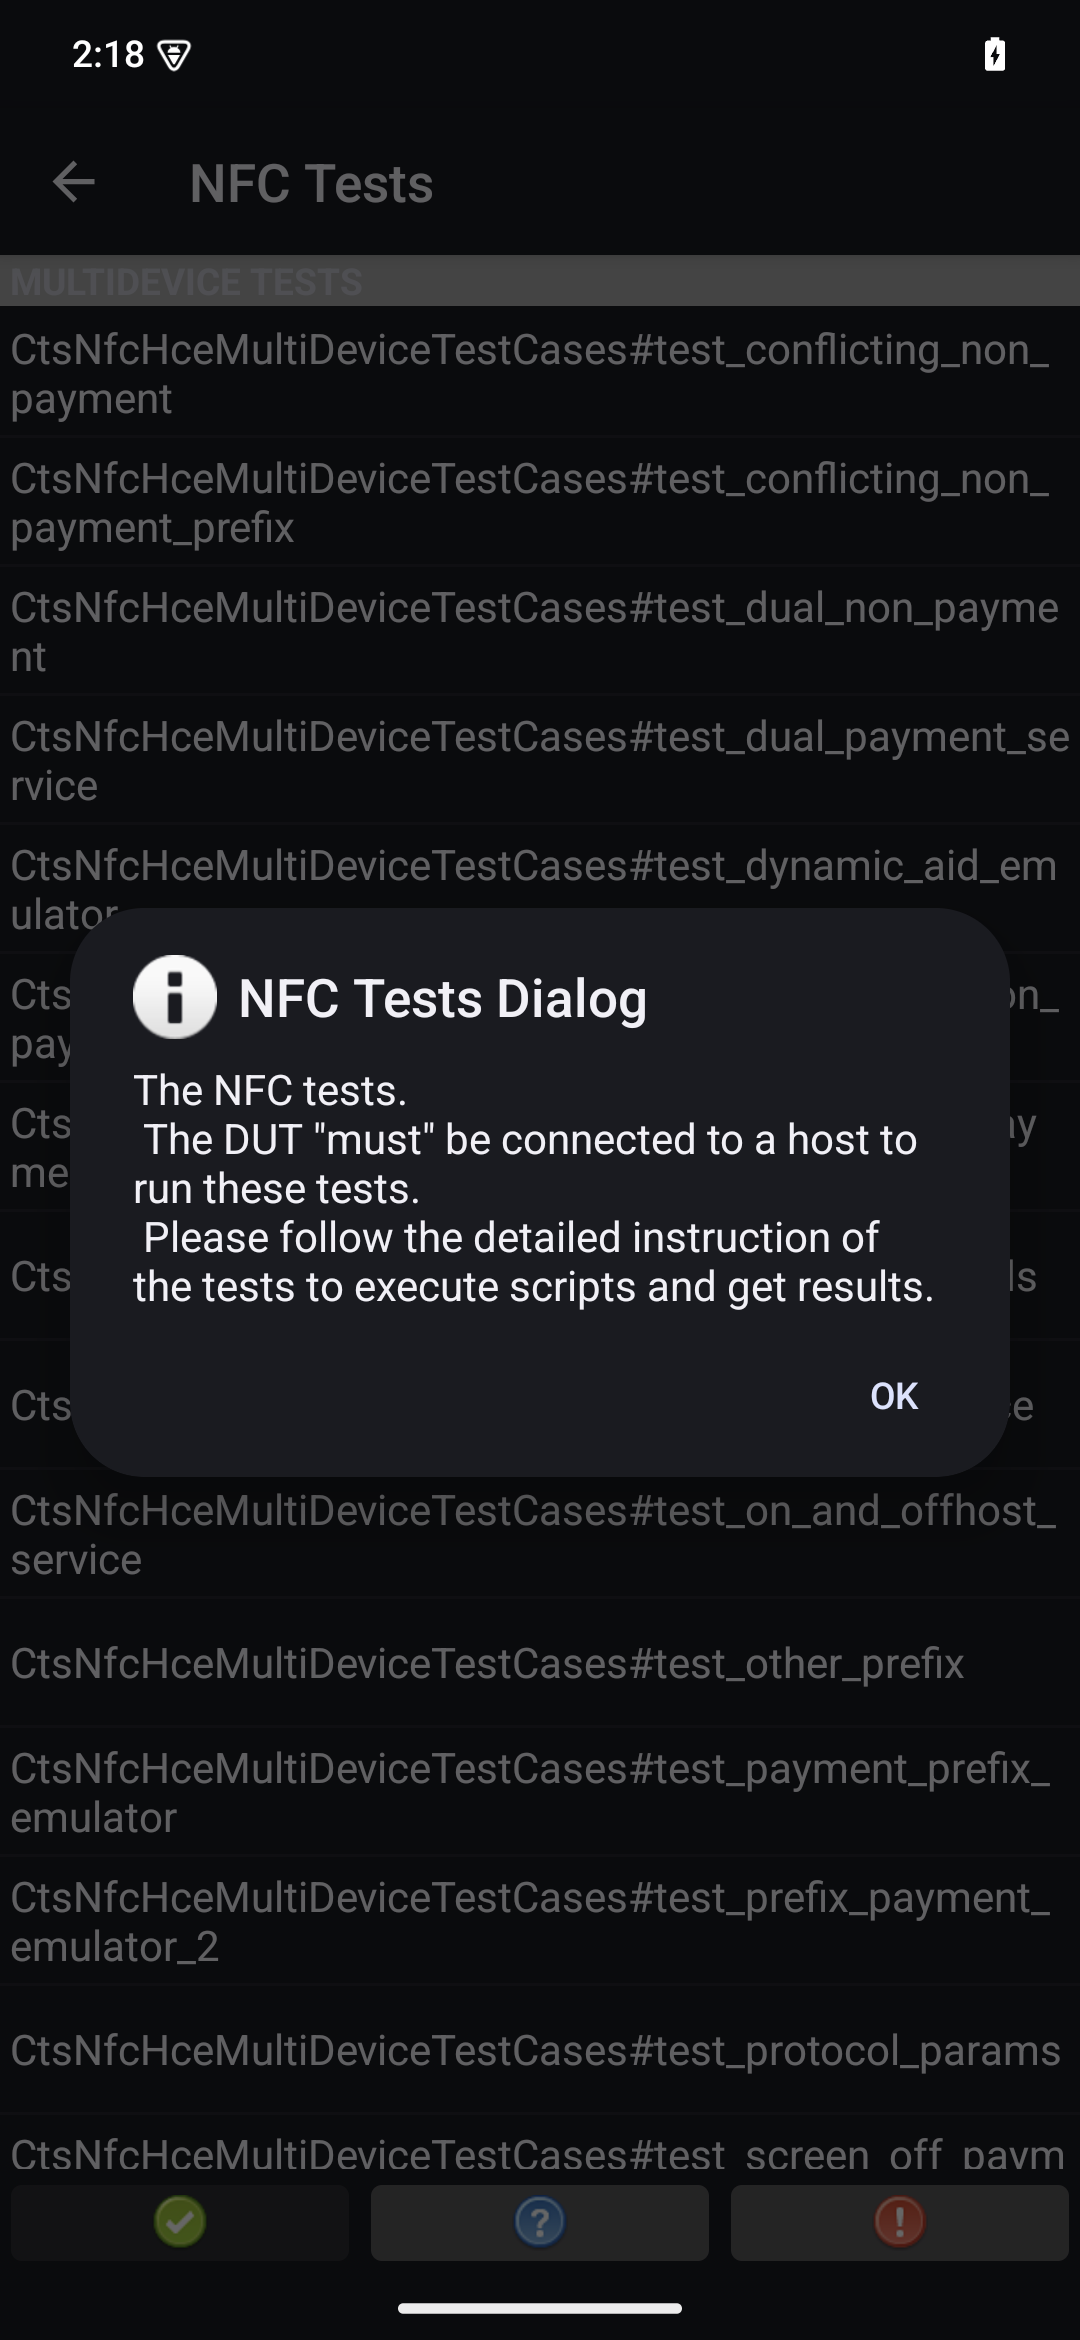
หน้าต่างข้อมูลพร้อมรายการเฟรมทดสอบจะปรากฏขึ้น
รูปที่ 3 กรณีทดสอบแอป CTS-V
ทำการทดสอบบนโฮสต์โดยทำดังนี้
MultiDevice$ python3 tools/run_all_tests.py
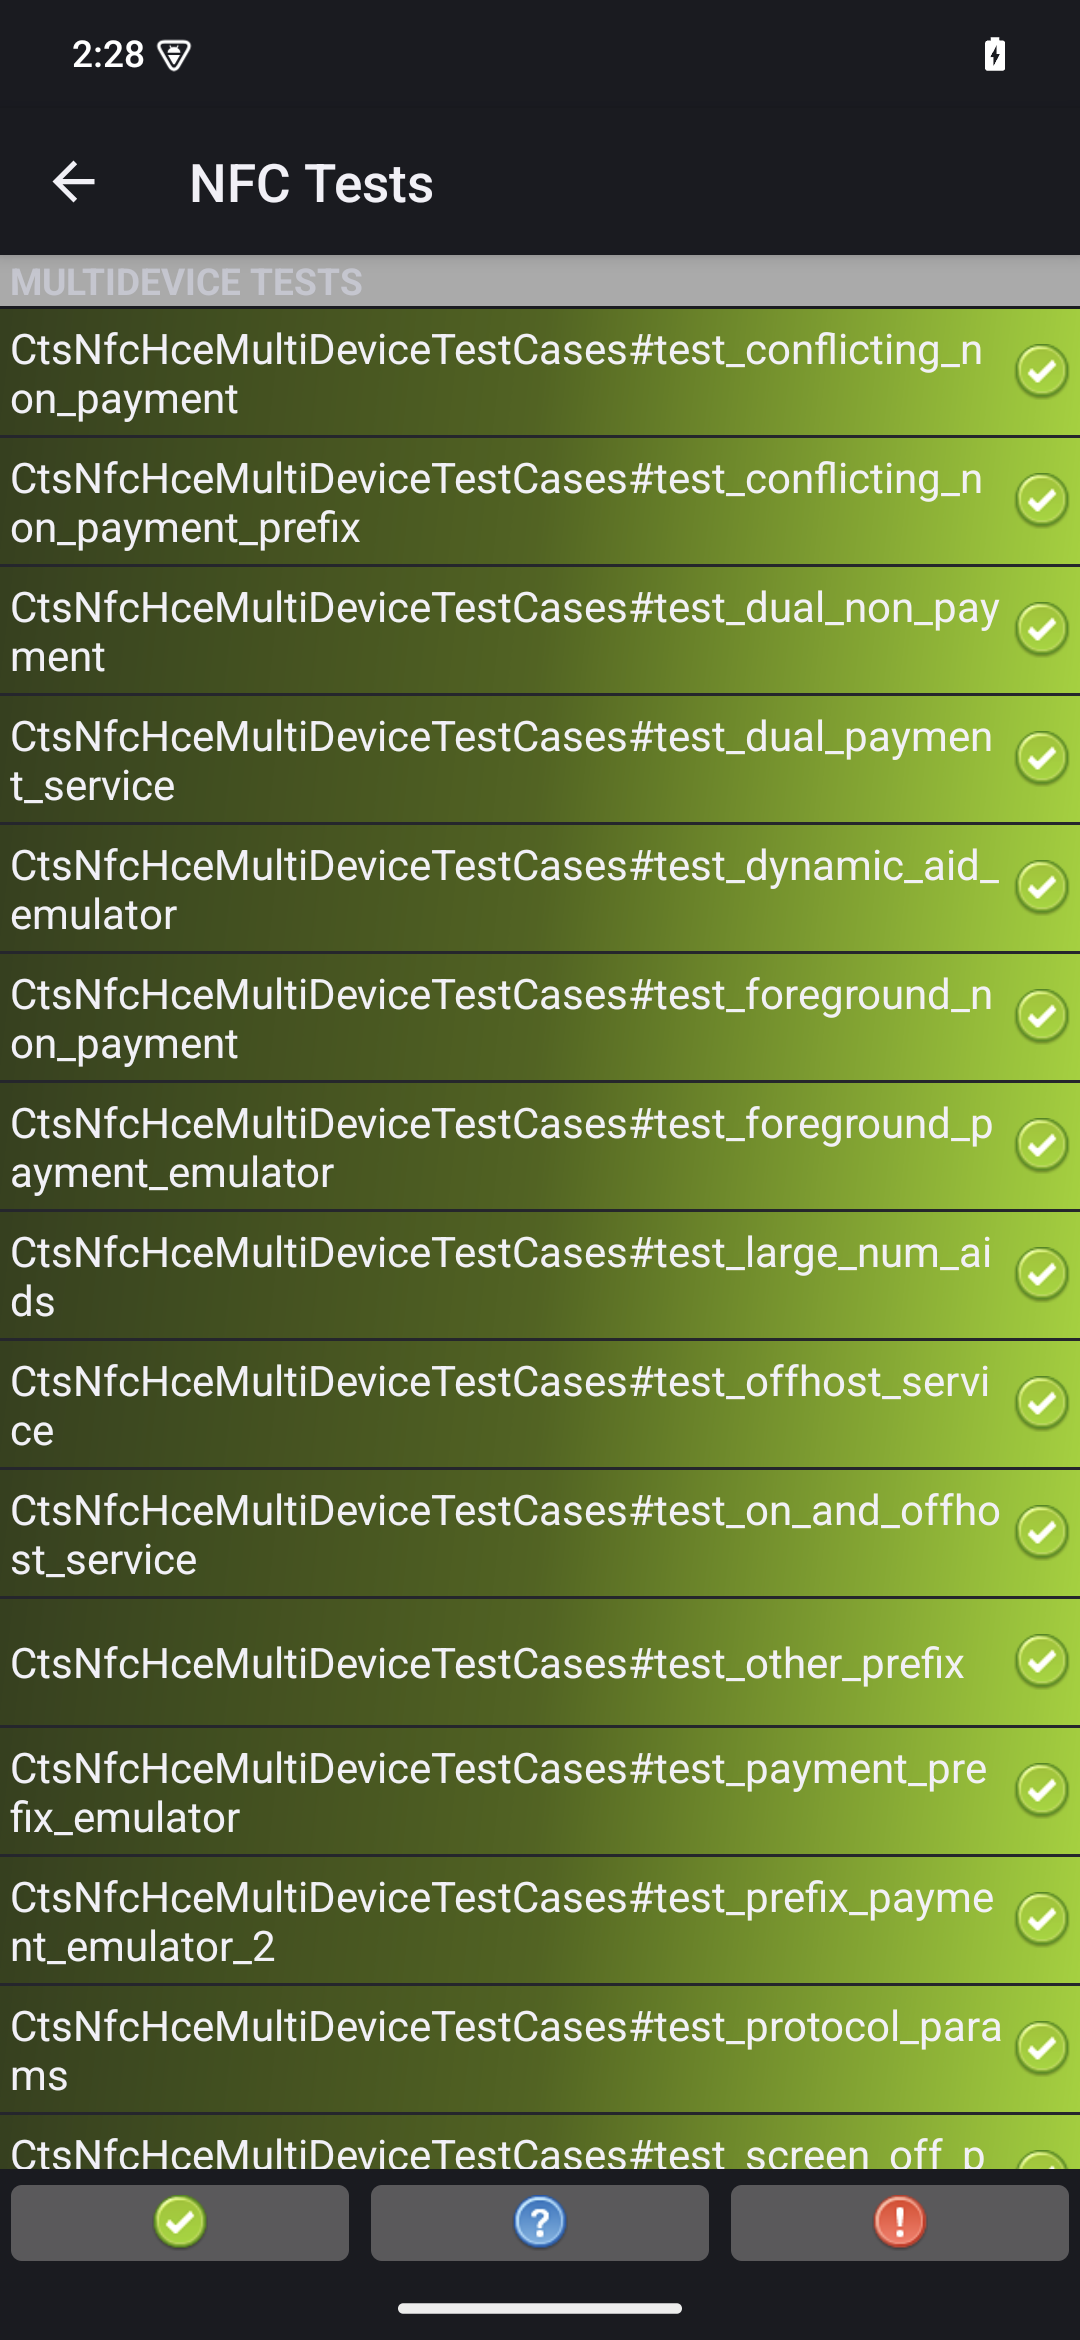
เมื่อการทดสอบเสร็จสิ้น ระบบจะอัปเดตผลการทดสอบในแอป CTS-V การทดสอบที่ประสบความสําเร็จจะมีสถานะเป็นสีเขียว
รูปที่ 4 ผลการทดสอบ CTS-V
หากเห็นการทดสอบที่ล้มเหลวซึ่งทำเครื่องหมายด้วยสีแดง ให้ใช้คำสั่งต่อไปนี้เพื่อเรียกใช้การทดสอบที่ล้มเหลวอีกครั้ง
python3 tools/run_all_tests.py --test_cases "`TestCaseA`" "`TestCaseB`" --test_files "`TestFileA`"
สถานที่:
TestCaseA
และ TestCaseB
เป็นชื่อของเฟรมทดสอบตามที่แสดงใน CTS-V
TestFileA
คือไฟล์ทดสอบที่มีเฟรมเวิร์กการทดสอบ
เช่น
python3 tools/run_all_tests.py --test_cases "test_conflicting_non_payment" "test_conflicting_non_payment_prefix" --test_files "CtsNfcHceMultiDeviceTestCases-py-ctsv"
ตัวอย่างเนื้อหาและโค้ดในหน้าเว็บนี้ขึ้นอยู่กับใบอนุญาตที่อธิบายไว้ในใบอนุญาตการใช้เนื้อหา Java และ OpenJDK เป็นเครื่องหมายการค้าหรือเครื่องหมายการค้าจดทะเบียนของ Oracle และ/หรือบริษัทในเครือ
อัปเดตล่าสุด 2025-07-27 UTC
[[["เข้าใจง่าย","easyToUnderstand","thumb-up"],["แก้ปัญหาของฉันได้","solvedMyProblem","thumb-up"],["อื่นๆ","otherUp","thumb-up"]],[["ไม่มีข้อมูลที่ฉันต้องการ","missingTheInformationINeed","thumb-down"],["ซับซ้อนเกินไป/มีหลายขั้นตอนมากเกินไป","tooComplicatedTooManySteps","thumb-down"],["ล้าสมัย","outOfDate","thumb-down"],["ปัญหาเกี่ยวกับการแปล","translationIssue","thumb-down"],["ตัวอย่าง/ปัญหาเกี่ยวกับโค้ด","samplesCodeIssue","thumb-down"],["อื่นๆ","otherDown","thumb-down"]],["อัปเดตล่าสุด 2025-07-27 UTC"],[],[],null,["# Run multi-device NFC tests (Android 15)\n\nThis document explains how to run multi-device NFC tests.\n\nMeet prerequisites\n------------------\n\nBefore you run multi-device NFC tests, do the following:\n\n1. Prepare a device with your Android 15 implementation.\n2. Follow CTS-V [requirements](/docs/compatibility/cts/verifier#requirements).\n3. Follow CTS-V [setup](/docs/compatibility/cts/verifier#setup).\n\nPrepare a DUT and a PN532 NFC reader for the test\n-------------------------------------------------\n\nAfter you finish the previous steps, follow these steps to run\nprepare a DUT and a PN532 NFC reader for the test:\n\n1. Connect the DUT to a host machine over USB.\n2. Grant permissions for the host to access the DUT over ADB.\n3. Install the CTS Verifier app (`CtsVerifier.apk`) on the DUT:\n\n extract root/out/host/linux-x86/cts-verifier/android-cts-verifier.zip\n\n cd android-cts-verifier\n\n adb install -r -g CtsVerifier.apk\n\n4. Install the NFC test required APKs:\n\n cd MultiDevice\n\n adb install -r -g NfcEmulatorTestApp.apk\n\nSet up NFC for the DUT\n----------------------\n\nFollow these steps to run set up NFC for the DUT:\n\n1. On the DUT, go to the **Settings** menu.\n2. Look for the **NFC** or **Connected Devices** section.\n3. Ensure the NFC toggle switch is turned on.\n4. Position an NFC chip on the phone's NFC reader:\n\n 1. Acquire a PN532 NFC chip. We recommend the [All-In-One PN532](https://shop.mtoolstec.com/product/mtools-all-in-one-pn532), non-BLE option.\n 2. Attach the PN532 NFC chip to the Linux host using a USB cable.\n 3. Place the PN532 NFC chip over the phone's NFC reader as shown in the following image:\n\n **Figure 1.** NFC chip placement.\n\nSet up the test environment\n---------------------------\n\nFollow these steps to run set up the test environment:\n\n1. Run these commands to set up the test environment:\n\n cd MultiDevice\n\n source build/envsetup.sh\n\n This command checks the Python and sets up the `PYTHONPATH` environment\n variable. If no errors are printed to the terminal, the environment is ready\n to run the multi-device tests.\n\n If you see the error message `libtinfo.so.6: no version information\n available (required by /bin/sh)` at runtime, run the following command\n to rename the `libtinfo.so.6` file: \n\n mv $ENV_DIRECTORY/lib/libtinfo.so.6 $ENV_DIRECTORY/lib/libtinfo.so.6.bak\n\n2. Set up the test bed by setting the device serial IDs of the DUT and PN532 NFC\n reader in `MultiDevice/config.yml`:\n\n TestBeds:\n - Name: CtsNfcHceMultiDeviceTestCases-py-ctsv\n Controllers:\n AndroidDevice:\n - serial: \"\u003cdevice-id\u003e\"\n TestParams:\n pn532_serial_path: \"\u003cpn532-serial-path\u003e\"\n\nRun the NFC tests\n-----------------\n\nTo run the NFC tests:\n\n1. Open the CTS-V app and tap **NFC Tests**:\n\n **Figure 2.** The CTS-V app.\n\n The info window with list of test cases appears:\n\n **Figure 3.** CTS-V app test cases.\n2. Run the tests on your host:\n\n MultiDevice$ python3 tools/run_all_tests.py\n\n When the tests are completed, the test results are updated in the CTS-V\n app. Successful tests are green:\n\n **Figure 4.** CTS-V test results.\n3. If you see any failures marked in red, use the following command to rerun\n the failed tests:\n\n python3 tools/run_all_tests.py --test_cases \"`\u003cvar translate=\"no\"\u003eTestCaseA\u003c/var\u003e`\" \"`\u003cvar translate=\"no\"\u003eTestCaseB\u003c/var\u003e`\" --test_files \"`\u003cvar translate=\"no\"\u003eTestFileA\u003c/var\u003e`\"\n\n Where:\n - \u003cvar translate=\"no\"\u003eTestCaseA\u003c/var\u003e and \u003cvar translate=\"no\"\u003eTestCaseB\u003c/var\u003e are the names of the test cases as displayed in CTS-V.\n - \u003cvar translate=\"no\"\u003eTestFileA\u003c/var\u003e is the test file containing the test cases.\n\n For example: \n\n python3 tools/run_all_tests.py --test_cases \"test_conflicting_non_payment\" \"test_conflicting_non_payment_prefix\" --test_files \"CtsNfcHceMultiDeviceTestCases-py-ctsv\""]]