Od 27 marca 2025 r. zalecamy używanie android-latest-release
zamiast aosp-main
do kompilowania i wspołtworzenia AOSP. Więcej informacji znajdziesz w artykule o zmianach w AOSP.
Uruchamianie testów NFC na wielu urządzeniach (Android 15)
Zadbaj o dobrą organizację dzięki kolekcji
Zapisuj i kategoryzuj treści zgodnie ze swoimi preferencjami.
Z tego dokumentu dowiesz się, jak przeprowadzać testy NFC na wielu urządzeniach.
Spełnij wymagania wstępne.
Zanim przeprowadzisz testy NFC na wielu urządzeniach:
- Przygotuj urządzenie z implementacją Androida 15.
- Przestrzegaj wymagań CTS-V.
- Wykonaj czynności opisane w instrukcji konfiguracji CTS-V.
Przygotuj do testu DUT i czytnik NFC PN532
Po wykonaniu poprzednich czynności wykonaj te czynności, aby przygotować urządzenie testowe i czytnik NFC PN532 do testu:
- Połącz urządzenie DUT z hostem przez USB.
- Przyznaj hostowi uprawnienia dostępu do DUT przez ADB.
Zainstaluj aplikację CTS Verifier (CtsVerifier.apk
) na urządzeniu testowym:
extract root/out/host/linux-x86/cts-verifier/android-cts-verifier.zip
cd android-cts-verifier
adb install -r -g CtsVerifier.apk
Zainstaluj wymagane pliki APK do testowania NFC:
cd MultiDevice
adb install -r -g NfcEmulatorTestApp.apk
Konfigurowanie komunikacji NFC na urządzeniu DUT
Aby skonfigurować NFC w przypadku DUT:
- Na urządzeniu testowym otwórz menu Ustawienia.
- Znajdź sekcję NFC lub Połączone urządzenia.
- Upewnij się, że przełącznik NFC jest włączony.
Umieść układ NFC na czytniku NFC telefonu:
- Uzyskaj chip NFC PN532. Zalecamy urządzenie All-In-One PN532, które nie obsługuje technologii BLE.
- Podłącz układ PN532 NFC do hosta Linuxa za pomocą kabla USB.
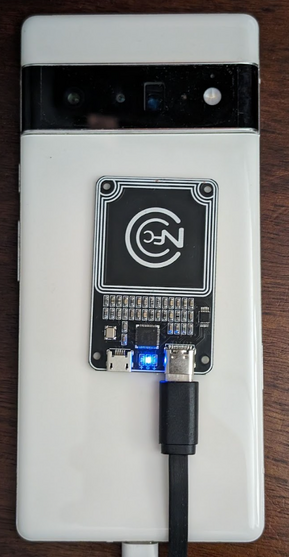
- Umieść układ PN532 NFC nad czytnikiem NFC telefonu, jak pokazano na ilustracji:
Rysunek 1. Umieszczenie układu NFC.
Konfigurowanie środowiska testowego
Aby skonfigurować środowisko testowe, wykonaj te czynności:
Aby skonfigurować środowisko testowe, uruchom te polecenia:
cd MultiDevice
source build/envsetup.sh
To polecenie sprawdza Pythona i konfiguruje zmienną środowiskową PYTHONPATH
. Jeśli na terminalu nie pojawią się żadne błędy, środowisko jest gotowe do przeprowadzania testów na wielu urządzeniach.
Jeśli w czasie wykonywania programu pojawi się komunikat o błędzie libtinfo.so.6: no version information
available (required by /bin/sh)
, uruchom to polecenie, aby zmienić nazwę pliku libtinfo.so.6
:
mv $ENV_DIRECTORY/lib/libtinfo.so.6 $ENV_DIRECTORY/lib/libtinfo.so.6.bak
Skonfiguruj stanowisko testowe, ustawiając numery seryjne urządzenia DUT i czytnika NFC PN532 w pliku MultiDevice/config.yml
:
TestBeds:
- Name: CtsNfcHceMultiDeviceTestCases-py-ctsv
Controllers:
AndroidDevice:
- serial: "<device-id>"
TestParams:
pn532_serial_path: "<pn532-serial-path>"
Przeprowadzanie testów NFC
Aby przeprowadzić testy NFC:
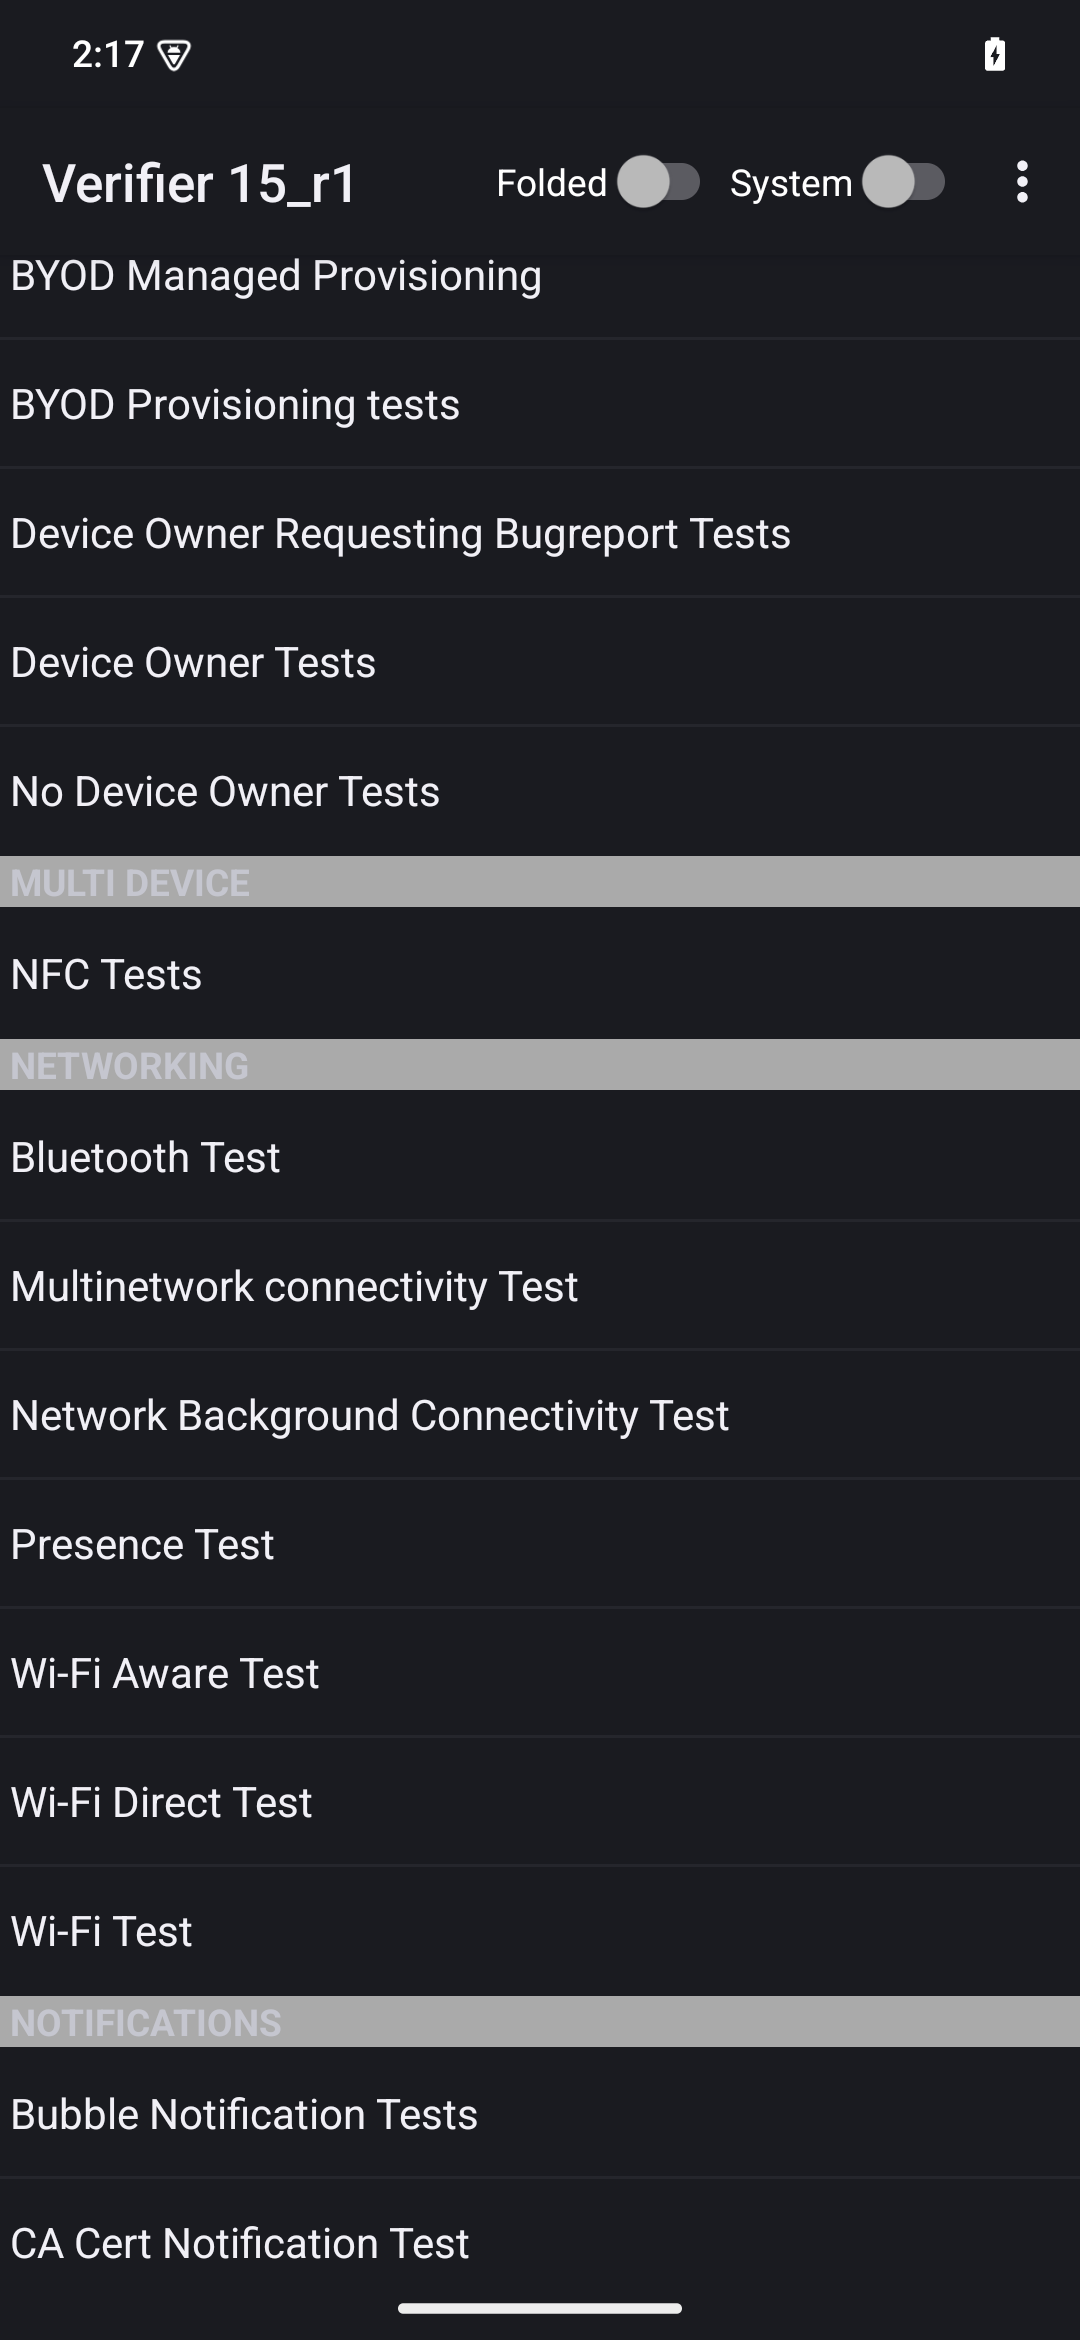
Otwórz aplikację CTS-V i kliknij Testy NFC:
Rysunek 2. Aplikacja CTS-V.
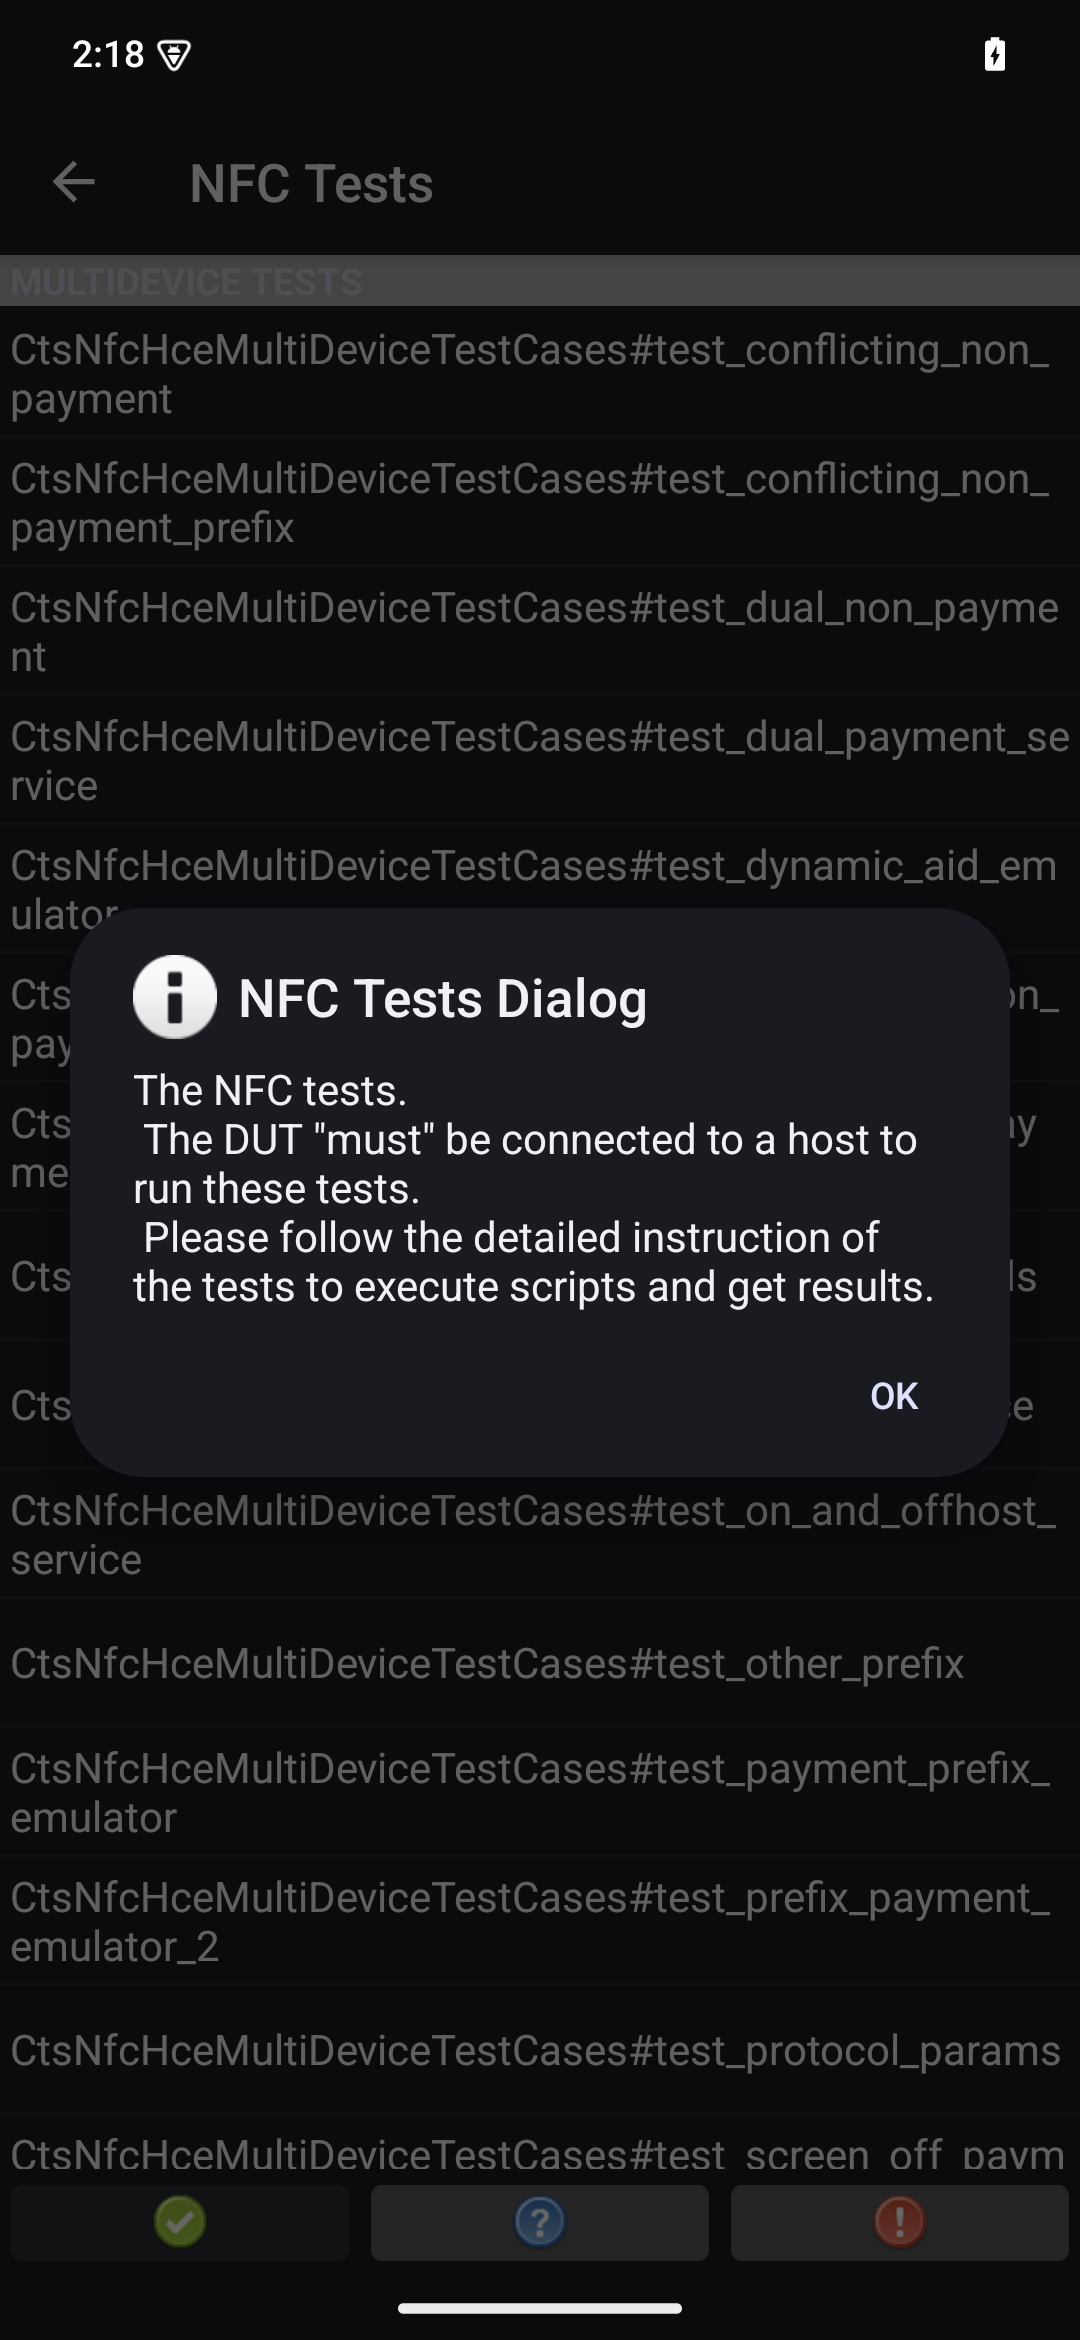
Pojawi się okno z listą przypadków testowych:
Rysunek 3. Przypadki testowe aplikacji CTS-V.
Przeprowadź testy na hoście:
MultiDevice$ python3 tools/run_all_tests.py
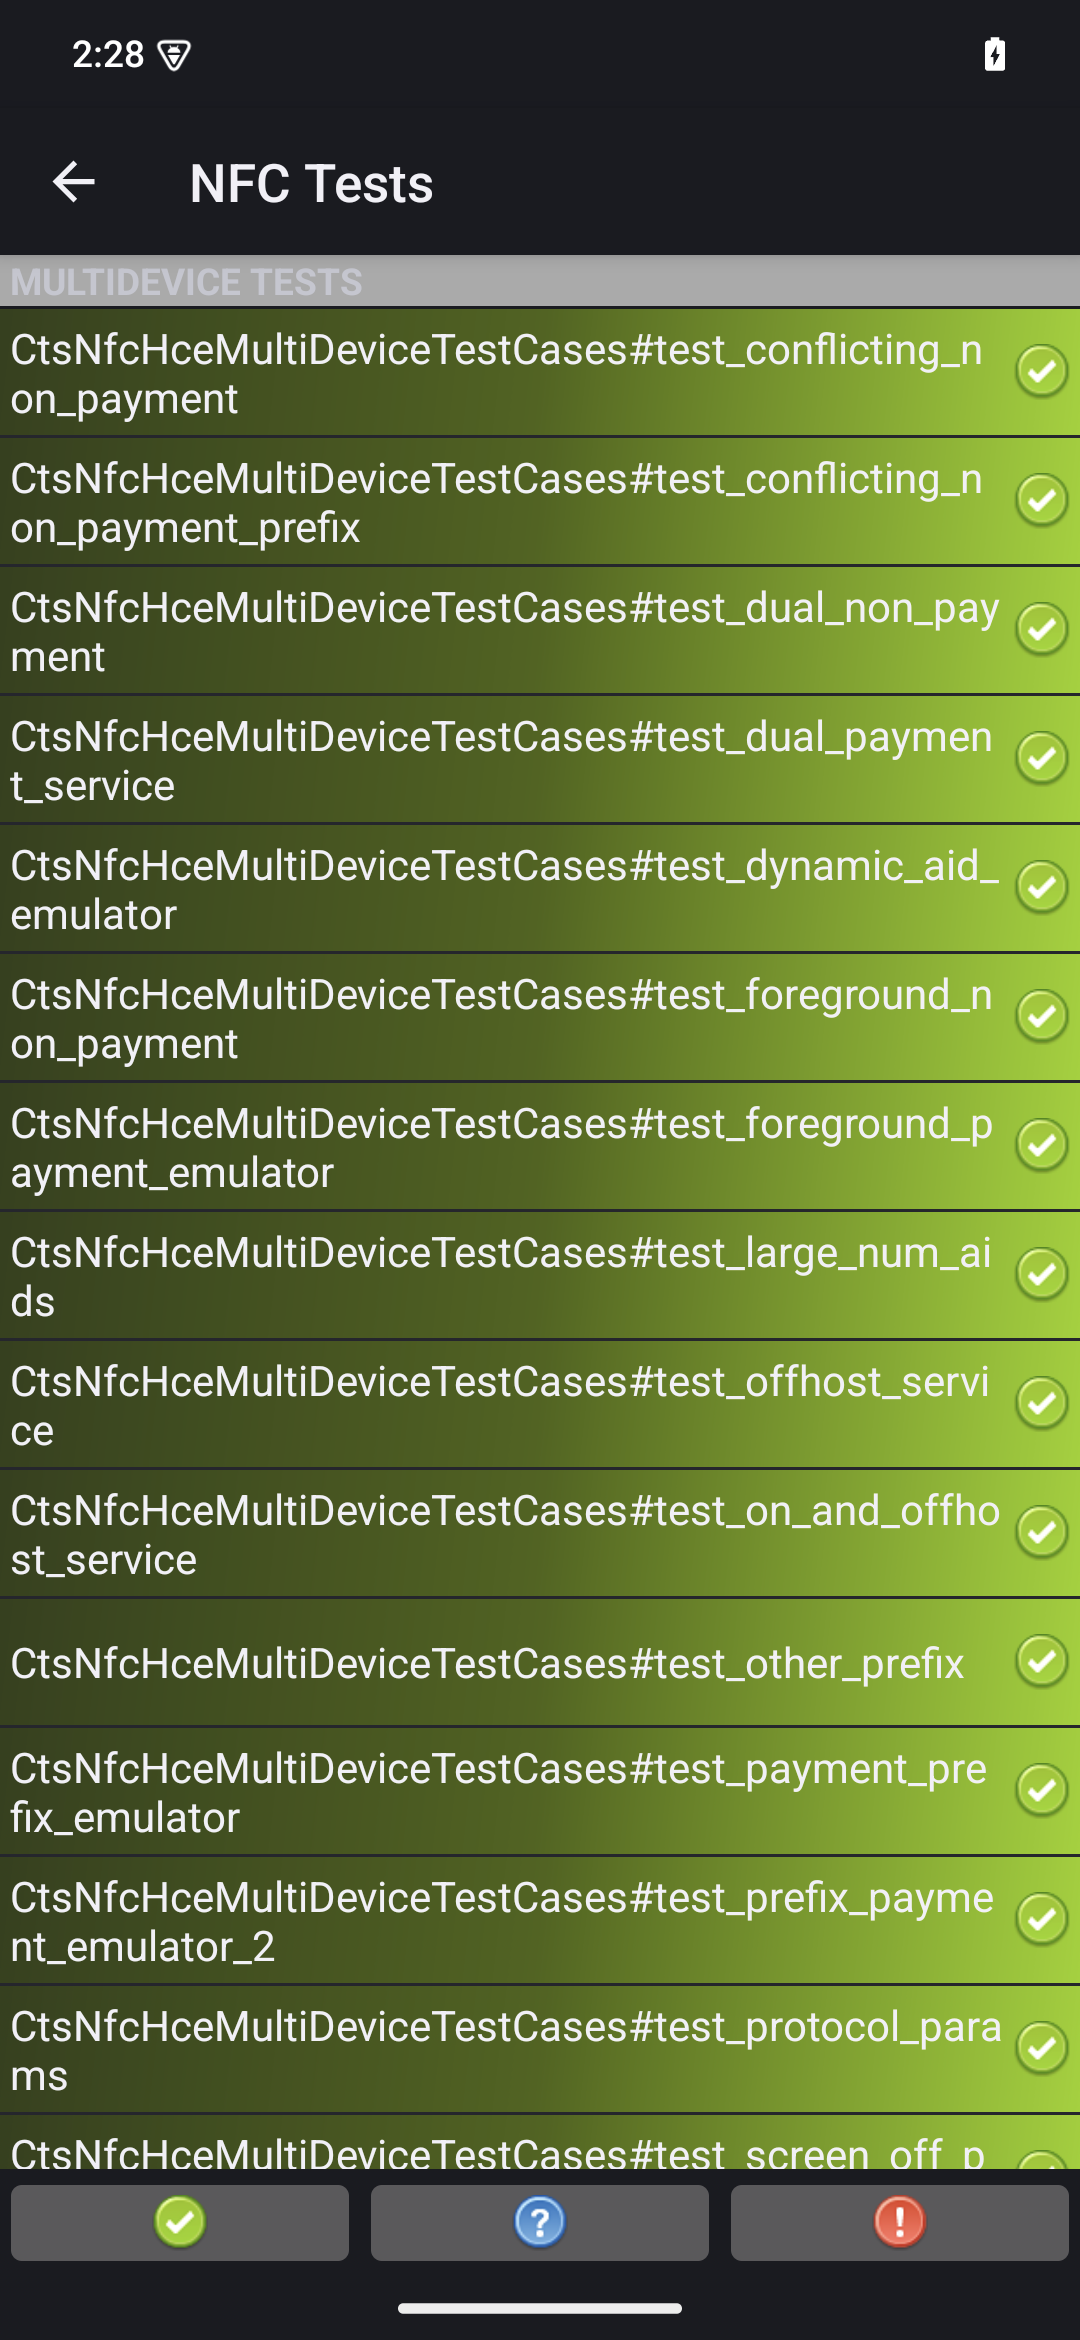
Po zakończeniu testów wyniki są aktualizowane w aplikacji CTS-V. Testy, które zostały ukończone, są oznaczone na zielono:
Rysunek 4. Wyniki testu CTS-V.
Jeśli widzisz błędy oznaczone na czerwono, uruchom ponownie testy, które się nie powiodły, za pomocą tego polecenia:
python3 tools/run_all_tests.py --test_cases "`TestCaseA`" "`TestCaseB`" --test_files "`TestFileA`"
Gdzie:
TestCaseA
i TestCaseB
to nazwy przypadków testowych wyświetlanych w CTS-V.
TestFileA
to plik testowy zawierający przypadki testowe.
Na przykład:
python3 tools/run_all_tests.py --test_cases "test_conflicting_non_payment" "test_conflicting_non_payment_prefix" --test_files "CtsNfcHceMultiDeviceTestCases-py-ctsv"
Treść strony i umieszczone na niej fragmenty kodu podlegają licencjom opisanym w Licencji na treści. Java i OpenJDK są znakami towarowymi lub zastrzeżonymi znakami towarowymi należącymi do firmy Oracle lub jej podmiotów stowarzyszonych.
Ostatnia aktualizacja: 2025-07-27 UTC.
[[["Łatwo zrozumieć","easyToUnderstand","thumb-up"],["Rozwiązało to mój problem","solvedMyProblem","thumb-up"],["Inne","otherUp","thumb-up"]],[["Brak potrzebnych mi informacji","missingTheInformationINeed","thumb-down"],["Zbyt skomplikowane / zbyt wiele czynności do wykonania","tooComplicatedTooManySteps","thumb-down"],["Nieaktualne treści","outOfDate","thumb-down"],["Problem z tłumaczeniem","translationIssue","thumb-down"],["Problem z przykładami/kodem","samplesCodeIssue","thumb-down"],["Inne","otherDown","thumb-down"]],["Ostatnia aktualizacja: 2025-07-27 UTC."],[],[],null,["# Run multi-device NFC tests (Android 15)\n\nThis document explains how to run multi-device NFC tests.\n\nMeet prerequisites\n------------------\n\nBefore you run multi-device NFC tests, do the following:\n\n1. Prepare a device with your Android 15 implementation.\n2. Follow CTS-V [requirements](/docs/compatibility/cts/verifier#requirements).\n3. Follow CTS-V [setup](/docs/compatibility/cts/verifier#setup).\n\nPrepare a DUT and a PN532 NFC reader for the test\n-------------------------------------------------\n\nAfter you finish the previous steps, follow these steps to run\nprepare a DUT and a PN532 NFC reader for the test:\n\n1. Connect the DUT to a host machine over USB.\n2. Grant permissions for the host to access the DUT over ADB.\n3. Install the CTS Verifier app (`CtsVerifier.apk`) on the DUT:\n\n extract root/out/host/linux-x86/cts-verifier/android-cts-verifier.zip\n\n cd android-cts-verifier\n\n adb install -r -g CtsVerifier.apk\n\n4. Install the NFC test required APKs:\n\n cd MultiDevice\n\n adb install -r -g NfcEmulatorTestApp.apk\n\nSet up NFC for the DUT\n----------------------\n\nFollow these steps to run set up NFC for the DUT:\n\n1. On the DUT, go to the **Settings** menu.\n2. Look for the **NFC** or **Connected Devices** section.\n3. Ensure the NFC toggle switch is turned on.\n4. Position an NFC chip on the phone's NFC reader:\n\n 1. Acquire a PN532 NFC chip. We recommend the [All-In-One PN532](https://shop.mtoolstec.com/product/mtools-all-in-one-pn532), non-BLE option.\n 2. Attach the PN532 NFC chip to the Linux host using a USB cable.\n 3. Place the PN532 NFC chip over the phone's NFC reader as shown in the following image:\n\n **Figure 1.** NFC chip placement.\n\nSet up the test environment\n---------------------------\n\nFollow these steps to run set up the test environment:\n\n1. Run these commands to set up the test environment:\n\n cd MultiDevice\n\n source build/envsetup.sh\n\n This command checks the Python and sets up the `PYTHONPATH` environment\n variable. If no errors are printed to the terminal, the environment is ready\n to run the multi-device tests.\n\n If you see the error message `libtinfo.so.6: no version information\n available (required by /bin/sh)` at runtime, run the following command\n to rename the `libtinfo.so.6` file: \n\n mv $ENV_DIRECTORY/lib/libtinfo.so.6 $ENV_DIRECTORY/lib/libtinfo.so.6.bak\n\n2. Set up the test bed by setting the device serial IDs of the DUT and PN532 NFC\n reader in `MultiDevice/config.yml`:\n\n TestBeds:\n - Name: CtsNfcHceMultiDeviceTestCases-py-ctsv\n Controllers:\n AndroidDevice:\n - serial: \"\u003cdevice-id\u003e\"\n TestParams:\n pn532_serial_path: \"\u003cpn532-serial-path\u003e\"\n\nRun the NFC tests\n-----------------\n\nTo run the NFC tests:\n\n1. Open the CTS-V app and tap **NFC Tests**:\n\n **Figure 2.** The CTS-V app.\n\n The info window with list of test cases appears:\n\n **Figure 3.** CTS-V app test cases.\n2. Run the tests on your host:\n\n MultiDevice$ python3 tools/run_all_tests.py\n\n When the tests are completed, the test results are updated in the CTS-V\n app. Successful tests are green:\n\n **Figure 4.** CTS-V test results.\n3. If you see any failures marked in red, use the following command to rerun\n the failed tests:\n\n python3 tools/run_all_tests.py --test_cases \"`\u003cvar translate=\"no\"\u003eTestCaseA\u003c/var\u003e`\" \"`\u003cvar translate=\"no\"\u003eTestCaseB\u003c/var\u003e`\" --test_files \"`\u003cvar translate=\"no\"\u003eTestFileA\u003c/var\u003e`\"\n\n Where:\n - \u003cvar translate=\"no\"\u003eTestCaseA\u003c/var\u003e and \u003cvar translate=\"no\"\u003eTestCaseB\u003c/var\u003e are the names of the test cases as displayed in CTS-V.\n - \u003cvar translate=\"no\"\u003eTestFileA\u003c/var\u003e is the test file containing the test cases.\n\n For example: \n\n python3 tools/run_all_tests.py --test_cases \"test_conflicting_non_payment\" \"test_conflicting_non_payment_prefix\" --test_files \"CtsNfcHceMultiDeviceTestCases-py-ctsv\""]]