A partir del 27 de marzo de 2025, te recomendamos que uses android-latest-release
en lugar de aosp-main
para compilar y contribuir a AOSP. Para obtener más información, consulta Cambios en AOSP.
Ejecuta pruebas de NFC en varios dispositivos (Android 15)
Organiza tus páginas con colecciones
Guarda y categoriza el contenido según tus preferencias.
En este documento, se explica cómo ejecutar pruebas de NFC en varios dispositivos.
Cumple con los requisitos previos
Antes de ejecutar pruebas de NFC en varios dispositivos, haz lo siguiente:
- Prepara un dispositivo con tu implementación de Android 15.
- Sigue los requisitos de CTS-V.
- Sigue la configuración de CTS-V.
Prepara un DUT y un lector de NFC PN532 para la prueba
Después de terminar los pasos anteriores, sigue estos pasos para ejecutar
preparar un DUT y un lector de NFC PN532 para la prueba:
- Conecta el DUT a una máquina host por USB.
- Otorga permisos para que el host acceda al DUT a través de ADB.
Instala la app de CTS Verifier (CtsVerifier.apk
) en el DUT:
extract root/out/host/linux-x86/cts-verifier/android-cts-verifier.zip
cd android-cts-verifier
adb install -r -g CtsVerifier.apk
Instala los APKs necesarios para la prueba de NFC:
cd MultiDevice
adb install -r -g NfcEmulatorTestApp.apk
Configura NFC para el DUT
Sigue estos pasos para configurar NFC en el DUT:
- En el DUT, ve al menú Configuración.
- Busca la sección NFC o Dispositivos conectados.
- Asegúrate de que el interruptor de activación de NFC esté activado.
Coloca un chip NFC en el lector NFC del teléfono:
- Adquiere un chip NFC PN532. Te recomendamos la opción PN532 todo en uno, que no es BLE.
- Conecta el chip NFC PN532 al host de Linux con un cable USB.
- Coloca el chip NFC PN532 sobre el lector NFC del teléfono, como se muestra en la siguiente imagen:
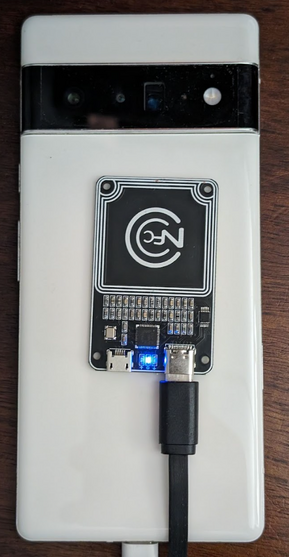
Figura 1: Ubicación del chip NFC
Configura el entorno de prueba
Sigue estos pasos para configurar el entorno de prueba:
Ejecuta estos comandos para configurar el entorno de prueba:
cd MultiDevice
source build/envsetup.sh
Este comando verifica Python y configura la variable de entorno PYTHONPATH
. Si no se imprimen errores en la terminal, el entorno está listo para ejecutar las pruebas multidispositivo.
Si ves el mensaje de error libtinfo.so.6: no version information
available (required by /bin/sh)
durante el tiempo de ejecución, ejecuta el siguiente comando para cambiar el nombre del archivo libtinfo.so.6
:
mv $ENV_DIRECTORY/lib/libtinfo.so.6 $ENV_DIRECTORY/lib/libtinfo.so.6.bak
Configura la plataforma de pruebas configurando los IDs de serie del DUT y el lector de NFC PN532 en MultiDevice/config.yml
:
TestBeds:
- Name: CtsNfcHceMultiDeviceTestCases-py-ctsv
Controllers:
AndroidDevice:
- serial: "<device-id>"
TestParams:
pn532_serial_path: "<pn532-serial-path>"
Ejecuta las pruebas de NFC
Para ejecutar las pruebas de NFC, haz lo siguiente:
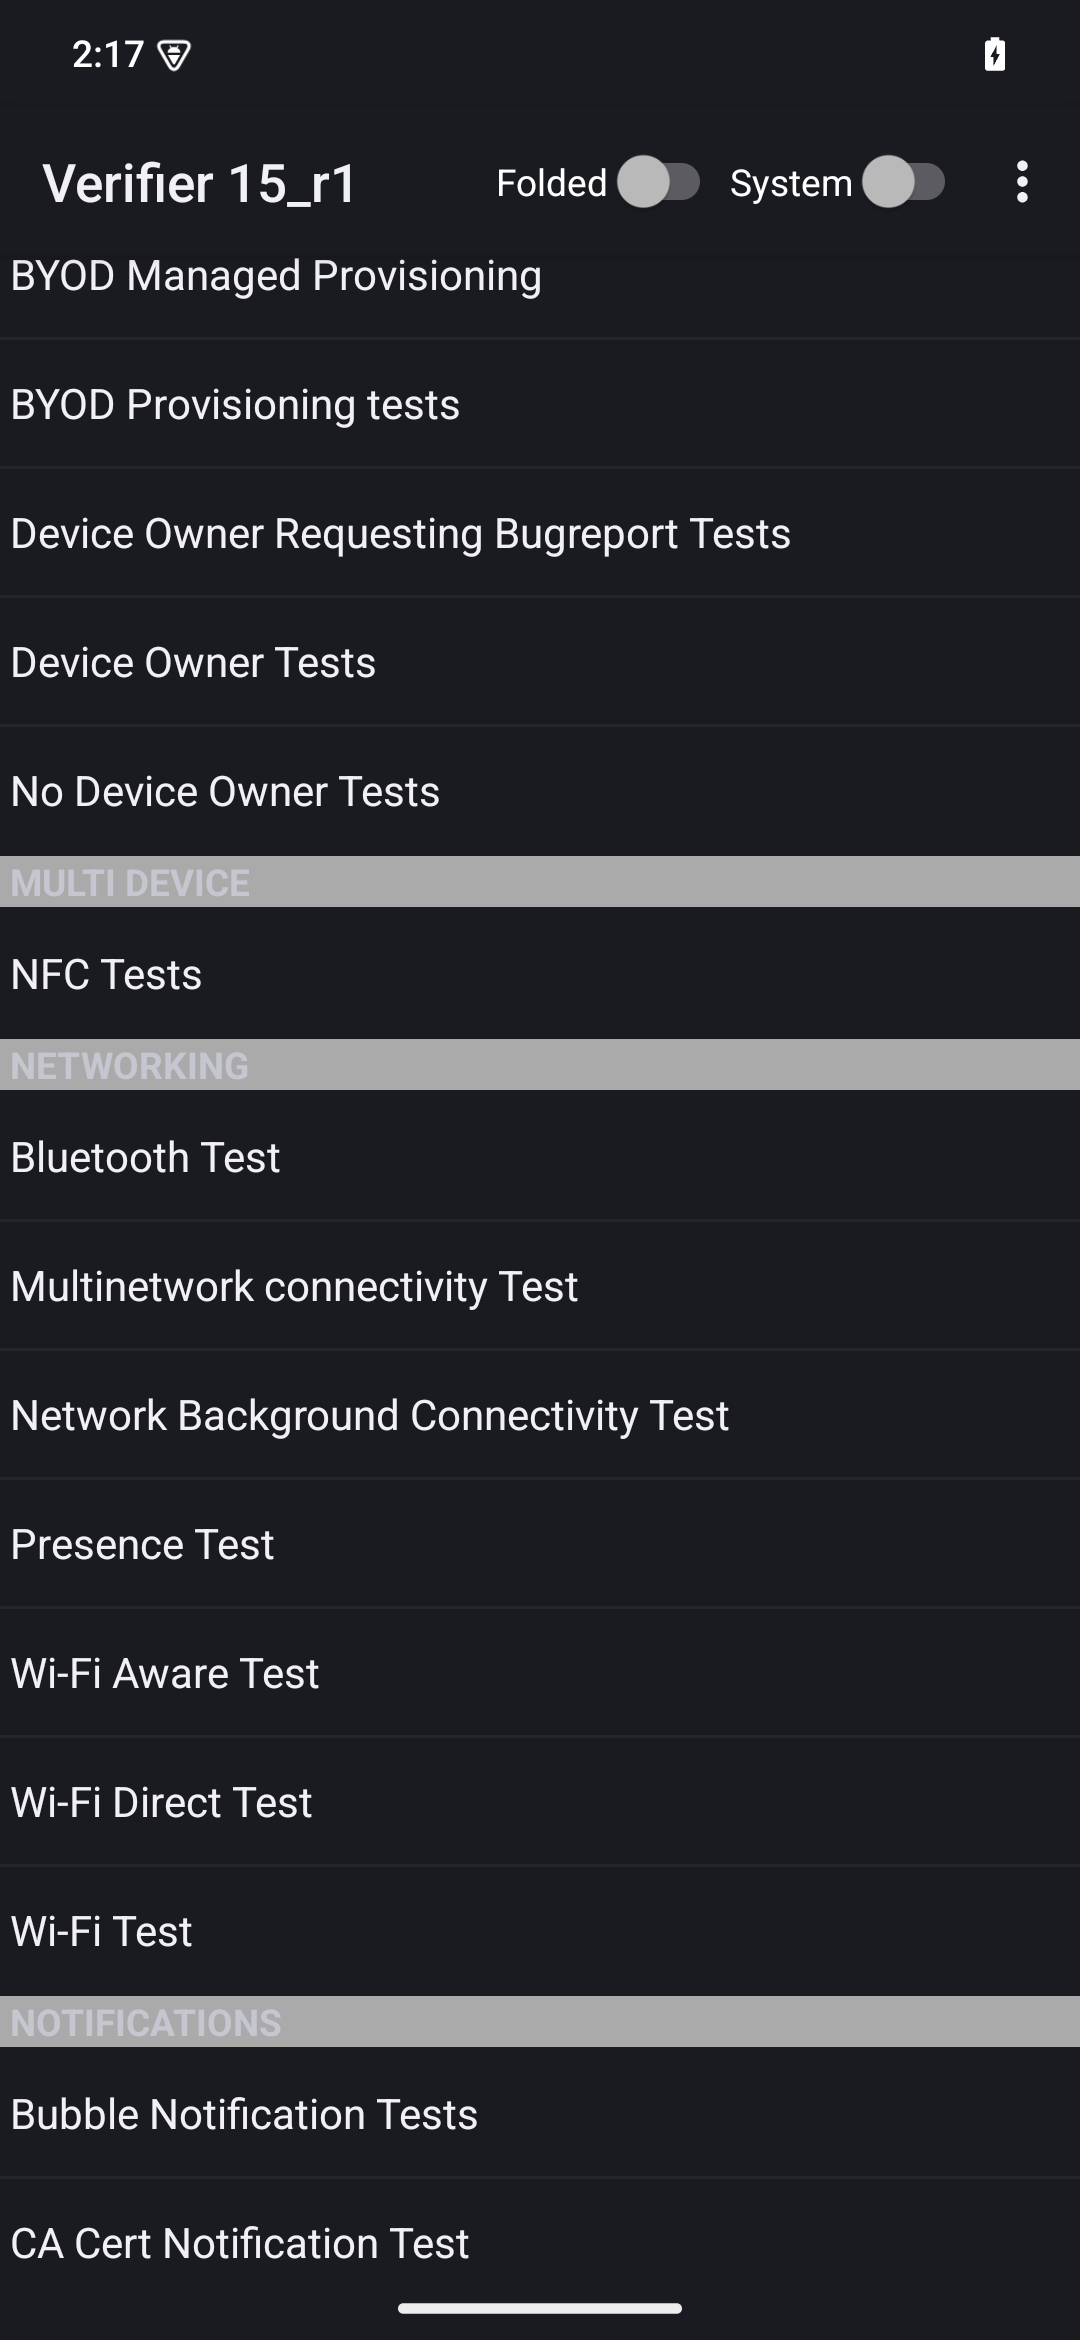
Abre la app de CTS-V y presiona Pruebas de NFC:
Figura 2: La app de CTS-V
Aparecerá la ventana de información con la lista de casos de prueba:
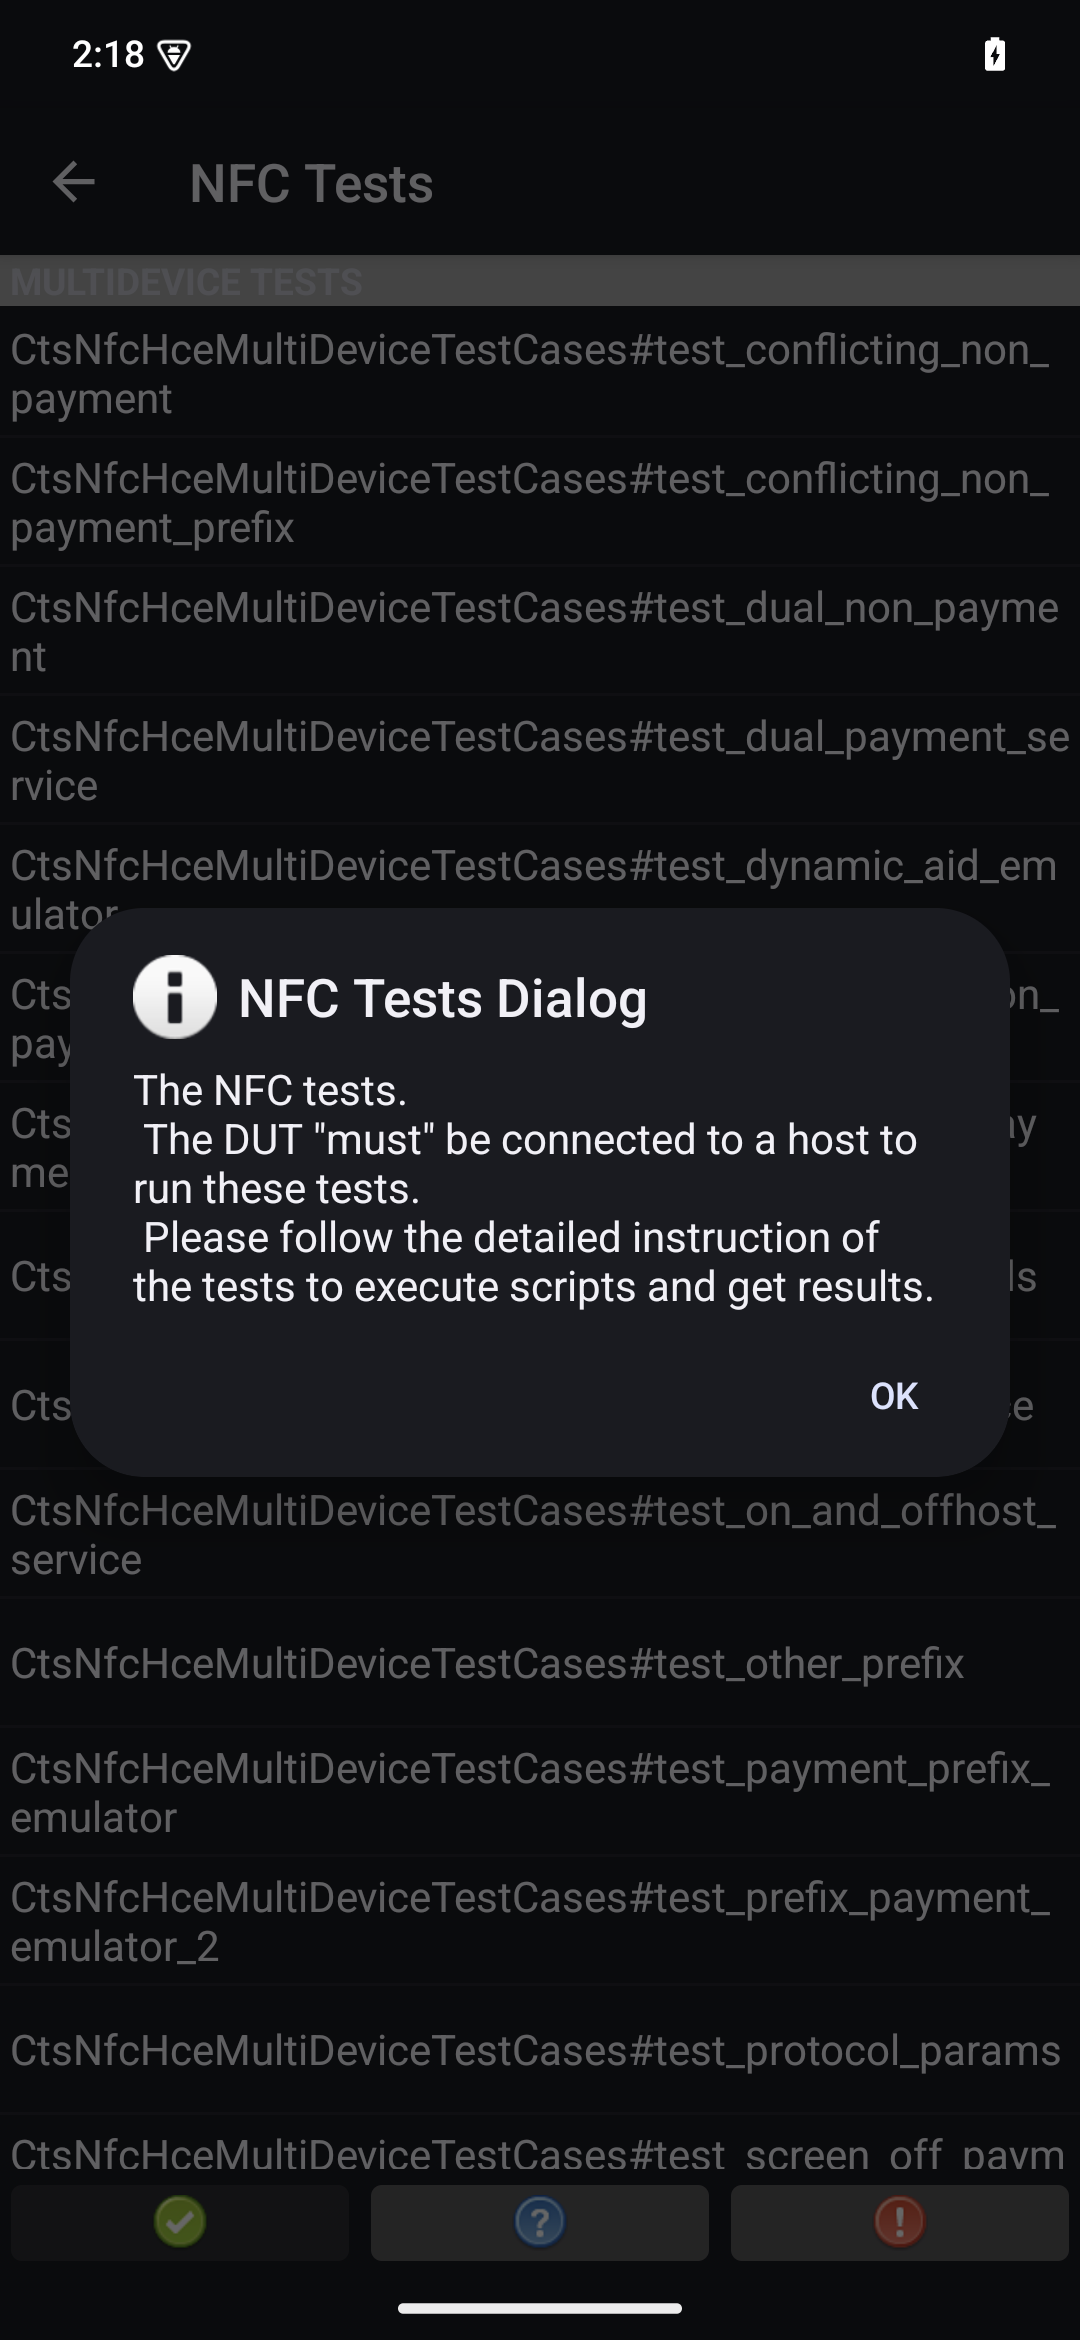
Figura 3: Casos de prueba de la app de CTS-V
Ejecuta las pruebas en tu host:
MultiDevice$ python3 tools/run_all_tests.py
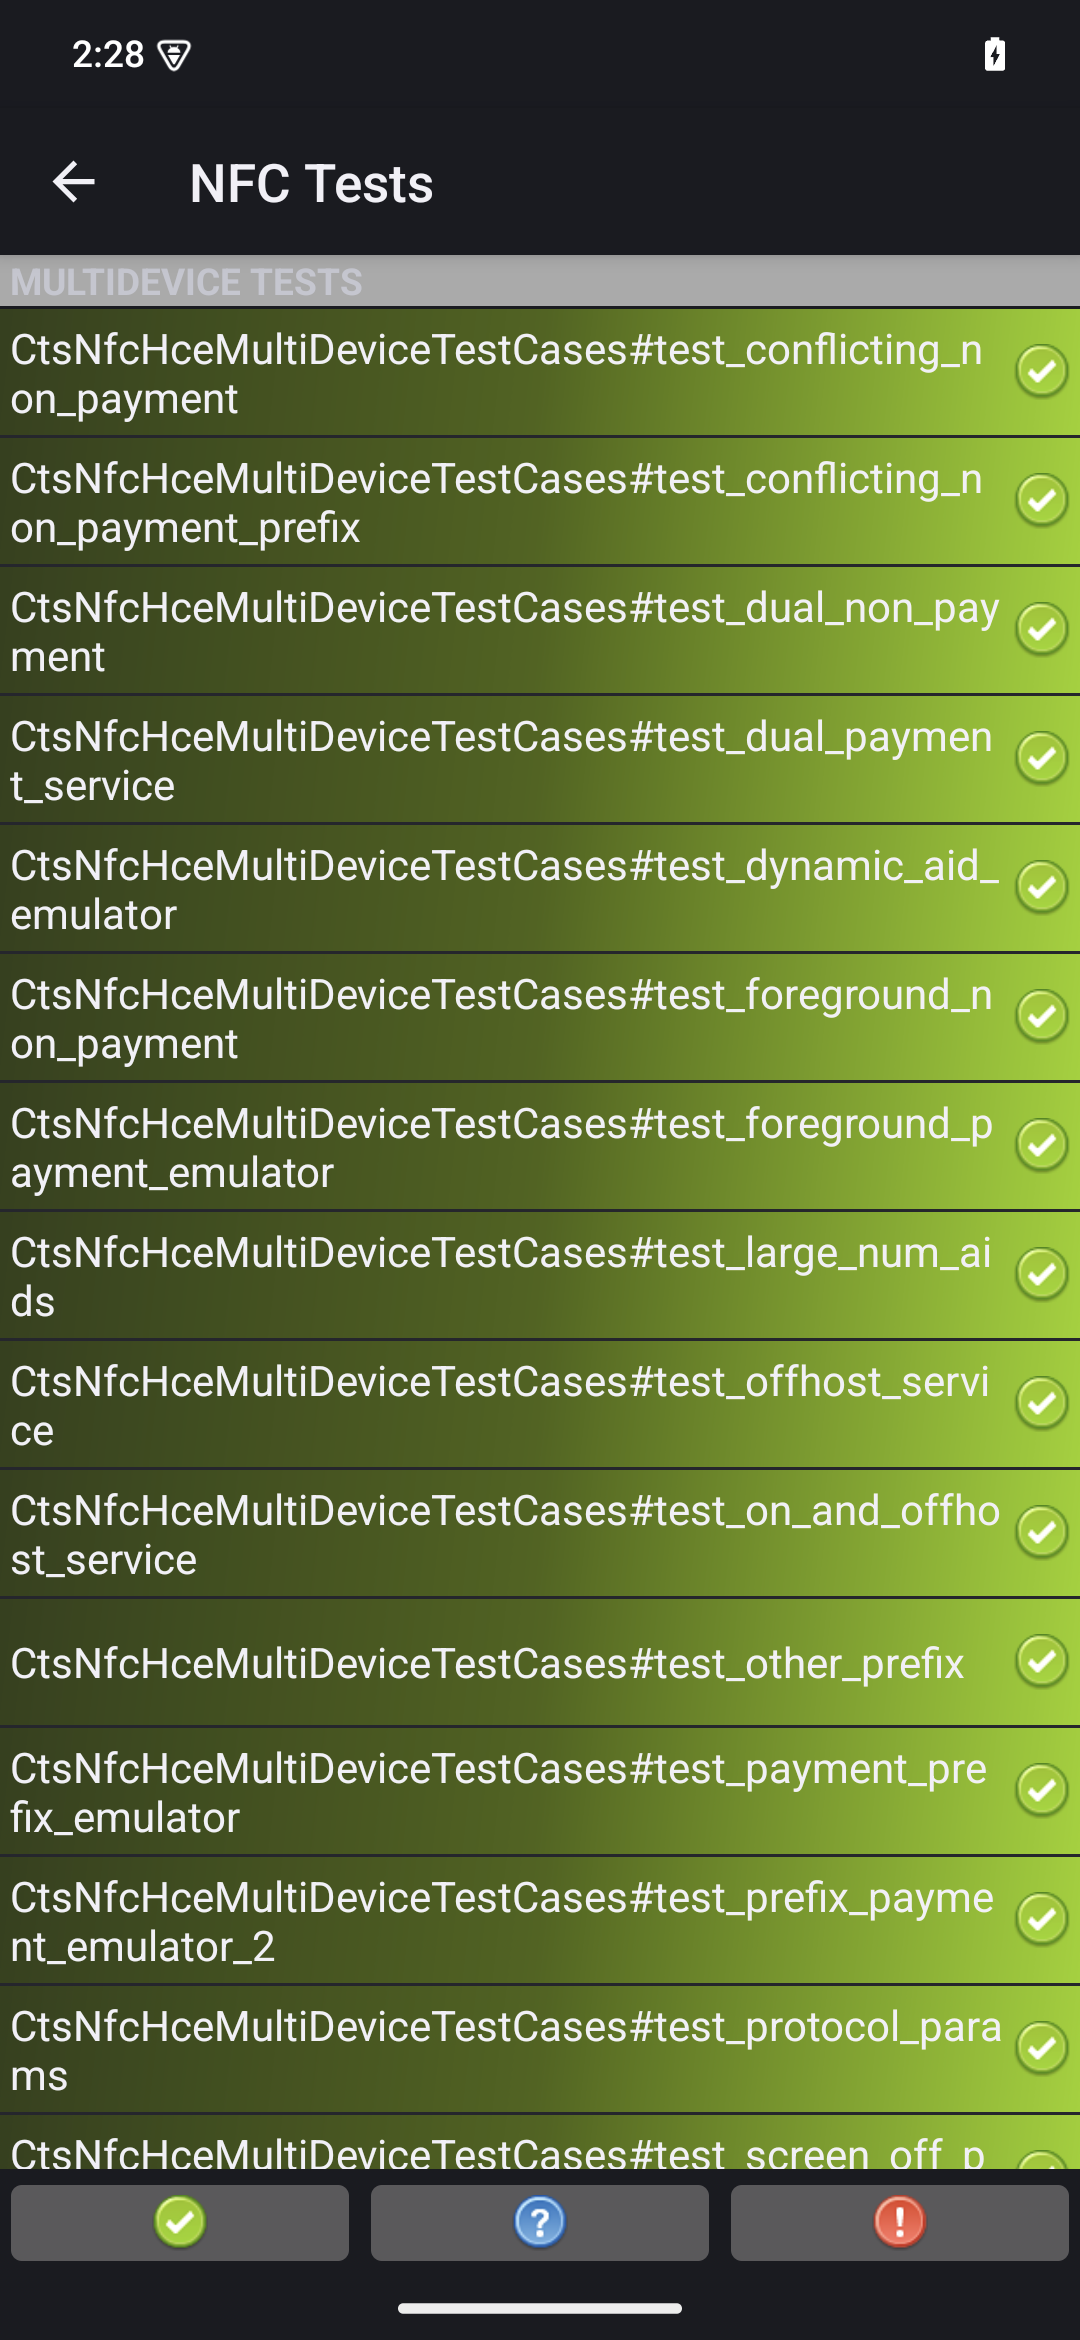
Cuando se completan las pruebas, los resultados se actualizan en la app de CTS-V. Las pruebas que se realizan correctamente aparecen en verde:
Figura 4: Resultados de la prueba de CTS-V
Si ves algún error marcado en rojo, usa el siguiente comando para volver a ejecutar
las pruebas que fallaron:
python3 tools/run_all_tests.py --test_cases "`TestCaseA`" "`TestCaseB`" --test_files "`TestFileA`"
En la que:
TestCaseA
y TestCaseB
son los nombres de los casos de prueba como se muestran en CTS-V.
TestFileA
es el archivo de prueba que contiene los casos de prueba.
Por ejemplo:
python3 tools/run_all_tests.py --test_cases "test_conflicting_non_payment" "test_conflicting_non_payment_prefix" --test_files "CtsNfcHceMultiDeviceTestCases-py-ctsv"
El contenido y las muestras de código que aparecen en esta página están sujetas a las licencias que se describen en la Licencia de Contenido. Java y OpenJDK son marcas registradas de Oracle o sus afiliados.
Última actualización: 2025-07-27 (UTC)
[[["Fácil de comprender","easyToUnderstand","thumb-up"],["Resolvió mi problema","solvedMyProblem","thumb-up"],["Otro","otherUp","thumb-up"]],[["Falta la información que necesito","missingTheInformationINeed","thumb-down"],["Muy complicado o demasiados pasos","tooComplicatedTooManySteps","thumb-down"],["Desactualizado","outOfDate","thumb-down"],["Problema de traducción","translationIssue","thumb-down"],["Problema con las muestras o los códigos","samplesCodeIssue","thumb-down"],["Otro","otherDown","thumb-down"]],["Última actualización: 2025-07-27 (UTC)"],[],[],null,["# Run multi-device NFC tests (Android 15)\n\nThis document explains how to run multi-device NFC tests.\n\nMeet prerequisites\n------------------\n\nBefore you run multi-device NFC tests, do the following:\n\n1. Prepare a device with your Android 15 implementation.\n2. Follow CTS-V [requirements](/docs/compatibility/cts/verifier#requirements).\n3. Follow CTS-V [setup](/docs/compatibility/cts/verifier#setup).\n\nPrepare a DUT and a PN532 NFC reader for the test\n-------------------------------------------------\n\nAfter you finish the previous steps, follow these steps to run\nprepare a DUT and a PN532 NFC reader for the test:\n\n1. Connect the DUT to a host machine over USB.\n2. Grant permissions for the host to access the DUT over ADB.\n3. Install the CTS Verifier app (`CtsVerifier.apk`) on the DUT:\n\n extract root/out/host/linux-x86/cts-verifier/android-cts-verifier.zip\n\n cd android-cts-verifier\n\n adb install -r -g CtsVerifier.apk\n\n4. Install the NFC test required APKs:\n\n cd MultiDevice\n\n adb install -r -g NfcEmulatorTestApp.apk\n\nSet up NFC for the DUT\n----------------------\n\nFollow these steps to run set up NFC for the DUT:\n\n1. On the DUT, go to the **Settings** menu.\n2. Look for the **NFC** or **Connected Devices** section.\n3. Ensure the NFC toggle switch is turned on.\n4. Position an NFC chip on the phone's NFC reader:\n\n 1. Acquire a PN532 NFC chip. We recommend the [All-In-One PN532](https://shop.mtoolstec.com/product/mtools-all-in-one-pn532), non-BLE option.\n 2. Attach the PN532 NFC chip to the Linux host using a USB cable.\n 3. Place the PN532 NFC chip over the phone's NFC reader as shown in the following image:\n\n **Figure 1.** NFC chip placement.\n\nSet up the test environment\n---------------------------\n\nFollow these steps to run set up the test environment:\n\n1. Run these commands to set up the test environment:\n\n cd MultiDevice\n\n source build/envsetup.sh\n\n This command checks the Python and sets up the `PYTHONPATH` environment\n variable. If no errors are printed to the terminal, the environment is ready\n to run the multi-device tests.\n\n If you see the error message `libtinfo.so.6: no version information\n available (required by /bin/sh)` at runtime, run the following command\n to rename the `libtinfo.so.6` file: \n\n mv $ENV_DIRECTORY/lib/libtinfo.so.6 $ENV_DIRECTORY/lib/libtinfo.so.6.bak\n\n2. Set up the test bed by setting the device serial IDs of the DUT and PN532 NFC\n reader in `MultiDevice/config.yml`:\n\n TestBeds:\n - Name: CtsNfcHceMultiDeviceTestCases-py-ctsv\n Controllers:\n AndroidDevice:\n - serial: \"\u003cdevice-id\u003e\"\n TestParams:\n pn532_serial_path: \"\u003cpn532-serial-path\u003e\"\n\nRun the NFC tests\n-----------------\n\nTo run the NFC tests:\n\n1. Open the CTS-V app and tap **NFC Tests**:\n\n **Figure 2.** The CTS-V app.\n\n The info window with list of test cases appears:\n\n **Figure 3.** CTS-V app test cases.\n2. Run the tests on your host:\n\n MultiDevice$ python3 tools/run_all_tests.py\n\n When the tests are completed, the test results are updated in the CTS-V\n app. Successful tests are green:\n\n **Figure 4.** CTS-V test results.\n3. If you see any failures marked in red, use the following command to rerun\n the failed tests:\n\n python3 tools/run_all_tests.py --test_cases \"`\u003cvar translate=\"no\"\u003eTestCaseA\u003c/var\u003e`\" \"`\u003cvar translate=\"no\"\u003eTestCaseB\u003c/var\u003e`\" --test_files \"`\u003cvar translate=\"no\"\u003eTestFileA\u003c/var\u003e`\"\n\n Where:\n - \u003cvar translate=\"no\"\u003eTestCaseA\u003c/var\u003e and \u003cvar translate=\"no\"\u003eTestCaseB\u003c/var\u003e are the names of the test cases as displayed in CTS-V.\n - \u003cvar translate=\"no\"\u003eTestFileA\u003c/var\u003e is the test file containing the test cases.\n\n For example: \n\n python3 tools/run_all_tests.py --test_cases \"test_conflicting_non_payment\" \"test_conflicting_non_payment_prefix\" --test_files \"CtsNfcHceMultiDeviceTestCases-py-ctsv\""]]