A partire dal 27 marzo 2025, ti consigliamo di utilizzare android-latest-release
anziché aosp-main
per compilare e contribuire ad AOSP. Per ulteriori informazioni, vedi Modifiche ad AOSP.
Eseguire test NFC su più dispositivi (Android 15)
Mantieni tutto organizzato con le raccolte
Salva e classifica i contenuti in base alle tue preferenze.
Questo documento spiega come eseguire test NFC su più dispositivi.
Soddisfare i prerequisiti
Prima di eseguire i test NFC su più dispositivi, svolgi i seguenti passaggi:
- Prepara un dispositivo con l'implementazione di Android 15.
- Rispetta i requisiti di CTS-V.
- Segui la configurazione di CTS-V.
Prepara un DUT e un lettore NFC PN532 per il test
Dopo aver completato i passaggi precedenti, segui questi passaggi per eseguire
preparare un DUT e un lettore NFC PN532 per il test:
- Collega il DUT a una macchina host tramite USB.
- Concedi all'host le autorizzazioni per accedere al DUT tramite ADB.
Installa l'app CTS Verifier (CtsVerifier.apk
) sul DUT:
extract root/out/host/linux-x86/cts-verifier/android-cts-verifier.zip
cd android-cts-verifier
adb install -r -g CtsVerifier.apk
Installa gli APK richiesti per il test NFC:
cd MultiDevice
adb install -r -g NfcEmulatorTestApp.apk
Configurare NFC per il DUT
Per configurare il servizio NFC per il DUT:
- Sul DUT, vai al menu Impostazioni.
- Cerca la sezione NFC o Dispositivi connessi.
- Assicurati che l'opzione NFC sia attiva.
Posiziona un chip NFC sul lettore NFC dello smartphone:
- Acquista un chip NFC PN532. Ti consigliamo l'opzione All-In-One PN532 non BLE.
- Collega il chip NFC PN532 all'host Linux utilizzando un cavo USB.
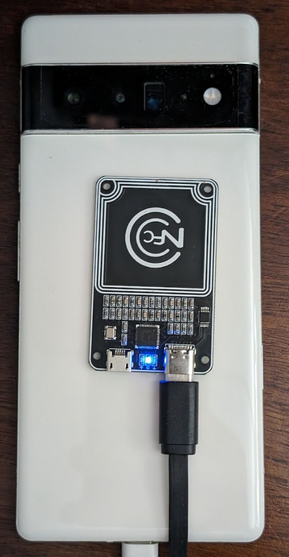
- Posiziona il chip NFC PN532 sopra il lettore NFC dello smartphone come mostrato nella seguente immagine:
Figura 1. Posizionamento del chip NFC.
Configura l'ambiente di test
Per configurare l'ambiente di test:
Esegui questi comandi per configurare l'ambiente di test:
cd MultiDevice
source build/envsetup.sh
Questo comando controlla Python e configura la variabile di ambiente PYTHONPATH
. Se non vengono stampati errori sul terminale, l'ambiente è pronto per eseguire i test su più dispositivi.
Se viene visualizzato il messaggio di errore libtinfo.so.6: no version information
available (required by /bin/sh)
in fase di esecuzione, esegui il seguente comando per rinominare il file libtinfo.so.6
:
mv $ENV_DIRECTORY/lib/libtinfo.so.6 $ENV_DIRECTORY/lib/libtinfo.so.6.bak
Configura la piattaforma di test impostando gli ID di serie del DUT e del lettore NFC PN532 in MultiDevice/config.yml
:
TestBeds:
- Name: CtsNfcHceMultiDeviceTestCases-py-ctsv
Controllers:
AndroidDevice:
- serial: "<device-id>"
TestParams:
pn532_serial_path: "<pn532-serial-path>"
Esegui i test NFC
Per eseguire i test NFC:
Apri l'app CTS-V e tocca Test NFC:
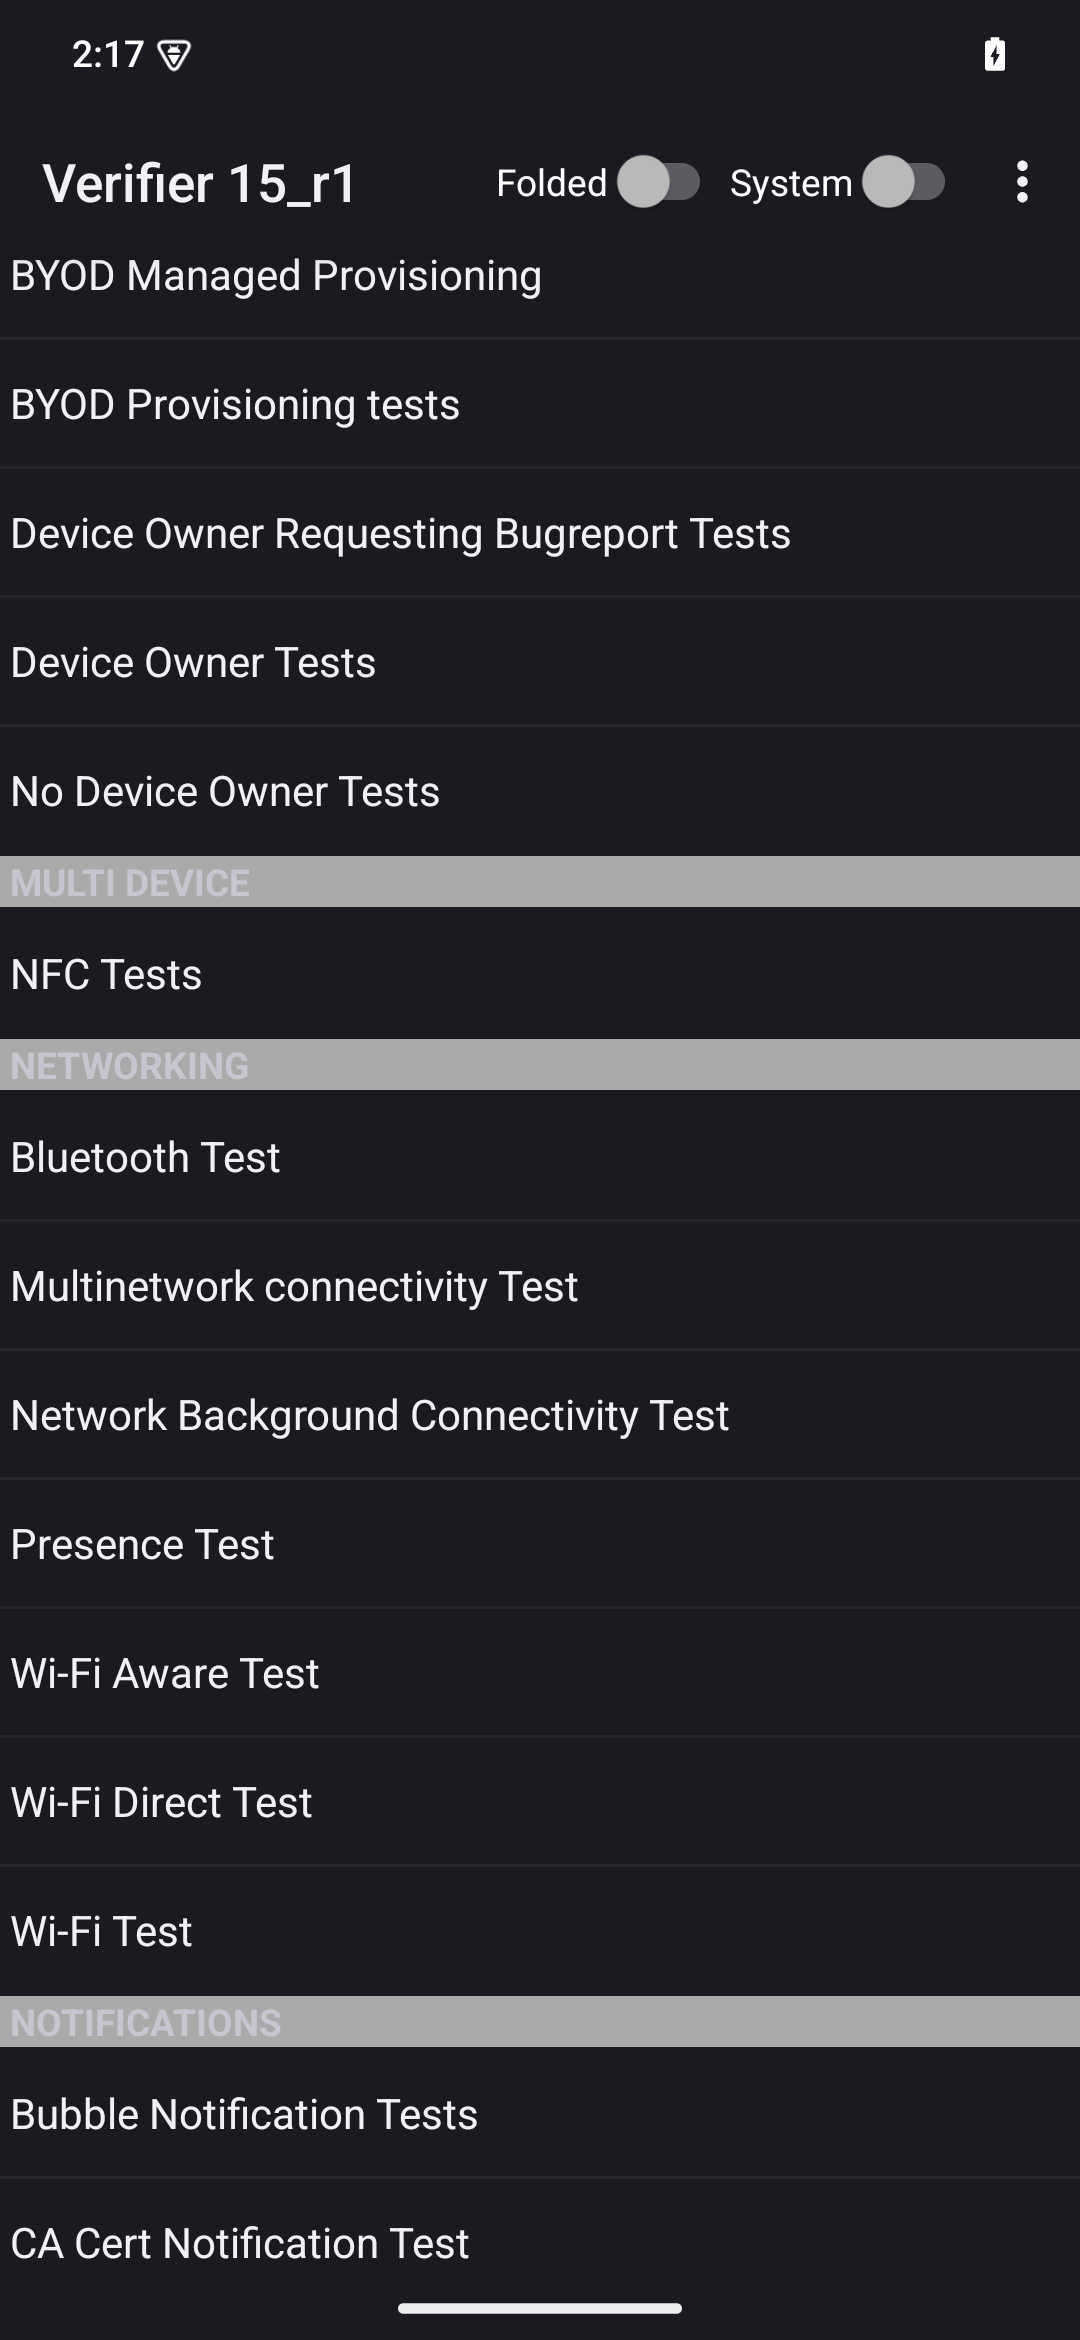
Figura 2. L'app CTS-V.
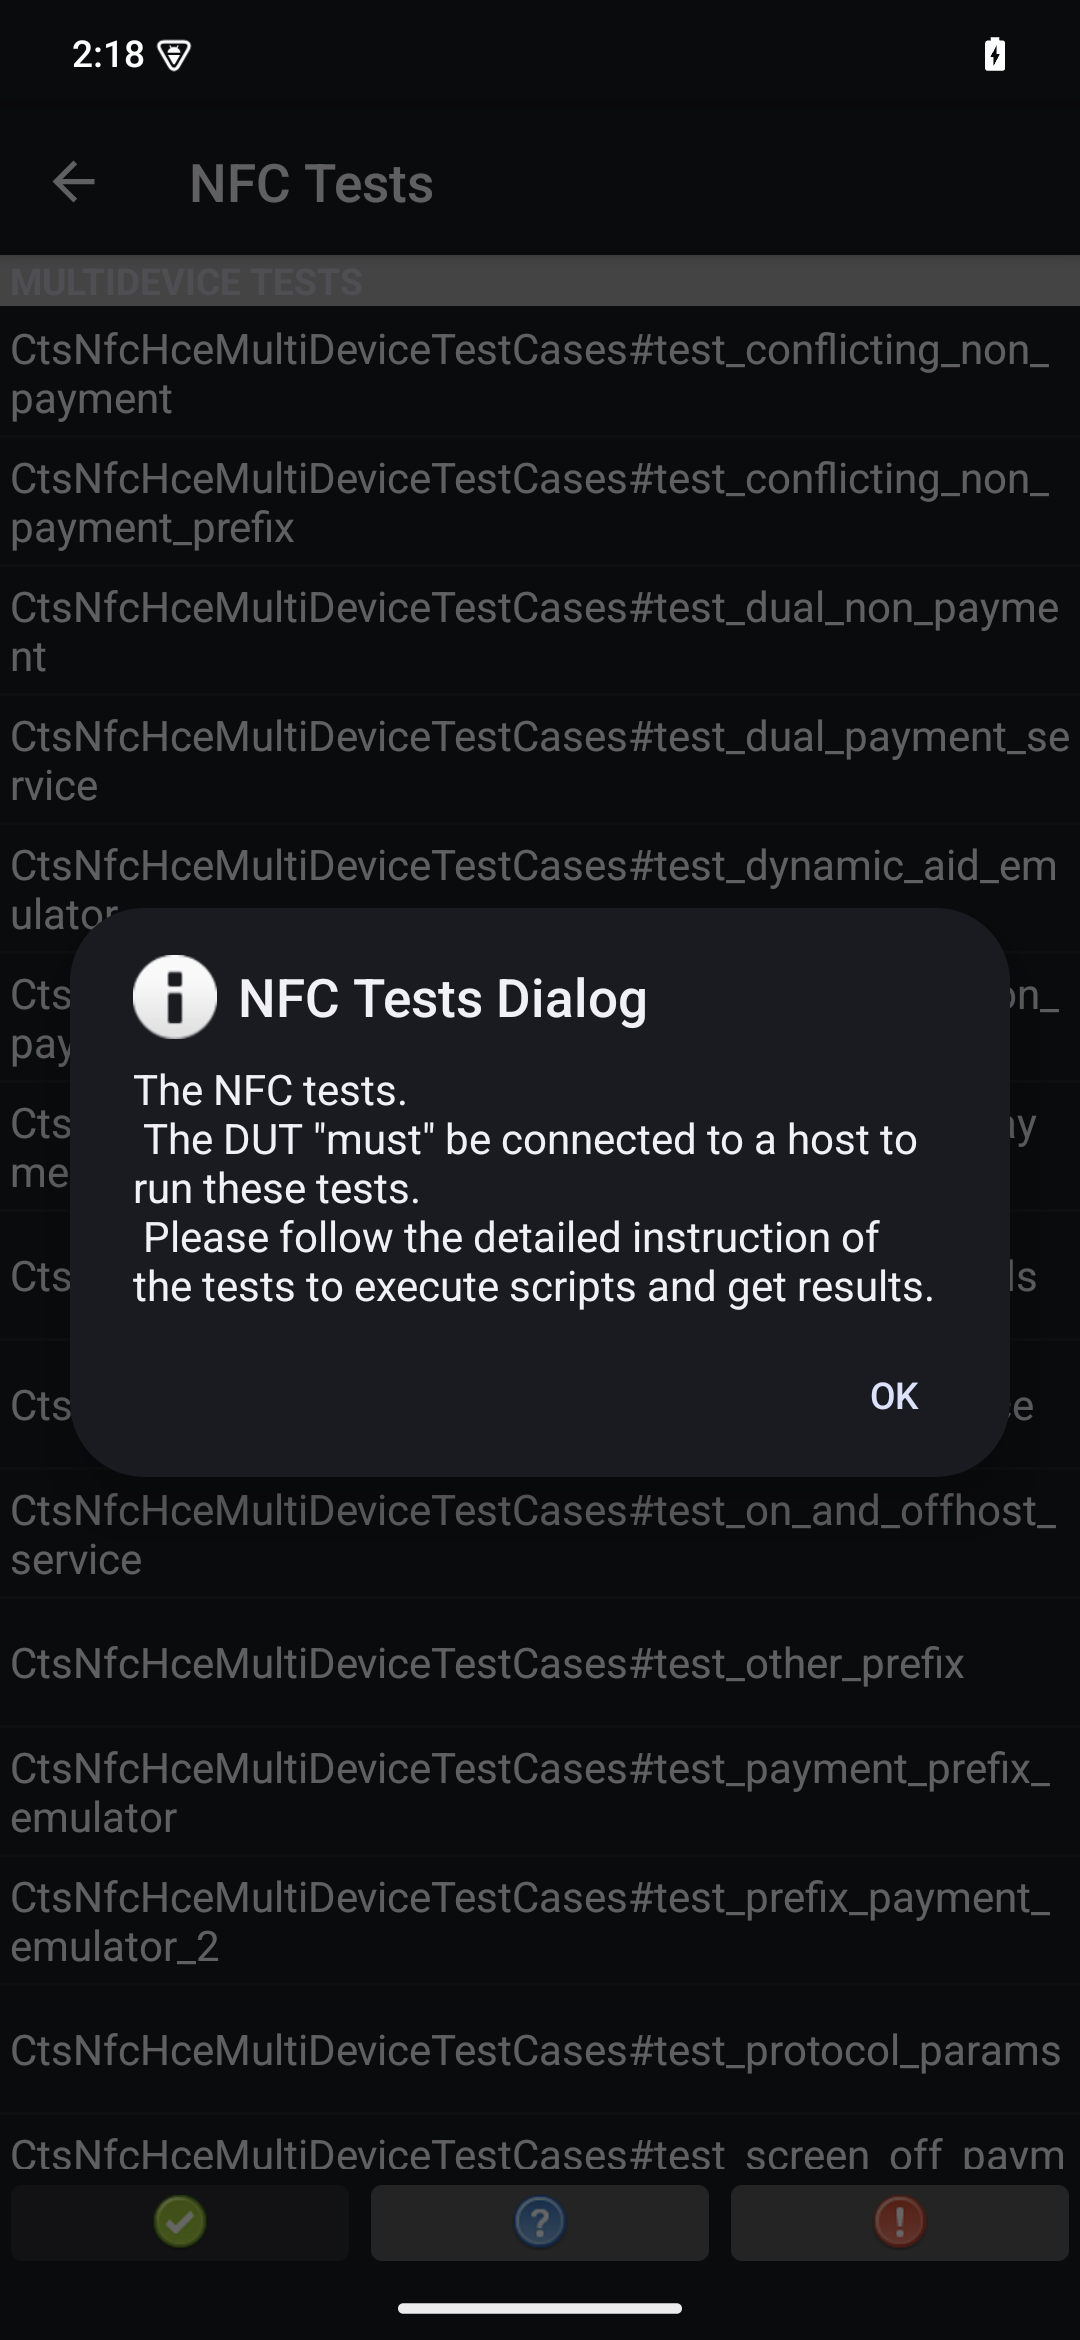
Viene visualizzata la finestra delle informazioni con l'elenco degli scenari di test:
Figura 3. CTS-V app test cases.
Esegui i test sull'host:
MultiDevice$ python3 tools/run_all_tests.py
Al termine dei test, i risultati vengono aggiornati nell'app CTS-V. I test riusciti sono verdi:
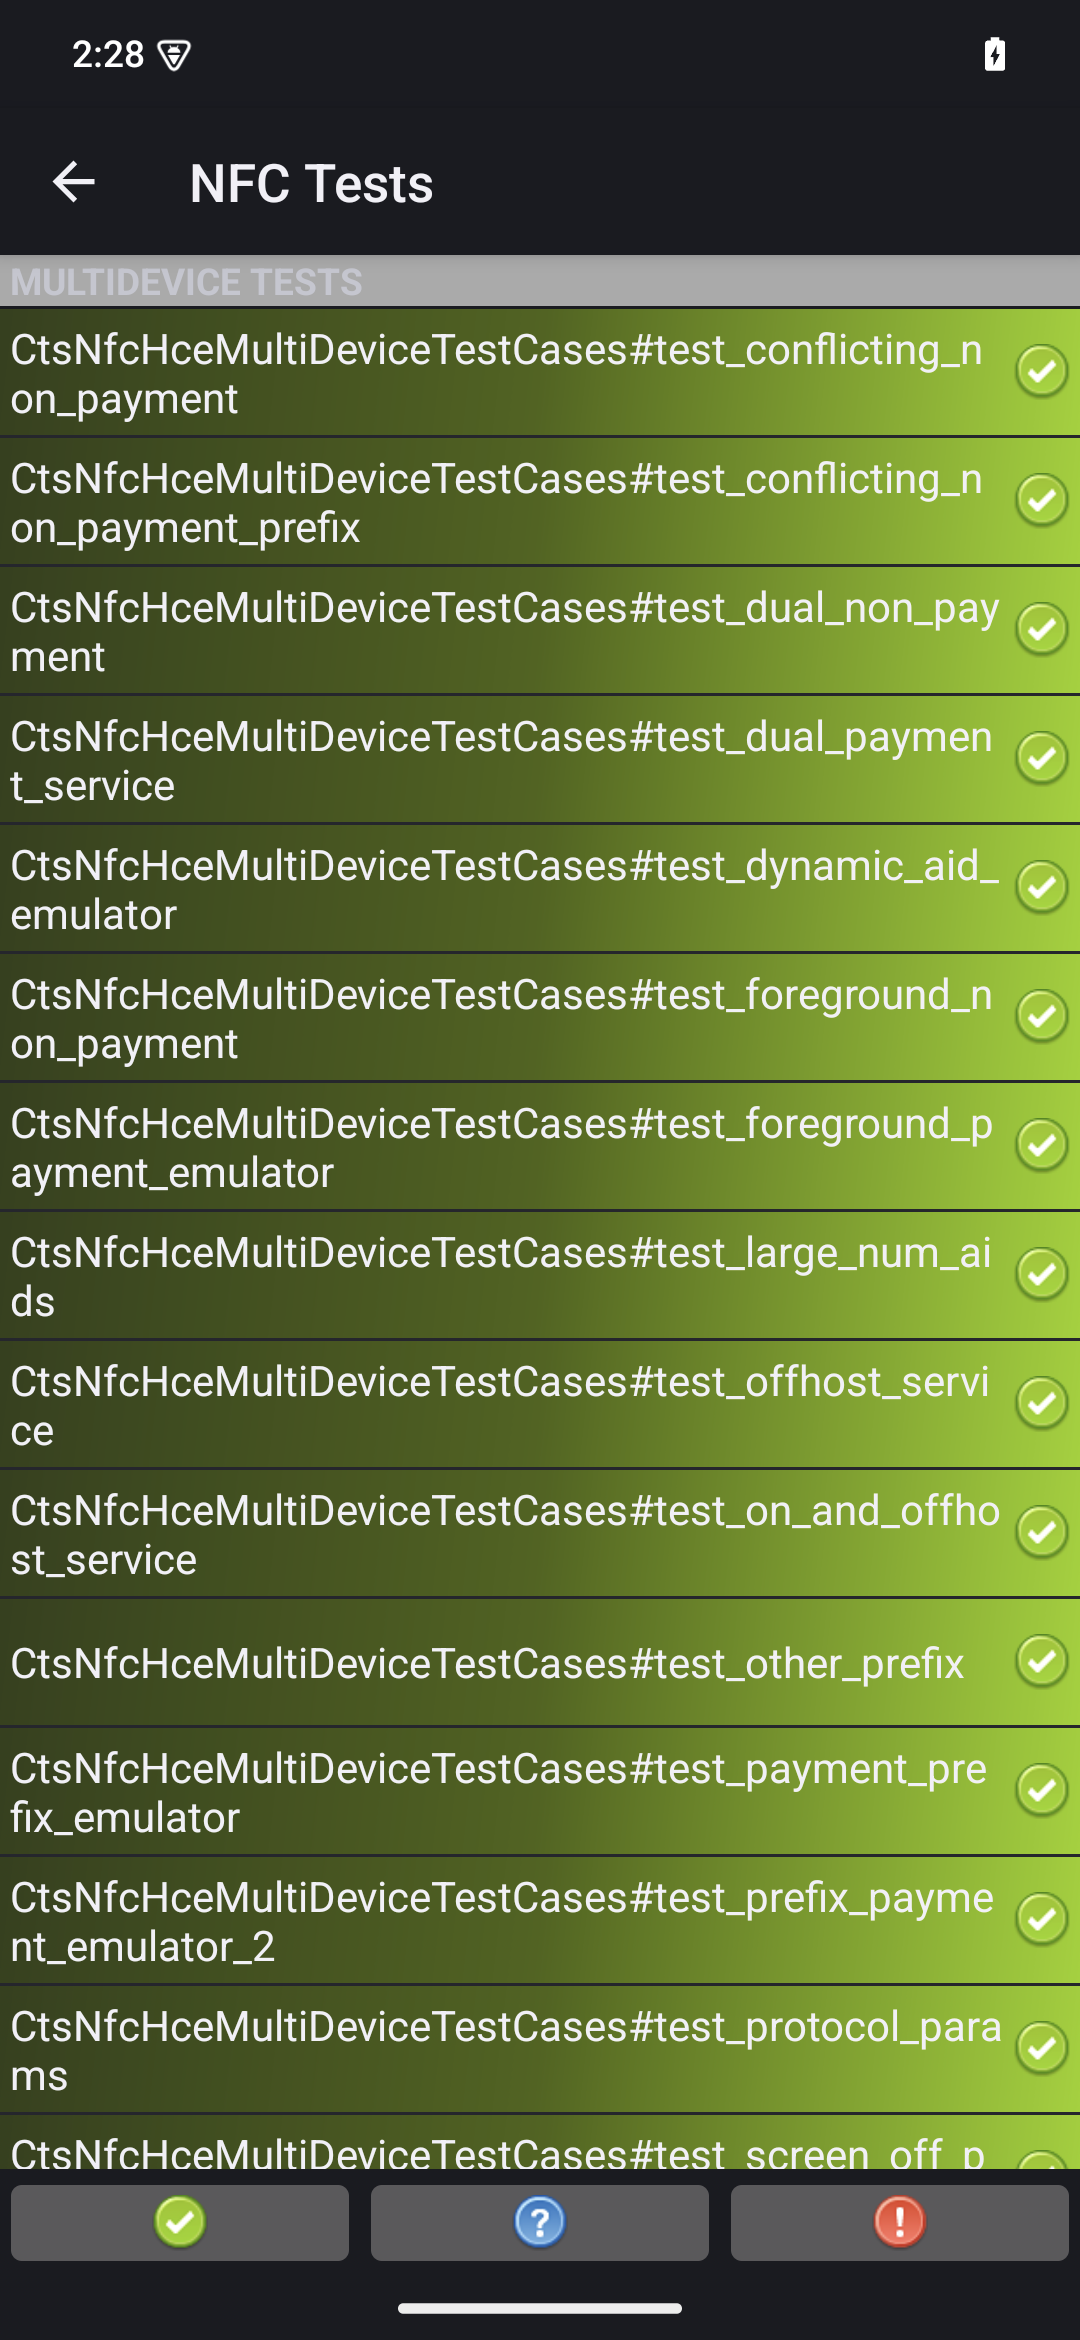
Figura 4. Risultati del test CTS-V.
Se vedi errori contrassegnati in rosso, utilizza il seguente comando per eseguire nuovamente i test non riusciti:
python3 tools/run_all_tests.py --test_cases "`TestCaseA`" "`TestCaseB`" --test_files "`TestFileA`"
Dove:
TestCaseA
e TestCaseB
sono i nomi dei casi di test visualizzati in CTS-V.
TestFileA
è il file di test contenente gli scenari di test.
Ad esempio:
python3 tools/run_all_tests.py --test_cases "test_conflicting_non_payment" "test_conflicting_non_payment_prefix" --test_files "CtsNfcHceMultiDeviceTestCases-py-ctsv"
I campioni di contenuti e codice in questa pagina sono soggetti alle licenze descritte nella Licenza per i contenuti. Java e OpenJDK sono marchi o marchi registrati di Oracle e/o delle sue società consociate.
Ultimo aggiornamento 2025-07-27 UTC.
[[["Facile da capire","easyToUnderstand","thumb-up"],["Il problema è stato risolto","solvedMyProblem","thumb-up"],["Altra","otherUp","thumb-up"]],[["Mancano le informazioni di cui ho bisogno","missingTheInformationINeed","thumb-down"],["Troppo complicato/troppi passaggi","tooComplicatedTooManySteps","thumb-down"],["Obsoleti","outOfDate","thumb-down"],["Problema di traduzione","translationIssue","thumb-down"],["Problema relativo a esempi/codice","samplesCodeIssue","thumb-down"],["Altra","otherDown","thumb-down"]],["Ultimo aggiornamento 2025-07-27 UTC."],[],[],null,["# Run multi-device NFC tests (Android 15)\n\nThis document explains how to run multi-device NFC tests.\n\nMeet prerequisites\n------------------\n\nBefore you run multi-device NFC tests, do the following:\n\n1. Prepare a device with your Android 15 implementation.\n2. Follow CTS-V [requirements](/docs/compatibility/cts/verifier#requirements).\n3. Follow CTS-V [setup](/docs/compatibility/cts/verifier#setup).\n\nPrepare a DUT and a PN532 NFC reader for the test\n-------------------------------------------------\n\nAfter you finish the previous steps, follow these steps to run\nprepare a DUT and a PN532 NFC reader for the test:\n\n1. Connect the DUT to a host machine over USB.\n2. Grant permissions for the host to access the DUT over ADB.\n3. Install the CTS Verifier app (`CtsVerifier.apk`) on the DUT:\n\n extract root/out/host/linux-x86/cts-verifier/android-cts-verifier.zip\n\n cd android-cts-verifier\n\n adb install -r -g CtsVerifier.apk\n\n4. Install the NFC test required APKs:\n\n cd MultiDevice\n\n adb install -r -g NfcEmulatorTestApp.apk\n\nSet up NFC for the DUT\n----------------------\n\nFollow these steps to run set up NFC for the DUT:\n\n1. On the DUT, go to the **Settings** menu.\n2. Look for the **NFC** or **Connected Devices** section.\n3. Ensure the NFC toggle switch is turned on.\n4. Position an NFC chip on the phone's NFC reader:\n\n 1. Acquire a PN532 NFC chip. We recommend the [All-In-One PN532](https://shop.mtoolstec.com/product/mtools-all-in-one-pn532), non-BLE option.\n 2. Attach the PN532 NFC chip to the Linux host using a USB cable.\n 3. Place the PN532 NFC chip over the phone's NFC reader as shown in the following image:\n\n **Figure 1.** NFC chip placement.\n\nSet up the test environment\n---------------------------\n\nFollow these steps to run set up the test environment:\n\n1. Run these commands to set up the test environment:\n\n cd MultiDevice\n\n source build/envsetup.sh\n\n This command checks the Python and sets up the `PYTHONPATH` environment\n variable. If no errors are printed to the terminal, the environment is ready\n to run the multi-device tests.\n\n If you see the error message `libtinfo.so.6: no version information\n available (required by /bin/sh)` at runtime, run the following command\n to rename the `libtinfo.so.6` file: \n\n mv $ENV_DIRECTORY/lib/libtinfo.so.6 $ENV_DIRECTORY/lib/libtinfo.so.6.bak\n\n2. Set up the test bed by setting the device serial IDs of the DUT and PN532 NFC\n reader in `MultiDevice/config.yml`:\n\n TestBeds:\n - Name: CtsNfcHceMultiDeviceTestCases-py-ctsv\n Controllers:\n AndroidDevice:\n - serial: \"\u003cdevice-id\u003e\"\n TestParams:\n pn532_serial_path: \"\u003cpn532-serial-path\u003e\"\n\nRun the NFC tests\n-----------------\n\nTo run the NFC tests:\n\n1. Open the CTS-V app and tap **NFC Tests**:\n\n **Figure 2.** The CTS-V app.\n\n The info window with list of test cases appears:\n\n **Figure 3.** CTS-V app test cases.\n2. Run the tests on your host:\n\n MultiDevice$ python3 tools/run_all_tests.py\n\n When the tests are completed, the test results are updated in the CTS-V\n app. Successful tests are green:\n\n **Figure 4.** CTS-V test results.\n3. If you see any failures marked in red, use the following command to rerun\n the failed tests:\n\n python3 tools/run_all_tests.py --test_cases \"`\u003cvar translate=\"no\"\u003eTestCaseA\u003c/var\u003e`\" \"`\u003cvar translate=\"no\"\u003eTestCaseB\u003c/var\u003e`\" --test_files \"`\u003cvar translate=\"no\"\u003eTestFileA\u003c/var\u003e`\"\n\n Where:\n - \u003cvar translate=\"no\"\u003eTestCaseA\u003c/var\u003e and \u003cvar translate=\"no\"\u003eTestCaseB\u003c/var\u003e are the names of the test cases as displayed in CTS-V.\n - \u003cvar translate=\"no\"\u003eTestFileA\u003c/var\u003e is the test file containing the test cases.\n\n For example: \n\n python3 tools/run_all_tests.py --test_cases \"test_conflicting_non_payment\" \"test_conflicting_non_payment_prefix\" --test_files \"CtsNfcHceMultiDeviceTestCases-py-ctsv\""]]