
इस दस्तावेज़ में, एक से ज़्यादा डिवाइसों पर NFC टेस्ट चलाने का तरीका बताया गया है.
ज़रूरी शर्तें पूरी करना
एक से ज़्यादा डिवाइसों पर NFC टेस्ट चलाने से पहले, यह काम करें:
- Android 15 वर्शन वाला कोई डिवाइस तैयार करें.
- CTS-V की ज़रूरी शर्तों का पालन करें.
- CTS-V सेटअप का पालन करें.
टेस्ट के लिए, DUT और PN532 NFC रीडर तैयार करें
पिछले चरण पूरे करने के बाद, टेस्ट के लिए डीयूटी और PN532 एनएफ़सी रीडर तैयार करने के लिए, यह तरीका अपनाएं:
- यूएसबी केबल की मदद से, DUT को होस्ट मशीन से कनेक्ट करें.
- होस्ट को ADB के ज़रिए DUT को ऐक्सेस करने की अनुमतियां दें.
DUT पर CTS Verifier ऐप्लिकेशन (
CtsVerifier.apk) इंस्टॉल करें:extract root/out/host/linux-x86/cts-verifier/android-cts-verifier.zip cd android-cts-verifier adb install -r -g CtsVerifier.apkएनएफ़सी टेस्ट के लिए ज़रूरी APK इंस्टॉल करें:
cd MultiDevice

adb install -r -g NfcEmulatorTestApp.apk
DUT के लिए एनएफ़सी सेट अप करना
DUT के लिए एनएफ़सी सेट अप करने के लिए, यह तरीका अपनाएं:
- DUT पर, सेटिंग मेन्यू पर जाएं.
- एनएफ़सी या कनेक्ट किए गए डिवाइस सेक्शन ढूंढें.
- पुष्टि करें कि एनएफ़सी टॉगल स्विच चालू है.
एनएफ़सी चिप को फ़ोन के एनएफ़सी रीडर पर रखें:
- PN532 एनएफ़सी चिप पाएं. हमारा सुझाव है कि आप All-In-One PN532 का इस्तेमाल करें. यह BLE की सुविधा के बिना काम करता है.
- यूएसबी केबल का इस्तेमाल करके, PN532 एनएफ़सी चिप को Linux होस्ट से अटैच करें.
- PN532 एनएफ़सी चिप को फ़ोन के एनएफ़सी रीडर के ऊपर रखें. इसके लिए, यहां दी गई इमेज देखें:
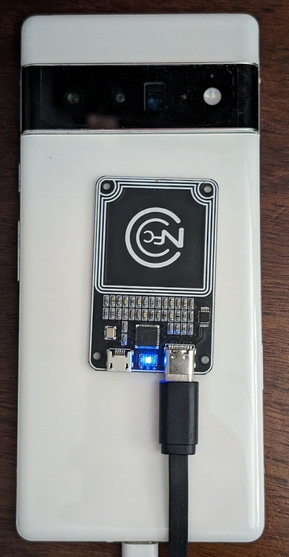
पहली इमेज. एनएफ़सी चिप की जगह.
टेस्ट एनवायरमेंट सेट अप करना
टेस्ट एनवायरमेंट सेट अप करने के लिए, यह तरीका अपनाएं:
टेस्ट एनवायरमेंट सेट अप करने के लिए, ये कमांड चलाएं:
cd MultiDevice

source build/envsetup.sh
यह कमांड, Python की जांच करती है और
PYTHONPATHएनवायरमेंट वैरिएबल सेट अप करती है. अगर टर्मिनल पर कोई गड़बड़ी नहीं दिखती है, तो इसका मतलब है कि एनवायरमेंट, एक से ज़्यादा डिवाइसों पर टेस्ट चलाने के लिए तैयार है.अगर आपको रनटाइम के दौरान गड़बड़ी का मैसेज
libtinfo.so.6: no version information
available (required by /bin/sh)
दिखता है, तोlibtinfo.so.6फ़ाइल का नाम बदलने के लिए, यह कमांड चलाएं:mv $ENV_DIRECTORY/lib/libtinfo.so.6 $ENV_DIRECTORY/lib/libtinfo.so.6.bakMultiDevice/config.ymlमें, DUT और PN532 NFC रीडर के डिवाइस सीरियल आईडी सेट करके, टेस्ट बेड सेट अप करें:TestBeds: - Name: CtsNfcHceMultiDeviceTestCases-py-ctsv Controllers: AndroidDevice: - serial: "<device-id>" TestParams: pn532_serial_path: "<pn532-serial-path>"
एनएफ़सी की जांच करना
एनएफ़सी की जांच करने के लिए:
CTS-V ऐप्लिकेशन खोलें और एनएफ़सी टेस्ट पर टैप करें:
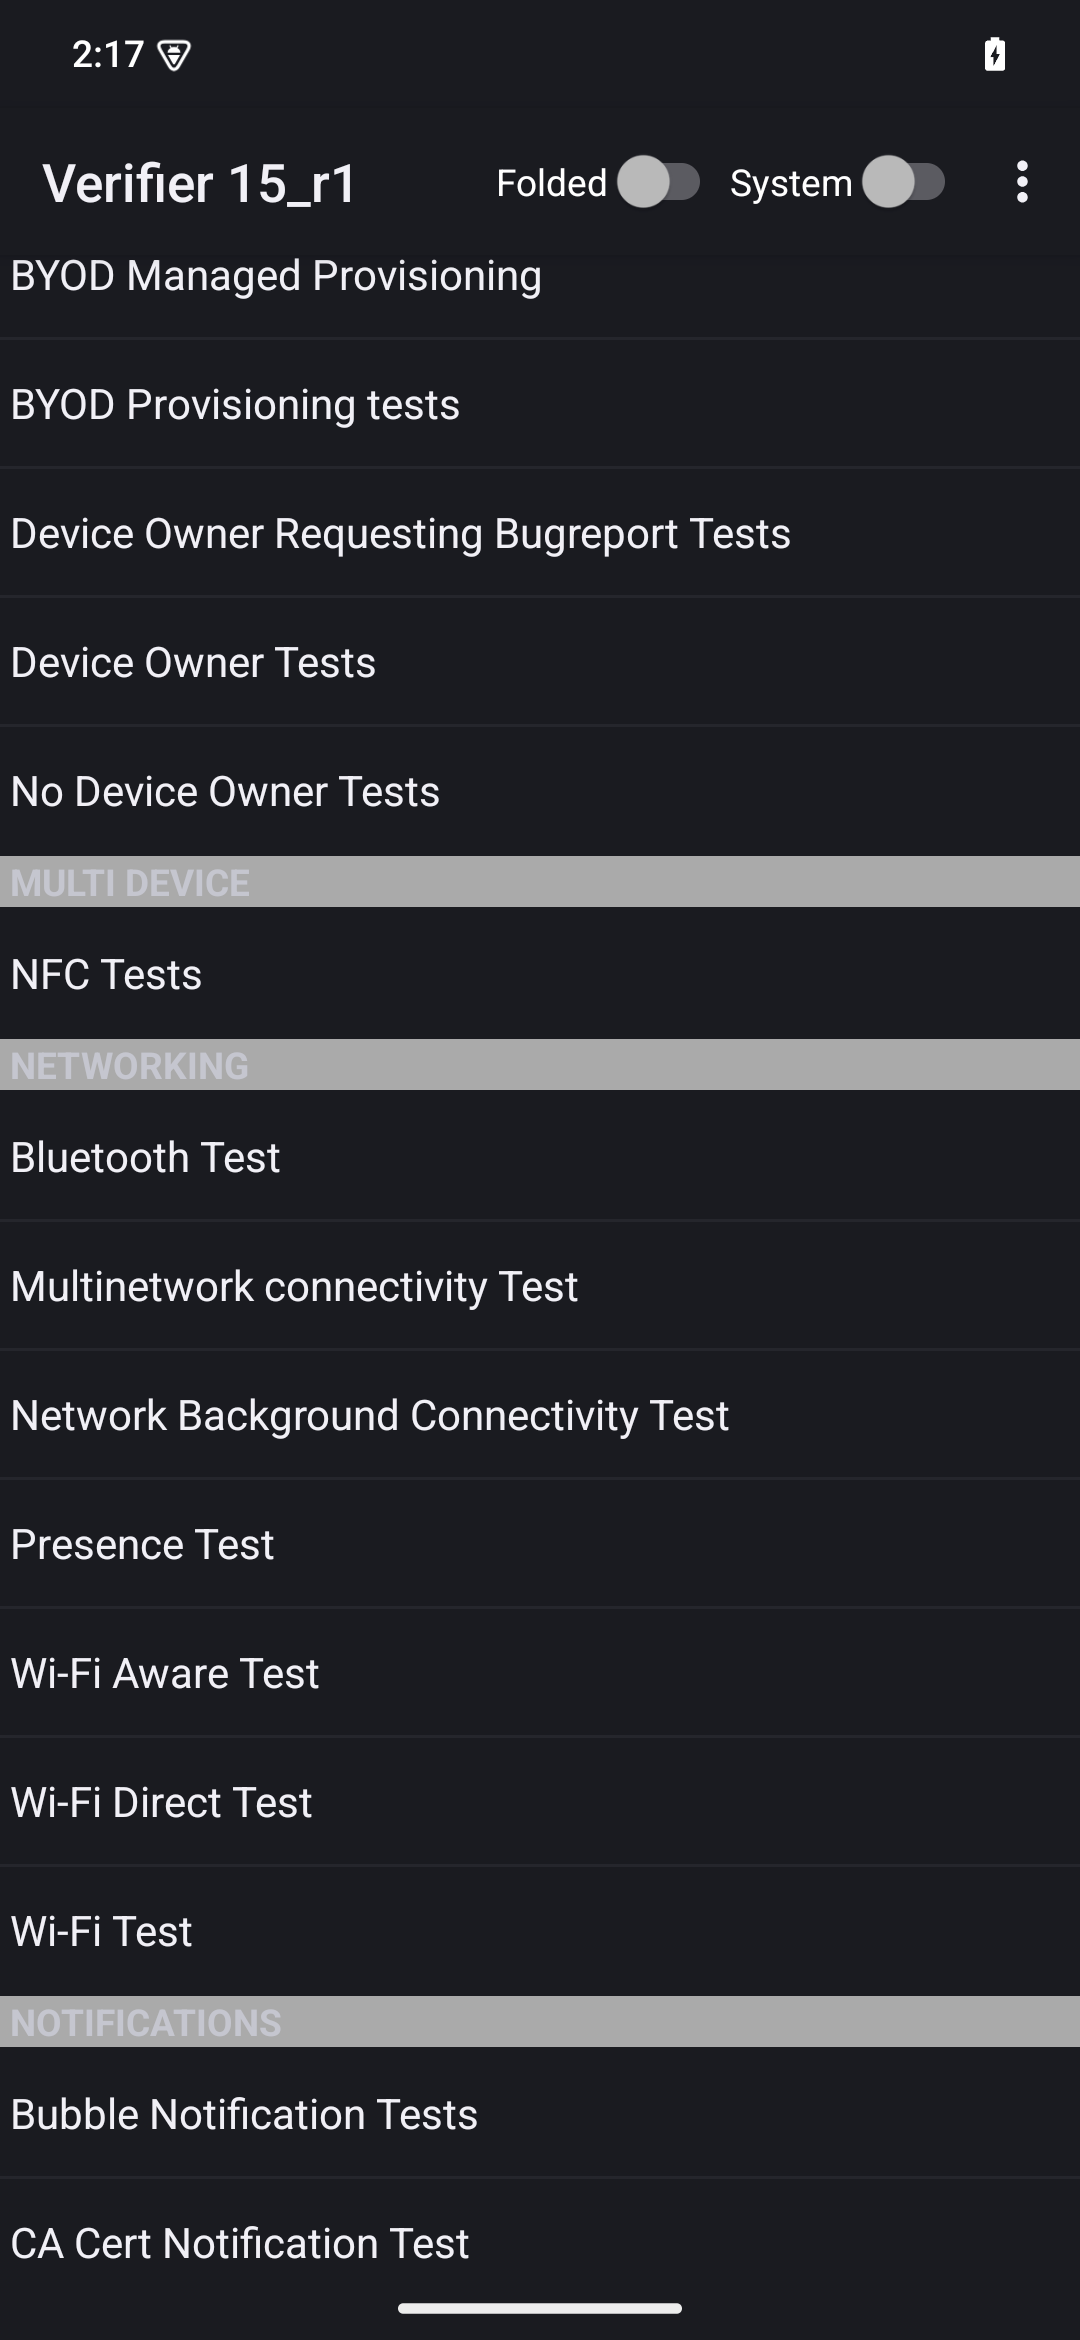
दूसरी इमेज. CTS-V ऐप्लिकेशन.
टेस्ट केस की सूची वाली जानकारी विंडो दिखती है:
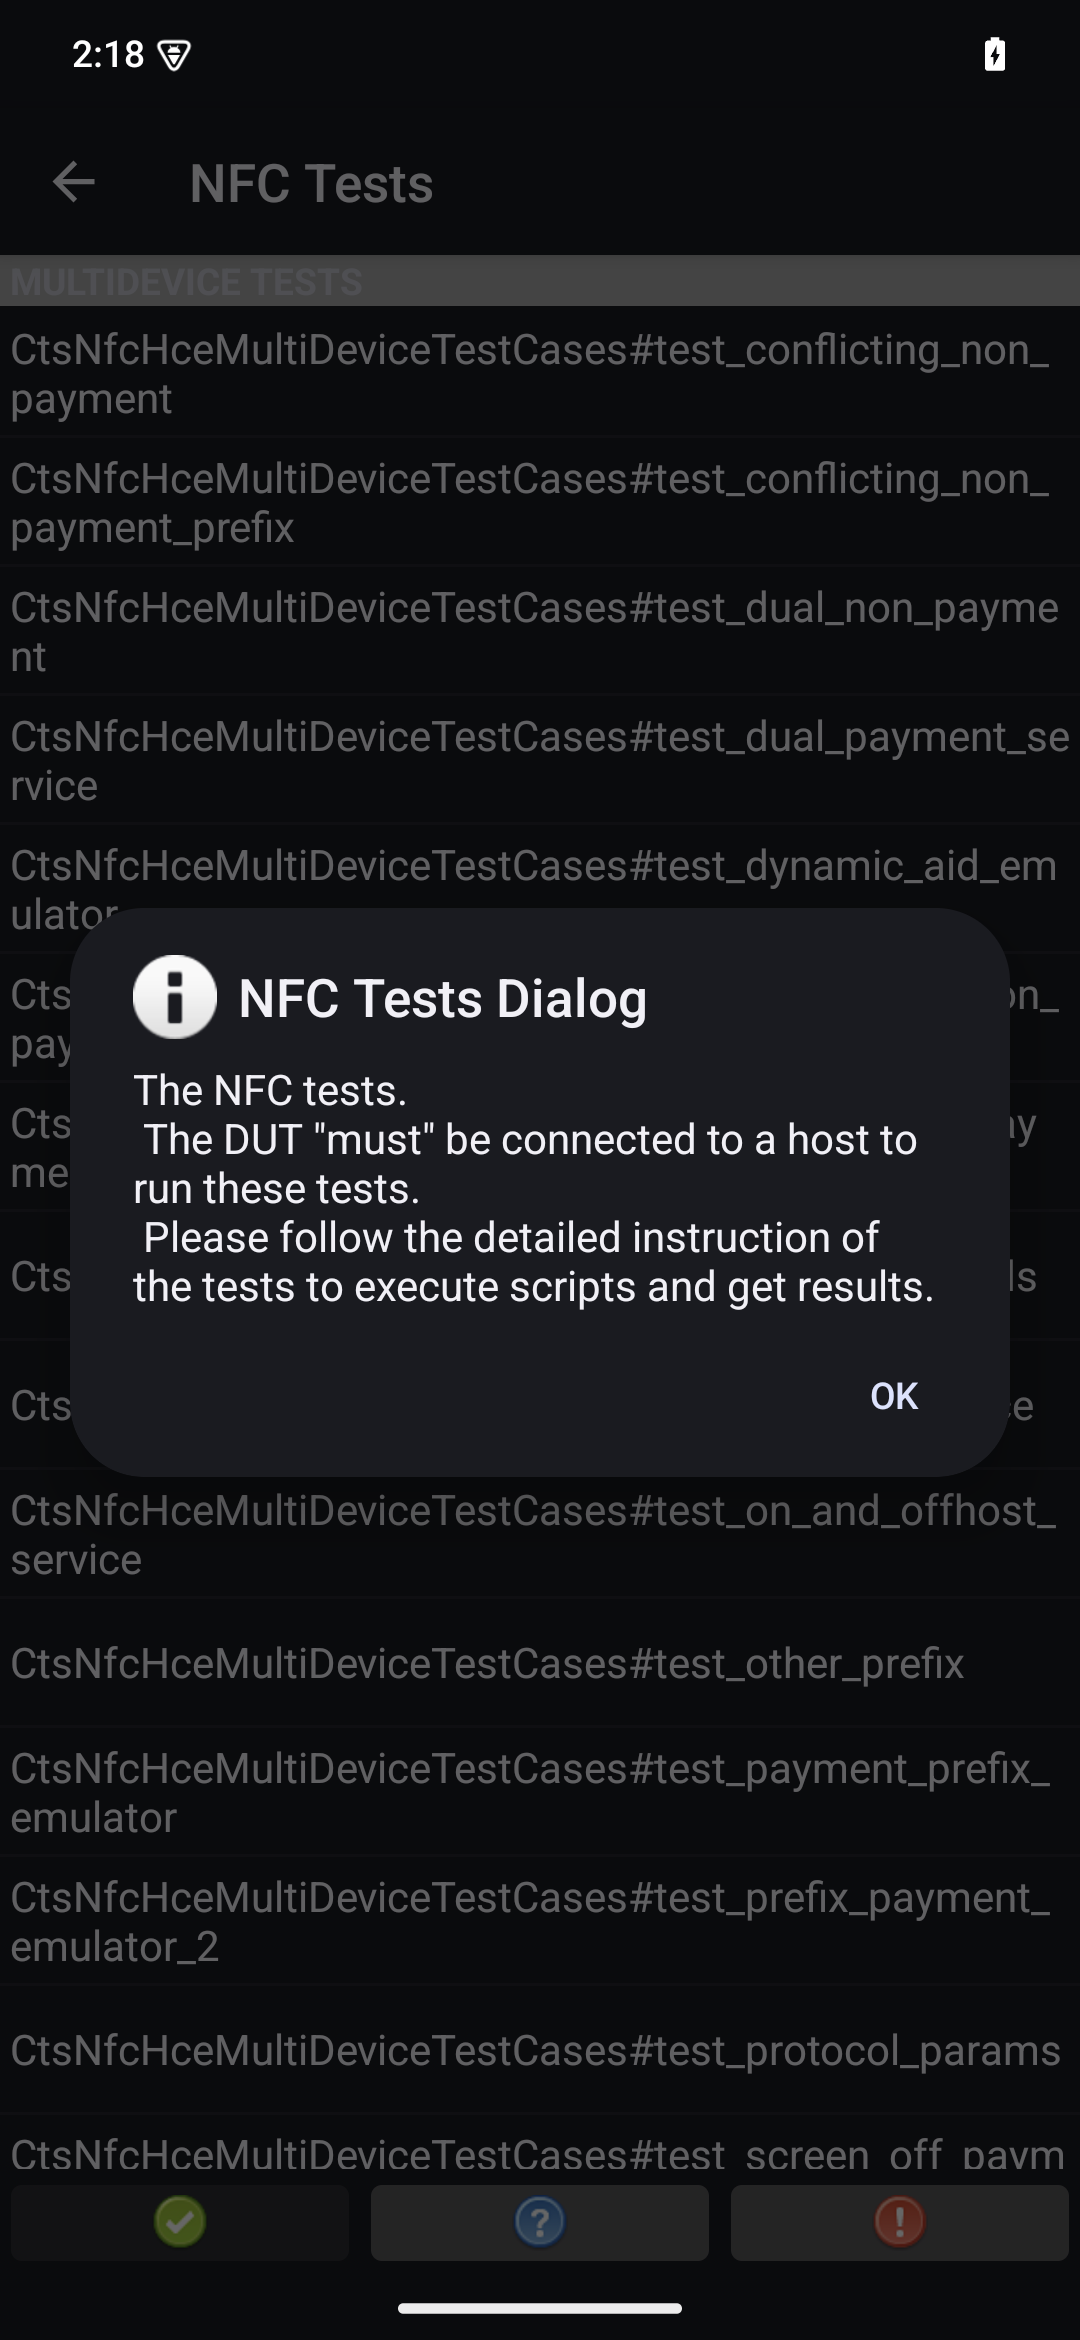
तीसरी इमेज. सीटीएस-वी ऐप्लिकेशन के टेस्ट केस.
अपने होस्ट पर ये टेस्ट चलाएं:
MultiDevice$ python3 tools/run_all_tests.pyजांच पूरी होने पर, CTS-V ऐप्लिकेशन में जांच के नतीजे अपडेट हो जाते हैं. पास की गई जांचों के नतीजे हरे रंग में दिखते हैं:
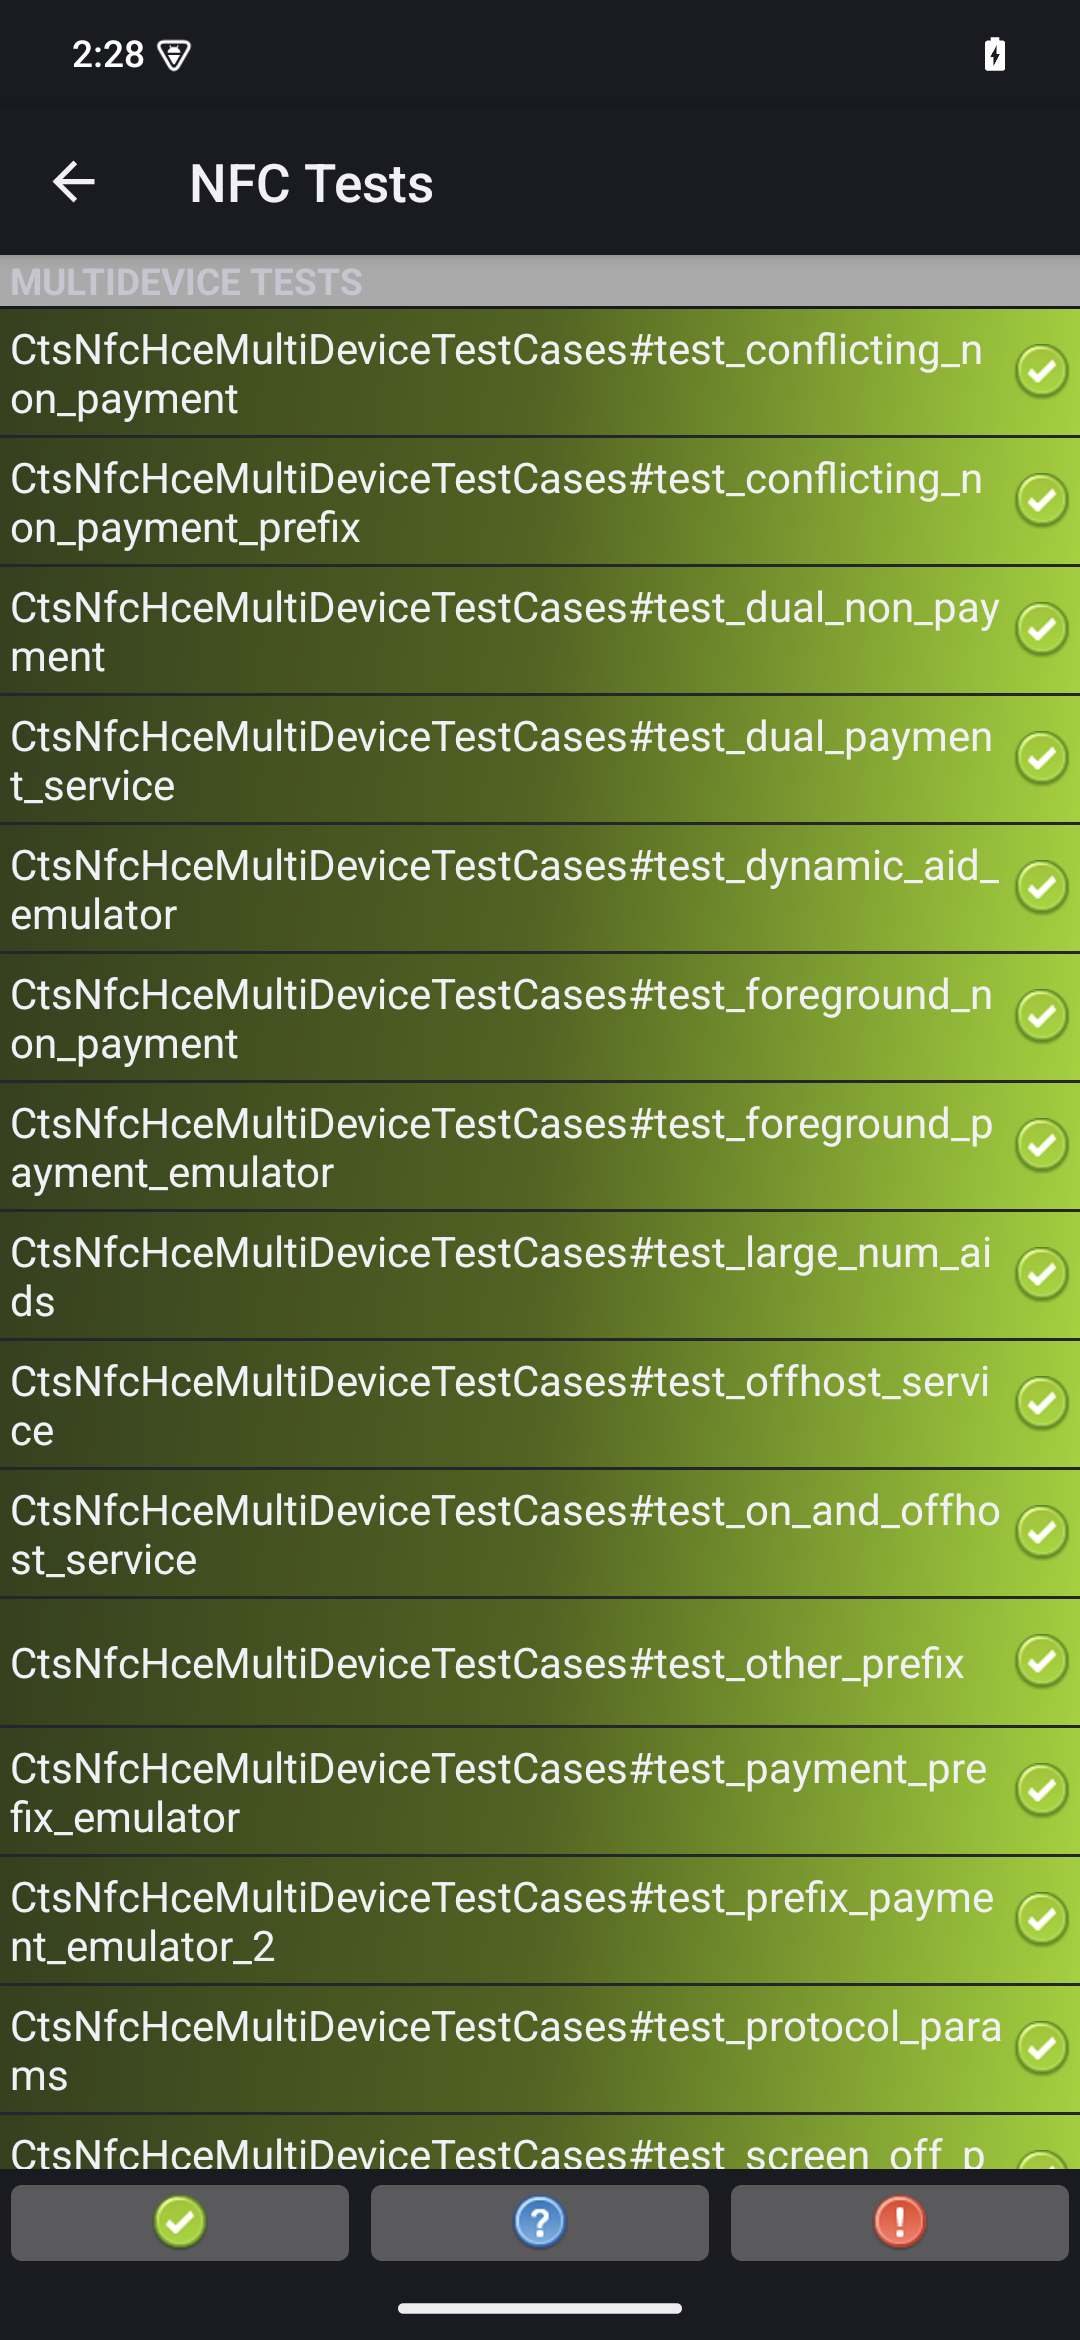
चौथी इमेज. CTS-V टेस्ट के नतीजे.
अगर आपको लाल रंग में मार्क की गई कोई गड़बड़ी दिखती है, तो गड़बड़ी वाली जांच को फिर से चलाने के लिए, इस कमांड का इस्तेमाल करें:
python3 tools/run_all_tests.py --test_cases "`TestCaseA`" "`TestCaseB`" --test_files "`TestFileA`"यहां:
TestCaseAऔरTestCaseB, CTS-V में दिखाए गए टेस्ट केस के नाम हैं.TestFileAटेस्ट फ़ाइल है, जिसमें टेस्ट केस शामिल हैं.
उदाहरण के लिए:
python3 tools/run_all_tests.py --test_cases "test_conflicting_non_payment" "test_conflicting_non_payment_prefix" --test_files "CtsNfcHceMultiDeviceTestCases-py-ctsv"