
All Android framework improvements built around haptics are driven by a set of UX principles that are evolving at an equal rate. The current principles involve replacing buzzy vibration with clear haptics, and exploring rich haptics.
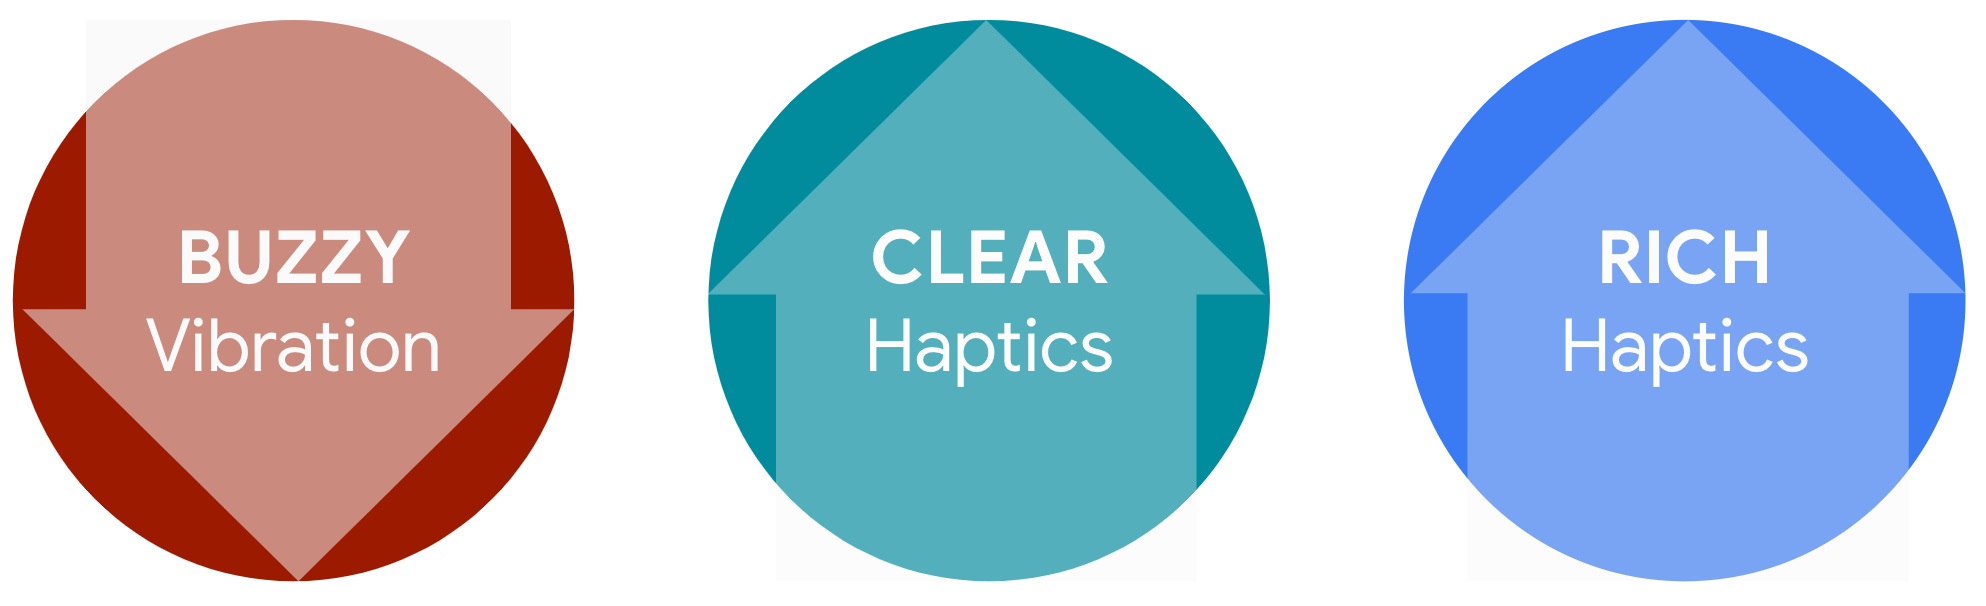
Figure 1. Current principles.
The following table lists all available haptics APIs:
| API | Methods and constants | Year added |
|---|---|---|
android.view.HapticFeedbackConstants |
|
Before 2016 |
|
2017 (Android 8) | |
|
2020 (Android 11) | |
android.View |
|
Before 2016 |
android.os.Vibrator |
|
Before 2016 |
|
2017 (Android 8) | |
|
2020 (Android 11) | |
android.os.VibrationEffect |
|
2017 (Android 8) |
|
2019 (Android 10) | |
android.os.VibrationEffect.Composition |
|
2020 (Android 11) |
android.media.AudioAttributes.Builder |
|
2019 (Android 10) |
Buzzy vibration
Dating back to pagers and feature phones, low-quality but power-efficient eccentric rotating mass (ERM) buzzer-based vibrations have been used as a substitute for auditory ringing in silent mode. The legacy hardware components that produce loud and unpleasant audible noises can harm haptic UX by delivering low-quality impressions (for example, a cheap, broken phone).
Clear haptics
Clear haptics support the sensation of discrete state changes (for example, binary changes during the power on and off process). Due to the nature of the discrete affordance, clear haptics are generated as a single entity (for example, one haptic effect per one input event).
Android aims to deliver clear haptics with strong, yet sharp sensations rather than sensations that are buzzy or mushy.
Predefined haptic constants that are created to support clear haptics include the following elements.
CLOCK_TICKCONFIRMCONTEXT_CLICKGESTURE_ENDGESTURE_STARTKEYBOARD_PRESSKEYBOARD_RELEASEKEYBOARD_TAPLONG_PRESSREJECTTEXT_HANDLE_MOVEVIRTUAL_KEYVIRTUAL_KEY_RELEASE
In
VibrationEffect:
EFFECT_CLICKEFFECT_DOUBLE_CLICKEFFECT_HEAVY_CLICKEFFECT_TICK
Building common knowledge between device manufacturers and developers is key to raising the overall quality of haptics in the Android ecosystem. Use the basic checklist, hardware assessment, and CDD. to learn more about haptic implementation.
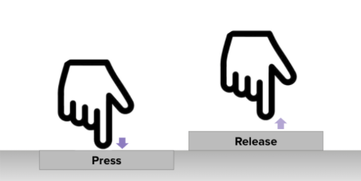
Figure 2. Pressing and releasing.
Rich haptics
Rich haptics is a growing haptics category that goes beyond single impulse-based effects. Android aims to support rich haptics with high composability and adjustability with a fine level of granularity. The following use cases are supported in Android 11 or lower.
Figure 3. Rich haptics with sliding texture.
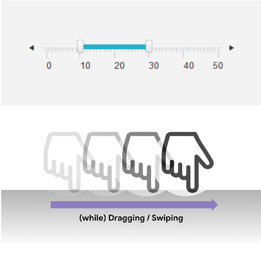
Figure 4. Dragging and swiping.
Use case 1: Sliding texture
If a haptic effect is repeated while the finger slides over a touch surface (for example, dragging, swiping, exploring the surface with phantom haptic texture), the repeating haptic effects are preferably crisp and subtle.
If the individual effect is buzzy rather than crisp, then the intervals between the repetitions are likely to be wiped out. The outcome is one long buzz, rather than multiple discrete signals.
If the amplitude isn't subtle enough, then the perceived haptic energy builds up through the repetition, resulting in overwhelmingly strong haptics at the end of the repetition.
Implement a surface haptic texture for swipe and drag gestures
Use CLOCK_TICK and TEXT_HANDLE_MOVE in HapticFeedbackConstants.
These constants predefine characteristics of repetition and amplitude.
Create your own effect
To make your own effect, compose a design by stringing together sequences
of PRIMITIVE_CLICK and PRIMITIVE_TICK in VibrationEffect.Composition.
You can adjust the characteristics of the repetition and amplitude scale
using addPrimitive(int primitiveID, float scale, int delay). Support relies on
the CAP_COMPOSE_EFFECTS capability of the Vibrator HAL Interface.
Use case 2: Long vibration with ease-in effect
Long vibration is a smooth amplitude vibration that transitions from 0 to the target amplitude. Long vibration can generate perceivable attentional haptics. However, a sudden long vibration can startle users in a quiet environment, and often produces audible buzzing noises. To generate a more pleasant long vibration, apply the ease-in effect at the beginning of the long vibration. This produces a smooth amplitude transition that builds toward the target amplitude.
Apply the ease-in effect
Check hardware capabilities of amplitude control with
android.os.Vibrator.hasAmplitudeControl().- The result has to be
trueto produce ease-in effect with varying amplitude.
- The result has to be
Use
VibrationEffect.createWaveform(timings[], amplitudes[], int repeat).Adjust the series of
timings[]andamplitudes[]to generate the ease-in curve, as shown in Figure 5.
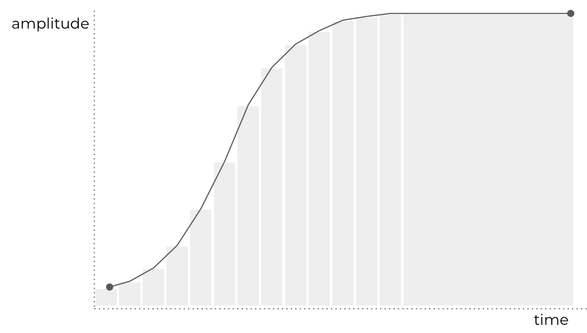
Figure 5. Long vibration ease-in curve.
Use case 3: Audio-coupled haptics
Audio-coupled haptics are haptic patterns coupled with the rhythm of the audio to get the user's attention.
Audio-coupled haptics: Benefits
To implement audio-coupled haptics, combine clear haptics with long vibrations. The strong but short haptic sensations from clear haptics deliver discrete rhythmic patterns. When combined with the high levels of stimuli that long vibration provides, this does a great job of getting a user's attention.
It's important to consider the sensation rhythmic patterns. If there's no sense of rhythm, the user perceives the haptic sensations as random buzzes, and tends to ignore them.
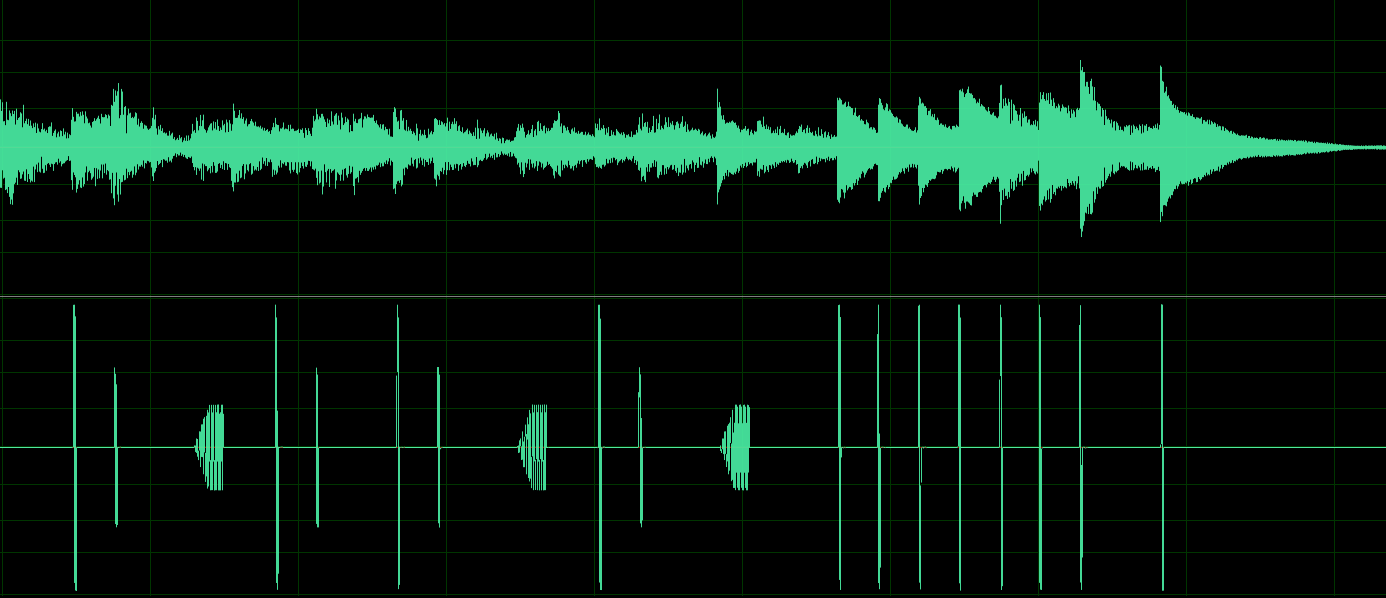
Figure 6. Audio couple haptics example.
Audio-coupled haptics: Tips for implementing
Implementing audio-coupled haptics requires a basic understanding of content playback of both audio and haptic channels. Keep the following things in mind:
Use the
MediaPlayerorSoundPoolclasses.- Assets in OGG format with a special metadata key
(
ANDROID_HAPTICfollowed by a number of haptic channels) indicate the presence of haptics data and playback withMediaPlayerandSoundPool.
- Assets in OGG format with a special metadata key
(
Indicate support of haptics and audio playback in
audio_policy_configuration.xml.- Use an output profile with haptics channel
AUDIO_CHANNEL_OUT_HAPTIC_A|B. - For an output stream with haptic channels, remember that haptic channels are presented as extra channels in the data.
Example
If the channel mask for the output stream looks like this:
AUDIO_CHANNEL_OUT_STEREO_HAPTIC_AThen every sample should look like this:
AUDIO_LEFT_CHANNEL,AUDIO_RIGHT_CHANNEL,HAPTIC_CHANNEL_A- Use an output profile with haptics channel
Change
AudioAttributes.Builder( ).setHapticChannelsMuted(boolean muted)tofalseto play the haptic channel.- By default, haptic channels are muted (
true). - Use cases include ringtones and UI sounds with synchronous haptics and feedback.
- By default, haptic channels are muted (
The Vibrator HAL must implement external control support.
- For HIDL implementations, use
setExternalControl(bool enabled) generates (Status status). - For AIDL implementations, use
void setExternalControl(in boolean enabled).
- For HIDL implementations, use
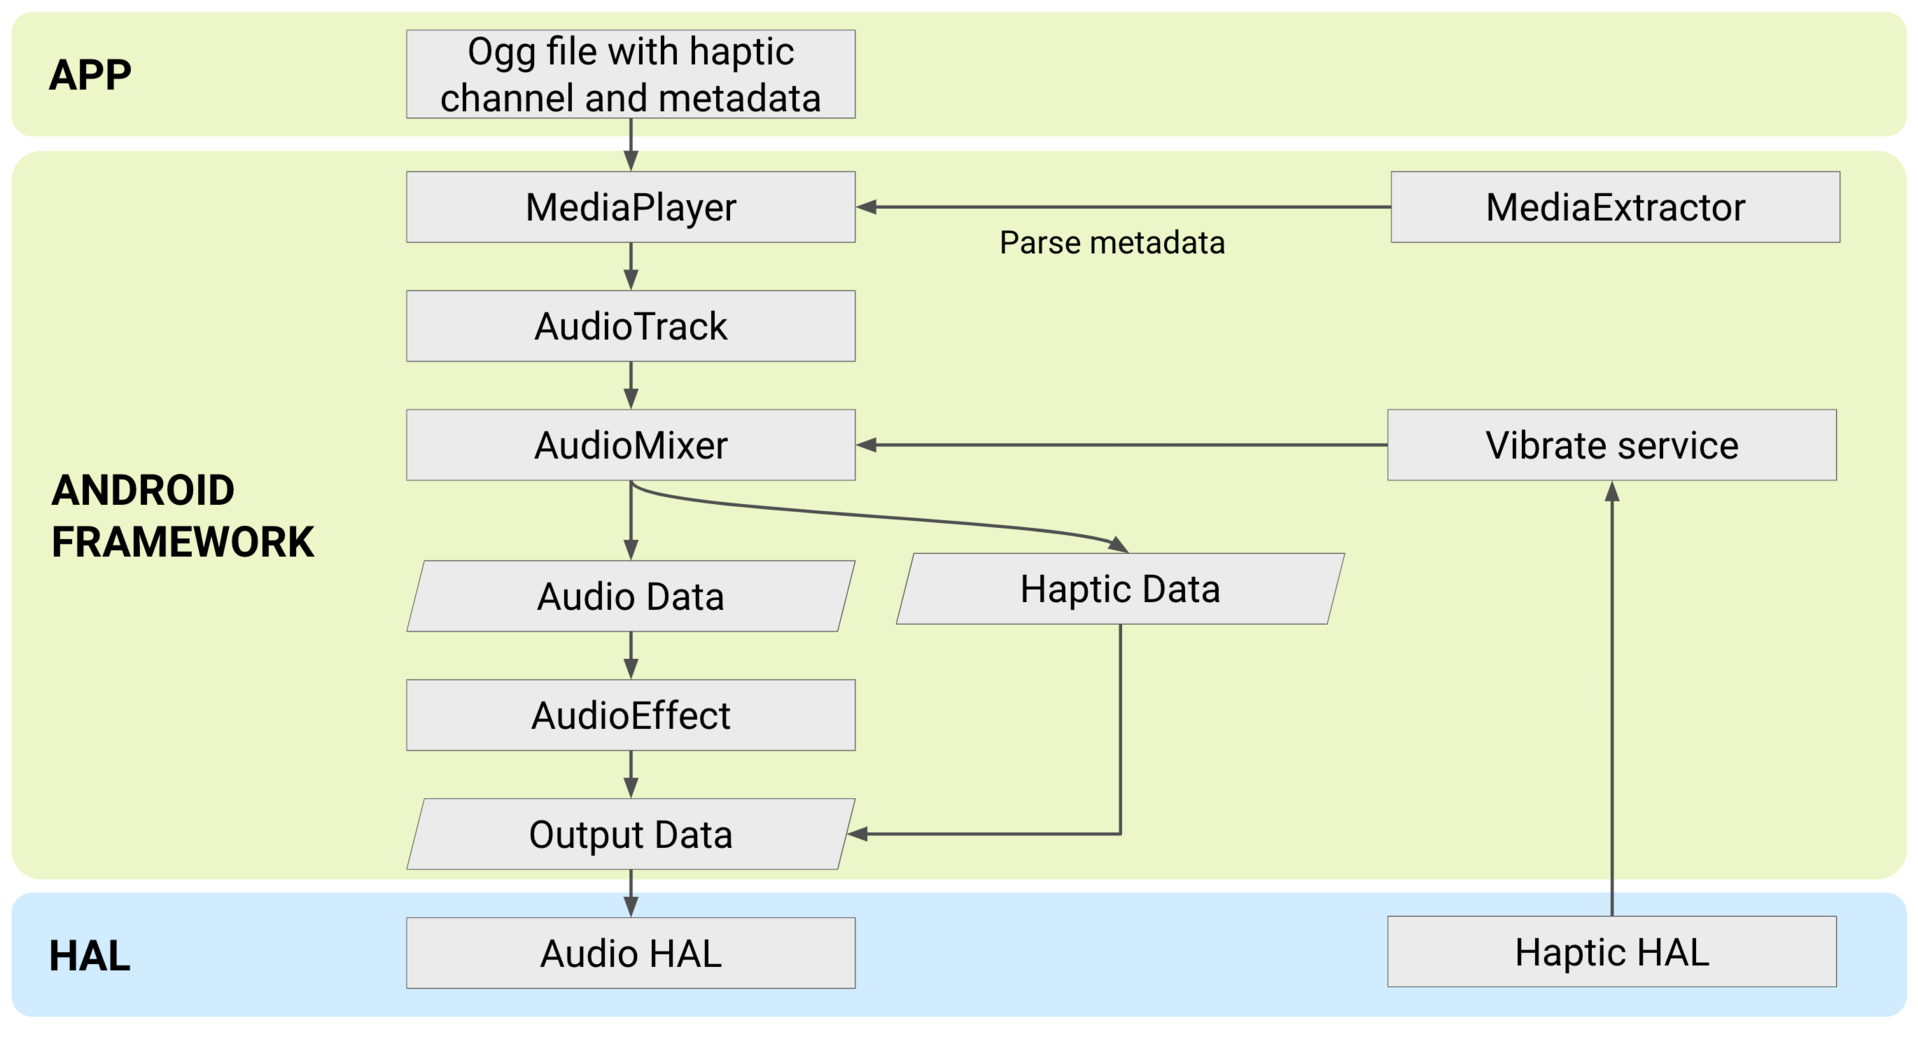
Figure 7. Implementing audio-coupled haptics.
Audio-coupled haptics: HapticGenerator
HapticGenerator is an audio effect introduced in Android 12 that
can generate haptic data from an audio channel and play it in real time as
audio-coupled haptics. The effect is applied to AudioTrack as
illustrated in Figure 8:

Figure 8. Haptic Generator architecture.
This architecture visualization shows where the Haptic Generator is applied to
the incoming user audio stream before it's sent to the Audio HAL. The generator
is applied after AudioMixer splits the audio and haptic data and before any
other audio effect, and its output overrides any previous haptic data in the
stream.
To make sure your haptic generator algorithm generates high-quality haptics, tune the generation algorithm to the device vibrator motor by adjusting the parameters that configure the chain of filters it applies to audio waveforms. This section describes these parameters in detail, and explains how to tune them to your hardware specification.
Resonant frequency for band-pass filter
The vibrator resonant frequency is the frequency at which a haptic actuator has maximum output. This parameter adjusts an anti-resonator to partially flatten the response transfer function, in order to get a wider bandwidth. The Android framework automatically links this value to the output of the Vibrator HAL method
IVibrator.getResonantFrequency.The default value for this parameter is 150 Hz. You can modify this in the code.
Normalization power for slow envelope
This parameter determines the exponent in the partial normalization (automatic gain control). Its default value is -0.8, which means that 80% of the dynamic range variation is removed by this gain control step. You can modify this in the code.
Q factor for band-stop filter
The vibrator quality factor (Q factor) is determined by two parameters:
The Zero Q, the quality factor of the zeros in the band-stop filter that partially cancels the resonance
The Pole Q, the quality factor of the poles in the band-stop filter
The ratio of those two values limits the suppression of resonance to boost lower frequencies and broaden the algorithm response. For example, the default values of 8 for the Zero Q and 4 for the Pole Q produce a ratio of 2, limiting resonance suppression by a factor of 2 (6 dB). The Android framework links both values to the output of the Vibrator HAL method
IVibrator.getQFactor.If the default values don't account for the dampening of the motor strength in your device, we recommend modifying both values at the same time, and either increasing both or decreasing both. The ratio of Zero Q to Pole Q should be greater than 1. You can modify this in the code.
Corner frequency for distortion
The corner frequency is applied by a low-pass filter that suppresses low-level vibration and enhances higher levels using a cubic distortion. It defaults to 300 Hz. You can modify this in the code.
Input gain and cube threshold for distortion
These parameters are used by a nonlinear distortion filter applied to the input waveform that dampens the amplitude of the lower frequency signals and increases amplitude of the higher-frequency signals.
- The default value for the input gain factor is 0.3.
- The default value for the cube threshold is 0.1.
We recommend modifying both values together. They can be found in the code.
For more information about the function applied by this filter, refer to the implementation in the code.
To learn more about how these two parameters influence the output, we recommend plotting the frequency responses of the filters and observing how the frequency responses change with different parameter values.
Output gain for distortion
This parameter controls the final vibration amplitude. It's a final gain applied after a soft limiter that limits vibration amplitudes to less than 1. Its default value is 1.5, and you can modify this in the code.
If the vibration is too subtle, increase the value. If you can hear the actuator hardware rattling, decrease the value.