
شتابسنج را به DUT وصل کنید.
با استفاده از موم زنبور عسل، شتابسنج را در محل مشخصشده در برنامهی آزمایشی قرار دهید.
اتصال شتابسنج باید محکم باشد، اما در عین حال به راحتی بتوان آن را بین هر بار اجرا جدا کرد.
بسته به نوع محرک، جهت شتابسنج را تنظیم کنید.
محرک تشدید خطی محور X (LRA): مطمئن شوید که علامت -> روی شتابسنج با جهت طول LRA همتراز باشد. این جهت عموماً معادل جهت تشدید است.
محرک رزونانس خطی محور Z (LRA): از جهت شتابسنج که در دستورالعملهای LRA محور X در بالا توضیح داده شده است، استفاده کنید.
محرک جرمی چرخان خارج از مرکز (ERM): سیگنال و هر سه محور را اندازهگیری کنید، سپس دادههایی را انتخاب کنید که قویترین دامنه سیگنال را دارند.
برنامه آزمایشی را روی DUT باز کنید و جلوههای هدف را ایجاد کنید.
از یک ماوس بلوتوث برای کلیک روی دکمههای هدف در برنامه استفاده کنید. این به شما امکان میدهد بدون اعمال نیروی خارجی، مانند فشار انگشت، روی دکمههای برنامه کلیک کنید.
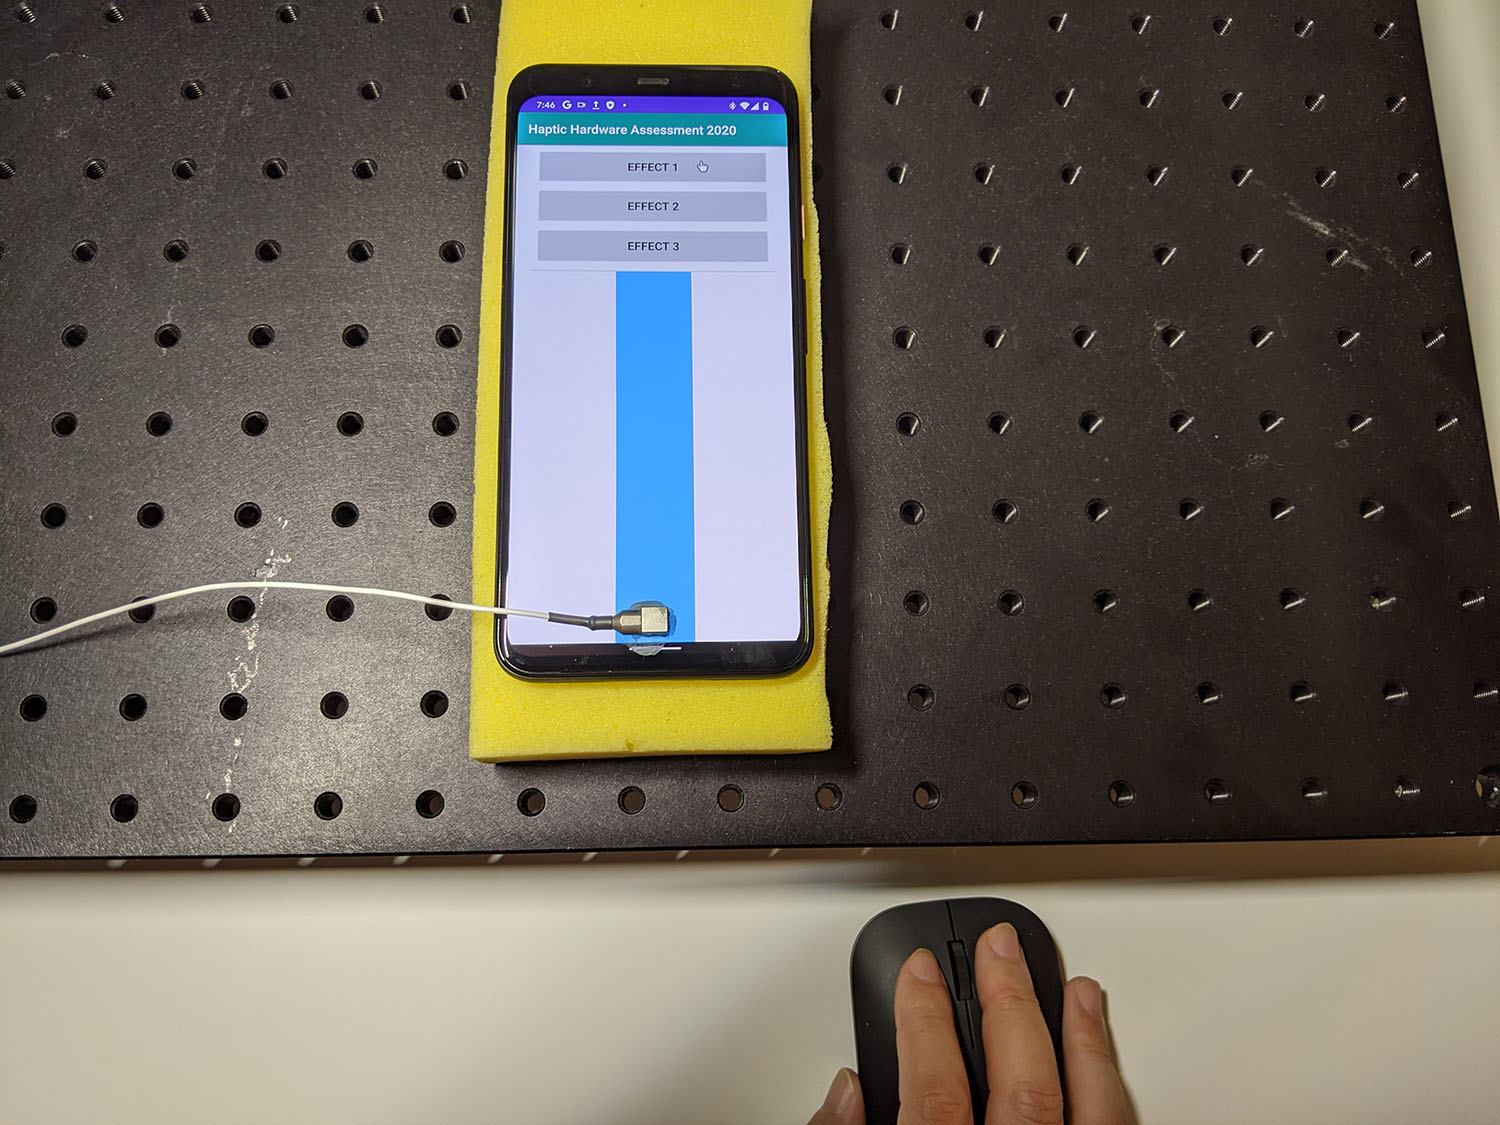
شکل 1. اثرات هدف تولید شده توسط DUT
شکل موج را از برنامه آزمایشی با استفاده از Audacity ضبط کنید و فایل را صادر کنید:
- روی ضبط در Audacity کلیک کنید.
- هر یک از دکمههای هدف را در برنامه آزمایشی فشار دهید.
ضبط را به عنوان فایل WAV صادر کنید.
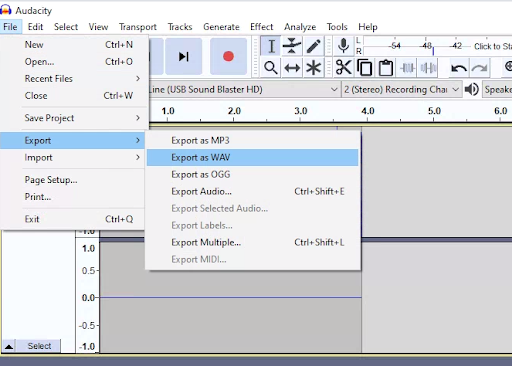
شکل ۲. خروجی گرفتن از Audacity
اندازه گیری و ثبت اثرات هدف
محتوا و نمونه کدها در این صفحه مشمول پروانههای توصیفشده در پروانه محتوا هستند. جاوا و OpenJDK علامتهای تجاری یا علامتهای تجاری ثبتشده Oracle و/یا وابستههای آن هستند.
تاریخ آخرین بهروزرسانی 2026-06-18 بهوقت ساعت هماهنگ جهانی.
[[["درک آسان","easyToUnderstand","thumb-up"],["مشکلم را برطرف کرد","solvedMyProblem","thumb-up"],["غیره","otherUp","thumb-up"]],[["اطلاعاتی که نیاز دارم وجود ندارد","missingTheInformationINeed","thumb-down"],["بیشازحد پیچیده/ مراحل بسیار زیاد","tooComplicatedTooManySteps","thumb-down"],["قدیمی","outOfDate","thumb-down"],["مشکل ترجمه","translationIssue","thumb-down"],["مشکل کد / نمونهها","samplesCodeIssue","thumb-down"],["غیره","otherDown","thumb-down"]],["تاریخ آخرین بهروزرسانی 2026-06-18 بهوقت ساعت هماهنگ جهانی."],[],[]]