ثبِّت مقياس التسارع على الجهاز قيد الاختبار.
استخدِم شمع العسل لتثبيت مقياس التسارع في الموقع الجغرافي المحدّد في تطبيق الاختبار.
يجب أن يكون اتصال مقياس التسارع ثابتًا ولكن يسهل أيضًا إزالته بين عمليات التشغيل.
اضبط اتجاه مقياس التسارع حسب نوع المشغّل.
المشغّل الرنان الخطي على المحور X: تأكَّد من أنّ السهم -> على مقياس التسارع محاذٍ لاتجاه طول المشغّل الرنان الخطي. ويكون هذا الاتجاه بشكل عام مكافئًا لاتجاه الرنين.
المشغّل الرنّان الخطي (LRA) على المحور Z: استخدِم اتجاه مقياس التسارع الموضّح في تعليمات المشغّل الرنّان الخطي على المحور X أعلاه.
المشغّل ذو الكتلة الدوّارة غير المتوازنة (ERM): يتم قياس الإشارة وجميع المحاور الثلاثة، ثم يتم اختيار البيانات التي تحتوي على أقوى سعة للإشارة.
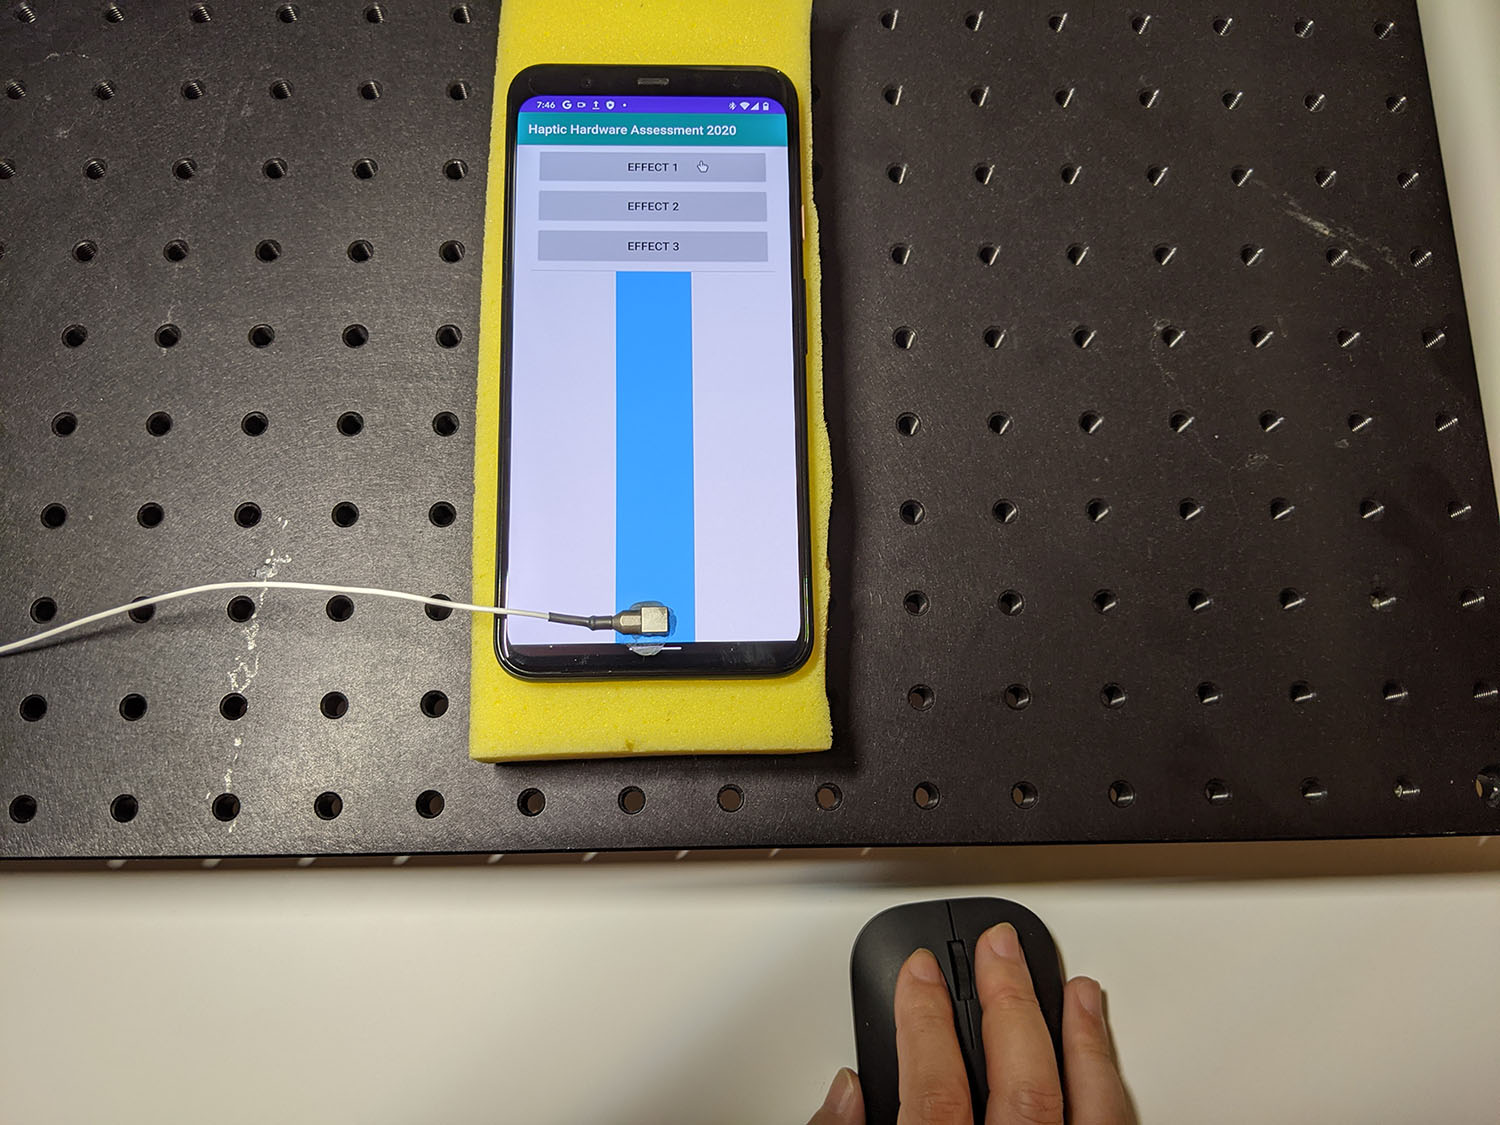
افتح تطبيق الاختبار على الجهاز قيد الاختبار وأنشئ التأثيرات المستهدَفة.
استخدِم ماوس Bluetooth للنقر على الأزرار المستهدَفة في التطبيق، ما يتيح لك النقر على أزرار التطبيق بدون إضافة قوى خارجية، مثل الضغط بإصبع.

الشكل 1. إنشاء تأثيرات مستهدَفة باستخدام أداة DUT
سجِّل شكل الموجة من تطبيق الاختبار باستخدام Audacity وصدِّر الملف:
- انقر على تسجيل في Audacity.
- اضغط على كل زر من الأزرار المستهدَفة في تطبيق الاختبار.
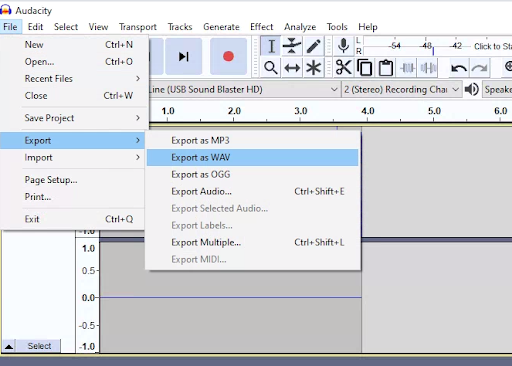
صدِّر التسجيل كملف WAV.

الشكل 2. التصدير من Audacity
قياس التأثيرات المستهدَفة وتسجيلها
يخضع كل من المحتوى وعيّنات التعليمات البرمجية في هذه الصفحة للتراخيص الموضحّة في ترخيص استخدام المحتوى. إنّ Java وOpenJDK هما علامتان تجاريتان مسجَّلتان لشركة Oracle و/أو الشركات التابعة لها.
تاريخ التعديل الأخير: 2025-12-03 (حسب التوقيت العالمي المتفَّق عليه)
[[["يسهُل فهم المحتوى.","easyToUnderstand","thumb-up"],["ساعَدني المحتوى في حلّ مشكلتي.","solvedMyProblem","thumb-up"],["غير ذلك","otherUp","thumb-up"]],[["لا يحتوي على المعلومات التي أحتاج إليها.","missingTheInformationINeed","thumb-down"],["الخطوات معقدة للغاية / كثيرة جدًا.","tooComplicatedTooManySteps","thumb-down"],["المحتوى قديم.","outOfDate","thumb-down"],["ثمة مشكلة في الترجمة.","translationIssue","thumb-down"],["مشكلة في العيّنات / التعليمات البرمجية","samplesCodeIssue","thumb-down"],["غير ذلك","otherDown","thumb-down"]],["تاريخ التعديل الأخير: 2025-12-03 (حسب التوقيت العالمي المتفَّق عليه)"],[],[]]

