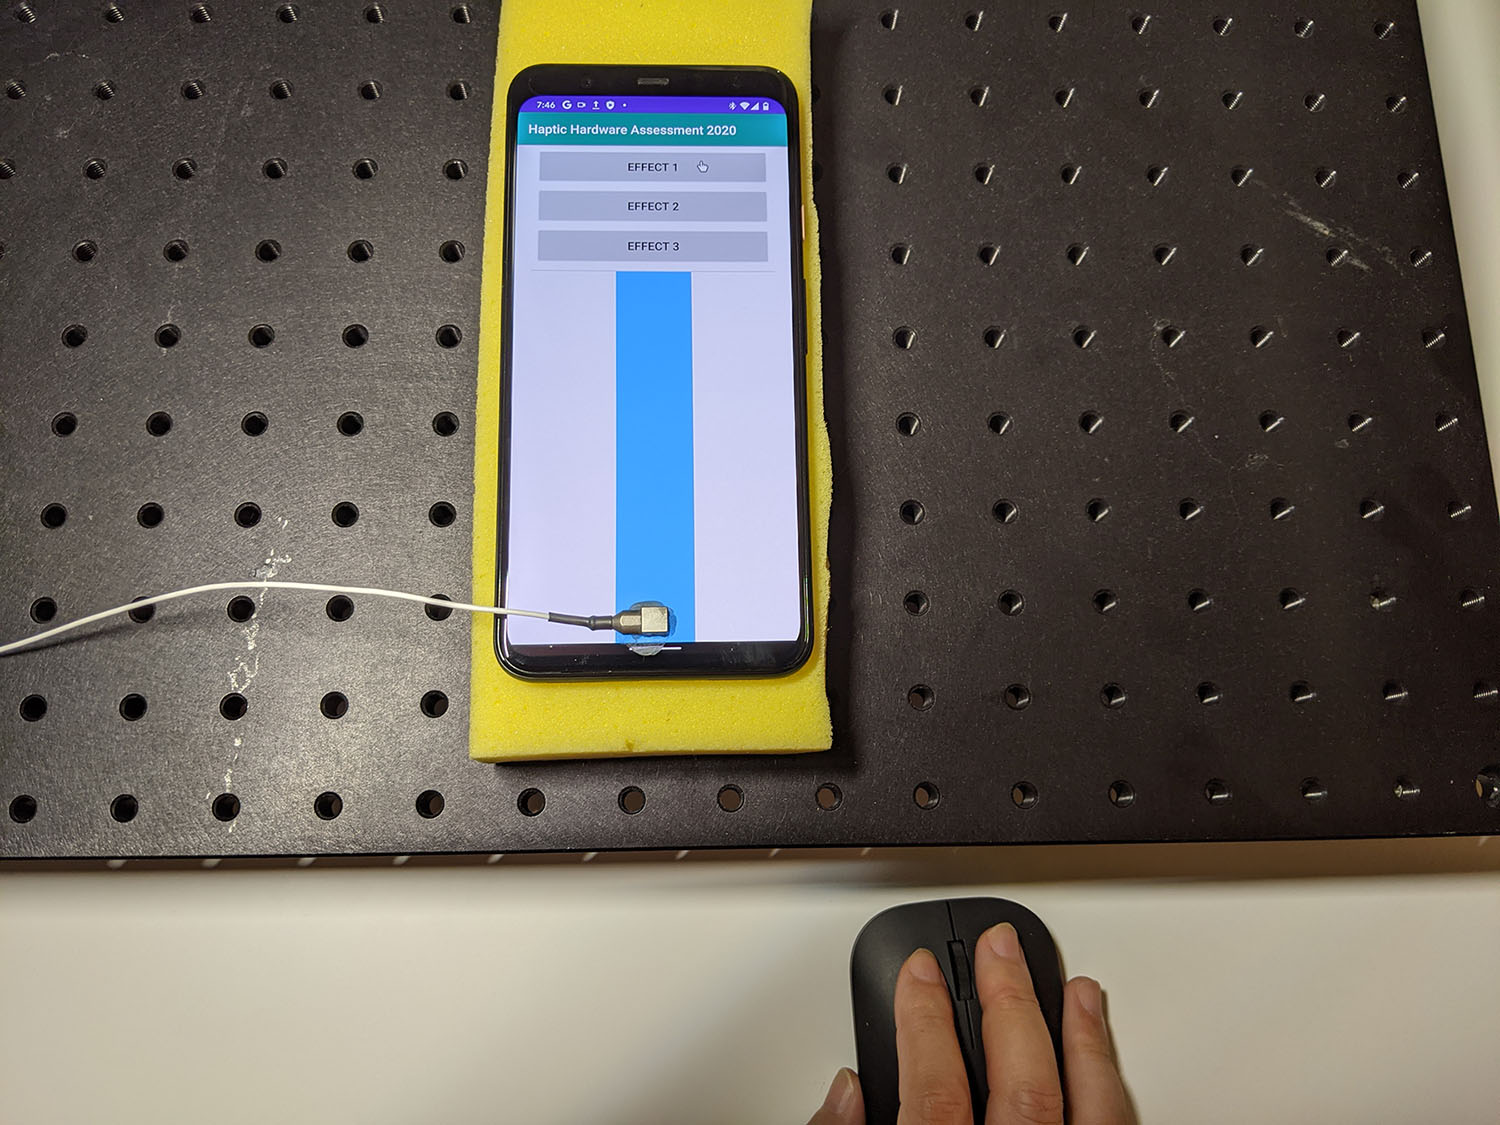
מחברים את מד התאוצה ל-DUT.
משתמשים בדונג דבורים כדי לחבר את מד התאוצה למיקום שצוין באפליקציית הבדיקה.
החיבור של מד התאוצה צריך להיות יציב אבל גם קל להסרה בין הריצות.
מגדירים את הכיוון של מד התאוצה בהתאם לסוג המפעיל.
מפעיל תהודה ליניארי (LRA) בציר X: מוודאים שהסימן -> במד התאוצה מיושר עם כיוון האורך של ה-LRA. הכיוון הזה בדרך כלל שווה לכיוון התהודה.
מפעיל תהודה ליניארי (LRA) בציר Z: משתמשים בכיוון של מד התאוצה שמתואר בהוראות לגבי מפעיל תהודה ליניארי בציר X שלמעלה.
מפעיל עם מסה מסתובבת אקסצנטרית (ERM): מודדים את האות ואת כל שלושת הצירים, ואז בוחרים את הנתונים עם אמפליטודת האות החזקה ביותר.
פותחים את אפליקציית הבדיקה ב-DUT ומפיקים אפקטים של טירגוט.
משתמשים בעכבר Bluetooth כדי ללחוץ על לחצני היעד באפליקציה. כך אפשר ללחוץ על לחצני האפליקציה בלי להוסיף כוחות חיצוניים, כמו לחץ מאצבע.

איור 1. מכשיר DUT שיוצר אפקטים של טירגוט
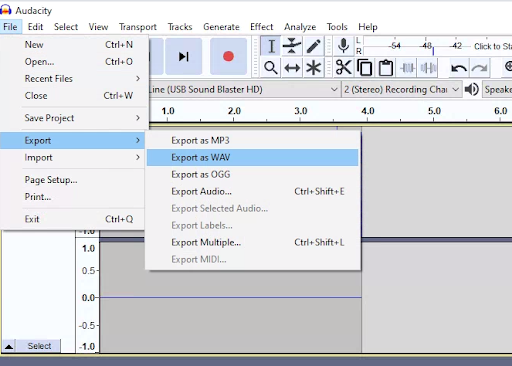
מקליטים את צורת הגל מאפליקציית הבדיקה באמצעות Audacity ומייצאים את הקובץ:
- לוחצים על הקלטה ב-Audacity.
- לוחצים על כל אחד מהלחצנים לטירגוט באפליקציית הבדיקה.
מייצאים את ההקלטה כקובץ WAV.

איור 2. ייצוא מ-Audacity
מדידה ורישום של השפעות היעד
דוגמאות התוכן והקוד שבדף הזה כפופות לרישיונות המפורטים בקטע רישיון לתוכן. Java ו-OpenJDK הם סימנים מסחריים או סימנים מסחריים רשומים של חברת Oracle ו/או של השותפים העצמאיים שלה.
עדכון אחרון: 2025-12-03 (שעון UTC).
[[["התוכן קל להבנה","easyToUnderstand","thumb-up"],["התוכן עזר לי לפתור בעיה","solvedMyProblem","thumb-up"],["סיבה אחרת","otherUp","thumb-up"]],[["חסרים לי מידע או פרטים","missingTheInformationINeed","thumb-down"],["התוכן מורכב מדי או עם יותר מדי שלבים","tooComplicatedTooManySteps","thumb-down"],["התוכן לא עדכני","outOfDate","thumb-down"],["בעיה בתרגום","translationIssue","thumb-down"],["בעיה בדוגמאות/בקוד","samplesCodeIssue","thumb-down"],["סיבה אחרת","otherDown","thumb-down"]],["עדכון אחרון: 2025-12-03 (שעון UTC)."],[],[]]
