將加速計連接至 DUT。
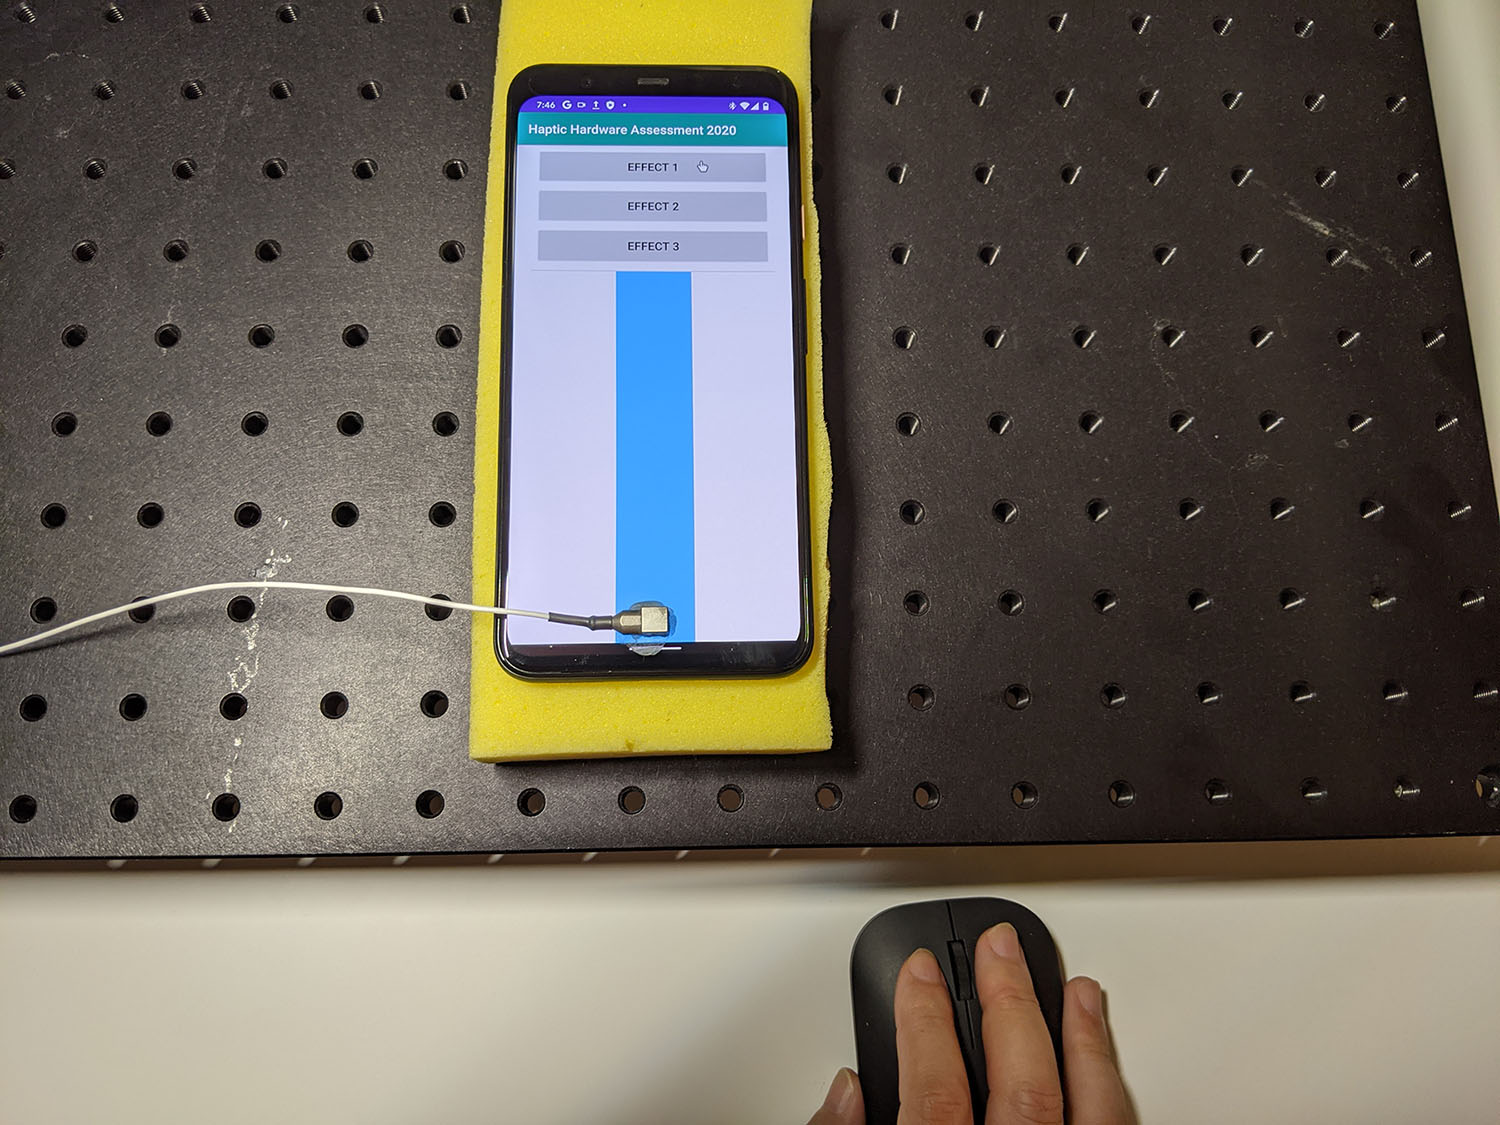
使用 beeswax 在測試應用程式中指定的位置附加加速計。
加速計連線應保持穩定,但也要能輕易在每次執行期間移除。
根據致動器類型設定加速計的方向。
X 軸線性諧振致動器 (LRA):請確認加速計上的 -> 與 LRA 的長度方向一致。這個方向通常等同於共振方向。
Z 軸線性諧振致動器 (LRA):請使用上述 X 軸 LRA 操作說明中的加速計方向。
偏心旋轉質量致動器 (ERM):測量信號和所有三個軸,然後選取信號振幅最強的資料。
在 DUT 上開啟測試應用程式,並產生目標效果。
使用藍牙滑鼠點選應用程式中的目標按鈕。這樣一來,您就能點選應用程式按鈕,而不需要額外施加外力,例如手指的壓力。
圖 1. DUT 產生目標效果
使用 Audacity 錄製測試應用程式的波形,然後匯出檔案:
- 在 Audacity 中按一下「錄製」。
- 按下測試應用程式中的每個目標按鈕。
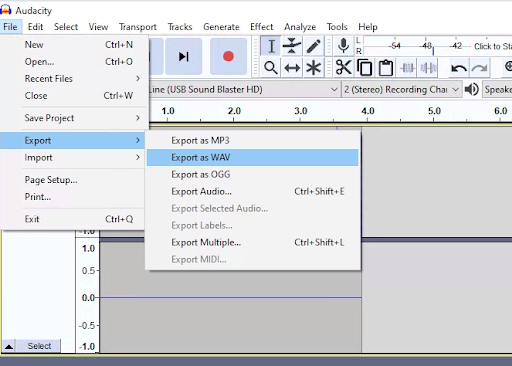
將錄音檔匯出為 WAV 檔案。
圖 2. 從 Audacity 匯出
評估及記錄目標成效
這個頁面中的內容和程式碼範例均受《內容授權》中的授權所規範。Java 與 OpenJDK 是 Oracle 和/或其關係企業的商標或註冊商標。
上次更新時間:2025-07-27 (世界標準時間)。
[[["容易理解","easyToUnderstand","thumb-up"],["確實解決了我的問題","solvedMyProblem","thumb-up"],["其他","otherUp","thumb-up"]],[["缺少我需要的資訊","missingTheInformationINeed","thumb-down"],["過於複雜/步驟過多","tooComplicatedTooManySteps","thumb-down"],["過時","outOfDate","thumb-down"],["翻譯問題","translationIssue","thumb-down"],["示例/程式碼問題","samplesCodeIssue","thumb-down"],["其他","otherDown","thumb-down"]],["上次更新時間:2025-07-27 (世界標準時間)。"],[],[],null,["# Measure and record target effects\n\n1. Attach the accelerometer to the DUT.\n\n - Use beeswax to attach the accelerometer at the location specified in the\n test app.\n\n - The accelerometer connection should be rigid but also easy to remove\n between runs.\n\n2. Set the orientation of the accelerometer depending on the actuator type.\n\n - **X axis linear resonant actuator (LRA):** Make sure that the -\\\u003e on the\n accelerometer is aligned with the length direction of the LRA. This\n direction is generally equivalent to the resonating direction.\n\n - **Z axis linear resonant actuator (LRA):** Use the accelerometer\n orientation described in the X axis LRA instructions above.\n\n - **Eccentric rotating mass actuator (ERM):** Measure the signal and all\n three axes, then select the data that has the strongest signal amplitude.\n\n | **Note:** If you change the measuring axis, be sure to also change the accelerometer cable attached to the CCLD signal conditioner.\n3. Open the test app on the DUT and generate target effects.\n\n - Use a Bluetooth mouse to click the target buttons in the app. This lets\n you click app buttons without adding external forces, such as pressure from\n a finger.\n\n **Figure 1.** DUT generating target effects\n4. Record the waveform from the test app using Audacity and export the file:\n\n - Click **Record** in Audacity.\n - Press each of the target buttons in the test app.\n - Export the recording as a WAV file.\n\n **Figure 2.** Exporting from Audacity"]]