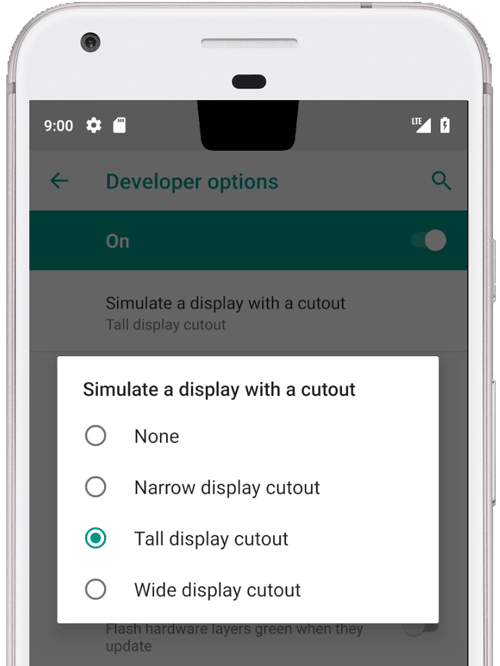
Android 9 เพิ่มการรองรับการใช้รอยบากประเภทต่างๆ บนอุปกรณ์ รอยบากช่วยให้คุณสร้างประสบการณ์การใช้งานที่สมจริงแบบขอบจรดขอบได้ ในขณะที่ยังคงมีพื้นที่สำหรับเซ็นเซอร์สำคัญที่ด้านหน้าของอุปกรณ์

รูปที่ 1 คัตเอาท์ดิสเพลย์ตรงกลางด้านบน
Android 9 รองรับรอยบากประเภทต่อไปนี้
- ตรงกลางด้านบน: รูเจาะที่กึ่งกลางขอบด้านบน
- ด้านบนไม่อยู่กึ่งกลาง: รอยบากอาจอยู่ที่มุมหรือไม่อยู่กึ่งกลางเล็กน้อย
- ด้านล่าง: รอยบากที่ด้านล่าง
- คู่: รูเจาะ 1 รูที่ด้านบนและ 1 รูที่ด้านล่าง
ตัวอย่างและแหล่งที่มา
โค้ดตัวจัดการหน้าต่างต่อไปนี้ใน
PhoneWindowManager.java
แสดงวิธีแทรกเฟรมการแสดงผลลงในพื้นที่ปลอดภัยเมื่อไม่ได้ตั้งค่า
LAYOUT_IN_DISPLAY_CUTOUT_MODE_ALWAYS
// Ensure that windows with a DEFAULT or NEVER display cutout mode are laid out in
// the cutout safe zone.
if (cutoutMode != LAYOUT_IN_DISPLAY_CUTOUT_MODE_ALWAYS) {
    final Rect displayCutoutSafeExceptMaybeBars = mTmpDisplayCutoutSafeExceptMaybeBarsRect;
    displayCutoutSafeExceptMaybeBars.set(displayFrames.mDisplayCutoutSafe);
    if (layoutInScreen && layoutInsetDecor && !requestedFullscreen
            && cutoutMode == LAYOUT_IN_DISPLAY_CUTOUT_MODE_DEFAULT) {
        // At the top we have the status bar, so apps that are
        // LAYOUT_IN_SCREEN | LAYOUT_INSET_DECOR but not FULLSCREEN
        // already expect that there's an inset there and we don't need to exclude
        // the window from that area.
        displayCutoutSafeExceptMaybeBars.top = Integer.MIN_VALUE;
    }
    if (layoutInScreen && layoutInsetDecor && !requestedHideNavigation
            && cutoutMode == LAYOUT_IN_DISPLAY_CUTOUT_MODE_DEFAULT) {
        // Same for the navigation bar.
        switch (mNavigationBarPosition) {
            case NAV_BAR_BOTTOM:
                displayCutoutSafeExceptMaybeBars.bottom = Integer.MAX_VALUE;
                break;
            case NAV_BAR_RIGHT:
                displayCutoutSafeExceptMaybeBars.right = Integer.MAX_VALUE;
                break;
            case NAV_BAR_LEFT:
                displayCutoutSafeExceptMaybeBars.left = Integer.MIN_VALUE;
                break;
        }
    }
    if (type == TYPE_INPUT_METHOD && mNavigationBarPosition == NAV_BAR_BOTTOM) {
        // The IME can always extend under the bottom cutout if the navbar is there.
        displayCutoutSafeExceptMaybeBars.bottom = Integer.MAX_VALUE;
    }
    // Windows that are attached to a parent and laid out in said parent already avoid
    // the cutout according to that parent and don't need to be further constrained.
    // Floating IN_SCREEN windows get what they ask for and lay out in the full screen.
    // They will later be cropped or shifted using the displayFrame in WindowState,
    // which prevents overlap with the DisplayCutout.
    if (!attachedInParent && !floatingInScreenWindow) {
        mTmpRect.set(pf);
        pf.intersectUnchecked(displayCutoutSafeExceptMaybeBars);
        parentFrameWasClippedByDisplayCutout |= !mTmpRect.equals(pf);
    }
    // Make sure that NO_LIMITS windows clipped to the display don't extend under the
    // cutout.
    df.intersectUnchecked(displayCutoutSafeExceptMaybeBars);
}
SystemUI จะแสดงในพื้นที่รอยบาก และต้องกำหนดตำแหน่งที่สามารถวาดได้ PhoneStatusBarView.java มีตัวอย่างของมุมมองที่กำหนดตำแหน่งของรอยบากบนจอแสดงผล ขนาดของรอยบาก และไม่ว่าการแทรกจากแถบนำทางจะหลีกเลี่ยงพื้นที่รอยบากหรือไม่
การลบล้าง onApplyWindowInsets() จะช่วยให้มุมมองระบุตำแหน่งของรอยบากได้
และอัปเดตเลย์เอาต์ตามนั้น
@Override
    public WindowInsets onApplyWindowInsets(WindowInsets insets) {
        if (updateOrientationAndCutout(mLastOrientation)) {
            updateLayoutForCutout();
            requestLayout();
        }
        return super.onApplyWindowInsets(insets);
    }
วิธีการเหล่านี้จะอธิบายวิธีจัดการรอยบากในแถบสถานะในทุกกรณี (เช่น ตรงกลางด้านบน ด้านบนที่ไม่ตรงกลาง ด้านล่าง และรอยบากคู่ในการหมุนทุกรูปแบบ)
ข้อกำหนด
คุณต้องตรวจสอบว่าแอปจะไม่ได้รับผลกระทบจากรอยบากโดยทำดังนี้
- แถบสถานะจะขยายออกอย่างน้อยเท่ากับความสูงของรอยบากในโหมดแนวตั้ง
- พื้นที่คัตเอาต์ต้องมีแถบดำด้านบนและด้านล่างในโหมดเต็มหน้าจอและแนวนอน
อุปกรณ์จะมีรอยบากได้สูงสุด 1 รอยที่ขอบสั้นแต่ละด้าน (ด้านบนและด้านล่าง)
ดูข้อมูลเพิ่มเติมได้ที่ CDD
การใช้งาน
หากต้องการใช้คัตเอาต์ของจอแสดงผลในอุปกรณ์ คุณต้องกำหนดค่าต่อไปนี้ สำหรับ UI ของระบบ
| ค่านิยม | คำอธิบาย |
|---|---|
quick_qs_offset_height
|
กำหนดระยะขอบบนสำหรับแผงการตั้งค่าด่วน นาฬิกาและแบตเตอรี่ จะแสดงในพื้นที่เหนือแผง ในค่าแลนด์ ให้ตั้งค่าเป็น |
quick_qs_total_height
|
ความสูงทั้งหมดของแผงการตั้งค่าด่วน (แผงการตั้งค่าด่วนที่ยุบอยู่) เมื่อขยายหน้าต่างแจ้งเตือน รวมถึงพื้นที่เหนือแผงที่มีนาฬิกา
เนื่องจากรูปแบบการจัดวางการตั้งค่าด่วน คุณจึงต้องทราบความสูงทั้งหมดของแผงการตั้งค่าด่วนแบบเร็ว (รวมถึงออฟเซ็ต) แบบคงที่
ดังนั้นคุณจึงต้องปรับค่านี้ตามเดลต้าเดียวกัน
|
status_bar_height_portrait
|
ความสูงเริ่มต้นของแถบสถานะจากมุมมองของเฟรมเวิร์ก ในอุปกรณ์ส่วนใหญ่ ค่านี้จะเป็น 24dp โดยค่าเริ่มต้น เมื่อมีการตัดออก ให้ตั้งค่านี้ เป็นความสูงของการตัดออก อาจสูงกว่ารอยตัดได้หากต้องการ |
status_bar_height_landscape
|
ความสูงของแถบสถานะในแนวนอน ระบบรองรับการตัดเฉพาะที่ขอบสั้นของอุปกรณ์เท่านั้น ดังนั้นความสูงของแถบสถานะจึงไม่เปลี่ยนแปลง ในอุปกรณ์ที่ไม่มีรอยบาก ค่านี้จะเทียบเท่ากับ
|
config_mainBuiltInDisplayCutout
|
เส้นทางที่กำหนดรูปร่างของการตัดออก ซึ่งเป็นสตริงที่แยกวิเคราะห์ได้โดย
|
config_fillMainBuiltinDisplayCutout
|
ค่าบูลีนที่กำหนดว่าจะวาดเส้นทางคัตเอาต์ (กำหนดไว้ ด้านบน) ในซอฟต์แวร์หรือไม่ ใช้เพื่อจำลองการตัดออก หรือเติม การตัดออกจริงเพื่อให้ได้การป้องกันรอยหยัก หากจริง |
ดูคำจำกัดความเริ่มต้นได้ในไฟล์ dimens เหล่านี้
ตัวอย่างภาพซ้อนทับสำหรับภาพคัตเอาต์จำลอง
<resources xmlns:xliff="urn:oasis:names:tc:xliff:document:1.2">

    <!-- The bounding path of the cutout region of the main built-in display.
         Must either be empty if there is no cutout region, or a string that is parsable by
         {@link android.util.PathParser}.

         The path is assumed to be specified in display coordinates with pixel units and in
         the display's native orientation, with the origin of the coordinate system at the
         center top of the display.

         To facilitate writing device-independent emulation overlays, the marker `@dp` can be
         appended after the path string to interpret coordinates in dp instead of px units.
         Note that a physical cutout should be configured in pixels for the best results.
         -->
    <string translatable="false" name="config_mainBuiltInDisplayCutout">
        M 0,0
        L -48, 0
        L -44.3940446283, 36.0595537175
        C -43.5582133885, 44.4178661152 -39.6, 48.0 -31.2, 48.0
        L 31.2, 48.0
        C 39.6, 48.0 43.5582133885, 44.4178661152 44.3940446283, 36.0595537175
        L 48, 0
        Z
        @dp
    </string>

    <!-- Whether the display cutout region of the main built-in display should be forced to
         black in software (to avoid aliasing or emulate a cutout that is not physically existent).
     -->
    <bool name="config_fillMainBuiltInDisplayCutout">true</bool>

    <!-- Height of the status bar -->
    <dimen name="status_bar_height_portrait">48dp</dimen>
    <dimen name="status_bar_height_landscape">28dp</dimen>
    <!-- Height of area above QQS where battery/time go (equal to status bar height if > 48dp) -->
    <dimen name="quick_qs_offset_height">48dp</dimen>
    <!-- Total height of QQS (quick_qs_offset_height + 128) -->
    <dimen name="quick_qs_total_height">176dp</dimen>

</resources>
การตรวจสอบความถูกต้อง
หากต้องการตรวจสอบการติดตั้งใช้งานส่วนเว้าของจอแสดงผล ให้เรียกใช้การทดสอบ CTS ที่ tests/framework/base/windowmanager/src/android/server/wm
