
ติดเครื่องวัดความเร่งกับ DUT
ใช้ขี้ผึ้งเพื่อติดตัวตรวจวัดความเร่งในตำแหน่งที่ระบุไว้ใน แอปทดสอบ
การเชื่อมต่อตัวตรวจวัดความเร่งควรแข็งแรงแต่ถอดออกได้ง่ายระหว่างการวิ่ง
ตั้งค่าการวางแนวของเครื่องวัดความเร่งตามประเภทแอคทูเอเตอร์
ตัวกระตุ้นเชิงเส้นแบบเรโซแนนซ์ (LRA) แกน X: ตรวจสอบว่า -> บน ตัวตรวจวัดความเร่งสอดคล้องกับทิศทางความยาวของ LRA โดยทั่วไปแล้ว ทิศทางนี้จะเทียบเท่ากับทิศทางการสั่นพ้อง
ตัวกระตุ้นเรโซแนนซ์เชิงเส้นแกน Z (LRA): ใช้การวางแนวของตัวตรวจวัดความเร่งตามที่อธิบายไว้ในวิธีการ LRA แกน X ด้านบน
แอคทูเอเตอร์มวลหมุนเยื้องศูนย์ (ERM): วัดสัญญาณและทั้ง 3 แกน จากนั้นเลือกข้อมูลที่มีแอมพลิจูดสัญญาณแรงที่สุด
เปิดแอปทดสอบใน DUT และสร้างเอฟเฟกต์เป้าหมาย
ใช้เมาส์บลูทูธเพื่อคลิกปุ่มเป้าหมายในแอป วิธีนี้จะช่วยให้คุณคลิกปุ่มแอปได้โดยไม่ต้องใช้แรงภายนอก เช่น แรงกดจากนิ้ว
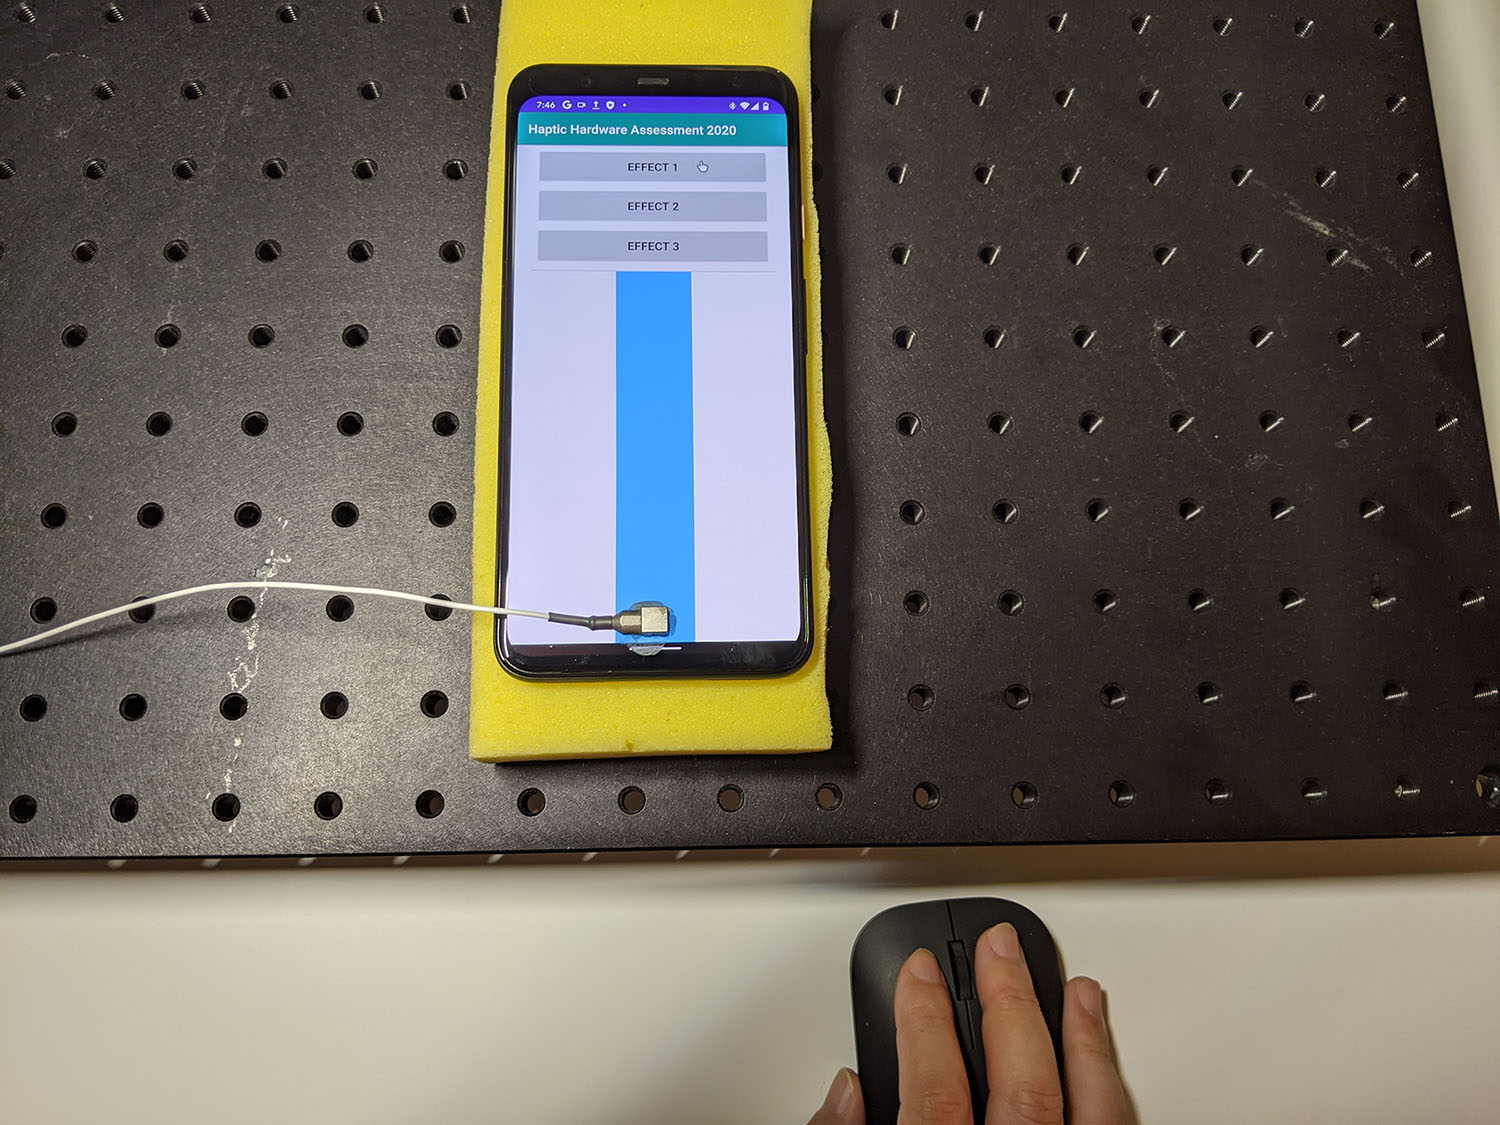
รูปที่ 1 DUT สร้างเอฟเฟกต์เป้าหมาย
บันทึกรูปคลื่นจากแอปทดสอบโดยใช้ Audacity แล้วส่งออกไฟล์โดยทำดังนี้
- คลิกบันทึกใน Audacity
- กดปุ่มเป้าหมายแต่ละปุ่มในแอปทดสอบ
ส่งออกไฟล์บันทึกเป็นไฟล์ WAV
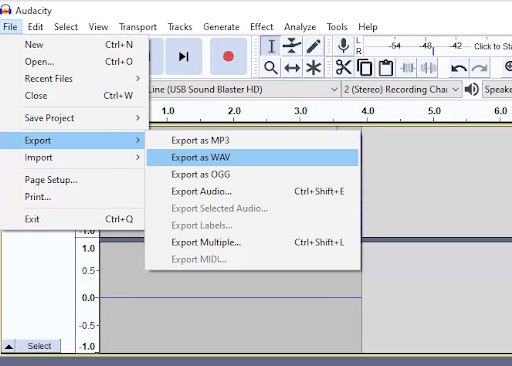
รูปที่ 2 การส่งออกจาก Audacity
วัดและบันทึกผลลัพธ์เป้าหมาย
ตัวอย่างเนื้อหาและโค้ดในหน้าเว็บนี้ขึ้นอยู่กับใบอนุญาตที่อธิบายไว้ในใบอนุญาตการใช้เนื้อหา Java และ OpenJDK เป็นเครื่องหมายการค้าหรือเครื่องหมายการค้าจดทะเบียนของ Oracle และ/หรือบริษัทในเครือ
อัปเดตล่าสุด 2026-06-18 UTC
[[["เข้าใจง่าย","easyToUnderstand","thumb-up"],["แก้ปัญหาของฉันได้","solvedMyProblem","thumb-up"],["อื่นๆ","otherUp","thumb-up"]],[["ไม่มีข้อมูลที่ฉันต้องการ","missingTheInformationINeed","thumb-down"],["ซับซ้อนเกินไป/มีหลายขั้นตอนมากเกินไป","tooComplicatedTooManySteps","thumb-down"],["ล้าสมัย","outOfDate","thumb-down"],["ปัญหาเกี่ยวกับการแปล","translationIssue","thumb-down"],["ตัวอย่าง/ปัญหาเกี่ยวกับโค้ด","samplesCodeIssue","thumb-down"],["อื่นๆ","otherDown","thumb-down"]],["อัปเดตล่าสุด 2026-06-18 UTC"],[],[]]