
অ্যাক্সেলেরোমিটারটি DUT-এর সাথে সংযুক্ত করুন।
টেস্ট অ্যাপে নির্দিষ্ট করা স্থানে অ্যাক্সেলেরোমিটারটি সংযুক্ত করতে মৌমাছির মোম ব্যবহার করুন।
অ্যাক্সেলেরোমিটার সংযোগটি দৃঢ় হওয়ার পাশাপাশি এক রান থেকে অন্য রানের মাঝে সহজে অপসারণযোগ্য হওয়া উচিত।
অ্যাকচুয়েটরের ধরন অনুযায়ী অ্যাক্সেলেরোমিটারের অভিমুখ নির্ধারণ করুন।
এক্স-অক্ষ লিনিয়ার রেজোনেন্ট অ্যাকচুয়েটর (LRA): নিশ্চিত করুন যে অ্যাক্সেলেরোমিটারের -> চিহ্নটি LRA-এর দৈর্ঘ্যের দিকের সাথে সারিবদ্ধ আছে। এই দিকটি সাধারণত অনুরণনের দিকের সমতুল্য।
Z অক্ষের লিনিয়ার রেজোনেন্ট অ্যাকচুয়েটর (LRA): উপরে X অক্ষের LRA নির্দেশাবলীতে বর্ণিত অ্যাক্সেলেরোমিটারের অভিমুখ ব্যবহার করুন।
উৎকেন্দ্রিক ঘূর্ণায়মান ভর অ্যাকচুয়েটর (ERM): তিনটি অক্ষ বরাবরই সিগন্যাল পরিমাপ করুন, তারপর সবচেয়ে শক্তিশালী সিগন্যাল বিস্তারযুক্ত ডেটাটি নির্বাচন করুন।
DUT-তে টেস্ট অ্যাপটি খুলুন এবং টার্গেট এফেক্টগুলো তৈরি করুন।
অ্যাপের নির্দিষ্ট বাটনগুলোতে ক্লিক করতে একটি ব্লুটুথ মাউস ব্যবহার করুন। এর ফলে আপনি আঙুলের চাপের মতো কোনো বাহ্যিক শক্তি প্রয়োগ না করেই অ্যাপের বাটনগুলোতে ক্লিক করতে পারবেন।
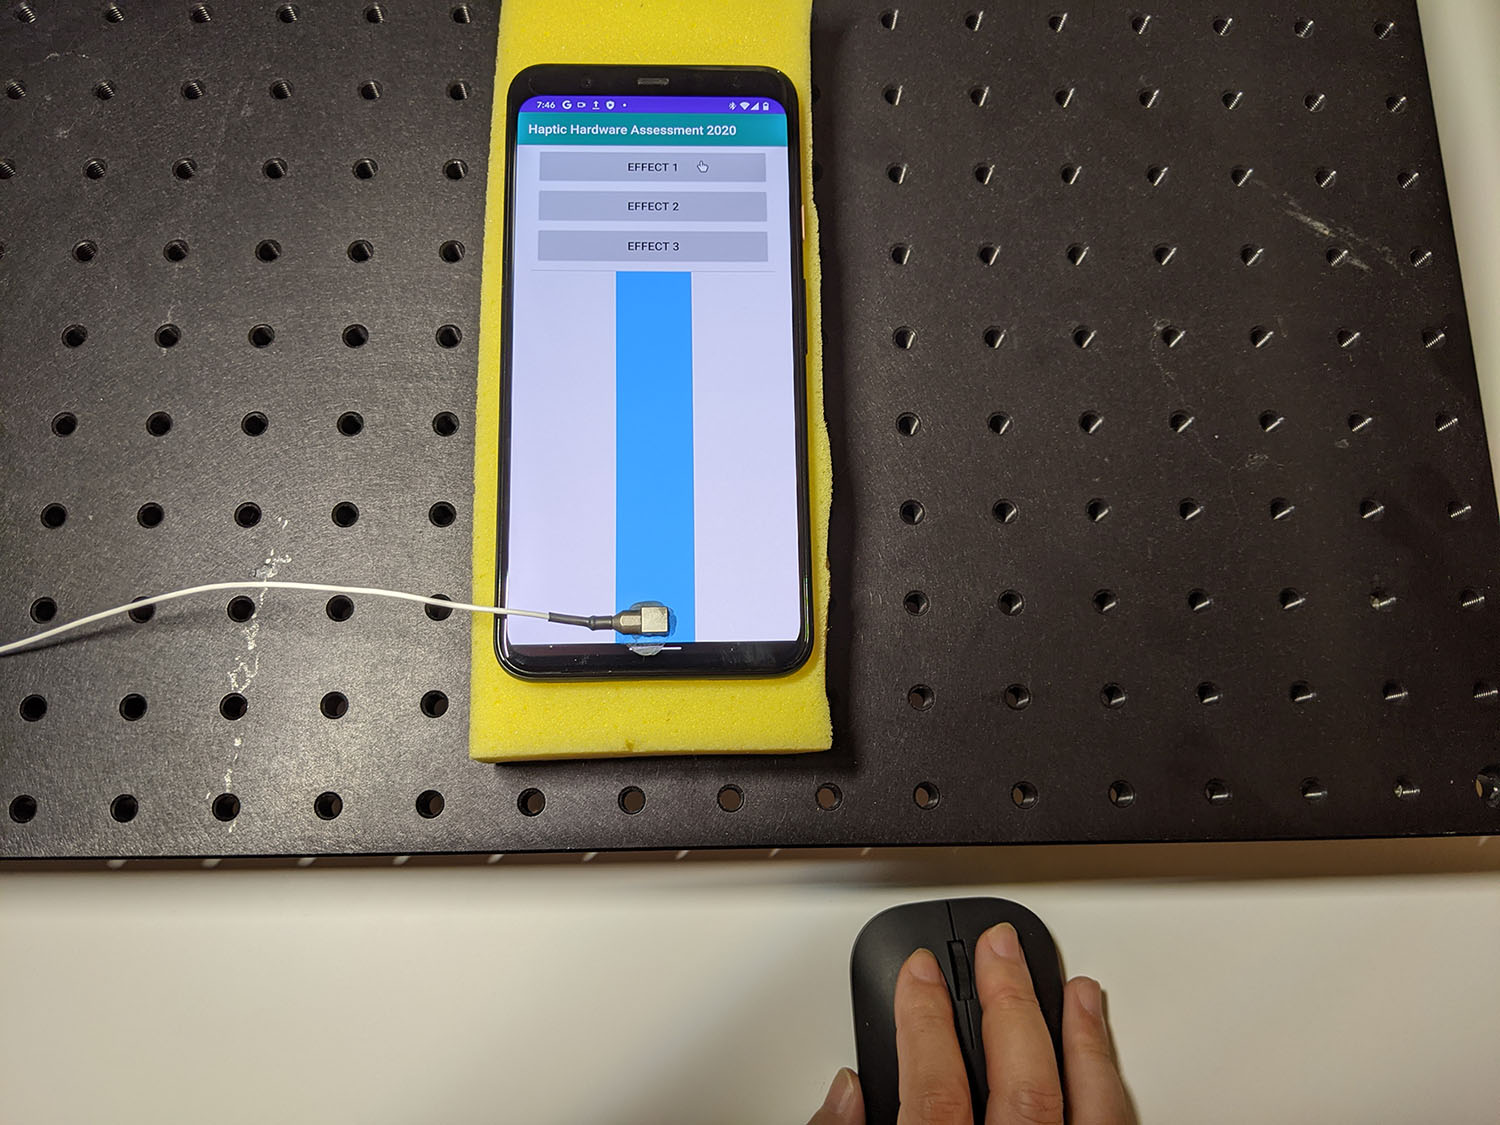
চিত্র ১. ডিইউটি দ্বারা সৃষ্ট লক্ষ্যবস্তু প্রভাব
Audacity ব্যবহার করে টেস্ট অ্যাপ থেকে ওয়েভফর্মটি রেকর্ড করুন এবং ফাইলটি এক্সপোর্ট করুন:
- Audacity-তে Record-এ ক্লিক করুন।
- টেস্ট অ্যাপে থাকা প্রতিটি টার্গেট বাটন চাপুন।
রেকর্ডিংটি একটি WAV ফাইল হিসেবে এক্সপোর্ট করুন।
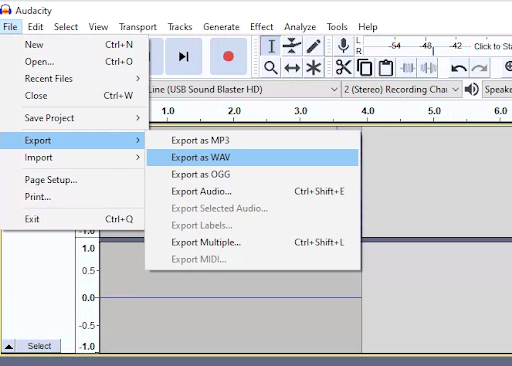
চিত্র ২. অডাসিটি থেকে রপ্তানি করা
লক্ষ্য প্রভাব পরিমাপ এবং রেকর্ড
এই পৃষ্ঠার কন্টেন্ট ও কোডের নমুনাগুলি Content License-এ বর্ণিত লাইসেন্সের অধীনস্থ। Java এবং OpenJDK হল Oracle এবং/অথবা তার অ্যাফিলিয়েট সংস্থার রেজিস্টার্ড ট্রেডমার্ক।
2026-06-18 UTC-তে শেষবার আপডেট করা হয়েছে।
[[["সহজে বোঝা যায়","easyToUnderstand","thumb-up"],["আমার সমস্যার সমাধান হয়েছে","solvedMyProblem","thumb-up"],["অন্যান্য","otherUp","thumb-up"]],[["এতে আমার প্রয়োজনীয় তথ্য নেই","missingTheInformationINeed","thumb-down"],["খুব জটিল / অনেক ধাপ","tooComplicatedTooManySteps","thumb-down"],["পুরনো","outOfDate","thumb-down"],["অনুবাদ সংক্রান্ত সমস্যা","translationIssue","thumb-down"],["নমুনা / কোড সংক্রান্ত সমস্যা","samplesCodeIssue","thumb-down"],["অন্যান্য","otherDown","thumb-down"]],["2026-06-18 UTC-তে শেষবার আপডেট করা হয়েছে।"],[],[]]