
หลังจากแฟลช User Build ลงในอุปกรณ์แล้ว คุณต้องเปิดใช้การแก้ไขข้อบกพร่อง USB อีกครั้ง OmniLab ATS สามารถทำให้ขั้นตอนนี้เป็นอัตโนมัติได้โดยใช้ การทำงานของอุปกรณ์ AOA ซึ่ง จะส่งชุดคำสั่ง UI ไปยังอุปกรณ์
บันทึกคำสั่ง AOA
ก่อนอื่น ให้ใช้ เครื่องมือแก้ไขคำสั่ง WebAOA เพื่อบันทึกรายการคำสั่งสำหรับเปิดใช้การแก้ไขข้อบกพร่อง USB
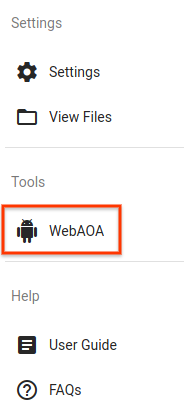
รูปที่ 1 ลิงก์ไปยังเครื่องมือแก้ไขคำสั่ง WebAOA ใน OmniLab ATS
นอกจากนี้ คุณยังเข้าถึงเครื่องมือนี้ได้ที่ http://localhost:8000/webaoa โดยค่าเริ่มต้น
WebAOA ช่วยให้คุณควบคุมอุปกรณ์ในเครื่องได้โดยใช้หน้าจอสัมผัสจำลองและบันทึกการโต้ตอบ UI
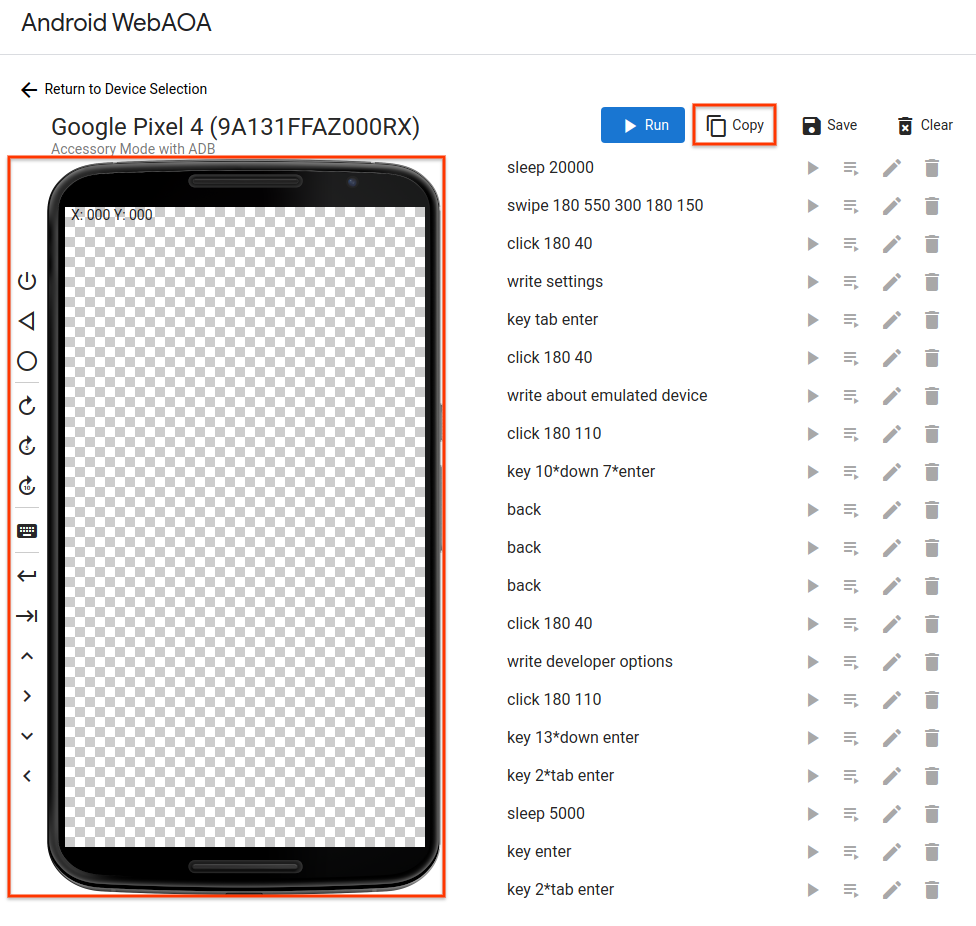
รูปที่ 2 การแก้ไขคำสั่งสำหรับเปิดใช้การแก้ไขข้อบกพร่อง USB ใน WebAOA
ระบบรองรับคำสั่ง 4 ประเภท ได้แก่
การคลิกและปัดบนหน้าจอสัมผัส (
click X Yและswipe X1 Y1 DURATION X2 Y2)การกดปุ่มของอุปกรณ์ (
back,homeและwake)การเขียนข้อความและการกดปุ่มผสม (
write TEXTและkey [KEY ...])การรอตามระยะเวลาที่ระบุ (
sleep DURATION)
เมื่อบันทึกคำสั่งเสร็จแล้ว คุณสามารถคัดลอกคำสั่งไปยังคลิปบอร์ดหรือบันทึกลงในไฟล์ได้
สร้างการทำงานของอุปกรณ์ AOA
หากต้องการเปิดใช้การแก้ไขข้อบกพร่อง USB อีกครั้งโดยอัตโนมัติ คุณต้องเพิ่มคำสั่งที่บันทึกไว้ลงในการทำงานของอุปกรณ์
สร้างการทำงานของอุปกรณ์ใหม่ และ
เพิ่ม TF Target Preparer โดยตั้งชื่อคลาสเป็น
com.android.tradefed.targetprep.AoaTargetPreparer
คัดลอกคำสั่งที่บันทึกไว้ใน WebAOA ลงในตัวเลือก action
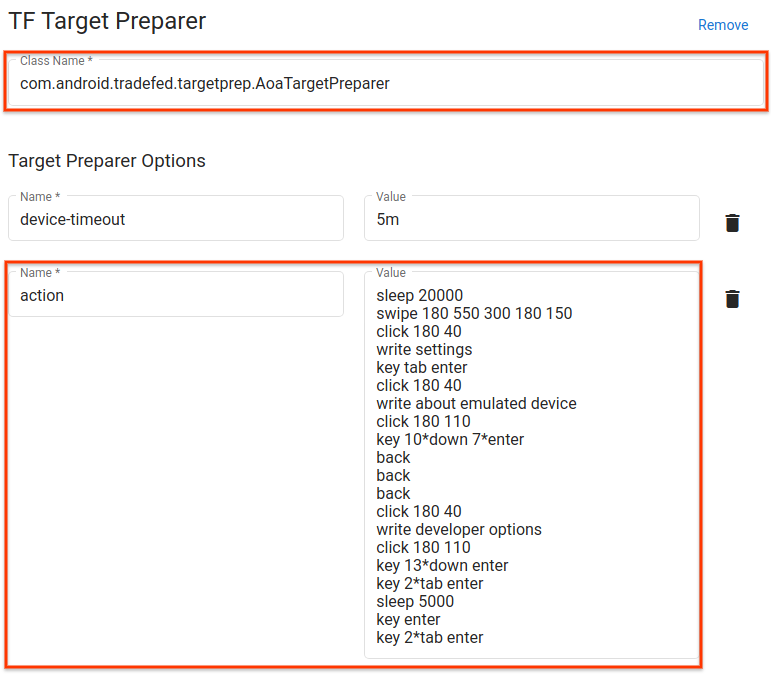
รูปที่ 3 การทำงานของอุปกรณ์ AOA สำหรับเปิดใช้การแก้ไขข้อบกพร่อง USB ใน Android 10 GSI
ใช้การทำงานของอุปกรณ์ AOA
เมื่อกำหนดเวลาการทดสอบ ให้เพิ่มการทำงานของอุปกรณ์ AOA และวางไว้หลังจากการทำงานของอุปกรณ์แฟลช
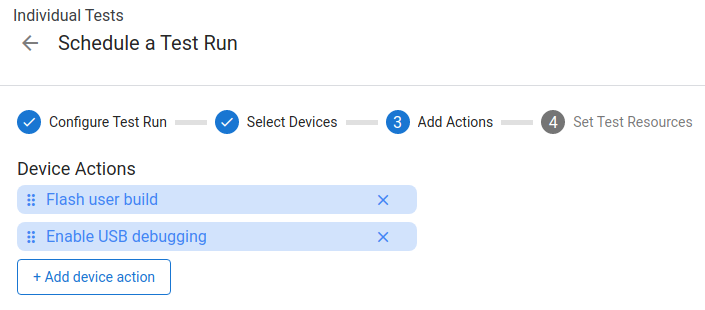
รูปที่ 4 การกำหนดเวลาการทำงานเพื่อแฟลช User Build และเปิดใช้การแก้ไขข้อบกพร่อง USB อีกครั้ง