
Przymocuj akcelerometr do testowanego urządzenia.
Użyj wosku pszczelego, aby przymocować akcelerometr w miejscu określonym w aplikacji testowej.
Połączenie akcelerometru powinno być sztywne, ale też łatwe do usunięcia między testami.
Ustaw orientację akcelerometru w zależności od typu siłownika.
Siłownik liniowy z rezonansem w osi X (LRA): upewnij się, że strzałka -> na akcelerometrze jest wyrównana z kierunkiem długości siłownika LRA. Ten kierunek jest zwykle równoważny kierunkowi rezonansu.
Siłownik liniowy z rezonansem w osi Z (LRA): użyj orientacji akcelerometru opisanej w instrukcjach dotyczących siłownika LRA w osi X powyżej.
Siłownik z mimośrodową masą wirującą (ERM): zmierz sygnał i wszystkie 3 osie, a następnie wybierz dane o największej amplitudzie sygnału.
Otwórz aplikację testową na testowanym urządzeniu i wygeneruj efekty docelowe.
Użyj myszy Bluetooth, aby klikać przyciski docelowe w aplikacji. Dzięki temu możesz klikać przyciski aplikacji bez dodawania sił zewnętrznych, takich jak nacisk palca.
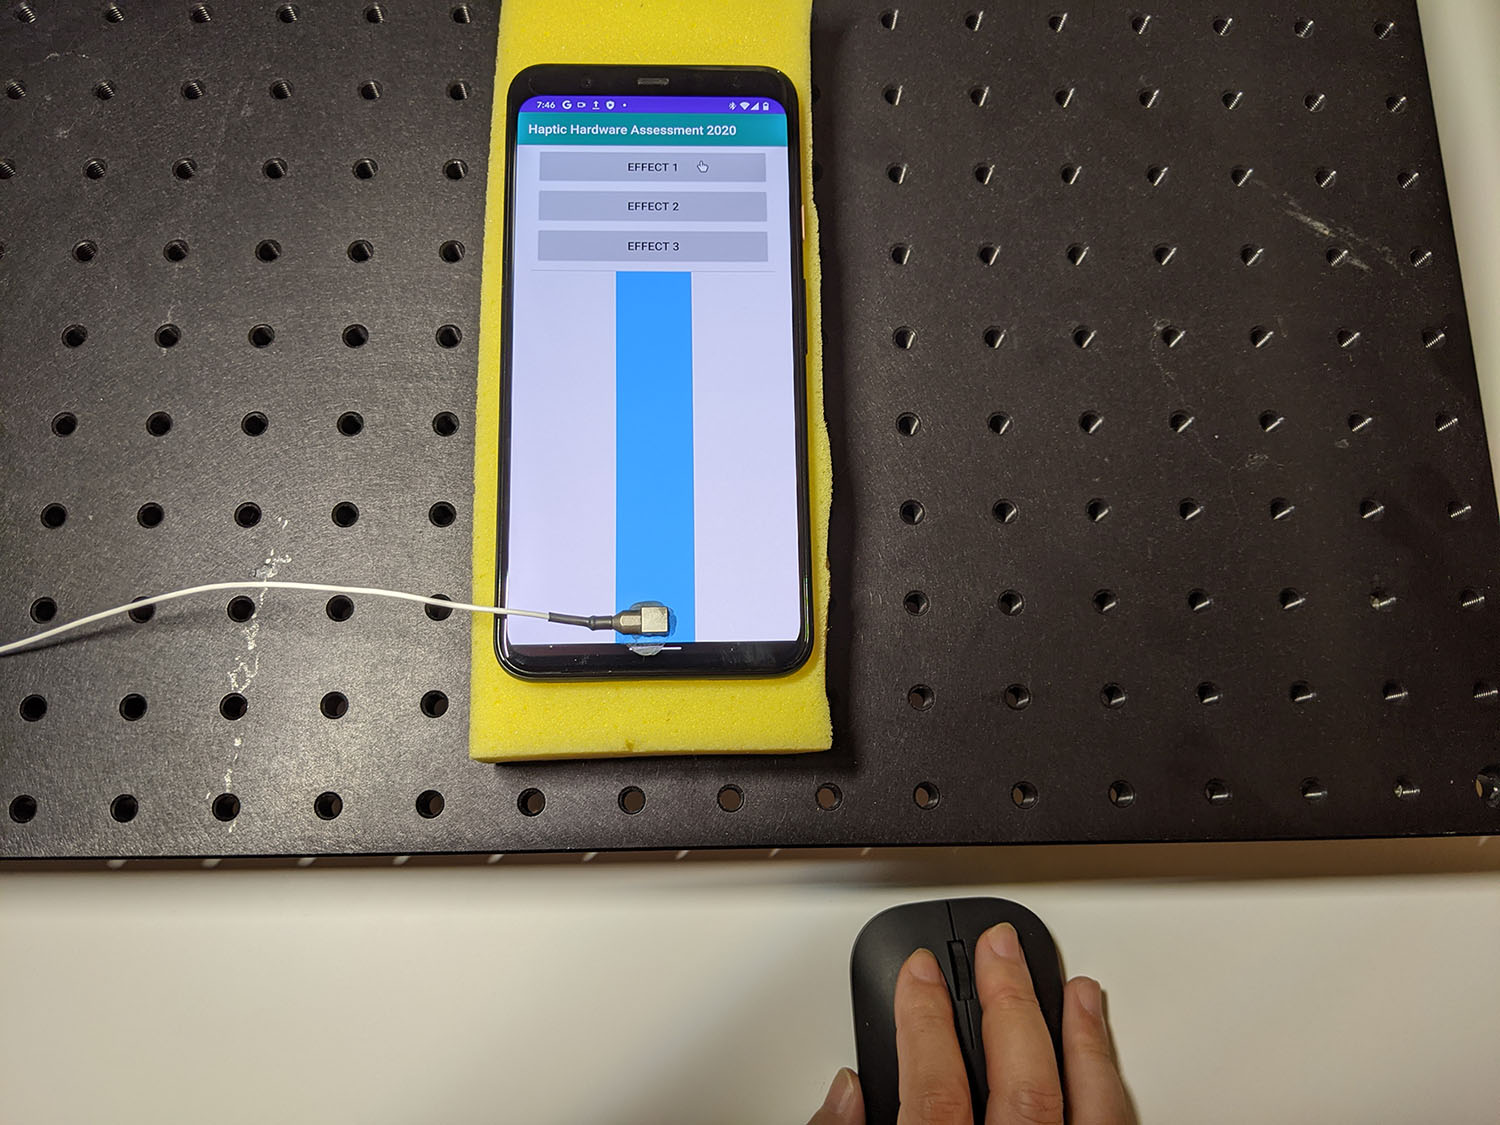
Rysunek 1. Testowane urządzenie generujące efekty docelowe
Zarejestruj przebieg z aplikacji testowej za pomocą programu Audacity i wyeksportuj plik:
- W programie Audacity kliknij Nagrywaj.
- Naciśnij każdy z przycisków docelowych w aplikacji testowej.
Wyeksportuj nagranie jako plik WAV.
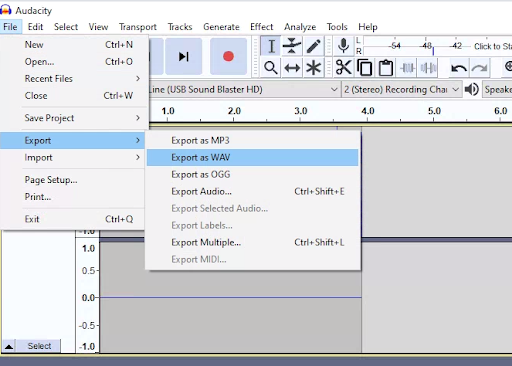
Rysunek 2. Eksportowanie z programu Audacity
Pomiar i rejestrowanie efektów docelowych
Treść strony i umieszczone na niej fragmenty kodu podlegają licencjom opisanym w Licencji na treści. Java i OpenJDK są znakami towarowymi lub zastrzeżonymi znakami towarowymi należącymi do firmy Oracle lub jej podmiotów stowarzyszonych.
Ostatnia aktualizacja: 2026-06-18 UTC.
[[["Łatwo zrozumieć","easyToUnderstand","thumb-up"],["Rozwiązało to mój problem","solvedMyProblem","thumb-up"],["Inne","otherUp","thumb-up"]],[["Brak potrzebnych mi informacji","missingTheInformationINeed","thumb-down"],["Zbyt skomplikowane / zbyt wiele czynności do wykonania","tooComplicatedTooManySteps","thumb-down"],["Nieaktualne treści","outOfDate","thumb-down"],["Problem z tłumaczeniem","translationIssue","thumb-down"],["Problem z przykładami/kodem","samplesCodeIssue","thumb-down"],["Inne","otherDown","thumb-down"]],["Ostatnia aktualizacja: 2026-06-18 UTC."],[],[]]