
بعد تثبيت إصدار مخصّص للمستخدمين على جهاز، عليك إعادة تفعيل تصحيح أخطاء USB. يمكن لأداة OmniLab ATS تنفيذ هذه الخطوة تلقائيًا باستخدام إجراءات جهاز AOA، التي ترسل سلسلة من أوامر واجهة المستخدم إلى الجهاز.
تسجيل أوامر AOA
أولاً، استخدِم أداة تعديل أوامر WebAOA لتسجيل قائمة الأوامر اللازمة لتفعيل تصحيح أخطاء الجهاز عبر USB.
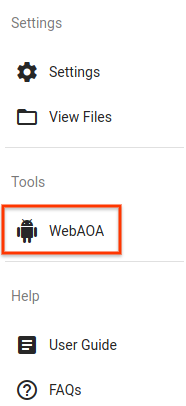
الشكل 1: رابط إلى أداة تعديل أمر WebAOA في OmniLab ATS
ويمكن الوصول إليه أيضًا على http://localhost:8000/webaoa تلقائيًا.
تتيح لك WebAOA التحكّم في جهاز محلي باستخدام شاشة لمس محاكاة وتسجيل تفاعلاتك مع واجهة المستخدم.
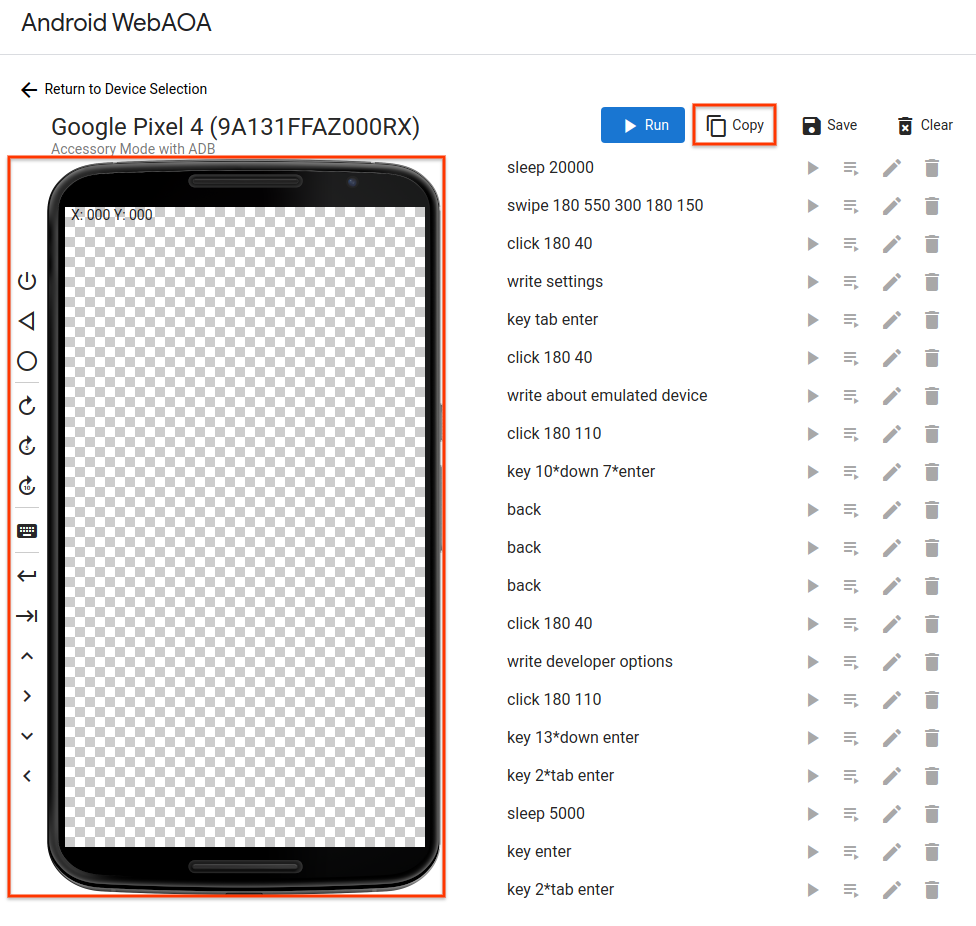
الشكل 2: تعديل الأوامر لتفعيل تصحيح أخطاء الجهاز عبر USB في WebAOA.
تتوفّر أربعة أنواع من الأوامر:
النقر والتمرير السريع على الشاشة التي تعمل باللمس (
click X Yوswipe X1 Y1 DURATION X2 Y2)الضغط على أزرار الجهاز (
backوhomeوwake)كتابة النص والضغط على مجموعات المفاتيح (
write TEXTوkey [KEY ...])الانتظار لمدة محددة (
sleep DURATION)
عند الانتهاء من تسجيل الأوامر، يمكنك نسخها إلى الحافظة أو حفظها في ملف.
إنشاء إجراء جهاز AOA
لإعادة تفعيل تصحيح أخطاء الجهاز عبر USB تلقائيًا، يجب إضافة الأوامر المسجّلة إلى إجراء على الجهاز.
أنشئ إجراء جهاز جديدًا وأضِف أداة إعداد TF Target Preparer مع ضبط اسم الفئة على com.android.tradefed.targetprep.AoaTargetPreparer.
انسخ الأوامر المسجّلة في WebAOA إلى الخيار action.
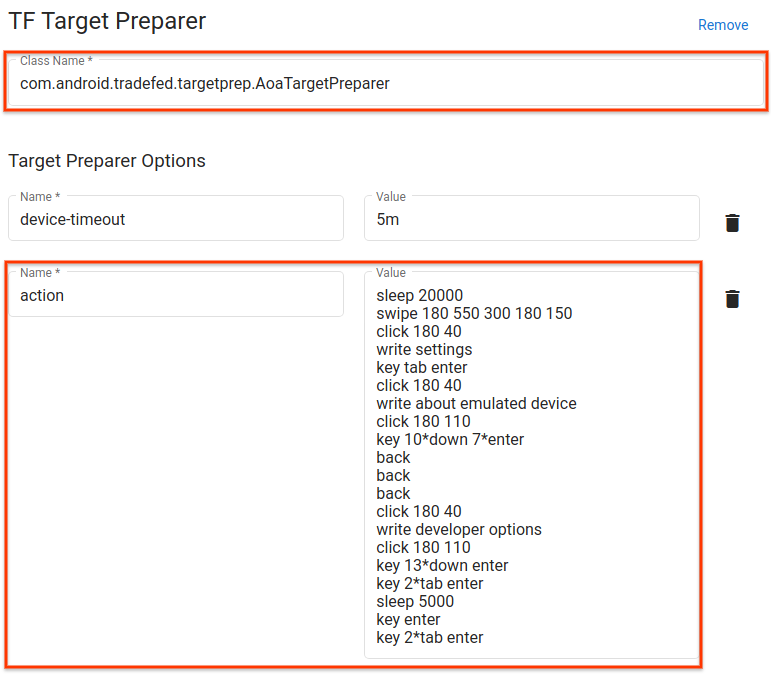
الشكل 3: إجراء جهاز AOA لتفعيل تصحيح أخطاء USB على صورة نظام Android 10 العامة.
استخدام إجراء جهاز AOA
عند تحديد موعد لتشغيل اختبار تجريبي، أضِف إجراء جهاز AOA وضعه مباشرةً بعد إجراء وميض الجهاز.
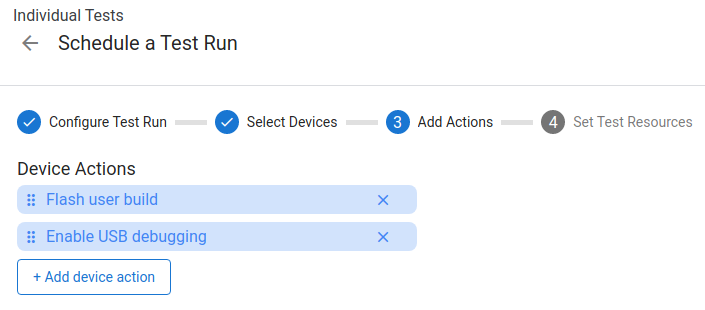
الشكل 4. جدولة عملية تنفيذ لتثبيت ذاكرة ROM لإصدار تجريبي للمستخدم وإعادة تفعيل تصحيح أخطاء الجهاز عبر USB.