
İvmeölçeri test edilecek cihaza takın.
İvmeölçeri test uygulamasında belirtilen konuma sabitlemek için balmumu kullanın.
İvme ölçer bağlantısı hem sağlam olmalı hem de koşular arasında kolayca çıkarılabilmelidir.
Aktüatör türüne bağlı olarak ivmeölçerin yönünü ayarlayın.
X ekseni doğrusal rezonanslı aktüatör (LRA): İvmeölçerdeki -> işaretinin LRA'nın uzunluk yönüyle hizalandığından emin olun. Bu yön genellikle rezonans yönüne eşdeğerdir.
Z ekseni doğrusal rezonans aktüatörü (LRA): Yukarıdaki X ekseni LRA talimatlarında açıklanan ivmeölçer yönünü kullanın.
Eksantrik dönen kütle aktüatörü (ERM): Sinyali ve üç ekseni de ölçün, ardından en güçlü sinyal genliğine sahip verileri seçin.
DUT'ta test uygulamasını açın ve hedef efektler oluşturun.
Uygulamadaki hedef düğmeleri tıklamak için Bluetooth fare kullanın. Bu sayede, parmağın uyguladığı basınç gibi harici güçler eklemeden uygulama düğmelerini tıklayabilirsiniz.
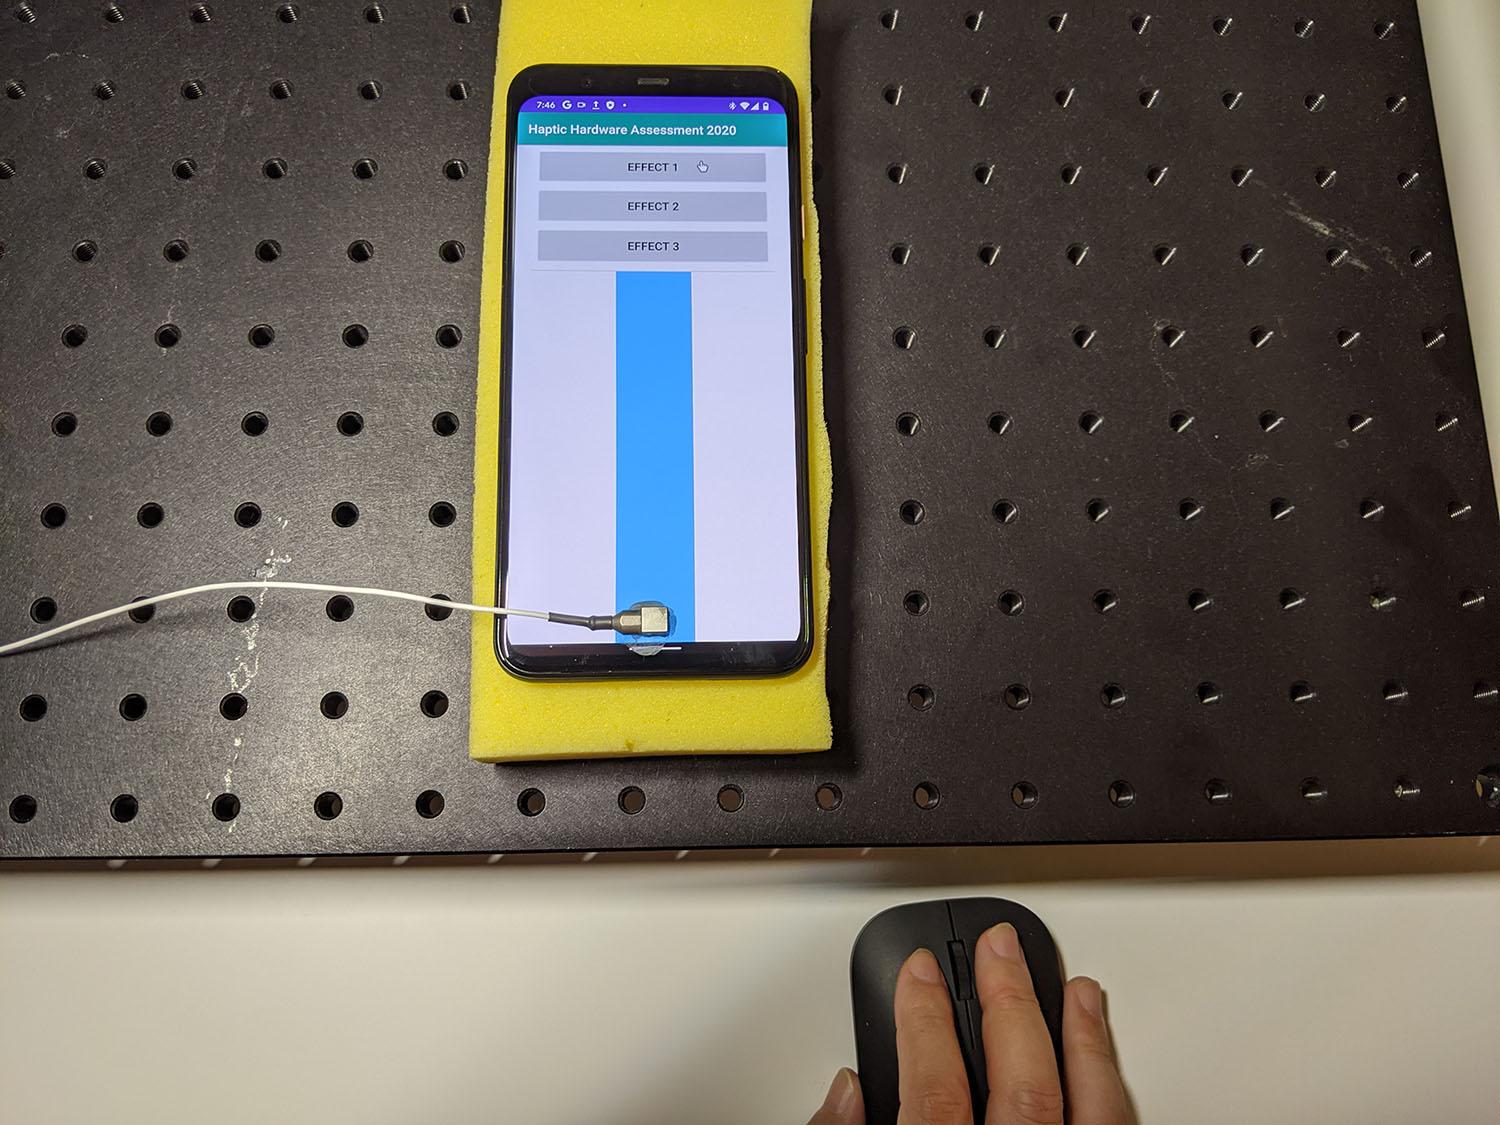
Şekil 1. DUT'un hedef efektler oluşturması
Audacity'yi kullanarak test uygulamasından dalga biçimini kaydedin ve dosyayı dışa aktarın:
- Audacity'de Kaydet'i tıklayın.
- Test uygulamasındaki hedef düğmelerin her birine basın.
Kaydı WAV dosyası olarak dışa aktarın.
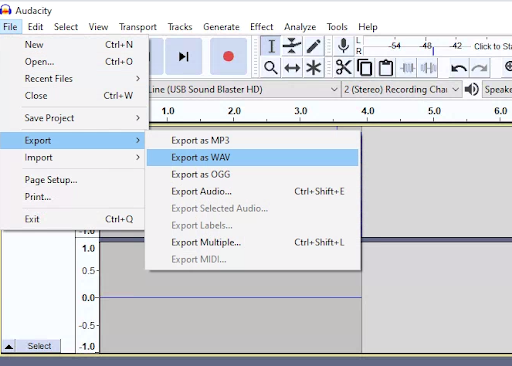
Şekil 2. Audacity'den dışa aktarma
Hedef etkileri ölçme ve kaydetme
Bu sayfadaki içerik ve kod örnekleri, İçerik Lisansı sayfasında açıklanan lisanslara tabidir. Java ve OpenJDK, Oracle ve/veya satış ortaklarının tescilli ticari markasıdır.
Son güncelleme tarihi: 2026-06-18 UTC.
[[["Anlaması kolay","easyToUnderstand","thumb-up"],["Sorunumu çözdü","solvedMyProblem","thumb-up"],["Diğer","otherUp","thumb-up"]],[["İhtiyacım olan bilgiler yok","missingTheInformationINeed","thumb-down"],["Çok karmaşık / çok fazla adım var","tooComplicatedTooManySteps","thumb-down"],["Güncel değil","outOfDate","thumb-down"],["Çeviri sorunu","translationIssue","thumb-down"],["Örnek veya kod sorunu","samplesCodeIssue","thumb-down"],["Diğer","otherDown","thumb-down"]],["Son güncelleme tarihi: 2026-06-18 UTC."],[],[]]